RAF Bircham Newton (Part 4 – Bircham Enters the War)

So far we have seen how Bircham Newton developed from a First World War training airfield through the cutbacks of the early 1920s, and on into the Expansion period of the 1930s. Bircham is now in the hands of Coastal Command, a force lacking in materials but not will power. The units at Bircham work hard, and new developments come along that will help save lives at sea and put Bircham on the map. After Part 3, Bircham now enters the war.

The declaration of war and the early 1940’s would see some remarkable events take place at Bircham Newton; new aircraft and new roles, along with some advances that were to help downed airmen who ended up in Britain’s coastal waters.

One of these advances, was the creation of the ‘Bircham Barrel’, a container manufactured from the tail end of a 250lb bomb that was carried under the wing of searching Air Sea Rescue (ASR) aircraft and dropped to downed aircrews. The barrel was based on the ‘Thornaby bag’ a container designed at RAF Thornaby, in which supplies of: water, food rations, first-aid equipment, clothing and cigarettes were all placed. The Bircham Barrel, developed this idea a little further, making it more water tight and easier to retrieve by crews once in the water.*4

The Barrel was placed under the wing of an aircraft on a bomb rack, and once a crew was sighted, the pilot could drop the barrel providing the crew with sufficient rations for several days. After tests, the idea was given the green light and by 1941 it was in use by a range of aircraft operating in the ASR role.

With an increase in coastal operations from Bircham, particularly in the Air Sea Rescue role, many of the aircraft that would now use the airfield would be the twin-engined types. Kicking off the decade were the Bristol Blenheims, of 254 Sqn in January 1940. Joining a small detachment of 233 Sqn  Blenheims that had arrived here late in 1939, 254 Sqn only stayed for three months, operating as ‘Trade defence’ or fisheries protection unit – perhaps one of the lesser well known operations of Coastal Command.

Twin-engined models were not to be the only aircraft seen at Bircham though. The spring and early summer of 1940 would see further detachments with Hurricanes from 229 Sqn, a short stay by 235 Sqn and the first of a number of Royal Navy’s Fleet Air Arm (FAA) units 815 Sqn with the delightful Swordfish. One further unit to be based here at this time, would bring with it one of the more intriguing models of aircraft used during the Second World War, the Wellington DWI of No 2 General Reconnaissance Unit (GRU).

One of the roles of the GRU was to detect and destroy German mines, particularly new magnetic mines that were proving to be a menace to allied shipping. Using a Wellington 1A bomber modified to carry a large 51 foot ring of wood containing an aluminium coil, it would generate, using a Ford motor, an electronic signature that would resemble a ship. By flying low and slow over the water, it was hoped that the signal from the coil would detonate the new mines. Whilst the idea worked well in principal on land, over water it caused a number of issues primarily because the aircraft had to fly between 60 feet and 35 feet to detonate the mine. A number of successful detonations were recorded, but some aircraft were struck by the blast wash, causing them to be knocked ‘off balance’ as the mines exploded. Fortunately though, there are no recordings of any serious damage being sustained by these aircraft, but it was nonetheless, a dangerous job to do and because of advances elsewhere, it became a short lived attempt to gain an advantage over the Germans in the mine laying war.

ROYAL AIR FORCE OPERATIONS IN THE MIDDLE EAST AND NORTH AFRICA, 1940-1943.

Wellington DWI Mark II of No. 1 GRU based at Ismaliya. The ring weighed over two and a quarter tons.© IWM (CM 5312)

Like the Swordfish, both the Wellingtons of 2 GRU and the Blenheims of 235 Sqn were only based at Bircham for a month, all departing in May 1940, although 235 Sqn did return in the summer staying this time for a year. The immediate period after their departure saw yet more FAA units arrive, 826 and 812 Sqns, with Albacores and Swordfish respectively. Both of these units would operate as shipping patrols and also in mine laying operations, but would again only stay for a short period of time. During operations on 21st June 1940, at De Kooy Naval air base, one 826 Sqn aircraft was lost, two of the Albacore’s crewmen: Sub Lieutenant (A) Peter William S. Butterworth, (famed for his acting in the ‘Carry On’ films) and Telegraphist /Air Gunner Robert (TAG) J. Jackson, were both captured. Sub. Lt Butterworth survived ending up in Stalag Luft III after several failed escape attempts, whilst TAG Jackson died in captivity on 18th January 1945. The third crewman, Sub-Lieutenant Victor J. Dyke, died the day after the attack.*6

Peter Butterworth - Wikipedia

Peter Butterworth from the 1968 film “Carry on… Up the Khyber” (wikipedia)

Bircham’s long standing 206 Sqn were by now replacing their Blenheims with Hudsons, the American built twin engined aircraft designed around the civil Lockheed Super Electra. By militarising it, they produced an aircraft that would serve well in Coastal Command operations.

Initially carrying out convoy duties, the Hudsons would then patrol as far away as the ‘North German Islands’, but primarily flew reconnaissance patrols along the  coastline between Norway and Brest. Shipping was engaged on a number of occasions as were flak and Luftwaffe aircraft. During May, as the new Hudsons were being delivered, a number were lost to enemy action, particularly fighters.

For one Hudson, (P5120), life at Bircham would be short lived, the aircraft arriving here in April, only to be written off after a crash landing in June. The aircraft, one of three, departed Bircham on June 19th at 23:50 for a night patrol. On return it struck a ridge on the airfield’s approach causing it to bounce heavily. The aircraft then stalled and hit the ground so hard it caused the undercarriage to collapse. Thankfully all four crewmen emerged from the aircraft unhurt.

WITH A HUDSON OF COASTAL COMMAND

Hudson C-VX (P5120) of 206 Sqn on patrol before being written off in a crash landing. (© IWM CH 287)

Both during and after the build up to Hitler’s planned invasion of Britain, airfields across southern England were targeted by the Luftwaffe, and Bircham Newton was no exception. Whilst not a fighter airfield high on the list of Luftwaffe priorities, bombs nonetheless did fall on the airfield, and it was the Hurricane detachment of 229 Sqn based here, who were tasked with providing cover against such attacks.

In addition, many support units were also based at Bircham, these would provide training for pilots, gunners, navigators, other members of aircrew along with cooperation with ground operations as well. One such unit here at Bircham was No. 1 Anti Aircraft Co-operation Unit (AACU) which consisted of several Flights, designated ‘B’, ‘C’, ‘D’, ‘K’ and ‘M’, they all operated the Hawker Henley, the Hurricane’s little known relative.

With Flights designated A – Z (‘I’ was omitted), the unit operated at various airfields across Britain, flying a mix of Henley IIIs, Wallace, Lysander and Battle aircraft, with both Flights ‘B’ and ‘M’ being formed here at Bircham Newton. Several of these Flights also used RAF Langham, another Coastal Command / training airfield a few miles away on the Norfolk coast, particularly useful for the training of heavy anti-aircraft guns.

The Henley – built along side the Hurricane – essentially used the same jigs, their similarity thus being quite stark. The Henley was initially designed as a light bomber with modifications to the guns and an additional seat added behind the pilot. However, changes in Government policy toward daylight bombers meant that the Henley was soon transferred to other duties notably target towing. To assist this, a small propeller driven motor was added to the port side of the aircraft, just below the rear cockpit, this would power the winch that held the target drogue as it was towed some 7,000ft behind the aircraft for gunners to aim at*5.

ROYAL AIR FORCE COASTAL COMMAND, 1939-1945.

Hawker Henley, L3353, of ‘K’ or ‘M’ Flight, No. 1 AACU, next to a bomb crater at Bircham Newton. A lone Do 17 dropped seven high explosive bombs on the station causing light damage but also slightly damaging this aircraft. The similarities to the Hurricane are very evident. (IWM CE 43)

In November of 1940, two more squadrons were formed here, one, another First World War unit, was 252 Sqn. It would not fly operationally from here though, instead collecting its aircraft from Chivenor to where it would move a matter of weeks later.

The second unit, 221 Sqn was formed on the 21st November, and was also a former World War One unit. Disbanded in 1919, it would serve for the remainder of the war with the Wellingtons in the Coastal Command role. The initial order was to train crews at Bircham prior to their move to operations at Limvardy, a role it would perform using twenty-four Wellington IC aircraft. By the end of the month two such models, N2909 and N2910 were delivered and ready to be used for the job. A third aircraft, a dual control Wellington (R2700), arrived on the 6th and then on the 12th December, the personnel were all moved off site to a new location the rather grand Heacham Hall. The hall, which burned down during the war, was a 17th Century building, and had historic ties to Matoaka (better known as “Pocahontas”), who married local man John Rolfe. It must have been a  rather nice change for the airmen to be ‘off base’ and in more luxurious, and historical, surroundings.

During the remainder of December more aircraft arrived and by the last day of the year, eleven more Wellingtons were ‘on role’ along with a growing number of personnel – both air and ground crew.

1941 started on a high for Bircham Newton, with a Royal Visit. On 26th January, the Royal party consisting of King George VI, Queen Elizabeth, and Princesses Margaret and Elizabeth, visited the area inspecting the airfield and its aircraft. Whilst here, the King gave airmen a number of awards before the whole party moved of to other airfields across Norfolk.

For the whole of January, training flights were the order of the day for the Wellingtons of 221 Sqn, but poor weather meant that only 12 out of the 31 days were actually suitable. However, by March 27th 1941, all pilots had flown solo by day and a new flight was crewed up and ready for operations. The squadron then began its move over to Limvardy in Northern Ireland.

The summer of 1941 was another busy time for Bircham Newton. In May, two squadrons appeared, the first 200 Sqn was formed from 206 Sqn, which had already been used to create 220 Sqn earlier on. 200 Sqn were formed to perform the ‘operational duties of a Coastal Command general reconnaissance land-plane squadron’ in other words maritime and anti-submarine patrols. It would be made up initially of 210 personnel, who would depart Bircham on the 25th to Greenock, whilst seven Hudsons would fly to Gibraltar on route to Gambia. It would remain abroad until its disbandment at the war’s end in 1945.

The second, 500 Sqn moved in from Detling in Kent, bringing Blenheims with it. With detachments at both Limvardi and Carew Cheriton, these were replaced by the Hudson V in November before the unit departed for Stornaway in Scotland’s Western Isles in May 1942. Once at Bircham they immediately began patrols, looking for downed aircrew, mines or enemy shipping. Poor weather restricted many of these patrols, but both mines and shipping were spotted, sadly no dinghies or aircraft were found in these early days.

The next unit to arrive was another Blenheim squadron, 248 Sqn who performed convoy patrols and strikes against enemy shipping. During July, a month after they moved in, they began to replace the Blenheim with Beaufighter ICs, a powerful and heavily armed aircraft built to design Specification F.37/35. After initial handling issues, it became a sturdy weapons platform that performed well, especially in the anti-shipping role, carrying a torpedo or rockets. For the next month the weather prevented much in the way of flying, with fog, rain and poor visibility preventing all but minimal flying, the squadron remained firmly on the ground for a good deal of August.
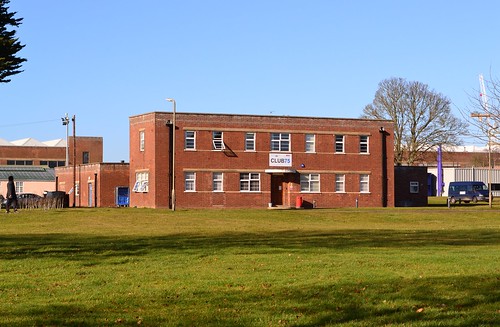
Armoury and Photographic building

Former armoury and photographic building.

The last of the summer squadrons to arrive were 53 Sqn and 59 Sqn. Initially based at Detling / Thorney Island, they had also maintained a detachment of aircraft here at Bircham. Once the two squadrons had reformed at Bircham, they both took on the Hudson replacing their Blenheims before departing back to St Eval in the October of that year (53 Sqn) and North Coates (59 Sqn).

By September 1941, the need for more Air Sea Rescue aircraft, particularly deep search aircraft, had become ever more apparent, and it called for the creation of two more squadrons able to perform such tasks. However, suitable aircraft were in short supply, especially Lockheed’s Hudson with ASV (Air to Surface Vessel) radar equipment and Lindholme rescue gear. Thanks though to Sir John Salmond GCB, CMG, CVO, DSO & Bar , Coastal Command’s corner was fought, and even though by the end of 1941, aircraft were still few and far between, by the December one of these Squadrons, 279 Sqn, was up and running here at Bircham. However, it would be a long haul, and it would not be until March the following year before they would be fully operational and their Hudsons operating regularly in the Air Sea Rescue role from this airfield.

The second squadron, 280 Sqn however, was not given the Hudson, instead they had to contend with the Anson. Another unit set up in 1941, its primary base was also at Detling in Kent. Whilst performing this duty, they maintained a detachment of aircraft here at Bircham Newton, a position it held whilst the bulk of the squadron moved to Langham in Norfolk in the summer of 1942. It would then be after this, that the entire squadron would move into Bircham Newton.

Like its sister unit it would take time to become fully operational and it would not be until June before the squadron was operating as it should. The benefit of both units was quickly seen though, thirty-five men from six crews were rescued over May – June by 279 Sqn, whilst one crew was rescued by 280 Sqn within days of them becoming fully operational.

The early years of the war were busy for Bircham Newton, and as war progresses, further units arrive and depart, the hectic scenes will not be stopping yet!

The full text can be seen in Trail 20 – North Norfolk Part 1.
RAF Bircham Newton (Part 3 – The build up begins).

In Part 2 we saw how Bircham had grown following the immediate post war cutbacks, and how France was seen as a threat. Now as developments occur in Germany, the dynamics of Europe begin to change and we enter the Expansion Period of the late 1930s.

Bircham sees more new squadrons, new aircraft and further developments to its infrastructure.

In the 1930s, the Government’s plans for expansion took a new direction when Germany too began to build up its armed forces – albeit surreptitiously at first. New expansion schemes were put in place, which not only signified the expansion of the RAF’s forces, but the number of available airfields, their design, and the number of their associated buildings as well.

One of these modifications was the construction of a standard watch office with attached tower. Designed as drawing 1959/34, it became the standard design used for all Watch Offices of this time, and was in essence a square building with a small observation tower built onto a flat roof. In addition to this, Bircham also had new barrack blocks (2357/36) built, now in the familiar ‘H’ shape, supplementing the previous models which were in the form of a ‘T’. These new buildings had reinforced roofs giving better protection to those inside should it be struck by small incendiaries.

The decade started off on a bad foot however, with the loss of a 207 Sqn aircraft, a Fairey IIIF on January 21st 1930. A previous resident of Bircham, the rear party had brought the last of the personnel to Bircham in November 1929. The next weeks were spent getting as many airmen flying solo on the Fairey IIIFs as possible. However, poor visibility due to fog that day, caused the aircraft ‘J9637’ to crash into an orchard near Sudbury in Suffolk killing both crewmen: F.O. Donald Mackenzie (aged 25) and Cpl. Leonard Edward Barnard who was a year younger.

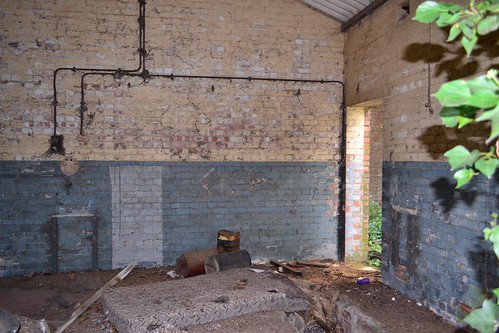
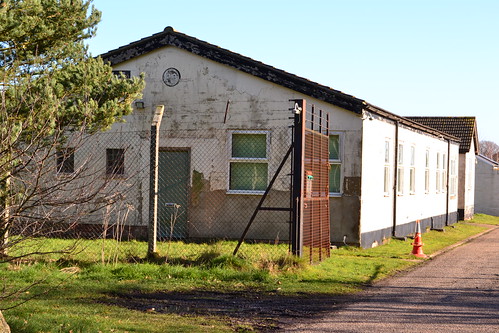
Former Technical Building

One of the former technical buildings no longer used.

In November 1935 information was received at Bircham that two new squadrons were to be formed here, 21 Sqn and 34 Sqn, both bomber units flying Hawker Hinds. Personnel began arriving on December 3rd and began to work on 207 Sqn’s  updated Fairey Gordons, preparing them for dispatch to Cardington prior to their move abroad once more. 21 Sqn were allocated Hangar No. 17, and would receive their first Hind (K.4638) on New Years Eve 1935.

34 Sqn on the other hand, wouldn’t receive their first batch of Hinds until January 1936, when four examples were delivered from the Hawker Aircraft Company Ltd. at Brooklands, by pilots from other units. With two more Hinds being delivered on June 11th, also by pilots of other units, the cadre would soon be preparing to move. On July 30th, both 21 and 34 cadres were ordered north, making the move from Bircham Newton to Abbotsinch in Scotland.

The latter part of the decade reflected previous events at Bircham. Many new changes meant that events at the airfield were as dynamic as ever. Several new squadrons were formed resulting in new crews and some new aircraft. Sharing the space at Bircham were 18 Sqn (Harts and Hinds), 49 Sqn (formed from ‘C’ Flight of 18 Sqn) and ending the decade 206 Sqn with Ansons and later Hudsons. 206 would themselves later be used to form 220 Sqn, which in turn would see ‘C’ Flight be renamed as 269 Sqn. Many of these new squadrons would in turn depart Bircham as changes occurred on the continent.

With 206 came new changes of command at Bircham. Their arrival in 1936, saw a move to Coastal Command (16 Group). Formed at Manston in June under the initial command of Sqn. Ldr. A. H. Love, 23 (Training) Group, 206 Sqn had three flights of six aircraft each and a further six Ansons in reserve. The squadron transferred across to Bircham at the end of July by which time the command had been taken over by Wing Commander F.J. Vincent D.F.C.

206’s main role at this point was training pilots selected for Flying Boats and the  Blenheim squadrons of Coastal Command. Shortly after arrival, the unit’s command would pass over to Wing Commander H. Long D.S.O., and by June 1937, 270 pilots would have been successfully converted in 2,700 hours of flying time.

Naturally accidents did occur during this time, on November 9th 1936, 220 Sqn Anson ‘K6199’ stalled after take-off killing P.O. Peter White (age 23) and injuring three others: Sqn. Ldr. William M. M. Hurley (the pilot), AC.2 Eric D. Butler and AC.1 Reginald K. Birtwistle. The aircraft was written off, after which a court of enquiry recommended modifications to locking bars, as it appeared that the pre-flight checks had been made with the control systems locked. The aircraft was left as an instructional air frame and a stark reminder for proper pre-flight checks!*7

A second accident occurred a year later in September 1937, when another 220 Sqn Anson, ‘K6227’ also stalled, this time falling into the sea near Conway. This time, the crew were not so lucky, with all three, a Sergeant, an AC.1 and an AC.2 all being killed. Their average age was just 22 years old.

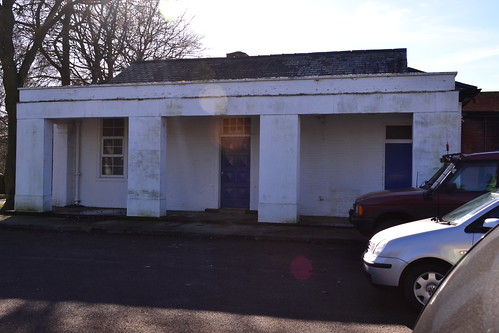
Guard House

The former Guard House now stands as a shop.

During the later years of the 1930s, a royal visitor was often seen parked in the hangars at Bircham Newton. The Airspeed Envoy G-AEXX of the King’s Flight was a regular here, being so close to Sandringham House, the Royal residency, it was an ideal location for the aircraft. The Envoy was a creation of the Airspeed company, headed by the author Nevil Shute, a former de Havilland and Vickers employee who later set up his own business, Airspeed Limited. The Envoy was later developed into the Airspeed Oxford which became one of the main trainers used by the RAF.

As the era closed and just weeks before the outbreak of war, another squadron arrived here at Bircham in the form of 42 Sqn with Vickers Vildebeests. The Vildebeest was a late 1920s design biplane, designed to meet Specification 25/25 which required an aircraft operating in the Coastal Defence role and capable of both day bombing and ant-shipping torpedo operations. Several marks were manufactured, up to and including the MK.IV of which only 18 were built. It was some of these that were later delivered to 42 Sqn at Bircham Newton. These aircraft remained in service at Bircham until April 1940, when they were replaced by Beauforts at which point, 42 Sqn departed Bircham transferring to Thorney Island in West Sussex.

On the day war was declared, another very mobile squadron appeared at the door of Bircham, this time it was the Blenheims of 90 Sqn who made a very brief appearance here from West Raynham. Over a period of just two weeks they would locate at five different RAF stations!

With the introduction of the last of the Expansion Schemes ‘L’ and ‘M’ over the years 1938 -39, Bircham would see yet more changes to its infrastructure, notably the demolition of the repair sheds and their replacement with three Type ‘C’ hangars. At this point a fourth was also proposed such was the size and nature of activity at Bircham Newton. In addition, the two original Belfast type hangars were retained providing a mass of hangar space on the airfield. Another bonus for Bircham was the addition of further accommodation blocks, providing better accommodation for the many new air and ground crews who were increasingly appearing at this Norfolk site.

Teetering on the bring of war, Bircham was now operational, more modern aircraft are filtering through and Coastal Command operations begin in earnest. In Part 4, Bircham Newton enters the war.

The full text can be seen in Trail 20 – North Norfolk Part 1.
RAF Bircham Newton (Part 2 – The 1920s)

In Part 1 – The Early Years – we saw how Bircham Newton was created and how it was chosen to be the forefront of long rang bombers targeting Berlin. We saw the untimely death of One Captain Cecil Darley and how, as we enter the 1920s, a new build up of the RAF was required following massive cutbacks after the First World War. In Part 2, we progress through the 20s, Bircham develops into a larger station and how one of its pilots won his VC before arriving here.

This decision to rebuild the RAF in response to France’s build up, then led to an initial burst of refurbishment and development of Britain’s current airfield stock, those not closed by the post-war political hatchet. This included Norfolk’s Bircham Newton.

The link forged in late 1918 with bombers would carry Bircham right through the 1920s and on into the mid 1930s, during which time a number of squadrons would either be formed here or pass through in transit elsewhere. The first of these was through the reforming of 207 Squadron on February 1st, 1920 with DH.9As. This unit came from the nucleus of 274 Sqn, itself a previous resident of Bircham. As a cadre, it would remain here for two years before departing for warmer climates and Turkey, in the Autumn of 1922. That was not the end of the link though, after a spell abroad the squadron would return to the UK, coming back to RAF Bircham Newton at the end of the decade. This return would bring a new variety of aircraft, the Fairey IIIF. By 1932 though, these models were themselves being replaced by another Fairey aircraft, the Gordon, and within three more years the squadron would be back on the road to the Middle East once more.

Another small cadre appeared here on New Year’s Day 1920. Moving in from the former Narborough airfield (Norfolk’s first), the cadre from 60 Squadron would disband later that month, having the good fortune to reappear at Risalpur, India, later in the year.

Over the period 1923 – 24 three more squadrons arrived at Bircham, 7 Sqn (who were formed here from 100 Sqn and stayed for four years); 11 Squadron (6 months) and 99 Squadron (four years) bringing a wide range of aircraft with them to this part of Norfolk. Delights such as the Vickers Vimy; Virginia II, III, IV, V, VI and VII; DH.9A, Fairey Fawn and the Handley Page Hyderabad were all present during this short period of time.

Squash courts

The original squash courts are still used as they were intended.

With such a mass of movement, accidents were inevitable. 7 Sqn suffered a loss when Vickers Vimy (F9187) overturned whilst landing at night on 16th October 1923. Damage to the aircraft itself was not too severe and it was repaired, however, one of the four man crew, AC.1 Ronald Sinclair Watson (aged 20), was not so lucky and was killed  in the crash. The remaining three crew all escaped unhurt.

Another accident befell a 99 Sqn aircraft on 27th February 1925, in which one of its crew was also killed with a second injured. The Avro 504K ‘H3083’,  spun after attempting a stall turn, the manoeuvre resulted in the death of P.O. Cecil S. Marshall Woode also aged just 20. This was the first fatal accident for 99 Sqn.

This build up of squadrons saw continuous movements both in and out of Bircham throughout the 1920s, resulting in many more personnel and aircraft residing at the airfield.

In mid January 1928, 39 Sqn appeared at Bircham (DH.9A) staying for just one year, followed soon after on March 21st, by 101 Sqn. This was another former RFC unit, and were reformed, under the initial command of Sqn. Ldr. J. C. P. Wood. Sqn. Ldr. Wood was posted in from RAF Uxbridge to oversee the formation of the unit and the training of the crews. At its inception the squadron had just 23 airmen in its ranks and was tasked with operating the Sidestrand, an aircraft built by Boulton and Paul aircraft manufacturers.

File:Im1927v145-p46f.jpg

The first example Boulton Paul Sidestrand (Grace’s Guide)

The first model built, J.7938 was collected and brought to Bircham Newton, it was then taken to Ringstead for testing there. It was however, unfortunately damaged in a landing accident after it developed an oil pressure problem whilst being flown by F.O. Duggan, the now Squadron Commander.

Meanwhile, at Bircham, Ground crew were occupied with further ground and air tests, along with lectures by staff from the Bristol Aeroplane Co. on maintenance of the  Sidestrand’s engine, the Jupiter VIIIF.

Rounding off the 1920s was 35 (Bomber) Sqn, reformed with DH.9As and then the Fairey IIIFs, followed not long after by the Fairey  Gordon. 35 Sqn was commanded by  Gilbert Stuart Martin Insall, who had in 1915 been awarded the VC for his actions in France. After having attacked  a German aircraft, he was forced down suffering numerous hits to his own aircraft. Once down, he was able to complete sufficient repairs enabling him to take off again, but in a hail of gunfire that kept others seeking cover.

Later, Insall was shot down again, this time he and his crewman were both injured and captured. Moved from hospital to a POW camp, he made two escape attempts, being recaptured in the first but successfully escaping in the second.

Once repatriated, Insall was by now, a keen archaeologist, and flying with 35 Sqn enabled him to take photographs of the Norfolk landscape. These photographs led to discoveries that have since proven to be very important in the archaeological world. His endeavours in this area went on to help in the development of aerial photography as a reconnaissance tool and to aerial photography as a whole.

However, by the mid 1930s, both Insall and 35 Sqn had also departed Bircham Newton, heading for warmer climates and the Sudan, this move ending their link with this Norfolk airfield.

By now, Bircham had grown considerably, partly in response to the number of its users but also in response to the growing concern over what was happening on the continent. The airfield would by now, have a single aircraft repair section shed along with three double bay general service sheds. All of these were located in the south-eastern corner of the main airfield site, sat in a row with doors facing north-west.

In Part 3, we enter the uncertain times of the 1930s. Germany begins a build up of her forces, and Bircham changes commands being transferred over to Coastal Command.

The full text can be seen in Trail 20 – North Norfolk Part 1.

RAF Bircham Newton (Part 1 – The Early Years)

The north Norfolk coast area boasts numerous wartime airfields and several Cold War examples too, all of which are now closed. Many of these retain buildings or parts of runways in various states of disrepair. In Trail 20, we visit three of these and in one case a substantial amount remains solely thanks to its owners. As we revisit Trail 20, we look at the long history of RAF Bircham Newton.

RAF Bircham Newton.

RAF Bircham Newton has one of the country’s best preserved technical and accommodation areas anywhere in the UK. This remarkable achievement is largely down to the owners, the Construction Industry Training Board (CITB), who opened their first training centre here at Bircham Newton in 1966. Attracted particularly by the large hangars, they are an organisation who specialise in training people for the construction industry through a number of training centres spread across the UK. Their work at Bircham Newton has ensured maintenance/preservation of many (but not all) of the buildings on site.

Located 8 miles from the Norfolk town of Fakenham, RAF Bircham Newton has associations with several airfields including: RAF West Raynham (its parent), RAF Docking (its satellite from where all night flying took place) and four minor decoy sites including the former RFC/RAF Sedgeford.

With its origins in the First World War, prior to the birth of the Royal Air Force, Bircham Newton has had a long and distinguished career mainly serving under 16 Group Coastal Command, who operated a range of single and twin engined aircraft from the site.

By the end of the Second World War, it would have seen considerable development, including three runways, all BRC steel matting (British Reinforcing Concrete), three ‘C’ Type Hangars, three Bellmans, ten Blister hangars and two Belfast hangars mainly located in the south eastern corner. It would also have an extensive range of accommodation and technical buildings catering for around 3,000 personnel of mixed rank and gender.

Opened in 1916, little initially happened with the airfield, and it wasn’t until near the war’s then that Bircham really came into being. Its first operational use was as a Fighter Gunnery School in 1918, with No. 3 School of Aerial Fighting & Gunnery (later known as No. 3 Fighting School) as its initial resident.

The School was born out of the need to train both pilots and gunners in the early biplanes to use their guns effectively in aerial combat. With their roots in the Auxiliary School of Aerial Gunnery, they were formed in May 1918 when Numbers 2 and 4 merged with another two Schools, Numbers 1 and 2 School of Aerial Gunnery. This amalgamation of ‘Schools’ was designed to streamline the complex array of establishments that had grown out of the need for new gunners and pilots. Once formed, they would be one of four new schools which were joined by a fifth in September later that year. Operating a range of aircraft including: B.E.2e, Bristol M.IC, D.H.4, Dolphins, Camels and H.P. 0/400 aircraft, their stay at Bircham would however, be short lived, moving to nearby RAF Sedgeford in November of that year.

Early losses with trainee pilots were high, novices learning to fly the hard way. At Bircham, one such loss occurred to 2Lt. Horace G. R. Boyt, who was killed when his Sopwith Camel (D8226) of No. 3 Fighting School stalled whilst attempting a forced landing near to Thornham bombing range, on July 31st 1918. 2Lt. Boyt was only 19 years of age at the time of his death – a young man taken in the prime of his life.

Possibly Bircham’s most significant early aircraft was the Handley Page V/1500 (Super-Handley) bombers*1. An enormous four-engined aircraft, it first flew in May 1918, and was designed to hit Germany hard, striking targets as far away as Berlin. The V/1500 was more than capable for the role too. It could carry up to thirty 250lb bombs over a range of 1,300 miles with a crew of six. Even more unusual, especially for an aircraft so large, it boasted folding wings; presumably this allowed it to be placed inside a hangar/repair shed for maintenance or storage.

BRITISH AIRCRAFT OF THE FIRST WORLD WAR

Handley-Page V/1500 heavy bomber biplane possibly at Bircham Newton. (© IWM Q 67329)

These aircraft arrived with three squadrons, the first 166 Squadron, was formed on 13th June 1918. Whilst initially receiving FE.2Bs, the squadron was created with the sole purpose of bombing Berlin, and the d’elite crews (mainly Canadian) were hand picked accordingly; a situation not unlike 617 (Dambusters) Sqn of the Second World War. Bircham Newton was chosen for these aircraft, as it was both the most suitable and the most easterly aerodrome available to the RAF at that time.

Formed under the command of Major Cecil H. Darley DSC and Bar, DFC,  a seasoned veteran of the war, the squadron fell under the control of 3 Group, a relationship it maintained until 13th September 1918 when it was transferred to 86 Wing, 27 Group. As the squadron rapidly developed, it naturally grew in size taking on new staff on a regular basis. By the end of September, after its Group transfer, it would have 17 officers and 308 ‘other ranks’ on its books.

After building the squadron up and preparing for war, an audacious and no doubt suicidal attack, was planned for November 9th 1918 – a raid on Berlin. However, maintenance problems meant that only two of the three aircraft at Bircham Newton were serviceable, this despite ground crews working hard to get all three in the air. There then followed a spell of bad weather which caused even further delay to the operation. By the time the situation had improved and the weather was more favourable, the armistice had been agreed, and so the raid was no longer required. As a result, the squadron was ordered to ‘stand down’ and the raid never took place.

For 166 Squadron it was a bitter disappointment, had the war gone on and the flight taken place, they certainly would have made history regardless of whether or not they were successful in their task. Perhaps they too would would have been as famous as their Second World War partners 617 Sqn.

As for the V/1500s, it is believed they were left in Bircham’s sheds, allowed to decay until they had deteriorated beyond use, ultimately they were scrapped. A rather appalling end to an incredible aircraft.*2

The second squadron to be formed with these remarkable aircraft here at Bircham, was 167 Sqn, who also failed to see any active military service. Being formed on the 18th November 1918, just days after the Armistice was agreed, they too were no longer required.

The last of these special squadrons to be created was 274 Sqn,  which was also  formed here, at Bircham Newton, a year later on 15th June 1919. Personnel for the unit came from the nucleus of No.  5 (Communication) Squadron after it was renamed. As the war had now come to a conclusive end though, there seemed little need for these huge, long-range bombers and so all three units were disbanded each within six or seven months of their initial creation.

The immediate post-war era saw little interest in the building of a military force, especially an air force, and strong opposition from both the Navy and Army was fuelled by an anti-war feeling amongst the British public. As a result, many airfields were sold off, aircraft and equipment were scrapped and thousands of personnel demobbed. Airfields like Bircham Newton, now had in their store, numerous surplus aircraft awaiting disposal.

On of these surplus aircraft was the V/1500, and it would be Major Darley of 166 Sqn, who would go on to fly one, not in an operational  capacity, but as a non-stop flight to Madrid to promote these long range aircraft as potential civilian transports. It was not all plain sailing though, for the trip nearly cost Major Darley his life when, on the return leg, the aircraft got into difficulties and crashed into he sea off Biarritz. Managing to survive the accident, Major Darley eventually returned home to Bircham where he continued his military service. In honour of his achievements, the Spanish Government awarded Major Darley the Cross of Military Merit.*3

In a twist of fate, Major (now Captain) Cecil H. Darley, was joined in 1919 by his brother Flt. Lt. Charles Curtis Darley, also a veteran of the First World War, here at Bircham Newton, and they would be tasked with flying more of these surplus aircraft, this time Vickers Vimys, to Cairo. On their first trip together, on 24th September 1919, they departed Bircham heading for France, then onto Rome and eventually Cairo. On the 27th, following a forced stop at Lake Bracciano, 20 miles from Rome, the aircraft struck a telegraph pole causing it to crash. The resultant fire killed Captain Cecil Darley whilst his brother tried in vane to pull him free from the burning wreckage.*3

BRITISH AIRCRAFT OF THE INTERWAR PERIOD

Vickers Vimy (© IWM Q 73389)

Whilst Britain had entered a period of ‘demilitarisation’, the early 1920s saw increasing Government concern over France’s build up of military aircraft, particularly its bombers. The Government now saw France not as  potential Allie, but a potential aggressor, and there was now a growing concern over Britain’s lack of defensive strength.

By 1922, Britain had only 12 squadrons available in the UK, a weak and lacking force it would have been unable to counteract any aggressive moves made by the French. Consequently the Government put in a place a plan to rebuild its forces and increase this number, to a more substantial 52 squadrons by the mid 1920s.

In Part 2. we see how Bircham developed in response to the Governments plans and how new squadrons arrived at this rapidly developing airfield.

The full text can be seen in Trail 20 – North Norfolk Part 1.

RAF Graveley and the Pathfinders (Part 1).

In Trail 29 we turn south and head to the southern end of Cambridgeshire. This area is rich in fighter stations, both RAF and USAAF. Home to Duxford and Bader’s ‘Big Wing’, Mustangs, Spitfires and Hurricanes once, and on many occasions still do, grace the blue skies of this historical part of the country.

We start off though not at a fighter station but one belonging to those other true professionals, the Pathfinders of No 8 Group RAF, and former RAF Graveley,

RAF Graveley

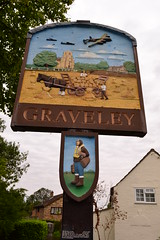
Village sign Graveley village sign depicts its aviation heritage.

Graveley airfield sits on the south side of Huntingdon, a few miles to the east of St. Neots in Cambridgeshire. It takes its unusual name from the nearby village. The airfield itself would see a number of changes to its infrastructure, including both upgrades and improvements and it would be home to several different squadrons during  its wartime life.

Initially built as a satellite for RAF Tempsford, Graveley opened in March 1942 when it accepted its first residents, 161 (Special Duty) Squadron.  Formed from a combination of elements from both 138 Sqn and the King’s Flight, it had been formed less than a month earlier at RAF Newmarket  and would bring with it the Lysander IIIA, the Hudson MkI and the Whitley V.

The role of the Special Duty Sqn  was to drop agents of the Special Operations Executive (SOE) into occupied France, a role it would perform throughout its operational wartime life.  Their stay at Graveley would however be short lived, remaining here for a mere month before departing to  Graveley’s parent airfield in Bedfordshire, before moving elsewhere once more.

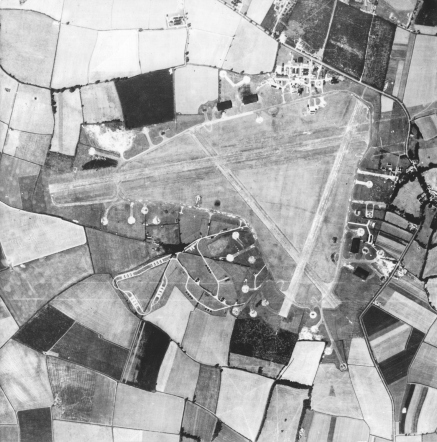
By the war’s end, Graveley would have become a complete operational airfield in its own right, forming part of Air Vice Marshall Donald Bennett’s 8 Group, with the Pathfinders. After upgrading, its initial concrete runways of 1,600 yards, 1,320 yards and 1,307 yards would be transformed into the standard lengths of one 2,000 yards and two 1,400 yard runways; the measures associated with all Class ‘A’ specification airfields.

Accommodation for all personnel was spread around the north side of the airfield, across the main Offord to Graveley road. These were separated into nine separate accommodation areas, incorporating both a separate communal area and sick quarters. Graveley would, once complete, accommodate upward of 2,600 personnel, a figure that included almost 300 WAAFs.

As with all sites, the bomb store was well away from the accommodation area, to the south-west, partially enclosed by the ‘A’ frame of the three runways. The 50 foot perimeter track linked these runaways with 36 pan style hardstands, all suitable for heavy bombers (after the extension three of these were replaced by loops). The main technical area, with its range of stores, workshops and ancillary buildings lay to the north-west, where two of the three T-2 hangars were also located, the third being erected to the south-east next to the only B-1 hangar on the site.

scan10_020

RAF Graveley (author unknown)

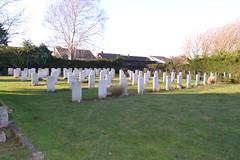
Following the immediate departure of 161 Sqn, Graveley lay operationally dormant. However, in May’s ‘1000’ bomber raid, aircraft from 26 OTU based at RAF Wing, flew from Graveley as part of the massive bombing operation. Sadly four of the Wellingtons (all Mk ICs) failed to return; WS704, DV740, DV707 and DV709. One of these, DV709 crashed some thirteen miles north-east of Cambridge whilst trying to make an emergency landing at Graveley. Unfortunately, when the aircraft came down, it overturned killing two of the crew on board: Sgt. J. Dixon the pilot, and Sgt. B. Camlin the tail gunner. Both these airmen were laid to rest in Beck Row Cemetery, at nearby Mildenhall.

St. John's Church Beck Row, Mildenhall

Beck Row Cemetery, Mildenhall.

The difficulty faced by Bomber Command crews in accurately hitting targets at night had, by now, become a problem for the ‘top brass’ at High Wycombe, and by April 1942, it had been decided, much against the views of Arthur Harris, that a new special Pathfinder Force was to be set up as soon as possible. As if adding salt to the wound, Harris was then instructed to organise it, and with a mixed charge of emotions, he appointed the then Group Captain Don Bennett, a man who had proven himself to have excellent flying and navigation skills.

Bennett then took charge, and on August 15th 1942, he formally took control of the new 8 (Pathfinder) Group, consisting of a specialised group of airmen who were considered to be the cream of the crop.

With its headquarters initially at RAF Wyton, Bennett received the first five founder squadrons of which 35 Sqn was one, the very day they moved into Graveley airfield.

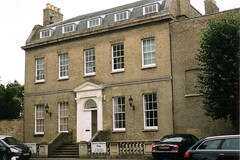
Castle Hill House, Huntingdon

Castle Hill House, Huntingdon, headquarters of the Pathfinders 1943 – 45. (Photo Paul Cannon)

Initially arriving with Halifax IIs, 35 Sqn would upgrade to the MK III in the following October, and then to the Lancaster I and III a year later. There would be little respite for the crews arriving here however, for they would be flying their first mission from Graveley, just three days after their initial arrival.

On the night of 18th/19th August 1942, a total of 31 PFF aircraft left to mark the target at Flensburg, close to the German-Danish border. However, poor weather and strong winds, prevented accurate marking, and two Danish towns were accidentally bombed as a result. It was a rather disastrous start for 35 Sqn and the Pathfinders.

Another blow was to fall 35 Sqn a month later, when on the night of 19th September 1942, the experienced 24 year old Wing Commander James.H. Marks DSO, DFC was lost when his Halifax II (W7657) ‘TL-L’  crashed at Blesme in France. Also being lost that night with W.C. Marks, was 19 year old F.L. Alan J. Child DFC and 25 year old F.O. Richard L. Leith-Hay-Clark; the remaining three crewmen being taken prisoner by the Germans. The squadron designation for this aircraft would then be reallocated, as was the case in in all squadrons, and as if bad luck were playing its hand yet again, that aircraft, Halifax HR928, would also crash with the loss of all its crew, including the highly experienced Sqn Ldr. Alec Panton Cranswick.

graveley

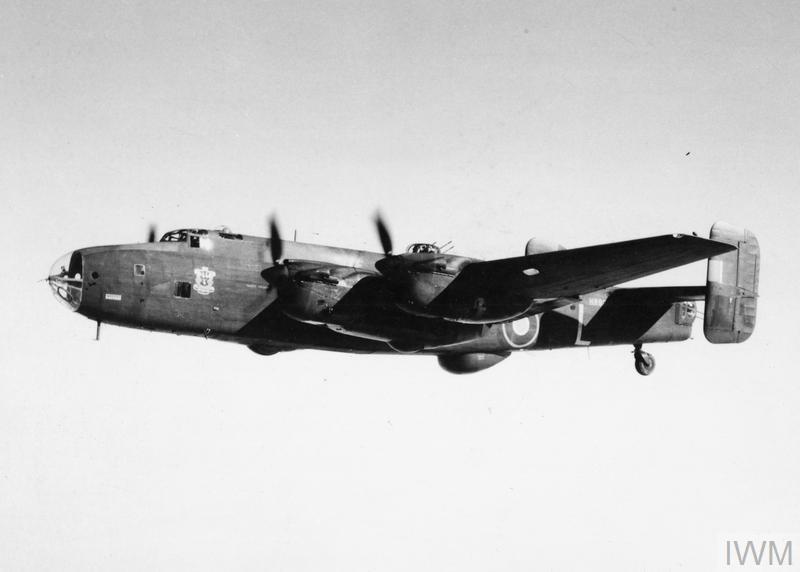
Halifax Mark II Series 1A, HR928 ‘TL-L’, 35 Sqn RAF being flown by Sqn Ldr A P Cranswick, an outstanding Pathfinder pilot who was killed on the night of 4/5 July 1944 on his 107th mission. The Cranswick coat-of-arms decorates the nose just below the cockpit.(I© IWM HU 92966)

In October, Gravely made history when it was earmarked to become the first operational airfield to test the new and revolutionary fog clearing system, FIDO. Classified as Station II, it would be the second of only fifteen British airfields to have the system installed and whilst it had its opponents, it was generally accepted and greeted by all who used it.

Installed by contractors William Press, the system’s pipes were laid along the length of the runway, a not easy feat as operations continued in earnest. One of the initial problems found with the FIDO system, was the crossing of the intersecting runways, pipes had to be hidden to avoid aircraft catching them and an obvious disaster ensuing. Two types of pipe were laid at Graveley, initially the Four Oaks type burner, but this was later replaced by the Haigas (Mk.I) burner. A more complex system, the Haigas took considerable time to install but by January 1943 it was ready, and an aerial inspection was then carried out by Mr. A Hartley – the Technical Director of the Petroleum Warfare Dept (PWD) and Chief engineer of the Anglo-Iranian oil Co. It was Hartley who later played a major role in PLUTO, the cross channel pipeline installed for D-day. Hartley, himself a non flyer, was flown over the burning pipes in a Gypsy Major by no less than Don Bennett himself.

It was later, on February 18th, that Bennett made the first four-engined heavy bomber FIDO landing at Graveley, using a Lancaster of 156 Sqn from Oakington. Setting off from Oakington, Bennett headed towards Graveley airfield, and with the burners lit, he remarked how he was able to see them from some 60 miles distant, the fire providing a far better light than searchlights alone, the means by which aircraft had been guided home on foggy nights previously. A great success, Bennett requested that certain minor modifications be made as he thought pilots could be distracted by the cross pipes at the threshold of the runway. Hartley keen to please Bennett, duly arranged for the necessary alterations and the modification were carried out without further delay.  However, further problems were to come to light on the the first operational lighting of the system, when bushes, hedges and telegraph poles adjacent to the pipelines were ignited due to an extension of the system passing through a nearby orchard!

The installation of FIDO meant that huge oil containers had to be installed too. At Graveley, sixteen cylindrical tanks were mounted in two banks, each tank holding up to 12,000 gallons of fuel. These tanks were kept topped up by road tankers, there being no railway line nearby as was the case at other stations.

Over the next few months, FIDO was tested further, but for various reasons its benefits weren’t truly exploited. On one occasion it was prevented from being lit by a crashed Halifax on the runway, the resultant lack of FIDO after the accident, was then blamed for the loss of two more aircraft, neither being able to safely put down in the poor conditions.  On another night, poorly maintained pipes caused burning fuel to spill onto the ground rather than heating the vaporising pipes above. Bennett somewhat angry at this, once more requested modifications to be made, needless to say they were not long in coming!

With further trials, one pilot was remarked as describing flying through FIDO as “entering the jaws of hell”*1 but once crews were used to it, the benefits were by far outweighing the drawbacks.

The safety of FIDO could not assist all crews though, and a number of other experienced crews were to be lost from Graveley over the next few months. But all news was not bad. The night of 18th/19th November 1942 saw a remarkable turn of fortune.

In Part 2 we see how Graveley sees out the war, the changes that occur, the new aircraft and new squadrons that arrive.

The whole trail can be read in Trail 29 – Southern Cambridgeshire.

RAF Leuchars – one of Britain’s oldest airfields (Part 3)

In Part 2, a number of twin engined models frequented Leuchars performing anti shipping roles and U Boat hunts out in the North Sea. BOAC had begun its clandestine role and shipping ball-bearings back from neutral Sweden. We now see a change to these flights and as the war ends, a new much larger breed begin to appear here are Leuchars.

Throughout all these changes at Leuchars, the BOAC company had been continually running its clandestine operations to Sweden. But by now it was clear that a new, faster more agile aircraft was needed. Even though they were marked with civilian markings and flown by Swedish crews, the Electras were slow and cumbersome and made easy targets for both fighters and flak. Now, with the development of the Mosquito, the opportunity had finally arrived.

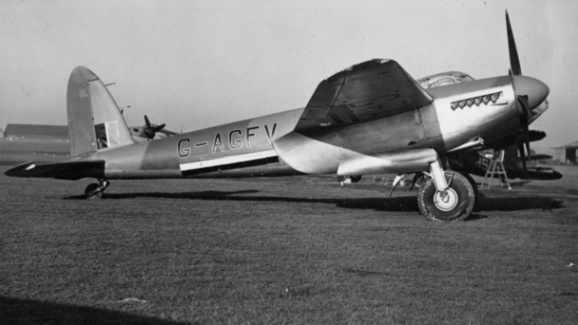
It was during December 1942 that the first civilian operated model of the aircraft arrived here at Leuchars. A Mosquito PR.IV ‘DZ411’,  it was assigned the civilian registration G-AGFV, and would begin flights to Stockholm on 4th February 1943, after which it was joined by six other aircraft. These MK.VIs were given the sequential registrations G-AGGC to GH, and would arrive during the April and May of that year.

By the end of April the following year, a total of nine Mosquitoes would have been modified and delivered to BOAC at Leuchars*5.

BOAC Mosqquito BAE Systems (@BAE Systems)

All these aircraft had to be changed from military status to civilian, this required the removal of all traces of armament. Modified at Hatfield – the home of the Mosquito – the resultant weight loss altered the aircraft’s centre of gravity and so additional ballast had to be added to prevent changes in the aircraft’s flying characteristics.

It was vital that the Mosquitoes remained unarmed for these operations, so as to not infringe or violate Sweden’s wartime neutrality, however, this made any aircraft on this run a potential ‘sitting duck’, even though, like their Lockheed predecessors, they carried BOAC insignia and were flown by civilian aircrew.

These operations were by now carrying more than just mail and ball-bearings though. These covert operations, took the civilian marked and unarmed Mosquito across the North Sea to Sweden, where it would drop off the mail, papers and other written material held within its bomb bay, and return with prominent scientists, special agents or allied aircrew who had been interned in Sweden as well as vital ball-bearings produced by the Swedes. The faster and far more agile Mosquito would, in most cases, be able to out run any opposing Luftwaffe fighter that should, and indeed did, try to intercept the aircraft whilst on one of these flights.

The returning ‘passenger’ on these flights had the unfortunate prospect of having to sit in a modified ventral bay for the whole duration of the flight. The prospect of further internment probably outweighing that of cramp and three hours of discomfort.

One such notable passenger who was carried back from Sweden, was the nuclear physicist Niels Bohr, whose work on atomic structures and quantum theory, had won him the Nobel Prize for Physics in 1922.*4 He would go on to work on the Atom Bomb in the Manhattan Project, the results of which were seen at both Hiroshima and Nagasaki in 1945.

Even though these flights were highly successful, a few aircraft were lost. In Mid August 1944, G-AGKP ‘LR296’, a former 27 MU aircraft, was lost when it crashed into the sea nine miles from Leuchars. All three on board were killed as it approached on return from Stockholm; the passenger being a BOAC Mosquito pilot himself. The crash was believed to have been caused by a structural failure, the aircraft having been repaired previously after an accident in January. By the war’s end fourteen Mosquitoes had been used in some way by BOAC, five of which crashed.*6

As the war moved on, squadron numbers at Leuchars begin to diminish. 1943 brought only two, that of 235 Sqn and 333 (Royal Norwegian Air Force) Sqn who were formed here on April 5th as ‘B’ Flight after the dividing and renumbering of 1477 (Norwegian) Flight. This was a split unit, one part flying the Catalina from Woodhaven, whilst ‘B’ Flight flew the Mosquito MK.II. An upgrade to the MK.VI then saw the unit move to join the famous Banff Strike Wing in September 1944. Whilst at Leuchars they operated as sub-hunters and convoy escorts, whilst ‘A’ flight flew more clandestine operations smuggling secret agents and supplies into occupied Norway. The Mosquito as a multi-function aircraft performed well in these duties, and by the end of the war numerous U-boats had been attacked by aircraft based at the Scottish airfield.

RAF Leuchars

One of the Hangars at Leuchars 2018

With 1944 dawning and major events happening on the continent, more changes would take place at Leuchars.

In the early months, proposals to extend and widen one of the runways was put forward, a part of which was agreed in April. This move also required the relocation of the Watch Office and widening of the perimeter tracks. A further three squadrons would pass through this year beginning with a detachment of 281 Sqn, who stayed for a year from February. A second unit 206 Sqn, stayed here for less than three weeks. But then September/October would bring a new and interesting model in the shape of the B-24 Liberator and 547 Sqn. A change to the smaller twin-engined models that had frequented Leuchars for the last four years or so, the move here was unfortunately a signal of their ending though, the squadron being disbanded in June 1945 never to appear again.

Whilst here, the Liberators would patrol the Norwegian coast in the A/U (anti-U boat) role, many of these patrols being uneventful, the U-boat threat by now greatly reduced compared to its previous Atlantic successes. However, on October 12th, Liberator MK.VI “G” did spot a U boat on the surface which it attacked with both front and rear turrets. Strikes from both guns were seen on and around the conning tower, and it was initially thought that the sub was sunk. After patrolling for a further 45 minutes, the U boat was again sighted some two miles away, but managed to escape in the poor weather. It was believed by the crew to have been a 740 ton vessel which had subsequently suffered damage from the attack.

The B-24s of the these RAF squadrons would be complemented by B-24s now flying separate runs to Sweden by the Americans. In addition to these, Leuchars also saw the reintroduction of the popular and highly successful American built Douglas DC3. The route to Stockholm now being a little less dangerous than it had been in previous years.

The arrival of the Liberator had signified a big change in direction for Leuchars,  they were to be the first of many four engined heavies to serve from the Fife base.

In 1945, 519 Sqn brought along the Halifax III, but sadly they were to go the way of 547 Sqn and disband here at Leuchars in the following May; it too would not reappear in the RAF’s inventory of operational Squadrons. 519 were a meteorological unit, collecting data for flying operations. Using both the Spitfire VII and Halifax IIIs, they would climb to altitudes of around 40,000 ft, and collect valuable meteorological data. Using Prata I, Prata II and Recipe I (Pressure And Temperature Ascent) many of these flights would take the aircraft high out over the North Sea.

With the close of the war, Leuchars had seen no less than twenty-eight operational squadrons pass through its doors, some of these merely staying for a day, whilst others were more prolonged. A range of aircraft had come and gone, mainly twin-engined models operating in the photographic reconnaissance or anti-shipping role. With its position on the north eastern coast, Leuchars had proven vital to maritime operations protecting the seas between Britain and Scandinavia, an area it had operated in, in a number of clandestine roles. But with the war now at an end, these were no longer required, and Leuchars’ role would again revert back to its original one – that of training.

The post war world was very different to the pre-war one, Britain like many other countries was rapidly trying to revert to pre-war budgets. A reduction in the armed forces was seen as essential to cutting costs, whilst rebuilding the nations cities that had been so heavily bombed in the Blitz, was paramount. As a result, the RAF as with the other forces, were having to do with what they had. A reduction in man power and machinery though would not only mean a reduction in squadrons, but the airfields that used them.

Leuchars, like so many, was now under the potential threat of closure. However, the increasing post war tensions between the east and west created the Cold War, with a strained and anxious stand off between Soviet and Western forces right across the European frontier. As had happened before, Leuchars’ position would once again be its saviour. Over the coming years it would see a wealth of operational aircraft and a broad range of front line fighters be based in this small corner of Scotland,

The coming months after the war’s end would see further four-engined models reappear, a previous resident 203 Sqn who had been here in the 1920s, returned from overseas operations in May 1946, bringing back with them the B-24 (Liberator VIII). Within two months though, this would be replaced by the Lancaster GR.3, a version of the mighty four-engined heavy that had wreaked so much devastation across Germany’s industrial cities. But by 1947, 203’s link with the Scottish airfield would finally draw to a close, and the squadron would depart for good.

160 Sqn who arrived a month later in June, also brought the Liberator, and similarly began taking on the Lancaster GR.3. By October though their demise had also arrived, they were renumbered and reformed as 120 Sqn, and by 1947 they had lost the last of their Liberators retaining only the Lancaster.

In December 1950, 120 Sqn were posted to Kinloss, where its wartime bombers were replaced with the newer Avro model, the long range maritime patrol aircraft, the Shackleton with its rare contra-rotating props.

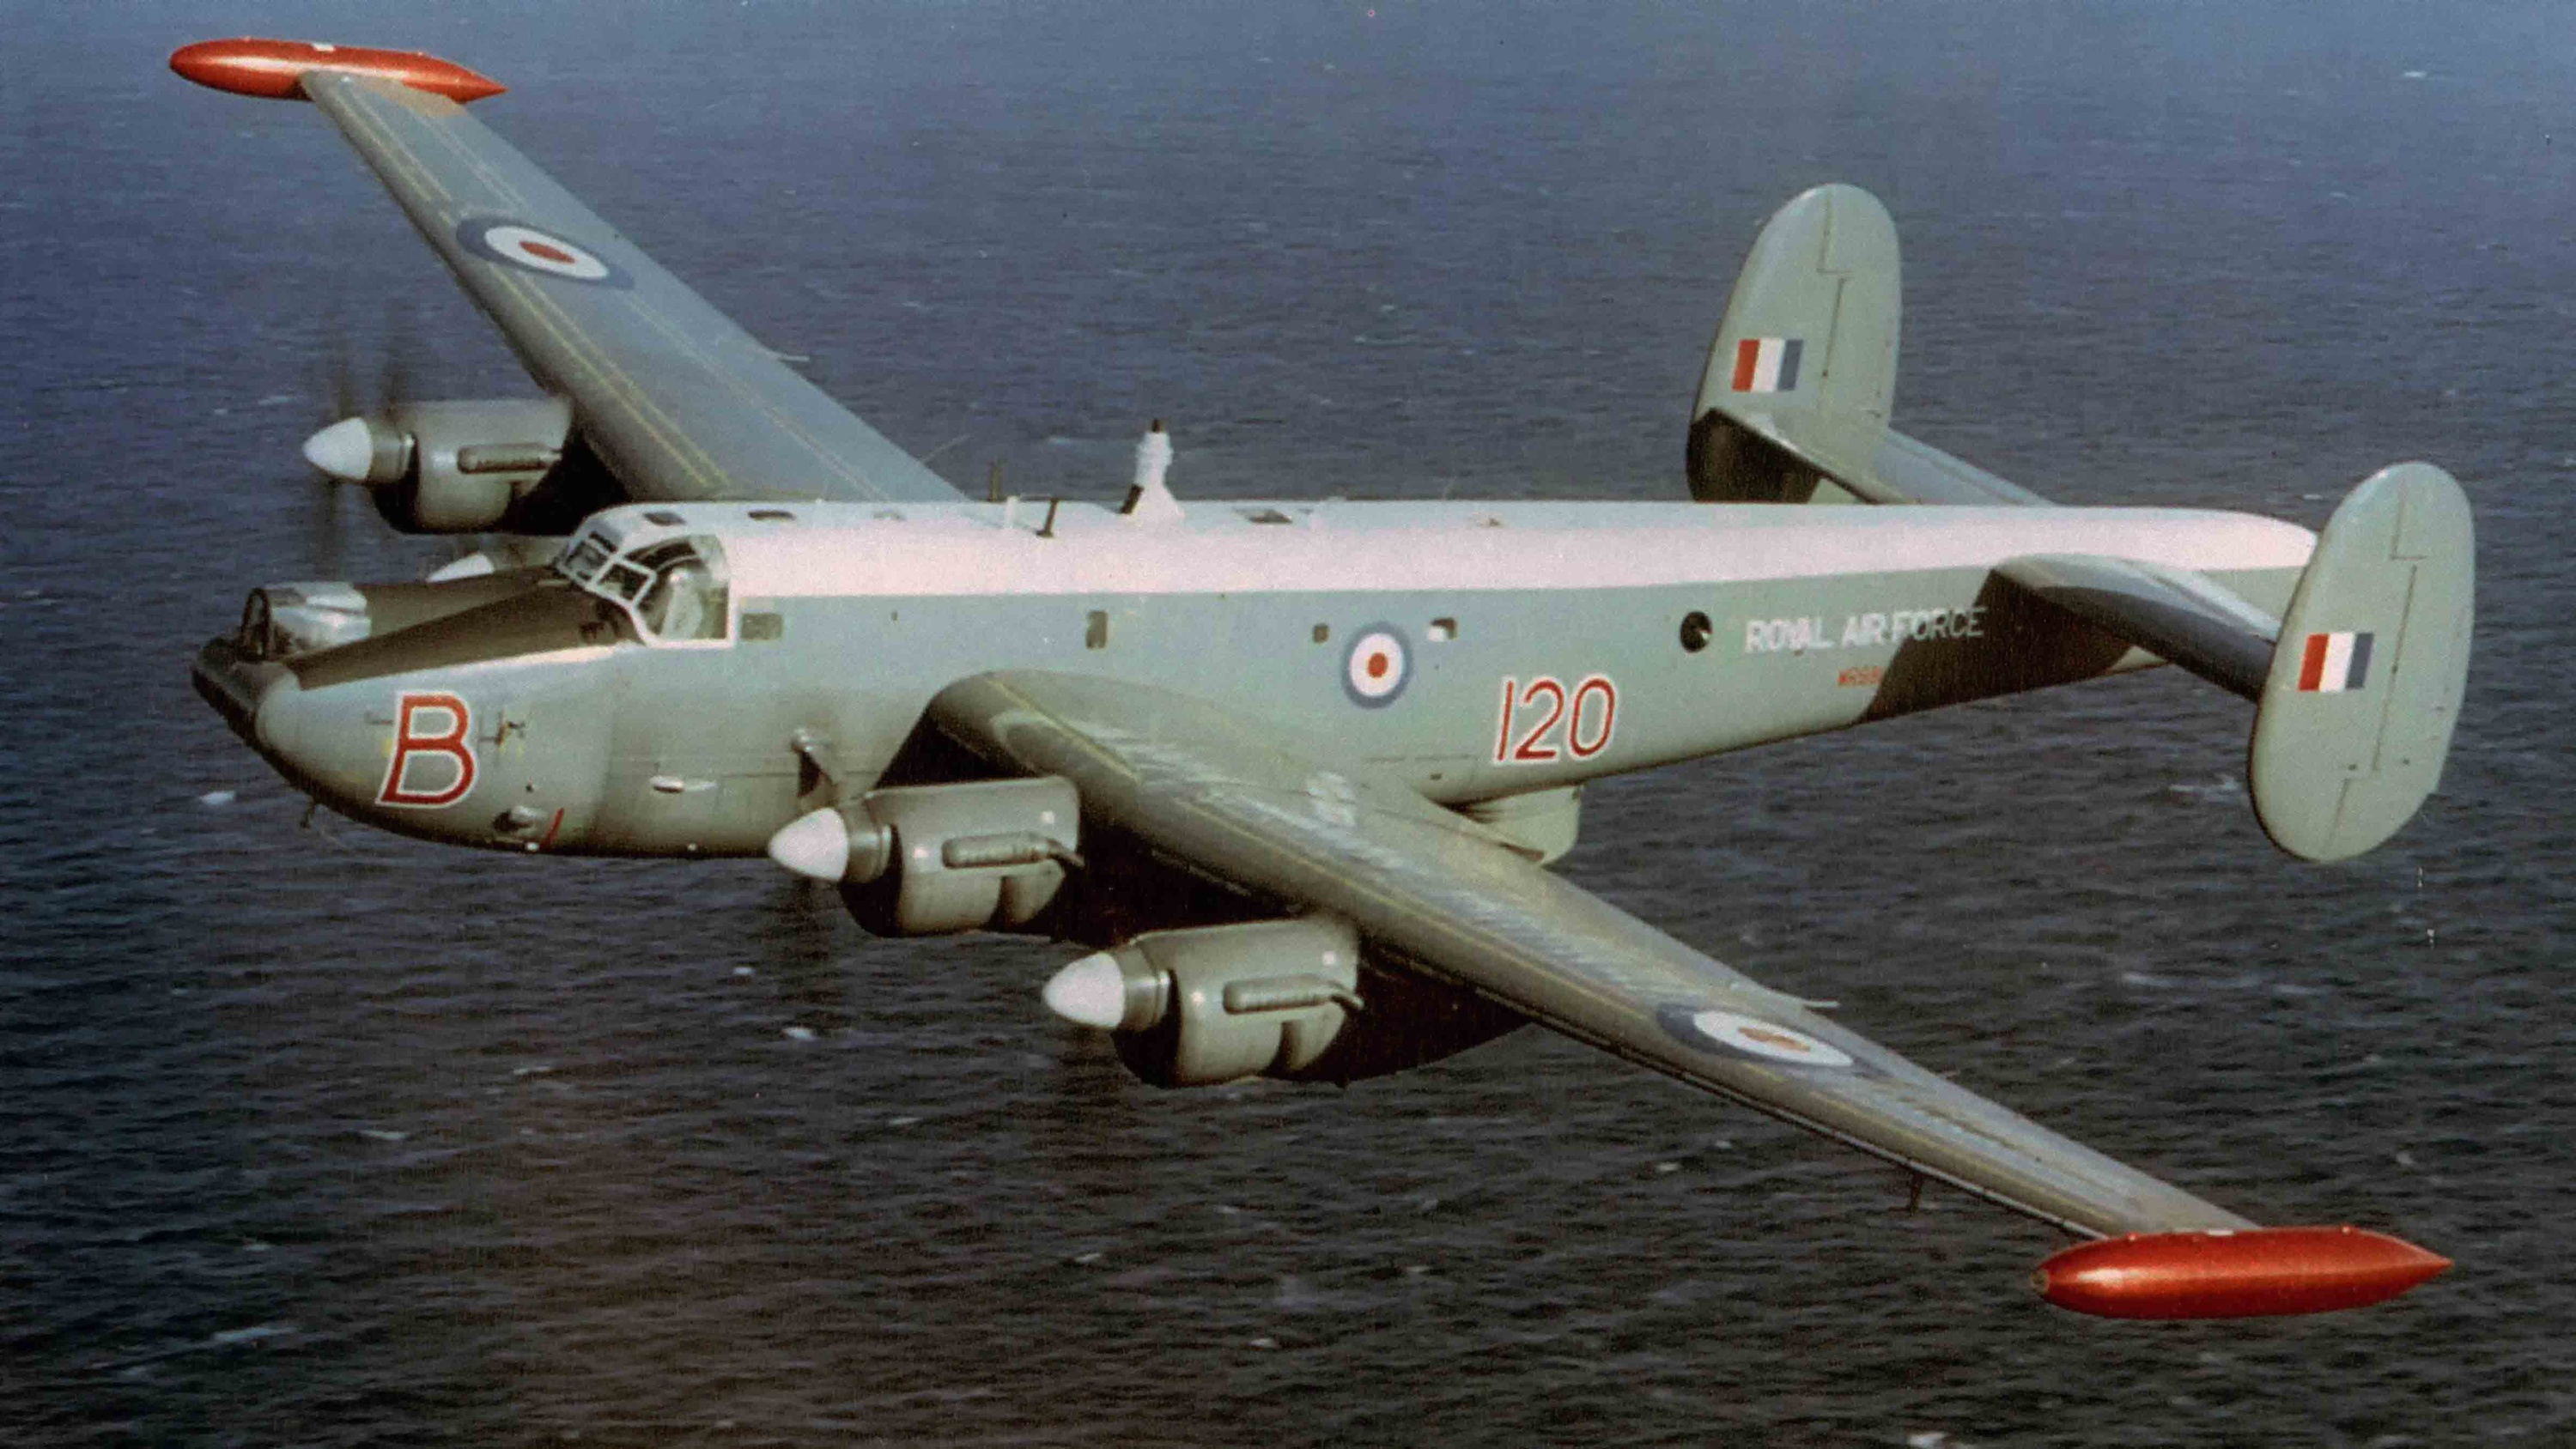
Avro Shackleton MR.3 (WR989) of 120 Sqn RAF (@BAE Sytems)

The aircraft, built in response to the growing Soviet threat, was designed around the Lancaster,  Roy Chadwick’s dream bomber. Chadwick, like R.J. Mitchell, having sadly died before their dream had finally been put into service. Built to Air Ministry Specification R 5/46, the Shackleton was initially designed with gun turrets and two Rolls-Royce Griffon 57A engines inboard, and two Roll-Royce Griffon 57 engines outboard.

One other unit arrived here at Leuchars that year, that of 82 Sqn, initially as a Lancaster detachment and then in June 1947 as a base with its own detachments at Eastleigh, Dar-es-Salaam and Lusaka. The last of the prop driven aircraft were now making their ultimate RAF appearances, and soon Leuchars would enter in the jet age.

In Part 4 Leuchars enters the jet age. The Cold War begins and Leuchars takes on a new challenge as it moves to a new Command, that of Fighter Command.

The full story of Leuchars can be seen on Trail 62.

RAF Leuchars – one of Britain’s oldest airfields (Part 2)

After Part 1 in which we saw how Leuchars came about and develop as we moved towards the Second World War, we enter the early 1940s. Here we now see anti shipping sorties, U boat hunts and a strange relationship spawn between the recently formed civilian organisation BOAC and RAF Leuchars.

Immediately after the declaration of war, searches began with flights penetrating out over the North Sea. On the September 4th, a Hudson of 224 Sqn spotted a Dornier 18. The Dornier attacked the Hudson which sustained damage in both the fuselage and fuel tank. Thankfully, the pilot evaded further damage and manged to nurse the aircraft back home to Leuchars without further problems. Leuchars’ position on the eastern coast provided an ideal opportunity for such flights, hunting for bombers, U-boats and ships over the North Sea; it was this operation perhaps that marked the beginning of these maritime searches- a role it would carry out for the next 5 years.

Armourers secure 250lb bombs in the bomb-bay of a Lockheed Hudson of No. 224 Squadron at RAF Leuchars. (public domain)

The two units at  Leuchars continued with repeated patrols, with 233 sighting  both enemy flying boats and a submarine on September 7th. Attacks were made on both but no signs of damage were reported to either. Sadly, on this day, a 224 Sqn Hudson was seen diving into the sea, no explanation was available as to the cause, and a launch was dispatched to search for survivors – sadly with no results. This rolling programme of patrols over the North Sea pretty much set the scene for the remainder of 1940, culminating in the departure of 233 Sqn in September, followed not long after by 224 Sqn on April 15th the following year.

At the base itself, more hangars were built, four (austerity) ‘C’ type hangars were added which expanded the servicing and maintenance area hugely. Leuchars was clearly expanding.

Leuchars like many of Britain’s airfields would not only operate ‘operational’ squadrons from them, but numerous support flights that would run along side. Some of these included: training flights, communications flights, Army support and co-operation flights, and Leuchars was no different. One such unit was that of  18 Group Communications Flight, who resided at Leuchars from the spring of 1940 right the way through to 1960. With only a brief spell at Turnhouse, it would operate a wide range of aircraft throughout its long service and be one of, if not the longest serving unit at the airfield.

The early part of 1940 saw yet another front line squadron arrive here at Leuchars, that of 605 Sqn with Hurricanes. The fighter squadron, whose battle honours would include The Battle of Britain and the Malta campaign,  would only stay for a very short period of time, transferring again at the end of the month to the rather unsuitable Wick, where only one Bessineau hangar existed and there were little or no dispersal facilities. As two other squadrons were also moving onto the airfield at the same time, it was decided to billet the non operational crews off the airfield site, an idea that became the norm in the following war years.

Over the next few years, there would be a plethora of squadrons use Leuchars. In October, 320 Sqn arrived in a move that saw the return of the Avro Anson. Within days of their arrival though the squadron would begin receiving the Hudson I. What makes this particular unit special was the fact that both it, and 321 Sqn with whom it would soon merge, were both formerly of the Royal Dutch Naval Air Service, and had arrived at Pembroke Dock in June that year after the Germans invaded Holland. They brought with them Fokker T VIII seaplanes which were quickly replaced with the Anson.

On January 18th 1941, the two units were merged to form 320 (Dutch) Sqn, whose headquarters were at Carew Cheriton under the command of Lieutenant Commander W. van Lier, at which point all but one of the Ansons were disposed of. For short time the unit would perform from both there and Silloth training crews on aerial photography in the Hudson, before returning here to Leuchars in the March, where upon they gradually updated the Hudsons with the MK.II, the MK.III and eventually the MK.IV before ending their link with Leuchars and departing to Bircham Newton in the April of 1942.

Another unusual squadron to arrive at Leuchars was that of 72 Sqn in November 1940. A Spitfire unit, they had then taken on the Gloster Gladiator, a 1934 designed bi-plane that became famous in the defence of Malta as ‘Faith‘, ‘Hope’, and ‘Charity‘. The switch to the bi-plane appears to have been made as a result of an unsuitable airfield at Acklington. However, and even though the Gladiator was in no way equal to the Spitfire, 72 Sqn retained the Gladiator well into the Spring of 1941, at which point they upgraded to the newer Spitfire, the IIa.

Arriving at Leuchars on November 29th, 1940, 72 Sqn immediately began flying patrols over the sea, their first being in the area around Dunbar. However, the Scottish winter weather dogged operational flying resulting in many cancelled flights and patrols. On December 8th, Green section led by P.O. Norfolk struck lucky, and the flight encountered a lone Luftwaffe Heinkel He.111 over Holy Island. The Spitfire engaged the Heinkel firing numerous shots at the enemy aircraft, but the bomber made his escape flying into the heavy cloud that blanketed the coastal skies. As a result, P.O. Norfolk was unable to make a claim against it. It was this very same bad weather that prevented the squadron’s proposed move back to Acklington, meaning that the planned trip for the 15th, was delayed, the aircraft unable to make the transfer until the end of the month.

AIRCRAFT OF THE ROYAL AIR FORCE 1939-1945: BRISTOL TYPE 152 BEAUFORT.

Beaufort Mark I, N1172 ‘AW-S’, of 42 Sqn RAF, in flight with L9834, also of 42 Sqn (@ IWM CH 2775)

The majority of 1941 saw similar moves; short stays by 86 Sqn (2nd February – 3rd March) with Blenheims; 42 Sqn (1st March – 18th June) with Beauforts on their way to the Far East; 107 Sqn (3rd March – 11th May) with Blenheims and 114 Sqn (13th May – 19th July) also with Blenheims, all of which brought a number of twin-engined models to the Scottish airfield. The primary role for these units was maritime patrols, monitoring and photographing vessels out over the cold waters of the North Sea.

In 1941 a strange relationship spawned between the recently formed British Overseas Airways Corporation (BOAC) and RAF Leuchars. BOAC – being formed by the amalgamation of British Airways Ltd and Imperial Airways – formed a partnership with Leuchars that would remain at the airfield up until the war’s end, operating in an ‘open’ but rather contradictory clandestine role.

The civilian company would initially operate a single Lockheed Model 14 Super Electra (the forerunner of the Hudson) named ‘Bashful Gertie‘, between Leuchars and Stockholm in neutral Sweden. Piloted by Swedish aircrew, the idea behind the route was to pass POW mail into Sweden where it could be forwarded to prison camps in occupied Europe. At the time though, Sweden was one of Europe’s largest producers of ball-bearings, a commodity that both the allied and axis powers needed in order to keep their war machine turning. It is now known that much of Germany’s war supply of ball-bearings was in fact coming from Sweden, but they were not the only country buying the Swedish goods. After dropping off the post, the Electra would be refuelled and filled with ball-bearings before returning to Leuchars. This run hence became known as the ‘ball-bearing run’. These operations would continue for several years from Leuchars, but upgrades at a later date, would see a new form take over from these rather slow and vulnerable aircraft.

On August 12th, another new squadron was formed here at Leuchars, that of 489 Sqn with Beauforts, who kept them until the January of 1942. At this point they began replacing them with the Blenheim IV. After departing to Thorney Island in March 1942, they returned here as a full squadron in October 1943. At this point they began receiving the Beaufighter X an aircraft they kept until the war’s end. Prior to D-day the squadron moved to RAF Langham in Norfolk where they donned invasion stripes ready for their part in the forthcoming invasion of Normandy*3.

A detachment of the Horsham-St-Faith based 105 Sqn, arrived at Leuchars in December 1941 bringing yet another twin-engined, but new design, to these Scottish shores. A revolution in aircraft design, it was the envy of the Luftwaffe and a joy for British pilots – the de Havilland Mosquito IV.

Aircrew of 105 Sqn next to a Mosquito (location unknown) (@IWM CH 018011 1)

The detachment would stay here until after September 1942 whereupon it would reform as a complete unit at RAF Marham in Norfolk. In the last days of September however, four aircraft would leave Leuchars to attack a ‘special’ target in Oslo.

In Oslo on this day was a gathering of high level Nazi officials at the Gestapo headquarters, and this was to be the primary target for the four aircraft. After bombing successfully, they four sped away at low level toward the sea and home, only to be attacked, by four FW-190s. All four Mosquitoes received damage to varying degrees, and one was sadly lost, that flown by twenty-six year old Flt. Sgt. F. Carter and his navigator twenty-year old Sgt. Young. The Mosquito was seen heading toward the Oslo Fjord (Lake Engervann) with its starboard engine on fire. Unable to maintain height, the aircraft clipped trees and struck the water killing the two crew. The two bodies were successfully  pulled from the Fjord by local fishermen and buried in Oslo. The four crews had only been posted to Leuchars the day before.

Little changed throughout 1942. More short detachments and movements through Leuchars saw 217 Sqn, 415 Sqn, 455 (RAAF), 144 Sqn and 544 Sqn bringing mainly twin engined models to Leuchars. Only the detachment of 544 Sqn with Spitfires saw any major changes. The longest standing unit at this time was 144 Sqn with Hampdens, but they were spread far and wide, detachments being located at Skitten, Sumburgh, Wick, Afrikanda and Vaenga.

In October, a month after the departure of 105 Sqn, the Mosquito returned once more. This time a new unit, 540 Sqn, who were created from both ‘H’ and ‘L’ flights of 1 Photographic Reconnaissance Unit (PRU). The multiple flights of this former RAF Benson unit was divided up into five separate consecutive squadrons 540 – 544. Flying models that included:  Mosquito II ‘DD615’, VIII ‘DZ424 and IX ‘LR422 they would also use the Spitfire IV up to the end of the year. Their role here was primarily to photograph targets in Norway and northern Europe, a role they performed until early February 1944. They would eventually return to their former home at RAF Benson leaving a sixteen month  stay at Leuchars behind.

In Part 3, the running of BOAC aircraft from Leuchars see a change, the war comes to a close and new larger aircraft begin to appear here at the Scottish base.

The full story of Leuchars can be seen on Trail 62.

Help Wanted – RAF King’s Cliffe!

In 2014, I published Trail 6 – ‘American Ghosts’ a trail around six American bases from the Second World War, one of these, RAF King’s Cliffe, was, at the time, under threat of development.

In 2015, objections from over 300 people were received which included supporters of Glenn Miller, aviation enthusiasts, wildlife groups and local people alike, who all highlighted concerns over the proposed development of the site and the impact it may have.

At an initial meeting in September that year, the council failed to come to any overall decision as they needed to consider further reports from different interested parties.  At a second meeting held on Wednesday 14th October,  after considering all the issues raised, East Northamptonshire Council approved the plans and so planning for 55 holiday homes were passed on an area known as Jack’s Green.

This area includes a memorial to the late Glenn Miller, who performed his last ever hangar concert here at King’s Cliffe before being lost over the sea. Assurances from the land owner at that time, were that the development would be in keeping with the area and that the memorial would remain “exactly as it was”.

I have not been able to return to Jack’s Green, nor King’s Cliffe airfield to see how this development has affected the area, and was wanting to know if anyone had photos of the development taken since the development started or more so, in the years following. As it would directly affect the memorial and adjoining public footpath, I was interested in the Jack’s Green area especially. I know that many geocachers use this path as do horse riders, walkers and enthusiasts alike, and am hoping someone may have a small collection of photos I could see.

Any photos you are willing to share would be very much appreciated.

My sincere thanks.

Andy

Links

The BBC report can be accessed here.

RAF King’s Cliffe was visited in Trail 6

Previous reports can be found here.

Glenn Miller Memorial RAF Kings Cliffe Dec 2014

Glenn Miller Memorial RAF Kings Cliffe Dec 2014

RAF Tuddenham – The last of the FIDOs (Part 2)

In Part one, we saw Tuddenham’s opening to the war. A rather cold and uninspiring airfield, it housed the Stirlings of 90 Squadron. Now, the Lancasters were arriving and front line bombing missions were once again on the horizon. 

The first of these major operations was on the night of 10th/11th June, when seven Lancasters, a mix of MK.Is and MK.IIIs, left Tuddenham to bomb rail facilities at Dreux –  90 Sqn had at last returned to the ‘front line.’

Sadly it was not to be the best night for the squadron, of the seven Lancasters that departed, two never returned home. The first NE149 ‘WP-A’ and the second NE177 ‘WP-B’ (both MK.IIIs), crashing in France. Of the fourteen airmen on board, three evaded capture, one was caught, and the remaining ten were all killed – it was not the most auspicious start for the unit. 

With two more Lancasters lost that month – one on the infamous Gelsenkirchen raid in which seventeen Lancasters were lost – June had proven to be difficult, and even though Stirlings were still operating, the Lancaster had become the main type and it wasn’t going to be an easy ride to Christmas. Forty-three, 90 Sqn airmen had been posted as either ‘killed’ or ‘missing’ in June alone.

Bomber Command’s tactical support of the land based forces continued on until mid September, by which time, Harris was back in charge and Bomber Command could once again turn its attention to targets in the German heartland. As the allied forces moved ever closer, night raids turned to daylight as allied air power began to get its grip on the skies over Europe. 

In October, a new squadron would reform here at Tuddenham, 186 Squadron also flying Lancaster MK.I and IIIs. Originally having its roots on board HMS Argus in 1918, it was another unit that had had short spells of activity before being disbanded once again. In a very different guise to its original formation, this time it was born out of 90 Sqn’s ‘C’ Flight, there the differences cease and by the December,  the squadron had left Tuddenham moving to Stradishall where it remained until the war’s end, and its final disbandment once more. 

The remainder of the year was relatively quiet for the Tuddenham group, regular missions with little or no opposition meant losses were low, and results were generally considered successful. But with bad weather setting in across both the UK and the wider continent, many squadrons had days of being stood down. Tuddenham on the other hand, with their FIDO system, was able to put up more flights than many others. Indeed during the Battle of the Bulge in the Ardennes, 90 Sqn were one of the few units able to launch attacks when most others were fog bound. 

The dawn of 1945 brought hope for an end to the war as the allied war machine moved ever closer to Berlin. The German’s last ditch attempt in the Ardennes was eventually overrun, and bombing picked up as fair weather returned once more. 

On February 2nd, Wing Commander W. G. Bannister joined the squadron on attachment. On the same day as he arrived, he took off at 20:52 in Lancaster HK610 ‘WP-Z’ along with thirteen other Lancasters from the squadron. Around an hour later, the aircraft collided with Lancaster PD336 ‘WP-P’, striking the tail trapping the rear gunner, Sgt. K. Hudspeth, inside the turret by his legs. Injured, he lay slumped over his guns. The pilot turned the aircraft over the Wash and ordered the bombs dumped in the sea. The rear tyre of the aircraft was burst and the port side of the tail was badly damaged, maybe even missing, and the turret by now was hanging off the aircraft. The pilot ordered chutes to be put on, after which the mid gunner Sgt. G. Wraith, went to help Sgt. Hudspeth, pulling him back into the aircraft’s fuselage where he administered morphine. The Lancaster made its way back to Tuddenham, and with the radio knocked out, red flares were fired to inform ground staff of its difficulties. Badly damaged with injured on board, the Lancaster made a safe landing, thanks to the skill of the pilot and crew.

Bannister’s Lancaster however, did not recover from the collision. After striking ‘P’ for Peter, the aircraft fell from the sky, crashing at 21:25,  3 miles from Bury St. Edmunds;  sadly there were no survivors.   

March 1945 saw a return of the Stirling to Tuddenham with 138 Sqn*3 transferring from Tempsford with the MK.V. As soon as they arrived they began to replace these with Lancasters MK.I and IIIs. 138 Sqn had been heavily involved in clandestine operations with the SOE, dropping agents into occupied Europe. With the need for such missions now largely gone, operations were wound down and the Stirling squadron were to be upgraded to front line bomber status. The first operational mission under this new guise was planned for the 28th but postponed until the following day. Three aircraft were ordered and all returned safely after having bombed the target. 

As the war drew  to its conclusion, 90 Squadron turned their attention to Kiel with both mining and bombing to prevent a German withdrawal. By the of the month it was all but over and operation Manna was put into place. On April 30th, 90 Sqn began their part in dropping supplies to the Dutch – targeting Rotterdam. Drop zones were identified by red T.Is and / or white crosses placed on the ground. By the end of the month 23 tons of food supplies had been dropped by the one squadron alone. During May, they began flights to Juvincourt to collect and bring back prisoners of war, dropping them at various sites including Dunsfold, Tangmere, Wing and Oakley; the aircraft then returned to base before carrying out further flights. 

On the 25th, ‘Cooks tours’ began, aircrew flying ground crew to Germany to see for themselves the damage inflicted by the war on the German heartland, it was a harrowing site for many. 

RAF Tuddenham

An electrical sub station shows its original RAF paint work

With no operational flying to do, training flights took over. It was a major change for  both the air and ground crews. As bases around the country began to close, so squadrons were moved around in preparation for disbandment. In April, two more Lancaster squadrons arrived here at Tuddenham, both 149 and 207 Sqns transferring across from RAF Methwold. The number of bomber squadrons now residing at Tuddenham totalling four.

Finally, in November 1946 the death knell finally rang for Tuddenham and it too was closed, flying ceased and the aircraft were all withdrawn. All four squadrons were pulled out of Tuddenham, 90 and 186 Sqns taking their Lancasters to RAF Wyton, whilst 149 and 207 went to RAF Stradishall. In what must have been a mass exodus, Tuddenham fell suddenly silent.

The airfield stood dormant for many years  whilst remaining in RAF hands, but then in 1953 life returned once more as the USAF arrived and used it as an ammunition storage area and renovation depot for surplus WWII ammunition and equipment. The American forces remained here for four years until 1957 when they too finally withdrew.

Tuddenham itself continued to stay in RAF ownership for a short while longer. As tension rose in the early part of the Cold War, ideal because of its low population and rural location, it was earmarked as a site for the new Thor missiles. New launch pads were built and a small section of the site was redeveloped accordingly.  Then in July 1959, 107 Squadron RAF reformed here, operating three of the Thor missiles as part of the UK-USA nuclear deterrent agreement. Retaining these until July 1963, the site finally closed once and for all. At this point all military personnel moved out and the gates were finally locked.

After this, Tuddenham was earmarked for quarrying to meet the rising demand for housing. Large sections were returned to agriculture, but a quarry opened to extract the much-needed materials for house construction. This operation has continued to the present day and has been responsible for the removal of large quantities of the main airfield site.

Visiting Tuddenham, reveals little of the history of the airfield and the people who stayed here. A few buildings, primarily the gymnasium and squash court remain standing, but in a very poor state and are likely to be pulled down soon. The roof has collapsed and part of the walls are missing. Located to the south of the airfield, they stand as reminders of those days long gone.

Other technical areas and the main part of the airfield, are now the workings of the quarry. The entrance to this site, rather insignificant, is part of the original perimeter track and is marked by an electrical sub-station. The shell is intact and complete with two blast walls, even the original RAF paint work can be seen! Overgrown and hidden beneath large thorns, this lone building will no doubt soon go the way of others some distance away.

Tuddenham airfield now stands lonely, large parts excavated and gone along with the memories of those who were stationed here. A pig farm covers a large part of the southern section and very little remains other than a few dilapidated buildings whose days are also very numbered. Tuddenham’s place in history is most certainly confined to the books and the memories of those whose numbers are also rapidly diminishing.

Before leaving Tuddenham, return to the village and stop at the village green. The village sign depicts a Lancaster flying low over the Suffolk landscape. A sundial, beautifully crafted marks the history of 90 Sqn, both the aircraft flown (1917 – 1965) as well as the airfields they were stationed at throughout their life. A superb tribute to a once active airfield and the gallant heroes of 90 Squadron Royal Air Force who served here*4.

RAF Tuddenham

Beneath the sundial, all the aircraft used by 90 squadron.

In July 2021 I was contacted by Herb Zydney who was stationed at the former RAF Tuddenham in the mid 1950s, he kindly sent some photos and has since sent the original road sign ‘home’ to remind us of RAF Tuddenham. Hopefully this will be suitable displayed. 

RAF Tuddenham road sign

The original road sign to Tuddenham airfield. It has since been returned to Tuddenham for display. (Photo courtesy Herb Zydney)

On leaving Tuddenham, carry on in a south-easterly direction toward Bury St. Edmunds and follow the A14 east. Passing Bury, we arrive at an industrial area on your left. Here we discover an aviation dream world see Trail 16.

Sources and Further Reading.

*1 National Archives AIR 27/731/25

*2 Grehan. J. & Mace. M. “Bomber Harris – Sir Arthur Harris’ Despatch on War Operations“, Pen & Sword, 2014

*3 No. 138 Squadron RAF went on to be the first ‘V-bomber’ squadron of the RAF, flying the Vickers Valiant between 1955 until being disbanded in 1962.

*4 Personal stories of personnel from 90 Squadron at Tuddenham can be found here on the Wartime Memories Project website.

*5 Williams, G. “Flying Through Fire – FIDO The Fogbuster of World War Two“, Alan Sutton Publishing. 1995 (An excellent book detailing the work on FIDO and its installations at each airfield).

National Archives: AIR 27/733/3; AIR 27/733/4

My thanks to Herb Zydney for the You Tube video and photos, they are very much appreciated.

RAF Tuddenham – The last of the FIDOs (Part 1).

In this trail we return to an RAF bomber airfield which opened later in the war. With a relatively quiet start, it soon became a front line base operating the four engined heavies the Lancasters of Bomber Command. Within a short time of it opening, it would become one of only a small number of airfields that would use the cleverly designed fog clearing system FIDO, a system that allowed aircraft to take-off and land in difficult weather conditions. As a result, it became a safe haven on more than one occasion. 

In Trail 16 we return to RAF Tuddenham.

RAF Tuddenham

Tuddenham (as opposed to the decoy site North Tuddenham) is one of those places that is today surrounded by large towns. To the north-east lies Thetford, to the south-east, Bury-St.-Edmunds and to the south-west that mecca of horse racing – Newmarket. As a result, the landscape of the area today is somewhat different to what it was in the 1930s and 40s.

Using land requisitioned in 1943 it was opened that same year. A standard Class ‘A’ airfield, its main runway ran south-east to north-west and was the standard 2,000 yards in length. With two secondary runways both of 1,400 yards, it would open under the control of 3 Group Bomber Command. For its protection it had its own decoy site built a short distance away at Cavenham, but even this didn’t stop attacks on the airfield, none of which thankfully caused any major damage.

Built by Taylor Woodrow, it would have two T2 and later one B1 hangar, with thirty-eight loop style hardstands and a perimeter track of the standard 50 yards width. A standard watch office for all commands (design 12779/41) was later redesigned to match the new war-time standard 343/43 design which had the smaller windows especially designed for bomber airfields.

RAF Tuddenham

Tuddenham village sign showing its links to a once active airfield.

Accommodation for air and ground crews was located on land to the south of the airfield spread across twelve sites. A mix of huts, they would accommodate around 2,000 personnel of which some 250 were WAAFs. Built as temporary buildings, these huts were unheated and unhomely, they were cramped and cold and as such, Tuddenham was not one of the most popular stations with crews posted there.

A fairly nondescript airfield, it was first frequented by the RAF’s 90 Squadron with the huge Stirling MK.III. 90 Squadron in name, had been in existence since 1917 although it had been disbanded and reformed on no less than four previous occasions, and had been at a variety of locations before arriving here at Tuddenham. This time however, it would be a much more permanent formation, and for the duration of the war it would reside at only one station, that of RAF Tuddenham.

90 Squadron had previously been recreated to test the suitability of B-17s for RAF service. Initially based at Watton, it would be less than a year before they were disbanded once more. Their more recent reincarnation led them to Wratting Common, from where they departed on their journey to Tuddenham on October 13th 1943.

According to the official records*1, this move was ‘worked out in every detail‘ and it went ‘expeditiously without incident‘ even though the airfield was still in a state of non completion. 90 Squadron’s first operational mission from Tuddenham occurred on the 17th, a return to mine laying off the Frisian Islands. Classed as ‘minor’ operations three aircraft were ordered to fly that day, one of which had to return early due to being struck by lightning and suffering damage to a number of areas including the rear turret. With only three other mining operations and an air-sea rescue search that month, the move to Tuddenham would have been uneventful had it not been for an accident involving Stirling EF497, piloted by Sgt. Wallace Jones who was aged just 21. The crew of the Stirling were on an air test when the aircraft struck trees just close to RAF Benson in Oxfordshire. As a result, all of the crew, of which three were in the RCAF, died in the ensuing crash. 

With only two other operational losses before the year was out, the Stirlings of 90 Sqn were not fairing as badly as many other units, but the days of the type were indeed now numbered as losses overall in 3 Group were high. The Stirling would soon be relegated to secondary duties completely. 

December 1943 would see a major installation take place at Tuddenham. By now, the fog dispersal system FIDO, was in place across several other British airfields and was proving to be a major breakthrough in poor weather flying.

Designed after pre-war investigations into ways of dispersing fog, it led to oil burners being laid along a mile length of the main runway at Tuddenham. Where these crossed secondary runways, the burners were entrenched and metal plates placed over the top to prevent aircraft using these runways, from having an accident. 

At Tuddenham (classed as FIDO Station XIX), the Mark IV Haigill burners were used, each burner was 40 yards in length and made of three pipes looped at the ends. Oil was fed into the burner via a feed pipe from the main pump on the southern side of the airfield. 

Supplying these burners took huge quantities of oil, this was brought in on the nearby railway which passed through the village of Higham. A special siding was constructed which could take a large number of wagons from which fuel was pumped into a small pumping station. From here, it would then cross several fields via underground pipes into one of three large storage tanks capable of holding around half a million gallons of fuel in total.

Work began at Tuddenham early in the new year 1944, and again Taylor Woodrow were charged with the task of carrying out the construction. By August, they were ready and stocks had begun arriving ready for a test burn.

Location unknown. FIDO burners alongside a runway 1945. © IWM CH 15274

FIDO amazed all those who saw it for the first time. Its ability to clear not only fog but low cloud as well, was a god send to those who were unfortunate enough to have found themselves lost in the thick of it. The first use of FIDO at Tuddenham was on August 8th 1944, when by pure accident, an American B-26 ‘Marauder’ was caught by fog. On that day, a test burn was planned, the burners were lit and the amazed onlookers watched as both fog and low cloud began to clear. Suddenly, out of the darkness and murk came the B-26, who had attempted to land elsewhere no less than eight times unsuccessfully. Seeing the bright blaze of Tuddenham’s burners, the pilot made for the airfield, flew over it to ascertain what it was, and once satisfied, made a successful wheels up landing. 

FIDO would be used regularly over the next few months, in November it provided a safe haven for both RAF and USAAF aircraft. In Geoffrey Williams’ book ‘Flying Through Fire‘, he quotes one pilot as stating he could see Tuddenham’s FIDO “from Ostend at 7,000 ft“, a point that illustrates the effectiveness of FIDO in poor conditions. 

The idea behind FIDO was to install it at a number of airfields that were located in a ‘hub’ of other airfields, thus keeping returning aircraft as close to their parent airfield as much as possible. It allowed returning aircraft to land (and take off) safely in poor or deteriorating weather conditions, but it was used ‘sparingly’, as in one day’s total of 6 hours burn, some 200,000 gallons*5 of fuel had been used. Not many sites actually had FIDO installed, just fifteen in the UK, eleven of which were Bomber Command airfields. However, FIDO was undoubtedly successful, these fifteen alone enabled somewhere in the region of 2,500 safe landings that would have no doubt led to a number of casualties or even deaths had it not been available. The airfields were very much appreciated by those who were caught out when returning from raids over Europe, the only major complaints being glare from the bright fires as aircraft came into land*2

RAF Tuddenham

South of the airfield lay the Squash court and Gymnasium.

Back in early 1944, Tuddenham’s operations continued, the Stirlings of 90 Sqn were soldiering on. More mining operations and bombing raids on the French coast dominated the months of January and February, whilst ‘special duties’ (SOE supply operations) took over as the main focus from March to May. By this time the Stirlings were starting to be replaced by the Lancaster, as it was now being relegated universally to secondary operations: supply sorties, paratroop transport and mining operations off the European coast. 

This transition began on May 11th, with pilots gaining initial experience by flying as 2nd pilot in other squadrons. New crewmen were soon being posted in, many of these from Conversion Units, whilst 90 Sqn’s Stirling crews were posted out. The continual cycle of trained crews coming in and ‘untrained’ crews going out filling the record books.

During all this operations continued on, and Stirlings continued to be lost. Four aircraft were shot down in May, three of them, on the two consecutive nights between the 8th and 10th, with many of the crewmen either being killed or captured.

The last Stirling to be lost on operations for 90 Sqn was on the night of June 2nd / 3rd when EF294 ‘WP-B’ crashed in France in the early hours of the 3rd. Of those on board, two managed to evade capture whilst the remaining five were caught and imprisoned in POW camps. 

With the invasion of Normandy on June 5th/6th, four Lancasters and fifteen Stirlings were prepared for operations in connection with the landings, but the Lancasters were withdrawn – perhaps to the annoyance of those on board. The Stirlings all took off and carried out their mission successfully, each one returning to Tuddenham safely. 

The last Stirling only operation took place on June 7th, the last two aircraft to return landing at Newmarket after completing their special operations. The Lancaster would now take over as the main aircraft and so 90 Squadron would soon return to bombing operations once more.

RAF Tuddenham

A sundial on the village green remembers the crews of 90 Squadron RAF.

In Part two the Lancaster arrive, but it is not the most auspicious of starts for the squadron.