Disaster at RAF Tibenham.

In this post, we revisit Tibenham in Norfolk, the home of the 445th Bomb Group, Eighth Air Force. Whilst here, the 445th would suffer the worst casualty rate of any Bomb Group in a single mission, a mission that virtually wiped out the entire Group. Yet they would no give up, determined they would go onto have one of the most successful bombs on target statistics of all the Eighth’s Bomb Groups, a record they can be proud of.

RAF Tibenham (Station 124)

Station 124 was one of those purpose-built airfields designed specifically for the USAAF in the mid-part of the war. Known to the locals as Tivetshall, it occupies a site previously used by the Royal Flying Corps in World War 1 (although there appears to be no record of units based here).

In preparation for the Air Force’s arrival, a Class A airfield was built, with three standard concrete and tarmac runways, the primary of 2,000 yds and two secondary each 1,400 yds long and all the standard 50 yds wide. In addition, there were thirty-five ‘frying pans’ hardstands and a further seventeen ‘spectacle’ hardstands, all dotted around the perimeter track. Aircraft maintenance was completed in two T2 hangars, one in the technical area and one other to the south side of the airfield. The bomb store was located to the north-west of the airfield, with the technical and administrative areas to the east. Beyond this, dispersed further to the north-east were the accommodation areas: two communal sites, a WAAF site, sick quarters and seven male accommodation sites. Accommodation was initially designed for 3,000 personnel, using mainly Nissen huts with some Orlit hutting on site. Most other buildings were ‘temporary’ and built of brick.

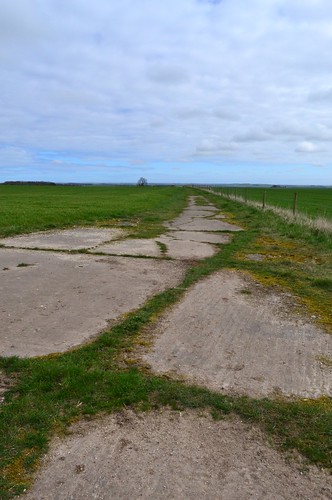
RAF Tibenham Perimeter track

Part of the perimeter track – RAF Tibenham

Built over 1941-1942 by W. and C. French Ltd, it was opened in 1942, and was the temporary residence for the ground echelons of two squadrons of the 320th BG in November that year. The plan was to send the air echelons via the northern route, but due to heavy losses of the 47th and 319th BGs, they were diverted to North Africa via the southern route. The Ground echelons would then join them departing both Tibenham and nearby Hethel on November 21st 1942.

Tibenham then remained unoccupied by operational forces until November 4th 1943, when the 700th, 701st, 702nd and 703rd Bomb Squadrons of the 445th Bomb Group, Eighth Air Force arrived.

The 445th’s journey brought them from Gowen Field in Idaho, through Wendover Air Force Base in Utah, to Sioux City where they completed their training. In October the ground echelons sailed on the Queen Mary arriving in Scotland in early November. The air echelons flew the southern route, covering Florida, Puerto Rico, Brazil and West Africa before arriving shortly afterwards.

Flying B-24 Liberators, they would perform their first mission on December 13th 1943 – a month after their arrival. Their first target was the U-boat pens at Kiel. Along with other units of the 2nd Bomb Division fifteen aircraft would take off and undertake what was to be a relatively uneventful sortie, all the 445th aircraft returning with only two aircraft damaged and no casualties.

Their third mission, also in December, was less successful. A massive force of 546 bombers left England to attack Breman, arriving over the target between 11:42 and 12:14, the force was badly hit by ME-410s of the Luftwaffe. The 445th had fifteen of their aircraft damaged, with two crewmen wounded and eleven classed as ‘missing’. The realities of war were beginning to bite home.

1944 would be a more decisive year for Tibenham and the 445th. During the February ‘Big Week’ campaign against the German aircraft industry, Tibenham would suffer from accidental bombing by a returning Liberator. After being recalled, a  B-24 accidentally released a bomb whilst flying over Tibenham airfield, the resultant explosion killing two servicemen and a civilian in a nearby house.

The 445th would also suffer this year, but for their determination and action over Gotha they would be awarded a Distinguished Unit Citation (DUC), an award that reflected their bravery.
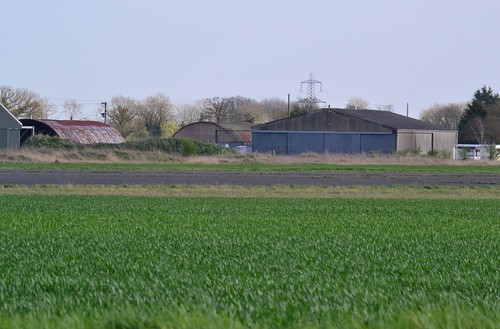
RAF Tibenham

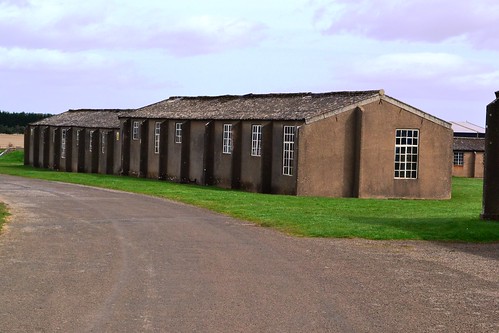
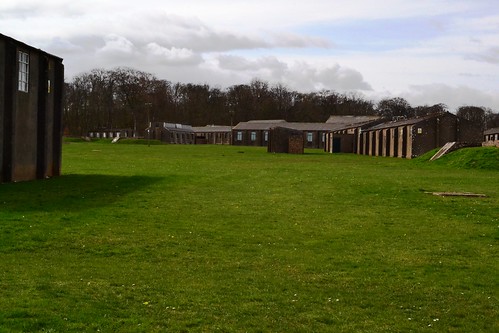
Today’s huts and hangars

The eight groups of the 2nd Bomb Division (BD) were targeting the Me-110 factories on February 24th 1944, dropping 372 tons of high explosive bombs. During the  mission 239 aircraft would leave England in three large wing formations, the 445th in the 2nd Combat Wing (CW) were to fly in the lead, along with the 389th BG and the 453rd BG. Behind them were the 14th Combat Wing with the 20th Combat Wing bringing up the rear.

The lead group were hit hard as much as 80 minutes before the target. Flying ahead of schedule, they had failed to rendezvous with their escort and so were at a huge disadvantage. Flying at altitude, the lead aircraft of the 389th suffered oxygen problems, which caused the bomb aimer to suffer from anoxia, the condition led to him release the bombs early, over Eisenach and not the primary target. As the bombs fell toward the ground, others in the wing began to follow suit, all releasing their bombs far too early, and well away from the target area. The 445th realising there was a problem, ignored the false signal and continued on to the target alone. Being out of formation and without escort, the B-24s were ‘sitting ducks’, and unsurprisingly were given special attention by the Luftwaffe.

From then on, and for an hour after the bomb run, Luftwaffe fighters attacked the B-24s, and one by one, the heavy bombers fell from the sky as fighters picked them off. After two and a half hours of relentless attacks, thirteen of the original twenty-five aircraft had been lost and nine others were badly damaged. The mission had cost 50% of the groups aircraft, but it was a tragedy that was not to be their last, nor their worst.

The main formation who had released early, had also suffered badly, being subjected to aerial bombing, cable bombing and rockets, an attack which led to a mission tally of thirty-three aircraft being lost and 314 airmen being classed as ‘missing in action’.

March 1944 would also be a noteworthy month. It was the end of a career as Commanding Officer for Capt. James Stewart, Commander of the 703rd BS. Posted here before he was declared unfit for flying duty, he arrived as ‘Operations Officer’, before being given the Command of the 703rd. He would go onto fly ten missions with the 703rd before departing Tibenham for Old Buckenham and the 453rd BG as Group Operations Manager.

Because the 445th had flown many missions over the winter months, March would become noteworthy for another reason. Four months after their first operation, Lt. Sam Miller and the crew of B-24 #42-110037 of the 700th BS had completed twenty-five missions whilst here at Tibenham, they were the first crew of the group to do so. At last some good news had brought relief to the horrors of the previous months and in particular the disaster of ‘Big Week’.

Ground personnel of the 445th Bomb Group gather around a B-24 Liberator (I5-B+, serial number 42-110037) after its return to base on D-Day. Printed caption on reverse: '51451- Ground crew swarming around a bomber returning from a D-Day mission for information on the invasion.' Handwritten caption on reverse: 'Lt Sam Miller's B-24 returning to Tibenham, Norfolk after he and crew completed a 25 mission tour of operations. First crew in the 445th bomb Group to do so.'

The return of B-24 #42-110037 after its crew had completed 25 Missions (USAF).

In the lead up to the Normandy invasion in June, the 445th attacked airfields in the Paris area along with V-weapons sites in Northern France, and on D-Day itself, they returned and attacked the shore installations, pounding them before the land forces arrived. The 445th then went on to help with the breakout at St. Lo striking enemy defensive positions. The Tibenham group were now so successful that they led the ratings for the most accurate bombing of all the Liberator groups in Europe, these successes though, were to be short-lived, for on September 27th 1944, the 445th would suffer its own ‘day of infamy’.

On that day the group was allocated the Henschel facility in Kassel, and they were to lead 315 B-24s to the target. Navigating by GEE the 445th took a wrong turn and left the protection of the formation. The turn went unnoticed by the remainder of the group and so, all of a sudden, the 445th were now out on a limb and lacking the protection of the formation once again.

The group then all dropped their bombs, but unbeknown to them they were not over Kassel but were in fact over Gottingen some 20 miles away. After implementing the withdrawal plan, the 445th put themselves even further away from the main force, they were now alone. All of a sudden the 445th met II/JG.4, and what followed would all but wipe out the group.

Fw-190s approached the group from behind, three abreast diving down as they fired. Then followed two Me-109 Gruppen of JG.4 who picked off the damaged aircraft. With individuals falling away, the formation was spread and broken up, some 150 enemy aircraft had attacked and devastated the group.

In around five minutes, the Luftwaffe fighters had picked off and dispatched twenty-five B-24s and damaged most of those that remained flying. Only the intervention of US fighters stopped the total and complete annihilation of the group. The scene was devastating, the sky was full of smoke and debris, parachutes from both sides floated through the carnage. Three more B-24s crashed on the way, luckily in allied territory, two others managed to reach Manston’s emergency runway and one more crashed at Old Buckenham. The four remaining aircraft managed to limp back to Tibenham, but only one was able to fly again the next day.

In a written account*1, Pilot Capt. William R Dewey Jr describes the scene in his B-24 (one of those that made Manston)

“The tail turret had caught fire, from direct hits by 20 mm cannon in the first wave of FW-190s, both waist gunners were wounded and bloody along with the tail gunner. There was a huge hole in the right waist ahead of the window, the left waist window was shattered. Control cables to the tail were partially damaged, and the twin vertical rudders appeared frayed and disintegrating. Looking out the copilot’s window we could see a 3′ diameter hole in the upper surface of the wing behind the #3 engine, where 100 octane gasoline was splashing out.”

Dewey goes on to explain how the co-pilot William L. Boykin Jr, carried oxygen bottles back to the wounded crew, gave them first aid and comforted them. Dewey then decided to drop below oxygen requirement level and risk ditching. Switching channels to the emergency channel, he manged to contact air-sea rescue using the code word “Colgate“. After obtaining a radar fix, they gave him a heading for Manston.

After an hour Dewey spotted Manston and began the task of landing not knowing what condition the flaps, undercarriage or tyres were in. Thankfully all were in good order and he described it as:

“the best I ever made in a B-24 – like we were on feathers. A day we will never forget!”*1

Statistics for the day were horrendous, the efficiency of the German controllers had been spectacular, no previous efforts had yielded such incredible results; 236 men were missing, 1 was dead and 13 were injured in the resultant crashes. This loss, left only ten aircraft in the entire group, and would go down as the worst operational day of the war for any single group of ‘The Mighty Eighth’.

The 445th would regroup and return though. In December and January they supported the troops in the Battle of the Bulge by bombing German communication lines, helping the Paratroops holding up in the forests of the Ardennes.

On February 24th 1945, Ford built Liberator B-24H-1-FO #42-7619 “Bunnie” a veteran of 103 missions, took off from Tibenham’s main east-west runway. Within seconds something went wrong and the bomber crashed a few hundred yards west of the airfield. In the crash four of the crew were killed, the remaining five managed to survive.

Photo of

“Chuck” Walker & his crew being congratulated by Lt. Col. Fleming, (deputy commander) on completion of their 35th mission and “Bunnie’s” 100th.(IWM)

and then on 24th March 1945, they dropped food, ammunition and medical supplies to the troops who had made the Rhine crossing at Wesel. They returned later that day to bomb the landing grounds at Stormede.

The 445th went on to carry out a total of 282 operations building a reputation for high accuracy bombing in the face of danger. Further awards were received from the French for their support of the Resistance, in dropping food supplies, gaining them the Croix de Guerre, a highly regarded award.

The 445th flew their last mission on 25th April 1945, the last mission by the Eighth Air Force in Europe, attacking airfields and rail targets in south-east Germany and Czechoslovakia without loss. The 445th finally returned to the US at the end of hostilities leaving behind huge numbers of crews for whom home would never be back on their own soil.

After their departure in May / June, Tibenham remained ‘operational’ although no operational flying took place. The RAF then began to sell off parts of the airfield to the local farmers. A short-lived expansion of the airfield’s runway in 1955 led nowhere, as no aircraft were assigned to the airbase, and in 1959, Tibenham was finally closed as a military base. During this time, the Norfolk Gliding Club took over part of the site, paying a rent to the Ministry of Defence, remaining here even after 1964/65 when the airfield site was finally sold.

Since then the Club has fought long and hard to keep flying at Tibenham. Battles over land and attempts to curb flying have so far failed. Gradually bit-by-bit the infrastructure has been removed, sold off for hardcore and agriculture use.

Flying at Tibenham

Small piston engined aircraft keep the spirit alive

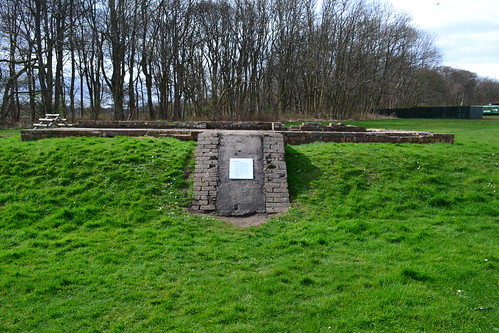
A small collection of memorabilia and photographs of the four squadrons based at Tibenham are maintained by the club, and a memorial stands as a lasting legacy to those who never returned.

Currently, large parts of two of the runways remain; the perimeter track can also be seen, being split by the main road round the airfield. Also a small number of huts are still being used and the site is in remarkable condition as a result.

Other evidence is hard to find, the majority of the accommodation, stores and works all being located to the east amongst the trees and on private land. I am reliably informed that primitive airfield defences can be found amongst the trees at the end of the runway. These amount to a ladder that would enable any defence troops to climb up and remain hidden should any German paratroopers fall.

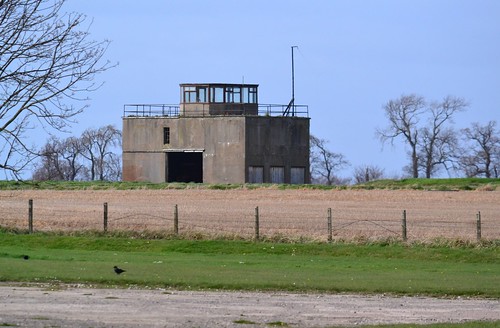
The heavily laden bombers have long since been replaced by the grace and beauty of gliders, the control tower and other major buildings are now history, but as the summer sun and cool breeze wafts across the open skies above Norfolk, it is easy to picture these lumbering bombers, fuelled and crewed waiting for their turn to depart. With the roar of labouring engines now long gone, peace has returned once more to this quiet corner of Norfolk.
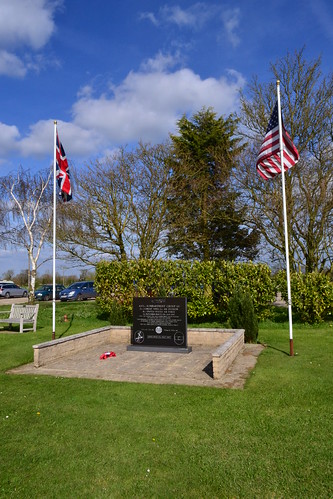
RAF Tibenham memorial

Memorial dedicated to the 445th BG.

Tibenham was initially visited in April 2014 when these photos were taken. It appears as part of Trail 13 along with Old Buckenham and East Wretham. This page is an update with additional information on the 445th’s history.

Sources and further reading.

The Norfolk Gliding Club website gives details of their activities, opening times and flying operations.

*1 A typescript memoir written by Capt. William R. Dewey ‘Disaster at Kassel’: 27th Sep 1944. Second Air Division Digital Archive . Ref: MC 371/250, USF 5/1 accessed 25/3/18.

All Saints Church in Tibenham also has a small memorial and kneelers dedicated to those who flew from Tibenham.

50 Aviation Trails Reached!

I am pleased to announce that since starting Aviation Trails four years ago, I have now reached that magic number of 50 Trails around Britain’s wartime airfields, a feat I never thought would happen.

Each Trail covers two or more sites, in some cases six, many three, covering in total, over 100 former RAF and USAAF airfields and museums around Britain.

I can honestly say its been a terrific four years, in which I have learnt a lot about Britain’s wartime past, the men and machines that flew from these places and the tragedies that occurred at so many. The development of these airfields was staggering, the process of construction, and the subsequent decay just as eye-opening. These sites and the people who used them, have changed both the British and world landscape, leaving in many cases scars that may never heal. The buildings and stretches of concrete that remain are monuments to human endurance and sacrifice, a sacrifice that we hope may never have to be repeated.

RAF Tibenham Perimeter track

The perimeter track at the former RAF Tibbenham.

During these four years there have been several changes at many of these sites, hangars and other buildings have gone, runways are continuing to be dug up as they become prime land for development. As we speak there are numerous sites under planning proposals, whilst others are waiting in the wings to hear what their fate will be.

To compile these trails I have personally visited each and every one of these sites, even a field has a certain something when you know who stood there before you.

To all those who have visited, commented and followed me on this journey, I thank you, I hope you have enjoyed the journey back in time as much as I have writing it. I hope that through these trails, the memories of those who gave their all may live on so that future generations may know who they were and what they did, so that we may enjoy the peace we do today.

Here’s to the next 50!

Andy.

RAF Andrews Field – (Great Saling/Station 485) – Trail 33: Essex Part 1.

RAF Attlebridge  (Station 120) – Trail 7: Northwest Norfolk.

RAF Barton Bendish – Trail 7: Northwest Norfolk.

RAF Biggin Hill (Westersham) (Station 343) – Trail 4: Kent Part 1.

RAF Bircham Newton – Trail 20: North Norfolk (Part 1).

RAF Bodney (Station 141) – Trail 8: Swaffham and Her Neighbours (Part 1 of 3).

RAF Bourn – Trail 31: Southern Cambridgeshire (Part 2).

RAF Brenzett (ALG) – Trail 18: Kent Part 2.

RAF Brunton – Trail 47: Northumberland.

RAF Bungay (Flixton) (Station 125) – Trail 14:  Central Suffolk (Part 1).

RAF Bury St. Edmunds (Rougham) (Station 468) – Trail 16: West Suffolk (part 1).

RAF Castle Camps – Trail 45: Essex (Part 2).

RAF Caxton Gibbet – Trail 29: Southern Cambridge (Part 1).

RAF Charterhall – Trail 41: The Borders of Scotland and England.

RAF Chedburgh – Trail 49: Bomber Command – Bury St. Edmunds to Haverhill

RAF Collyweston – Trail 37: The Northern Reaches of Cambridgeshire.

RAF Coltishall – Trail 7: Northwest Norfolk.

RAF Coningsby – Trail 1: Lower Lincolnshire.

RAF Cottam – Trail 40: Yorkshire (East Riding).

RAF Cranwell – Trail 2: Lincoln Borders and Newark.

RAF Debach (Station 152) – Trail 39: Suffolk around Ipswich (Part 1).

RAF Debden (Station 356) – Trail 46: Essex Part 3,

RAF Deenethorpe (Station 128) – Trail 6: American Ghosts.

RAF Deopham Green (Station 142) – Trail 27: Southern Norfolk (Part 3).

RAF Digby (Scopwick) – Trail 1: Lower Lincolnshire.

RAF Docking – Trail 20: North Norfolk (Part 1).

RAF Downham Market (Bexwell) – Trail 7: Northwest Norfolk.

RAF Drem – Trail 42: Edinburgh’s Neighbours.

RAF East Fortune – Trail 42: Edinburgh’s Neighbours.

RAF East Kirkby – Trail 1: Lower Lincolnshire.

RAF East Wretham (Station 133) – Trail 13: Southern Norfolk around Diss (Part 2).

RAF Eye (Brome) (Station 134) – Trail 14: Central Suffolk (Part 1).

RAF Fersfield – (Station 130) – Trail 28: Southern Norfolk (Part 4).

RAF Foulsham – Trail 22: North Norfolk (Part 3).

RAF Fowlmere – Trail 32: Southern Cambridgeshire (Part 3).

RAF Framlingham (Parham) (Station 153) – Trail 39: Suffolk around Ipswich (Part 1).

RAF Glatton (Station 130) – Trail 6: American Ghosts.

RAF Gransden Lodge – Trail 31: Southern Cambridgeshire (Part 2).

RAF Graveley – Trail 29: Southern Cambridge (Part 1).

RAF Grafton Underwood (Station 106) – Trail 6: American Ghosts.

RAF Great Dunmow (Station 164)- Trail 33: Essex (Part 1).

RAF Great Massingham – Trail 21: North Norfolk (Part 2).

RAF Great Sampford (Station 359) – Trail 50: Haverhill’s neighbours – Wratting Common and Great Sampford.

RAF Hardwick (Station 104) – Trail 12: Southern Norfolk around Diss (Part 1).

RAF Hawkinge – Trail 18: Kent Part 2.

RAF Hethel – Trail 38: To the West of Norwich.

RFC Hingham – Trail 38: To the West of Norwich.

RAF Hunsdon – Trail 25: Hertfordshire.

RAF Kimbolton (Station 117) – Trail 6: American Ghosts.

RAF King’s Cliffe (Station 367) – Trail 6: American Ghosts.

RAF Langham – Trail 23: North Norfolk (Part 4).

RAF Lashenden (Headcorn) – Trail 18: Kent Part 2.

RAF Lavenham (Station 137) – Trail coming soon.

RAF Little Snoring – – Trail 22: North Norfolk (Part 3).

RAF Marham – Trail 7: Northwest Norfolk.

RAF Martlesham Heath – Trail 48: Suffolk around Ipswich (Part 2).

RAF Matching (Station 166) – Trail 33: Essex Part 1.

RAF Matlask (Station 178) – Trail 34: North Norfolk (Part 5).

RAF Mattishall – Trail 36: North Norfolk (Part 6).

RAF Mendlesham (Station 156) – Trail 15: Central Suffolk (Part 2).

RAF Mepal– Trail 11: Around Ely.

RAF Methwold – Trail 8: Swaffham and Her Neighbours (Part 1).

RAF Millfield –  Trail 47: Northumberland.

RAF Narborough (Narborough Aerodrome)- Trail 7: Northwest Norfolk.

RAF North Creake – Trail 23: North Norfolk (Part 4).

RAF North Pickenham (Station 143) – Trail 9: Swaffham and Her Neighbours (Part 2).

RAF North Weald – Trail 25: Hertfordshire.

RAF North Witham (Station 479) – Trail 3: Gone But Not Forgotten.

RAF Old Buckenham (Station 144) – Trail 13: Southern Norfolk around Diss (Part 2).

RAF Oulton – Trail 34: North Norfolk (Part 5).

RAF Polebrook (Station 110) – Trail 19: Northamptonshire American Ghosts II.

RAF Rattlesden (Station 126) – Trail 15: (Central Suffolk (Part 2).

RAF Sawbridgeworth – Trail 25: Hertfordshire.

RAF Scampton – Trail 30: Scampton and the Heritage Centre.

RAF Sculthorpe – Trail 21: North Norfolk Part 2.

RAF Shipdham (Station 115) – Trail 10: Swaffham and Her Neighbours (Part 3).

RAF Snetterton Heath – (Station 138) – Trail 27: Southern Norfolk (Part 3).

RAF Spanhoe Lodge (Station 493) – Trail 6: American Ghosts.

RAF Steeple Morden – Trail 32: Southern Cambridgeshire (Part 3).

RAF Stoke Orchard – Trail 24: Gloucestershire.

RAF Stradishall- Trail 49: Bomber Command – Bury St. Edmunds to Haverhill

RAF Sutton Bridge – Trail 3: Gone But Not Forgotten.

RAF Swannington – Trail 36: North Norfolk (Part 6) 

RAF Swanton Morley – Trail 38: To the West of Norwich.

RAF Thorpe Abbotts (Station 139) – Trail 12: Southern Norfolk around Diss (Part 1).

RAF Tibenham (Station 124) – Trail 13: Southern Norfolk around Diss (Part 2).

RAF Tuddenham – Trail 16: West Suffolk (Part 1).

RAF Tydd St. Mary – Trail 37: The Northern Reaches of Cambridgeshire.

RAF Upwood – Trail 17: The Pathfinders.

RAF Warboys – Trail 17: The Pathfinders.

RAF Watton (Station 376/Station 505) – Trail 9: Swaffham & Her Neighbours (Part 2).

RAF Wendling (Station 118) – Trail 10: Swaffham and Her Neighbours (Part 3).

RAF West Malling – Trail 4: Kent Part 1.

RAF West Raynham – Trail 21: North Norfolk Part 2.

RAF Wethersfield – Trail 45: Essex (Part 2).

RAF Westley – Trail 16: West Suffolk (part 1).

RAF Winfield – Trail 41: The Borders of Scotland and England.

RAF Winthorpe – Trail 2: Lincoln Borders and Newark.

RAF Witchford – Trail 11: Around Ely.

RAF Wittering  – Trail 37: The Northern Reaches of Cambridgeshire.

RAF Woodall Spa – Trail 1: Lower Lincolnshire.

RAF Wratting Common – Trail 50 – Haverhill’s neighbours – Wratting Common and Great Sampford.


RAF Stradishall – The early years.

Moving on from RAF Chedburgh, we continue south-west along the A143 to another former bomber airfield, and the parent station of Chedburgh. This next site has a history that dates back to the late 1930s and is one that has many of its original buildings still in situ, many thankfully still being used albeit by a completely different organisation.

The next stop on this trail is the historically famous airfield the former RAF Stradishall.

RAF Stradishall.

RAF Stradishall has a rather unique history, it was one of the first to be built during the expansion period of Britain’s Air Force beginning in 1935.  A series of Schemes, this programme was to develop the RAF over a period of years to prepare it for the forth coming war; a series of schemes that continued well into the war and created the basis of what we see today around Britain’s forgotten landscape.

This first scheme, Scheme ‘A’ (adopted by the Government in July 1934), set the bench mark by which all future schemes would develop, and called for a front line total of 1,544 aircraft within the following five years. Of these aircraft, 1,252 would be allocated specifically for ‘home defence’. This scheme brought military aviation back to the north of England, and to the eastern counties of Norfolk and Suffolk. Under this scheme, a number of airfields would be built or developed, of which Marham (the first completed under these schemes), Feltwell and Stradishall were among the first. These airfields were designed as “non-dispersed” airfields, where all domestic sites were located close to the main airfield site, and not spread about the surrounding area as was common practice in later airfield designs. At this stage, the dangers of an air attack were not being whole heartedly considered, and such an attack could have proven devastating if bombs had been accurately dropped.

Thus in 1938 Stradishall was born, its neo-Georgian style buildings built-in line with common agreements and local features. Within the grounds of the airfield accommodation blocks provided rooms for just over 2,500 personnel of mixed rank, and all tightly packed in within the main airfield site.

In these pre-war years, the development of hard runways and large airfields was a new phenomena, hard surfaces being a new aspect still very much a topic of considerable controversy. By now, Bomber Command had realised that the new era of bombers would call for hard runways on its airfields, and so they pushed the Government on allowing these to be developed. However, before any firm decisions could be made, trials would need to be carried out to determine whether or not they were indeed needed and if so, how they should be best constructed.

The test to determine these needs was to take a Whitley bomber, laden to equal its full operational weight, and taxi it across a grassed surface.  A rather primitive assessment, it was intended to ascertain the effects of the aircraft on the ground beneath. Trials were first carried out at Farnborough and then Odiham, and these were generally successful, the Whitley only bogging down on recently disturbed soils. Further trials were then carried out here at Stradishall in March 1938, and the results were a little more mixed. Whilst no take offs or landings took place during these trials, the general agreement was that more powerful bombers would have no problems using grassed surfaces, as long as the ground was properly prepared and well maintained. All well and good when the soils were dry and well-drained.

However, Dowding continued to press home the need for hard surfaces, and by April 1939, it had finally been recognised by the Air Ministry that Dowding was indeed right. A number of fighter and bomber airfields were then designated to have hard runways, of which Stradishall was one. These initial runways were only 800 yards long and 50 yards wide, extended later that year to 1,000 yards long, as aircraft were repeatedly running off the ends of the runways on to the grassed areas. Over the years Stradishall would be expanded and further developed, its longest runway eventually extending to 2,000 yards.

Stradishall was also one of the first batch of airfields to have provisions for the new idea of dispersing aircraft around the perimeter. To meet this requirement, hard stands were created to take parked aircraft between sorties, thus avoiding the pre-war practice of collective storage, and so reducing the risk of damage should an attacking force arrive – a practice not necessarily extended to the accommodation! By the end of development, Stradishall would have a total of 36 hardstands of mixed types, the extension of the runway being responsible for the removal and subsequent replacement of some. For maintenance, five ‘C’ type hangars and three ‘T2’ hangars were built, again standard designs that would be later superseded as the need required.

As Stradishall was one of this first batch of new airfields, it would also be used for trials of airfield camouflaging, particularly as the now large concrete expanses would reveal the tell-tale sign of a military airfield. On wet days the sun would shine off these surfaces making the site highly visible for some considerable distance. Initial steps at Stradishall used fine coloured slag chippings added to the surface of the paved areas. Whilst generally successful, and initially adopted at many bomber stations, Fighter Command refused the idea as too many aircraft were suffering burst or damaged tyres as a result of the sharp stones being used. Something that is reflected in many casualty records of airfields around the country.

RAF Stradishall

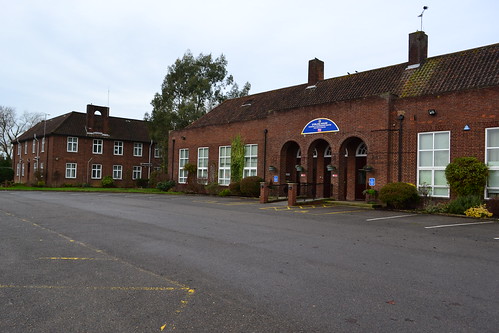
The Type ‘B’ Officers Mess at Stradishall is now a Prison Officers Training Facility. The Officers quarters are located in wings on either side of the mess hall.

On opening Stradishall would fall under the command of 3 Group Bomber Command, and would operate as an RAF airfield until as late as 1970, being home to 27 different operational front line squadrons during this time. Many of these would be formed here and many, particularly those post-war, would be disbanded here, giving Stradishall a long and diverse history.

The first squadrons to arrive did so on March 10th 1938. No. 9 Sqn and No. 148 Sqn (RAF) arriving with Heyford III and the Vickers Wellesley respectively. 148 Sqn replaced these outdated Wellesleys with the Heyfords in November, and then again replacing these with both the Wellington and Anson before departing for Harwell on September 6th 1939. No. 9 Sqn also replaced their aircraft with Wellingtons in January 1939, themselves departing on July 7th that same year.

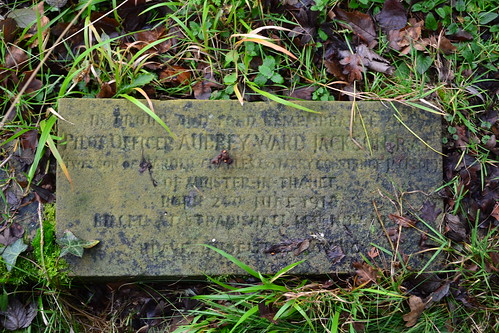
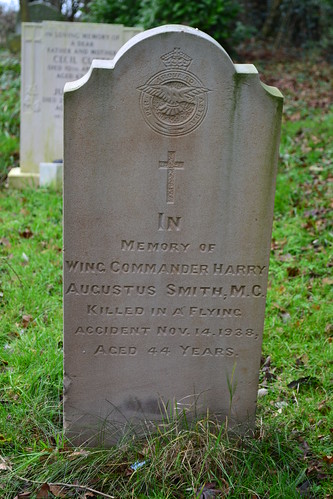
It was during a night training flight, on November 14th 1938, that Wing Commander Harry A. Smith MC along with his navigator Pilot Officer Aubrey W. Jackson would be killed in Heyford III K5194, when the aircraft undershot the airfield striking trees outside the airfield boundary. The crash was so forceful that the aircraft burst into flames killing both airmen.

Wing Commander Smith MC qualified as a pilot whilst in the Royal Flying Corps in 1916, and was the first of his rank to be killed since the inception of Bomber Command in July 1936. He had been awarded the Military Cross ‘for gallantry and distinguished service in the field‘ in 1918.

Pilot Officer Jackson was appointed for a Short Service Commission in January 1937, and later a Permanent Commission. He was only 20 years old at the time of his death.

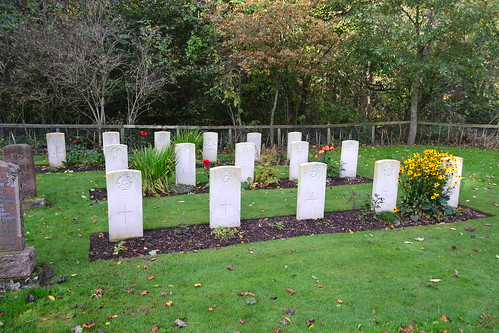
Both crewmen are buried in Stradishall’s local cemetery.

St. Margaret of Antioch, Stradishall

A very much less than grand grave stone marks the plot of P.O. Aubrey W. Jackson, killed on November 14th 1938 on a night training flight.

St. Margaret of Antioch, Stradishall

Wing Commander Smith, killed alongside P.O. Jackson on a night training flight. He was the first of his rank to die since the formation of Bomber Command.

Two more squadrons arrived here in 1939. No. 75 Sqn operated the Wellington MK. I from July, departing here just after the outbreak of war in September, and 236 Sqn flying Blenheims between the end of October and December that same year. 236 Sqn were reformed here after being disbanded in 1919, and after replacing the Night-Fighter Blenheims with Beaufighters, they went on with the type until the end of the war and disbandment once more. Almost simultaneously, 254 Squadron reformed here in October 1939, also with Blenheims. They remained here building up to strength before moving to RAF Sutton Bridge in Lincolnshire in December – one of many ‘short stay’ units to operate from Stradishall during its life.

This pattern would set the general precedence for the coming years, with bizarrely, 1940 seeing what must have been one of the shortest lived squadrons of the war. No. 148 Sqn being reformed on April 30th with Wellingtons only to be disbanded some twenty days later!

This year saw three further squadrons arrive at Stradishall: 150 Sqn on June 15th, with the Fairy Battle (the only single engined front line aircraft to be used here during the war), whilst on their way to RAF Newton; a detachment of Wellington MK.IC from 311 Sqn based at East Wretham (Sept); and 214 Sqn flying three variants of Wellington between 14th February 1940 and 28th April 1942. No. 214 Sqn would be the main unit to operate from here during this part of the war, and would suffer a high number of casualties whilst here.

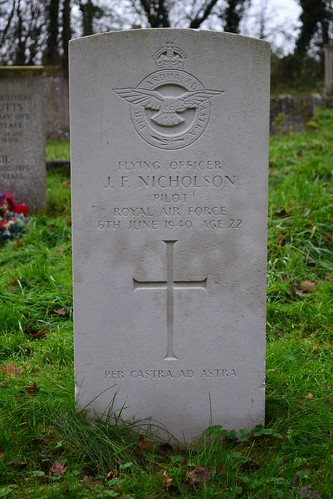
On June 6th 1940, 214 Sqn Wellington IA ‘N2993’ piloted by F/O. John F. Nicholson (s/n 70501), would take off on a routine night flying practice flight. During the flight, it is thought that F/O. Nicholson became blinded by searchlights throwing the aircraft out of control. Unable to regain that control, the aircraft came down near to Ely, Cambridgeshire, killing the five crewmen along with an additional Leading Aircraftman (LAC) Maurice Peling who had joined them for the flight. A tragic accident that needlessly took the lives of many young men. F/O. Nicholson is buried in the local cemetery at Stradishall, whilst the remainder of the crew are buried in different cemeteries scattered around the country.

St. Margaret of Antioch, Stradishall

F/O. J. Nicholson was killed when he lost control of his Wellington on the night of June 6th 1940.

214 Sqn began operations from Stradishall on the night of June 14th/15th, the day German forces began entering Paris. This first raid was to the Black Forest region of Germany, a mission that was relatively uneventful.

Joining 214 Sqn at Stradishall was another unit, 138 Sqn*1 between December 1941 and March 1942. Flying a mix of aircraft, including the Lysander, Whitley, and later: Liberator, Stirling and Halifax, they would perform duties associated with the Special Operations Executive (SOE) carrying out clandestine missions dropping agents behind enemy lines.

It was one of these aircraft, Lysander III T1508, that crashed in January, nosing over near to the French town of Issoudun, a medieval town that bordered the regions of occupied France and ‘free’ France. The towns people protected many wanted resistance supporters, and so it was the scene of many heroic acts. From this particular accident, Squadron Leader J. Nesbit-Dufort managed to escape, evading capture and eventually returning to England where he was awarded the DSO for his actions. Needing to destroy the aircraft, locals pushed the Lysander onto nearby railway lines where it was obliterated after being hit by a passing train*2. It is believed that this was the first Lysander to be lost on these clandestine operations.

This night of January 28th/29th 1942, was a particularly bad night for Stradishall, with three aircraft being lost, two from 138 Squadron and one from 214 Squadron. Thirteen souls were lost that night none of which have any known grave.

1942 would also see a short one month stay by the Wellingtons of 101 Squadron, a detachment of 109 Squadron, and the accommodation of 215 Squadron’s ground echelon. Formed at Newmarket, the ground crews were posted to India whilst the air echelons were formed up at Waterbeach joining them with Wellingtons in April.

An updating of Wellington MK.Is with the MK.VI saw the remainder of 109 Squadron move into Stradishall, only leaving a small detachment at Upper Heyford – a residency that only lasted 4 months between April and July 1942. As 109 Sqn left, Stradishall was joined by the Heavy Conversion Unit 1657 HCU.

Formed as a bomber training unit through the merger of No. 7, 101, 149 and 218 Squadron Conversion Flights and 1427 (Training Flight), it would also operate the Stirling, and later the Lancaster along with some smaller aircraft such as the Airspeed Oxford. They would remain here until late 1944 when they too were finally disbanded. This meant that 1943 was quieter than usual, there wasn’t any sign of the previous ebbing and flowing that had taken place in the preceding years.

With a focus on training, few of these aircraft were used for ‘operational’ sorties until the closing stages of the war. That said, there were still a number of accidents and crashes that resulted in injury. A number of these were due to technical issues, engine failure, engine fires or undercarriage problems, some were due to pilot error. One of the earliest incidents here was that of Stirling MK.I W7470 which crashed, after suffering engine problems over County Durham. The accident killed two crewmen and injured a further two.

After a short spell at Honnington, 214 Sqn would join 1657 HCU, also replacing the Wellington with the ill-fated Short Stirling MK.I in April 1942. But the last flights of the Wellington would not be a good one. The night of April 1st/2nd 1942 would go down as 214 Sqn’s worst on record, and one that would prove devastating to the crews left behind.

In part two of RAF Stradishall, we look at the later war years, the terribly sad events that scarred 214 Squadron, and Stradishall’s post war development. The dawning of the jet age.

September 8th 1943 – Tragedy at RAF Mepal.

On the night of September 8/9th 1943,  a force of 257 aircraft comprising 119 Wellingtons, 112 Stirlings, 16 Mosquitoes and 10 Halifaxes took off from various bases around the U.K. to bomb the Nazi gun positions at Boulogne. Included in this force were aircraft from the RAF’s Operational Training Units, and for the first time of the war, five B-17s flown by US aircrews of the USAAF’s 422nd BS, 305th BG at Grafton Underwood. This was the first of eight such missions to test the feasibility of the USAAF carrying out night operations over Europe.  After the remaining seven missions, in which the squadron had dropped 68 tons of bombs, the idea was scrapped, the concept considered ‘uneconomical’ although the aircraft themselves proved to be more than capable of the operations.

The Gun battery targeted, was the emplacement that housed the Germans’ long-range guns, and the target wold be marked by Oboe Mosquitoes. With good weather and clear visibility, navigation was excellent, allowing the main force to successfully drop their bombs in the target area causing several huge explosions. However, not many fires were seen burning and the mission was not recorded as a success. Reports subsequently showed that the emplacement was undamaged due to both inaccurate marking by Pathfinders, and bombing by the main force. However, as both anti-aircraft fire and night fighter activity were light, no aircraft were lost during the flight making it a rather an uneventful night.

However, the mission was not all plain sailing, and whilst all crews returned, the night was marred by some very tragic events.

Three Stirlings were to take off from their various bases that night: at 21:00 hrs from Chedburgh, Stirling MK. III, EF136, piloted by F/S. R. Bunce of 620 Sqn; at 21:30, another Stirling MK.III, from 75 Sqn at RAF Mepal, BK809 ‘JN-T*1‘ piloted by F/O I.R.Menzies of the RNZAF; and lastly at 21:58 also from Chedburgh, Stirling MK. I, R9288 ‘BU-Q’ piloted by N.J. Tutt  of 214 Sqn.  Unfortunately all three aircraft were to suffer the same and uncanny fate, swinging violently on take off. The first EF136 crashed almost immediately, the second BK809 struck a fuel bowser, and the third R9288 ended up in the bomb dump. Miraculously in both the Chedburgh incidents there were no casualties at all, all fourteen crew men surviving what must have been one of their luckiest escapes of the war! The same cannot be said for the second though.

Stirling BK809 was part of a seventeen strong force of 75 Sqn aircraft. Each aircraft was carrying its full load made up of 1,000lb and 500lb bombs. As the Stirling was running along the runway, it swung violently, striking a fuel bowser which sent it careering into houses bordering the edge of the airfield.

One of the occupants of one of the houses, Mr. P. Smith, saw the aircraft approaching and ran into the street to warn others to get clear. As the aircraft struck the rear of the houses, it burst into flames causing some of the bombs to detonate. This brought considerable rubble down on the occupants of the second house, Mr and Mrs John Randall.

Mrs Randall managed to get out, her legs injured, whereupon she was met by a local fireman, Mr. A.E. Kirby of the National Fire Service. Mr. Kirby went on to help search in the wreckage of the house until his attempts were thwarted by another explosion. His body, along with that of Mr. Randall, was found the next day.

Two other people were also killed that night trying to provide assistance, those being F/Sgt Peter Gerald Dobson, RNZAF and Section Officer Joan Marjorie Easton WAAF. F/Sgt. Dobson was later mentioned in despatches. Three members of the crew lost their lives as a result of the accident, F/O. Menzies and F/O. N. Gale both died in the actual crash whilst Sgt. A. Mellor died later from injuries sustained in the accident.

A number of others were injured in the crash and one further member of the squadron, Cpl Terence Henry King B.E.M, was awarded the British Empire Medal “for his bravery that night in giving assistance“.

The mission on the night of September 8/9th 1943 will not go down as one of the most remarkable, even though  it was unique in many respects, but it will be remembered for the sad loss of crews, serving officers and civilians alike in what was a very tragic and sad event.

The crew of Stirling BK809 were:

F/O. Ian Robert Menzies RNZAF NZ415002. (Pilot).
P/O. Derek Albert Arthur Cordery RAFVR 136360. (Nav).
P/O. Norman Hathway Gale RAFVR 849986. (B/A).
Sgt. Ralph Herbert Barker RNZAF NZ417189. (W/O).
Sgt. Albert Leslie Mellor RAFVR 943914. (Flt. Eng).
Sgt. Bullivant G RAFVR 1395379. (Upp. G)
Sgt. Stewart Donald Muir RNZAF NZ416967. (R/G).

RAF Mepal was visited in Trail 11.

Sources and Further Reading.

*1 Chorley, 1996 “Bomber Command Losses 1943” notes this aircraft as AA-T.

Chorley, W.R., “Bomber Command Losses – 1943“, Midland Counties, (1996)

Middlebrook M., & Everitt C., “The Bomber Command War Diaries”  Midland Publishing, (1996)

Further details of this accident, the crews and those involved can be found on the 75 (NZ) Sqn blog. This includes the gravestones of those killed and a newspaper report of the event.

My thanks also go to Neil Bright (Twitter handle @Blitz_Detective) for the initial  information.

2017 – A Look Back Over The Last Three Years.

As 2017 draws to a close and another year passes, I’d like to look back at some of the highlights of the blog so far.

Since starting the site, way back in 2014, I have learned a lot about Britain’s airfields, their design and construction, and the men and machines that flew from them. What started as a record of memories has turned into a passion of history and hopefully, a dedication to all those who served, fought and died at these places. I have also seen how gradually, over time, many of these historic sites have sadly disappeared, beaten by the onslaught of time, the developers pen, and the ploughs of the industrial farmer evermore determined to draw out more crops from his expanding domain.

What were once massive military sites covering a vast acreage of land, homes to several thousand people who were all doing ‘their bit’ for the war effort; who came from all four corners of the world to fight, are now mere ruins or a collection of derelict and decaying buildings. In many cases they are merely small patches of concrete often covered with the waste of farm practices, or as in some cases, completely gone.

Since starting I have managed to visit over 100 different airfields, stretching from the southern most county of Kent to Edinburgh in Scotland; from Gloucestershire in the west to the East Anglian counties in the East. This has resulted in just short of 50 Trails around the country, but even this has barely scratched the surface of what is still out there waiting to be found. There are many, many more to go, so I thought at this point of the year, I’d share some of the posts that I’ve enjoyed, and also those examples that highlight the extent of this massive war-time development. With this, I hope to show a selection of the examples of features that have (so far) survived and the evidence of them that can be seen today. I hope you enjoy them and may I take this time to wish all followers, family and friends a very merry Christmas and a happy and safe New Year.

With the forming of the Royal Flying Corps, Britain needed and built a number of small airfields all with grass runways, wooden sheds for workshops and accommodation sites using tents. Examples of these places include the likes of Collyweston, (absorbed into modern-day RAF Wittering), Tydd St Mary (Attacked by Zeppelins) and Narborough (Norfolk’s very first airfield) to name but a few. Such little evidence of these sites now exists – many were absorbed into later airfields or they were returned to agriculture – that some, such as Hingham and Westley, we don’t even know the precise location of.

We saw  with the expansion of Britain’s airfields in the 1930s, how buildings changed dramatically from wooden construction – such as RAF Castle Camps – to more permanent (although classed as temporary) brick buildings, many examples of which survive in a preserved state at RAF Bircham Newton.

Technical buildings in use today. At the former RAF Snetterton Heath, technical buildings have survived as small industrial units.

We saw the development of the hangar, one of the most recognisable and distinguishing features of an airfield, from early wooden sheds through canvas doored Bessoneaux hangars, to metal hangars of over 150 feet in length. Many of these buildings still exist today, absorbed into farms or used for storage. Examples are thankfully still relatively common with some found at RAF East Fortune (now a museum), RAF Methwold (farmland), RAF Little Snoring (a light airfield) and RAF North Creake.

RAF Waterbeach 'J' Hangar RAF Waterbeach’s ‘J’ type hangar with a ‘T2’ behind. Waterbeach like so many, is an airfield embroiled in the planning process.

Runways to allow bigger and heavier aircraft to use them, grew from short grass strips to those of wood chip, tarmac and concrete of 2,000 yards in length and 50 yards wide. Some of these even exceeded a massive 3,000 yards in length. Many of these pathways continue to exist today in some form or other, RAF Eye (industrial), RAF Cottam (built and never used), RAF Debden (currently an army barracks), RAF Deopham Green (farmland) and RAF North Witham (an open and public space) are some of the better examples we can find today.

RAF Great Dunmow RAF Great Dunmow typifies the state of many of the better examples of these massive runways today.

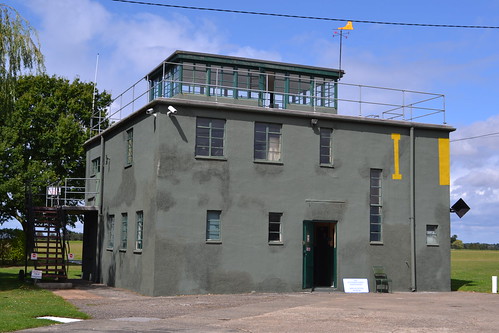
The Watch Office, another distinguishing feature, lay central to the operations of a wartime airfield. Again its development was rapid and complex. Some thankfully have been restored as museums such as those at RAF Framlingham (Parham), RAF Debach, RAF East Kirkby, and RAF Martlesham Heath. Some are now derelict, decaying memorials to those who served. Examples found at RAF Winfield, and RAF North Pickenham, are particularly severe, whilst many are used for other purposes such as RAF Matching Green (radio); RAF Attlebridge (offices) and RAF Rattlesden (a glider club).

RAF Bury St Edmunds (Rougham) At Bury St. Edmunds (Rougham) the watch office is now restored and forms the main part of the museum.

There are numerous examples of other buildings on some of these sites, many are now part of small industrial complexes, workshops that were once used to repair aircraft parts now repair cars or other small items. Their original features often hidden by new cladding, overgrown weeds or a change in frontage. Slowly, but surely, they are gradually disappearing from our skyline.

The purpose of theses places was to wage war. In doing so many lives were lost, both military and civilian – on both sides. As a result, many heroic acts of bravery and self-sacrifice took place. The VC, the highest award given to members of the British armed forces for gallantry “in the face of the enemy”, was awarded to two pilots: Flt. Sgt. Arthur Louis Aaron, V.C., D.F.M. and Sqn. Ldr. Ian Willoughby Bazalgette (RAFVR) VC., both flying from RAF Downham Market. The American S.Sgt. Archibald Mathies, USAAF, 510th BS, 351st BG, was one of many Americans awarded the Medal Of Honour for his valour in combat whilst flying from RAF Polebrook, another was 2nd Lt. Robert E. Femoyer MOH, 711th BS of RAF Rattlesden, for his actions over Meresberg.

Losses were high both in combat and also during training. This year, I managed to visit several training stations of which two RAF Chaterhall and RAF Milfield had high losses of trainee pilots. Many are those are buried locally, and one delightful small church I visited at Fogo, had almost as many war dead as it did living inhabitants!

Fogo Church The church yard at Fogo has 16 war dead, most from the nearby training airfield RAF Chaterhall.

All in all its been a fascinating journey, I have entered the lives of many people who fought for what they believed in. I have read their stories, visited the very places they served at, and in many cases, the graves in which they now lie.  These decaying sites are the true monuments to their sacrifice. The buildings that once housed these young men stand as a lasting tribute to them, I hope that their memories never fade away in the way that many of these sites now have.

I’d like to thank you for taking the time to join me on this journey, I hope you have enjoyed reading about them as much as I have enjoyed visiting, researching and writing about them. I look forward to you joining me next year as we travel on many more trails around Britain’s disused airfields.

A Merry Christmas and a Happy New Year to all!

Andy.

389th BG Exhibition at Hethel.

Whilst visiting RAF Hethel (Trail 38), we drop into the exhibition of the of the 389th BG who were stationed here during World War II.

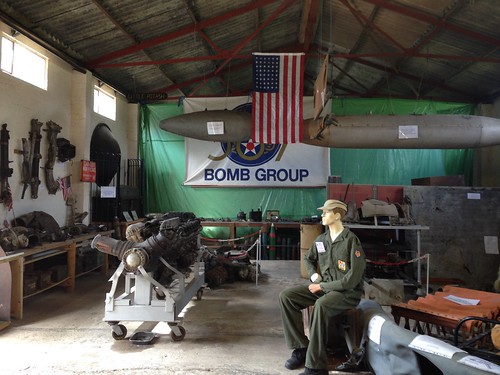
The exhibition is small but it has a lot to offer. Located in the former Chapel/Gymnasium, it has been carefully restored and filled with information and artefacts pertaining to the former airfield and U.S Air Force during the Second World War.  There are also articles from the 466th Bomb Group who were based at nearby RAF Attlebridge, the RAF and stories from local people who befriended the Americans whilst they were here.

The exhibition is located on a working poultry farm and so access is limited, open every second Sunday of each month between April and October, from 10:00 am to 4:00 pm.

The buildings have been painstakingly restored by volunteers, some of whom have had connections with the airfield or Lotus cars, the current owner of the airfield itself. In 2001 the museum opened its doors to the public, after moving a collection of memorabilia from the Lotus site over to their new home here at the 389th exhibition.

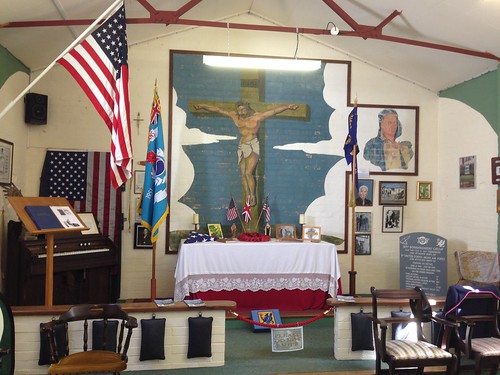
It was during the restoration that two murals were discovered, these are perhaps one of the more stunning aspects of the exhibition. Painted in 1943 by Sgt. Bud Doyle, the then Chaplin’s driver, they are located on one of the walls of the Chapel. One is of Christ on a cross, whilst the other is a portrait of a pilot, both have been restored and remain on display where they were originally painted all those years ago..

389th BG Exhibition Hethel

The restored murals in the Chapel.

Located here, are a number of items many with stories attached. In the Chaplin’s quarters next door, are maps and other documents relating to the groups activities.

Two new Nissen huts have also been built, opened and dedicated in 2014 and 2017, they extend the exhibition further to include uniforms, service records, numerous photographs and more memorabilia.

RAF Hethel, 389th BG Museum

The dedication plaque.

There is also a refreshments bar offering the usual tea and snacks, along with a toilet facilities.

From the museum there are public footpaths into what was one of the accommodation areas of RAF Hethel, here are some of the remains of buildings, shelters primarily, hidden amongst the undergrowth. The footpaths are mainly concrete once you get onto the site.

RAF Hethel, 389th BG Museum

Part of the exhibition inside the former Chapel at RAF Hethel.

A nice little museum it has free entry and welcomes donations to help with the upkeep and maintenance of the site, if in the area, it is well worth a visit and your support .

The 389th website has further details and opening times and information of forthcoming events.

Trail 44 – Kent (Part 3) – Sir Barnes Wallis – His Early Years

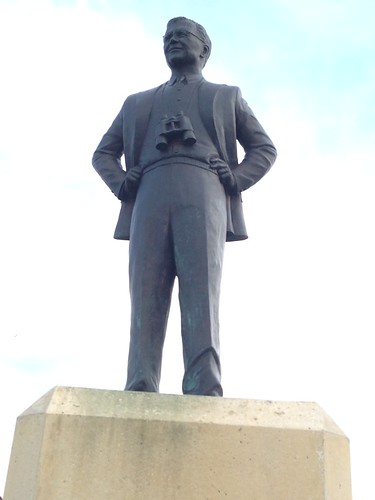
After visiting the many museums and former airfields in the southern and central parts of Kent (Trail 4 and Trail 18) we now turn north and head to the northern coastline. Here we overlook the entrance to the Thames estuary, the Maunsell Forts – designed to protect the approaches to London and the east coast – and then take a short trip along the coastline of northern Kent. Our first stop is not an airfield nor a museum, it is a statue of the designer of one of the world’s most incredible weapons – the bouncing bomb. Our first short stop is at Herne Bay, and the statue of Sir Barnes Wallis.

Sir Barnes Wallis – Herne Bay

Sir Barnes Wallis

The Barnes Wallis statue located at the eastern end of the town overlooking the sea at Reculver.

There cannot be a person alive who has not seen, or know about, the famous Dambusters raid made by 617 Sqn. It is a story deeply embedded in history, one of the most daring raids ever made using incredible ideas, skill and tenacity. There is so much written about both it, and the man behind the idea – Sir Barnes Neville Wallis CBE FRS RDI FRAeS – a man famous for his engineering prowess and in particular the famous ‘Bouncing Bomb’ that was used by Guy Gibson’s 617 Squadron in that daring raid of 16th May 1943. But there is so much more to Barnes Wallis than the Bouncing bombs; he made a huge contribution to British Aviation, weaponry of the Second World War, and later on in his life, supersonic and hypersonic air travel.

He is certainly one the Britain’s more notable designers, and has memorials, statues and plaques spread across the length and breadth of the country in his honour. But he was not just a designer of the Bouncing bomb, his talent for engineering and design led him through a series of moves that enabled him to excel and become a major part of British history.

Born on 26th September 1887 in Ripley, Derbyshire, he was educated at Christ’s Hospital in Horsham, he went on to study engineering in London, and shortly afterwards moving to the Isle of Wight. With the First World War looming, he was offered a chance to work on airship designs – an innovative design that would become widely used by the Naval forces of both the U.K. and Germany.

Wallis cut his teeth in marine engines as an engineer and draughtsman. He began his career in the London’s shipyards, moving to the Isle of Wight after which he broke into airship design. He followed a colleague he had met whilst working as a draughtsman with John Samuel White’s shipyard, together they would design His Majesty’s Airship No.9 (HMA 9).

The design process of HMA 9 was dynamic to say the least. Early non-rigid airships were proving to be very successful, and the new rigids that were coming in – whilst larger and more capable of travelling longer distances with greater payloads – were becoming the target for successive quarrels between the government and the Admiralty. World unrest and political turmoil was delaying their development even though plans for HMA 9 had already been drawn up.

Joining with his colleague, H.B. Pratt in April 1913, at the engineering company Vickers, the two designers began drawing up plans for a new rigid based along the lines of the German Zeppelin. HMA 9 would be a step forward from the ill-fated HMA No. 1 “Mayfly”, and would take several years to complete. Further ‘interference’ from the Admiralty (One Winston Churchill) led to the order being cancelled but then reinstated during 1915. The final construction of the 526 ft. long airship was on 28th June 1916, but its first flight didn’t take place until the following November, when it became the first British rigid airship to take to the Skies.

HMA 9 (author unknown*1)

With this Wallis had made his mark, and whilst HMA 9 remained classed as an ‘experimental’ airship with only 198 hours and 16 minutes of air time, she was a major step forward in British airship design and technology.

The Pratt and Wallis partnership were to go on and create another design, improving on the rigids that have previously been based on Zeppelin designs, in the form of the R80. Created through the pressure of war, the R80 would have to be designed and built inside readily available sheds as both steel and labour were in very short supply. Even before design or construction could begin there were barriers facing the duo.

Construction started in 1917, but with the end of the war in 1918, there was little future as a military airship for R80. Dithering by the Air Ministry led to the initial cancellation of the project, forcing the work to carry on along a commercial basis until the project was reinstated once more. With this reinstatement, military modifications, such as gun positions, were added to the airship once again. With construction completed in 1920, she made her first flight that summer. However, after sustaining structural damage she was returned to the sheds where repair work was carried out, and a year later R80 took to the air once again. After a brief spell of use by the U.S. Navy for training purposes, R80 was taken to Pulham airship base in Norfolk and eventually scrapped. Wallis’s design had lasted for four years and had only flown for 73 hours.

However, undaunted by these setbacks, the Vickers partnership of Pratt and Wallis went on to develop further designs. In the 1920s, a project known as the 1924 Imperial Airship Scheme, was set up where by a Government sponsored developer would compete against a commercial developer, and the ‘best of both’ would be used to create a new innovative design of airship that would traverse the globe. This new design, would offer both passenger and mail deliveries faster than any current methods at that time.

The Government backed design (built at the Royal Airship Works at Cardington) would compete against Vickers with Wallis as the now Chief Designer.

The brief was for a craft that could transport 100 passengers at a speed of 70 knots over a range of 3,000 miles. Whilst both designs were similar in size and overall shape, they could not have been more different. Wallis, designing the R.100, used a mathematical geodetic wire mesh which gave a greater gas volume than the Government’s R101, which was primarily of stainless steel and a more classic design. This geodesic design was revolutionary, strong and lightweight, it would prove a great success and emerge again in Wallis’s future.

Built at the Howden site a few miles west of Hull, the R100 was designed with as few parts as possible to cut down on both costs and weight; indeed R100 had only 13 longitudinal girders half that of previous designs. Wallis’s design was so far-reaching it only used around 50 different main parts.

The design plan of Wallis’ R-100 airship (author unknown*2

The 1920s in Britain were very difficult years, with the economy facing depression and deflation, strikes were common place, and the R100 was not immune to them. Continued strikes by the workers at the site repeatedly held back construction, but eventually, on 16th December 1929, Wallis’s R100 made its maiden flight. After further trials and slight modifications to its tail, the R100 was ready. Then came a test of endurance for the airship, a flight to Canada, a flight that saw the R100 cover a journey of 3,364 miles in just under 79 hours. Welcomed as heroes, the return journey would be even quicker. Boosted by the prevailing Gulf Stream, R100 made a crossing of 2,995 miles in four minutes under 58 hours. The gauntlet had been thrown, and Wallis’s airship would be hard to beat.

The R101 would face a similar flight of endurance, this time to India, and it would use many of the same crew such was the shortage of experienced men. On October 4th 1930, R101 left its mooring at Cardington for India. Whilst over France she encountered terrible weather, a violent storm caused her to crash, whereupon she burst into flames and was destroyed with all but six of the 54 passengers and crew being killed.

The airship competition became a ‘one horse race’, but an inspection of the outer covering of Wallis’s R100 revealed excessive wear, only cured by replacing the skin, an expense the project could barely swallow. With plans already in place for the R102, the project was in jeopardy, and eventually, even after offers from the U.S. Government, it was deemed too expensive, and by 1932 R100, the worlds largest airship and most advanced of its time, had been scrapped and the parts sold off.

Wallis’s airship career had now come to an end, but his prowess and innovation as a designer had been proven, he had set the bench mark that others would find hard to follow.

In the next part, we look at the work carried out by Wallis both during the Second World War and in the later years of his life.

Sources and further reading

*1 Photo from The Airship Heritage Trust website.

*2 ibid

R.A.F. East Fortune – Scotland’s Baby that Grew up.

After leaving R.A.F Drem, we travel a few miles to the east, away from Edinburgh to an airfield that was originally built in the First World War. In the mid war years it was closed and returned to agriculture; then, as the Second World War loomed, it was reopened, used by both the Navy and the Air Force. As such, its history goes back to the turn of the last century. Today it is Scotland’s home of the National Museum of Flight, it is also has one of the best preserved collections of original buildings left in the country. In the second part of Trail 42, we visit the former airfield of R.A.F East Fortune.

R.A.F East Fortune.

R.A.F East Fortune is another airfield that has its roots in the First World War. Located 4 miles north-east of the small town of Haddington, and a similar distance east of R.A.F Drem, it has since become Scotland’s premier aviation museum, housing one of the best collections of aircraft in the north.

East Fortune National Museum of Flight

One of the many buildings left at East Fortune.

With the outbreak of war in 1914, German intrusions over British towns and cities became both a tangible and frightening threat. Scotland and the north-east along with North Sea shipping lanes, all became targets. To counteract these threats, a string of defensive airfields (Stations) were built along the eastern coast of Britain operating as a combined force in the British Home Defence Network.

East Fortune become one such station, from which, during 1915, a small number of aircraft would operate. Designed to protect the waters around the city of Edinburgh and the North Sea coast, it fulfilled this role using a selection of aircraft including types such as the: Sopwith Scout, Maurice Fairman, Avro 504 and B.E.2c.

It wasn’t until 1916 though that the airfield really came into its own. Officially opened in August as a Royal Naval Air Station, it operated initially Coastal Class airships, followed shortly after by North Sea Class airships, both of the non-rigid design. Later on, as airships developed, the more famous ‘R’ series rigid airships appeared and took their place at East Fortune.

As a major airship station, there would often be five or six of the type at East Fortune at any one time, each carrying out submarine patrols over the North Sea. To ensure their safety whilst on land, a number of airship sheds were built; the design and development of these sheds proceeded almost as fast and dramatic as the airships themselves.

When war broke out, the threat posed to British ships  by German submarines, became all too apparent. The Admiralty recognising the potential of airships as spotters, were soon to put in an order for a ship that would be able to travel at speeds of between 40 – 50 mph, carry two crew, 160lb of bombs, wireless equipment and sufficient fuel for up to 8 hours flying time. These airships would ideally reach altitudes of around 5,000ft, and their design be so basic, that the crew could be trained and in the air within weeks rather than months. The first of these ships was the Submarine Scout (S.S.) class, a design that was so simple, the first were airborne within three weeks of the initial prototype being built. In essence, these used the wingless fuselage of a B.E.2c aeroplane suspended beneath a simple envelope. These ‘S.S.’ ships were so successful in their role, that the Admiralty ordered more, bigger and faster airships, and so the Coastal Class was then born.

The Coastal Class was larger at 195.6 feet long. They had two 150hp engines, a top speed of 52 mph, and could be airborne for up to 22 hours at a time. Designed around a French design, they were made of three sections, an unusual “Tri-lobe” design. The gondola itself, utilised two shortened Avro seaplane aircraft fuselages, the tails were removed and the two sections joined back-to-back. This produced a car that could seat four or five crew members with two engines at opposing ends. Canvas and planking was added for further strength and improved crew comfort. Operating successfully for two years, many soon became weary and in need of updating. Deciding to opt for an improved alternative, the Admiralty scrapped the Coastal Class and brought in the last of the non-rigid designs, the North Sea (N.S.) Class.

Initial trials and operations of the N.S. Class proved it to be very unpopular. Problems with the drive system left many crews unhappy about its performance, its top speed of 57mph rarely, if ever, being achieved. The original engines, 250 horse-power Rolls Royce engines, had very elaborate transmission systems, in fact so elaborate that they were prone to breaking. The only answer was to replace the entire system and attach the propellers directly to the engine itself. Once this problem was overcome, the airship was hailed as a success to the point that many of them broke flight endurance records on an almost regular basis. Whilst flights of 30 hours or more were not unusual, some extended as far as 61 hours, and even post war, one of these ships flew for an incredible 101 hours non stop.

The period 1916 – 17 saw a rapid advancement in airship design and development. The larger rigid airships (so-called because the envelope was now wrapped around a rigid frame) were now coming into being, and the remainder of the war would see these new airships coming on-line and into service, many appearing at East Fortune.

To counter the German’s Zeppelin threat, three new manufactures were contracted to build these rigid ships: Beardmore, Armstrong and Whitworth, and lastly Shorts Brothers.

At East Fortune, (H.M.A) R.24 was delivered on October 28th 1917, and not without its problems. Initial testing revealed that it was two-thirds of a ton heavier than its sister ship R.23, and after investigations as to why, it was discovered that it was the rivets used that were the problem. In order to move the craft from its Beardmore shed, a number of weight modifications had to urgently be made. These modifications included removing an engine and all the associated components from the rear car.

RAF EAST FORTUNE DURING THE INTERWAR YEARS

The camouflaged Airship shed built to house H.M.A. R.34 at East Fortune. Note the smaller shed to the right. (IWM – Q103040)

Although now much lighter, R.24 paid the price with speed, with no replacement of the propulsion unit, she remained slow, achieving a top speed of little more than 35 mph. But she did cover some 4,200 miles and flew for 164 hours in total; most of which were as training flights. As an operational airship however, she was little more than useless, and was eventually scrapped in 1919.

The next rigid airship to arrive and operate from East Fortune was R.29 in the following June. R.29 went on to be considered the most successful wartime rigid airship. Being the only one to be involved in direct enemy action, she was responsible for the sinking of the German submarine UB.115. Commissioned on 20th June 1918, she was based at East Fortune and would cover around 8,200 operational miles, in some 335 hours flying time. This would be a short-lived active life though, lasting only five months before the war finally came to an end.

Carrying on flying post war, she would eventually be scrapped in October 1919 having covered in total, 11,334 miles in service, more than any other British rigid airship up to that time.

Post war, rigids continued to operate from East Fortune; R.34 perhaps being the most famous. Another craft from the works of William Beardmore and Co. Ltd. of Inchinnan near Glasgow, R.34 would be constructed in the later stages of the war under War Specifications. At 634 feet in length with a top speed of 62 mph generated by five 270 hp Sunbeam ‘Maori’ engines, she would cost £350,000 to build. R.34 would be designed to carry twenty 100 lb and four 550 lb bombs, a range of Pom-Pom, Lewis and two-pounder quick-firing guns, but as she wasn’t finished until after the war, none of these were ever fitted, nor was she flown in anger.

R.34 probably at East Fortune. (author unknown)

Completed in early 1919, she just missed out the first Atlantic crossing, being laid up by damage caused by poor handling, and thus beaten to the record now held by Alcock and Brown. In May, she arrived at East Fortune, here she carried out a number of test flights including an endurance flight across the Scandinavian countries. Then in July 1919, she became the first aircraft to make the Atlantic crossing, both east to west, and back again.

On the evening of 1st July 1919 the ship was fueled to capacity, in the early hours of the morning she was moved out of her shed and prepared for the flight. Her captain, Major Scott, decided gave the order to release and at 1.42 am (GMT) R.34 lifted slowly in to the Scottish sky.

A record was made, R.34 had put East Fortune firmly on the map. After 108 hours and 12 minutes flying time, R.34, her crew and two stowaways: William Ballantyne and a small tabby kitten called “Whoopsie”, landed at Mineola, Long Island, New York.

After a major refit at East Fortune, R.34 left for Pulham airship base in Norfolk. Here she carried out a number of flights, but was eventually badly damaged in strong winds, and after being stripped, she was sold for scrap – a rather ungainly ending to an incredible machine.

Airships were not to be the only user of East Fortune though. With the formation of the Royal Air Force in 1918, it would initially house No. 208 Training Depot Station (T.D.S.), designed to train torpedo bomber pilots using a variety of aircraft types, such as the Sopwith Camel and Beardmore W.B.III. In August 1918, it became 201 Training Depot Station, merging both 1 Torpedo Training Squadron, and the Torpedo Aeroplane School already at East Fortune.

A Sopwith Cuckoo (N6954) of the Torpedo Aeroplane School dropping a torpedo during trials at East Fortune, 24 – 26 July 1918. (IWM Q 67496)

On 21st October 1918, No. 185 Squadron was formed here, made by merging elements of 31, 33, 39 and 49 Torpedo Depot Stations, they would fly the Sopwith Cuckoo until April 1919, when it was reduced to a cadre, and then disbanded five days later on April 14th, 1919.

It was also in this month on the 31st, October 1918, just days before the armistice that year, that Bristol F.2b B8942 of 201 T.D.S, left R.A.F. East Fortune for a bombing mission against the German Fleet. During the take off, the aircraft stalled and crashed into the ground. In what must have been the last casualties of 201’s operations, the two crew: Lieutenant Lynn N. Bissell (age 19), and  Lieutenant Eric W. Bragg (22), were both killed when a bomb they were carrying exploded on impact. They have remained together ever since in Athelstaneford Parish Churchyard in East Lothian*1.

201 Training Depot Station were soon re-designated as the Torpedo Training School, finally being disbanded on February 1st, 1920, here at East Fortune.

This move signalled the end of East Fortune as an airfield for now. The site was closed, many of the buildings were removed either scrapped or sold off, and no further flying activity would take place.

East Fortune National Museum of Flight

A small part of the collection of wartime buildings that still exist at East Fortune.

After laying dormant for around twenty years, the outbreak of war saw East Fortune brought back to life once more. Designated a satellite for R.A.F. Drem, it was virtually unchanged in its layout. After a period of expansion and development, new runways were laid, a technical site established, and accommodation and administration areas developed. A bomb dump was created to the south-west, well away from the other areas to the north. The runways, tarmac laid on hardcore, were all non-standard lengths, 1,710 yards, 1,560 yards and 1,100 yards but they were the standard 50 yards wide.

The first to arrive were 60 Operational Training Unit (O.T.U.)  in June 1941. A night fighter development unit they flew a range of aircraft including: Boulton Paul’s Defiant, Miles’ Master and Magister, and Westland’s Lysander. In June 1942, the  twin-engined Beaufighter also arrived here, a year which also saw a return of the Blenheim and Beaufort. Some of these Beaufighters were dual control and several had Aircraft Interception (A.I.) equipment installed.

It was in one of these Defiants, that pilot Sergeant Anthony. D.C. La Gruta, (s/n 400719) (R.A.A.F.) was killed when the aircraft he was in plunged into the ground with such force that it buried itself some 16 feet down. The Ministry of Defence, unable to recover the wreckage, declared it a war grave and his body remains there to this day. A monument and parts of the wreckage currently mark the spot where the aircraft lies. Whilst it can’t be confirmed, it would appear that whilst out conducting a series of ‘homing tests’, the pilot lost control of the aircraft resulting in the tragic accident.

East Fortune National Museum of Flight

One of several Air Raid shelters at East Fortune.

During October 1942, No. 2 Glider School were formed here, they were quickly moved on however, and disbanded later at Dumfries – playing virtually no part in the development of East Fortune. On 24th November 1942, 60 O.T.U. was officially disbanded, and then immediately reformed as 132 (Coastal) Operational Training Unit, remaining at East Fortune airfield. Operating under the leadership of No. 17 (Training) Group (R.A.F. Coastal Command) it was designed to train crews in the long-range fighter and strike role. To achieve this, there were some sixty aircraft split primarily between Beaufighters and Blenheims; with other models such as Beauforts, Lysanders, Magisters and Spitfire VBs also adding to the busy airspace in this region of Southern Scotland.

In May 1944, Belgian Flying Officer, Gilbert A. E. Malchair, (s/n 132969), and Flight Sergeant, Roger H. L. Closon, (s/n 1424811), both of the Royal Air Force Volunteer Reserve, took off in Beaufighter ‘EL457’ on what is believed to be a training sortie. Little is still known about the accident but it is believed that the pilot reduced height to prevent icing, in doing so, the aircraft collided with the ground at Hedgehope Hill (Threestoneburn Wood) in the Cheviots. As a result, both crewmen were killed.

In 1944 a few D.H. Mosquitoes arrived at the airfield, but by now East Fortune had begun the long wind down. By May 1946, 132 O.T.U. was disbanded, and the aircraft were either dispersed or scrapped.

The airfield remained in R.A.F. hands, but during the cold war years, the U.S. Air Force lengthened two of the runways in anticipation of the Cold War becoming ‘hot’. Thankfully however,  hostilities never broke out and occupation of the site never materialised. East Fortune was then used as storage facility in case of any subsequent Soviet attack, primarily for the ‘Green Goddess’ fire engines, and later to store food stuffs by the Ministry for Agriculture and Fisheries. The site remained ‘open’, and for a short period – April to August 1961 – it acted as a replacement for Edinburgh’s Turnhouse international airport recording just short of 100,000 passenger movements. After this, in 1961, East Fortune was finally closed and the site vacated.

Callender-Hamilton Hangar East Fortune National Museum of Flight

Two of the three Callender-Hamilton hangars.

Over the years East Fortune had gone from an Airship site to a night fighter training school. Operational Training Units had lost crews and the entire site developed and expanded. Two of the three runways were expanded up to 2,000 yards, 46 hardstands were laid, it had 3 Callender-Hamilton hangars, 8 blister hangars, and accommodated 1,501 R.A.F personnel and 794 W.A.A.Fs. Designed as a satellite it had achieved a remarkable status, incredibly much more than it was ever designed to do.

Since its closure however, it has taken on a new role, developing both its past and preserving its history, turning it into what is possibly Scotland’s finest aviation museum. Many of the Second World War buildings still remain: The night flying store (drawing number 17831/40); three Callender-Hamilton hangars; Nissen stores, latrines and a refurbished parachute store. The Watch Office sadly not refurbished, is also present on the airfield site, as are a number of air raid shelters. The main runway is also still in situ, now used for Sunday markets, with the original section and extended post war sections being dissected by the road through the site. The perimeter track and secondary runways are also intact, having been used in part for racing activities.

East Fortune

The Watch Office remains on the ‘active’ side of the airfield site.

One of the benefits of East Fortune is the location of all these buildings, primarily on one relatively small site. Access is easy although many of them are sadly locked and out-of-bounds to the public.

Considering its early history and the sacrifice many of its crews gave, East Fortune is an important site, it stands as a memorial to all those who came and died here, and to all those who not only wrote history, but have contributed to it over the last 100 years.

Sources and further reading:

Further details of R,34’s trip can be found here.

Additional pictures of East Fortune can be found on flckr.

More detailed information about R.34 and the development of Airships can be found on The Airship Heritage Trust website .

The Eastern Daily Press ran several articles on the commemoration of R34’s journey 100 years on. The articles are available on the EDP Website.

*1 The Commonwealth War Graves Commission website.

RAF Cottam – Built and Abandoned.

Up in the Yorkshire Wolds stands an airfield that could have been considered as one the Air Ministry’s ‘less sensible’ decisions. Open to the elements, this site was built but never fully used by an operational flying unit, in fact, Cottam could be considered one of the RAF’s more expensive bomb dumps, used primarily for munitions storage toward the war’s end. In its construction it would have accommodation, a hangar, and a watch office, along with three concrete runways – all the makings of an RAF bomber base, yet it was often desolate and empty. Even though it wasn’t used operationally, it did have its own problems however, and its own casualties . As we head across the River Humber into the East Riding of Yorkshire, we visit the former RAF airfield, RAF Cottam.

RAF Cottam.

Designed originally as a satellite for RAF Driffield, Cottam airfield lies high up in the hills on Cottam Well Dale, about 5 miles north of Driffield, just a stones throw from the village of Langtoft, and the tiny parish of Cottam. At 475 ft. above sea level, it is one of the higher peaks in the area which makes it popular with dog walkers and ramblers alike.

The airfield site encompasses the site of the ancient village of Cottam, (on maps of the late 1600s it appears as Cotham) of which only the church remains.  A lone building, it stands neglected and derelict, a reminder of a small community that has long since gone.

RAF Cottam (Yorkshire)

The abandoned medieval church marks the boundary of Cottam airfield and a community long gone.

The Air Ministry decided to build an airfield here to be used as a satellite and possible bomber base. The airfield would have a watch office with detached operations block (the separate block designed to drawing 13023/41). As construction was completed before June 1941, it would be classed as a Type ‘A’ building, and would need to be modified to bring it up to the newer Type ‘B’ standard as were being built on later airfield sites. Under the Type ‘B’ scheme, Cottam would have a Watch Office built to design 13726/41, then adapted by the fitting of smaller ‘slit’ windows more in line with bomber and O.T.U. satellite airfields of that time (15683/41). Sadly, the entire building was demolished in 1980, and no there are no signs of its existence left on site today.

A single T1 hangar provided space for aircraft repairs and maintenance, and accommodation, although sparse, would accommodate around 1000 men and 120 women of the Maintenance Command by December 1944.

RAF Cottam (Yorkshire)

The remains of the secondary runway looking west.

Cottam officially opened in September 1939, and as a grassed airfield, would only be used for dispersed aircraft from Driffield’s 4 Group Bomber Command, flying Whitleys of 77 and 102 Sqn. Cottam was also used later on for the Fairy Battles of 4 Group Target Towing Flight (4G T.T.F.) also based at Driffield at that time.

It wouldn’t be long though before Cottam would have its first accident. On July 1st 1940, a dispersed aircraft, Whitley V, (N1391) ‘DY-H’ of 102 Sqn, swung on take off causing minor damage to the aircraft. Luckily there weren’t thought to be any casualties in the incident, but the aircraft was rendered unable to fly, and the damage was sufficiently serious to need it to be taken away for repairs.

A month later, the 15th August 1940, signified a major point in the Battle of Britain, one which saw all of the Luftwaffe’s air fleets deployed for the first time, in a full and coordinated attack on the British mainland. This day saw the heaviest fighting of the Battle with attacks ranging from the south coast to east Yorkshire, and up to Edinburgh. This also meant the start of a number of attacks on British airfields and Driffield would not be left out. In this first attack, a Luftwaffe force of some 50 Junkers Ju 88s attacked the airfield damaging or destroying 12 aircraft on the ground – many of these were Whitleys. This attack was particularly devastating for a number of reasons, one of which was that it caused the first death on active service of a Bomber Command W.A.A.F., (A.C.W.2) Marguerite Hudson, who was killed after delivering stores to the site. This attack caused extensive damage to both the airfield site, infrastructure, and aircraft, and for a short period whilst repairs were undertaken, some aircraft were moved and dispersed here at Cottam. Indeed, on 27th September 1940, 4 Group T.T.F moved over to Cottam where they stayed for a month, not returning until the 24th October, once repairs had been completed and air attacks had all but ceased.

RAF Cottam (Yorkshire)

The secondary runway looking east, this part is full width but built upon.

It is possible that these attacks may have led to the demise of one 77 Sqn Whitley V (N1355) ‘KN-X’ flown by Sgt. James Walter Ward RAFVR (741435), who undershot on landing at Cottam, hitting a fence, causing the undercarriage to later collapse. The five occupants of the aircraft were unhurt, but the aircraft itself was later struck off charge on 22nd September 1940, after assessment at Armstrong Whitworth in Baginton*1. Ward himself was killed with his crew only five days later, when his aircraft, Whitley V, (N1473) was shot down by flak over Noord Brabant, 2km from Vijfhuizen, on September 25th 1940. He died along with P/O C. Montague, himself a veteran of three previous serious crashes.

By the end of August 1940, both 77 and 102 Sqns had departed Driffield and so Cottam, which left it only being used by the Fairy Battles of 4 G T.T.F. During the winter months Cottam was abandoned by these aircraft, presumably due to its inclement weather conditions, but dispersed aircraft did return again in the spring and summer months. In October 1941, 4G T.T.F. reformed at Driffield as 1484 T.T.F., and it is at this point that it is thought their use of Cottam ceased.

RAF Cottam (Yorkshire)

The perimeter track looking east. The main airfield is to your left.

Under the Ministry’s airfield expansion plan, new airfields of the early 40s were built with concrete surfaces. ‘Older’ grass sites, like Cottam, were upgraded having new runways laid down in an effort to reduce water logging and provide a more stable surface for the heavier bomber aircraft coming in. To meet these upgrades Cottam’s three runways – all consisting of concrete and wood chip – were built; the main being just short of 5,300 ft., with the two further runways around 4,000 ft. in length. Pan style aircraft dispersals were also added which gave Cottam a new look and hope for the future. However, and even though huge amounts of money had been spent on the airfield, it was decided it was not to be used further, as either a satellite or a bomber station. Cottam was offered to various other military groups who all turned down the location for various reasons. The army did take up residency for a short while until March 1944, whereupon it was then used to store vehicles for the impending invasion of Normandy.

RAF Cottam (Yorkshire)

Blocks from the former site, and the beautiful views across the Wolds from one of the highest peaks in the area.

It is believed that further forced landings took place at Cottam during this time. Firstly, a damaged B-24 ‘Liberator’ came down after sustaining damage on a raid; and secondly, it is also thought that a Halifax landed here after an S.O.E. mission. Sadly at present, I can find no further official details of these events, and cannot therefore expand on them further.

Toward the end of the year 91 Maintenance Unit (M.U.) were based here*2 using the runways and hardstandings to store ammunition and other stores that were delivered by road from the rail yard at Driffield. A spell of residency for 244 Maintenance Unit carried on the storage work before the airfield was finally abandoned and closed in June 1954.

Returned to agriculture, the airfield is mostly gone, a section of the easy-west runway does still exist, and in part, at full width. Footpaths allow for walks across the site allowing views along the runway in both directions, they also allow walkers to use the remains of the perimeter track and secondary runway – albeit as a track. The frame of an air-raid shelter and the standby set house (designed to drawing 13244/41) are in situ, although by far the runways are the most prominent feature surviving today.

Access is best made from the Cottam Lane junction. The path leads up through the site of the medieval village of Cottam where the church still stands. This takes you south onto the airfield site itself and along the two runways. The walk extends along the perimeter track to the south, where debris from the perimeter track can also be seen.

Built high on the Wolds of Yorkshire, it is hard to understand why such a site was chosen. In winter, it could be bleak, windy and very cold. Landing conditions must have been difficult at best, and treacherous at worst. Its history of accidents tell their own tale.

In 2016, Cottam Airfield was the subject of a wind farm review, and a battle between the locals and the energy firm R.W.E, began. As yet though the site remains free of turbines, a gem for walkers and those wishing to experience the natural beauty of the Yorkshire Wolds. The open air and fabulous views hide a strange history, one that goes back long before the Second World War, but one that has only scars to tell the tale in this oddly historical, but beautiful part of Yorkshire. *3

Source and further reading:

*1 This was reported on a number of sites (Air Safety Network) but no records could be found referring to the accident in the Operational Records Book recorded by 77 Squadron at that time.

*2 See the National Archives website for details.

*3 News report on the proposal.

The Hull and East Riding at War Website has a range of information on the area during the Second World War.

My thanks go to Ronnie and Jo for the great walk, and for being such fabulous hosts. 

RAF North Witham – A Truly Historical Place

On the western fringes of Lincolnshire close to the Leicestershire border, is an airfield that is little known about, yet its part in history is perhaps one of the most important played by any airfield in Britain. Famous battles such as the Normandy invasion, the Ardennes and the crossing of the Rhine all took place because of the events that occurred here, and were it not for North Witham, many may not have been as successful as they were. For the next part of trail 3, we head west to perhaps one of Britain’s best kept secrets.

RAF North Witham (Station 479)

RAF North Witham sits quietly amongst the trees of Twyford Woods, a site originally known as Witham Wood, it is now a public space owned and maintained by the U.K.’s Forestry Commission.

Originally, North Witham was one of twelve airfields in the Leicestershire cluster intended to be an RAF bomber station for No. 7 Group, however, it was never used operationally by the Royal Air Force, instead like ten others in the area, it was handed over to the US Ninth Air Force and in particular the IX Troop Carrier Command.

North Whitham control tower

North Witham’s Tower – now a mere shell.

As it was originally designed as a bomber station it was built to the Air Ministry’s class ‘A’ specification, formed around the usual three triangular runways, perimeter track and aircraft hardstands. With construction beginning in the mid-war years 1942/43, its main runway would be 2000 yds long, with the second and third runways 1,400 yds in length and all 50 yds wide. To accommodate the aircraft, 50  ‘spectacle’ style dispersals were built, scattered around the adjoining perimeter track. As a bomber base it had a bomb store, located to the north-eastern side of the airfield, with the admin and technical site to the south-east. One feature of North Witham was its operations block, built to drawing 4891/42, it was larger than most, with ceilings of 14 feet high. Amongst the myriad of rooms were a battery room, cipher office, meteorology room, PBX, traffic office and teleprinter room, all accessed through specially designed air locks. A further feature of this design was the attachment of a Nissen hut to house plant equipment and boiler equipment, a feature not commonly seen at this time.

Aircraft maintenance could be carried out in one of two ‘T2’ hangars with additional work space provided by one of six ‘Butler’ hangars. Designed and built by the Butler Manufacturing Company of Kansas, USA, these were supplied in kit form and had to be erected on site by an Engineer Aviation Battalion. These ‘hangars’ had rigid box section girders over a canvas cladding, and once fully erected, gave a wide 40 ft span. Quite a rare feature, these types of structures were only built in limited numbers during the Second World War and only appeared on American occupied airfields. Post-war however, they were far more commonly used appearing on many American cold-war sites across the UK.

A hangar under construction at the 1st Tactical Air Depot at North Witham. Printed caption on reverse: '77877 AC - A butler hangar under construction by members of the 833rd Engineer Aviation Battalion at North Witham, England. U.S. Air Force Photo.'

A ‘Butler’ hangar under construction by members of the 833rd Engineer Aviation Battalion (EAB) at a very snowy North Witham (IWM479)

The Ninth Air Force was born in 1942 out of the ashes of the V Air Support Command, and then combined with units already located in the England operating under the American Eighth Air Force. Its initial activities focused on the allied push across North Africa followed by the move up into southern Europe through Italy.

Moving to England in October 1943, it then became the tactical Air Force that would support the Normandy invasion, supplying medium bombers, operating as troop support and providing supply flights. Facilitation of this massive invasion required both a huge backup, and an intricate supply and support network. North Witham would form part of this support network through both repair and maintenance of the troop carrier aircraft that were operated by the Ninth Air Force – primarily the C-47s. The main group undertaking this role at North Witham was the 1st Tactical Air Depot comprising the 29th and 33rd Air Depot Groups between January and September 1944*1. One of a number of depots, they were once described as the “backbone of Supply for the Army Air Force”, and had a complicated arrangement that encompassed numerous groups across the entire world theatre.

For such a large base, North Witham would be operationally ‘underused’, the only unit to fly from here being those of the IX Troop Carrier Command (TCC), who would primarily use C-47 ‘Skytrains’ – an established and true workhorse, and one that would go on to supply many air forces around the world.

During the Sicily campaign, it was found that many incoming aircraft were not finding the drop zones as accurately as they should and as a result, paratroops were being widely and thinly scattered. More accurate flying aided by precise target marking was therefore required and so the first Pathfinder School was set up.

North Whitham pen

Part of one of North Witham’s 50 dispersal pans.

The IX TCC Pathfinder School (incorporating the 1st, 2nd, 3rd and 4th Pathfinder Squadrons) was formed whilst the TCC was at RAF Cottesmore. Initially having only seven C-47 aircraft, it arrived at North Witham in March 1944. These aircraft were fitted with ‘modern’ Gee radar and navigation equipment, and would be used to train paratroops of the 101st and 82nd Airborne to mark targets prior to the main invasion force arriving.

These crack troops would remain at North Witham for short periods before returning to their own designated bases. The idea being a joint venture to land the troops who would then set up a ‘homing’ station using ‘Eureka’ beacons that would connect to ‘Rebecca’ receivers in the aircraft. This would allow flying to near pinpoint accuracy even in poor weather or at night; something that would be employed with relative success in the forthcoming Normandy landings.

On arrival at North Witham, the Pathfinders were accommodated in the huts originally provided for the depot’s crews – some 1,250 enlisted men and 75 officers. Many of these displaced men were rehoused in tents along the northern end of the site which only added a further strain to the already rudimentary accommodation that was already in place at the airfield. At its height, North Witham would house upward of 3,700 men in total, a figure that included an RAF detachment of 86 men and large quantities of GIs.

Pathfinders of North Witham were the first to leave the UK and enter the Normandy arena. Departing late in the evening of June 5th, men of the 82nd and 101st Airborne climbed aboard their C-47s and departed in to the night sky. North Witham based C-47A*2 ‘#42-93098’ piloted by Lieutenant Colonel Joel Crouch*3, led the way. Nineteen other North Witham aircraft joined Crouch that night, with only one being lost in the entire mission. The Douglas built C-47A-15-DK Skytrain, #42-92845 was lost en route due to mechanical failure – the aircraft ditching in the sea. All the crew and paratroops on-board were believed to have been rescued by the British destroyer HMS Tartar.

Image result for Lieutenant Colonel Joel Crouch and his crew

The Crew of C-47A #42-93098, a few hours before they left for Normandy. Including Pilot, Lieutenant Colonel Joel Crouch (centre), Captain Vito Pedone (copilot), Captain William Culp (Navigator), Harold Coonrod (Radio Operator), along with Dr. Ed Cannon (physician), and E. Larendeal (crew chief)

Pathfinder training continued at North Witham into the summer of 1944, training that included Polish paratroops (1st Independent Polish Airborne Brigade) who would perform a similar role to their American counterparts. These various Pathfinder groups would go on to have long and distinguished careers, supporting the battles at Arnhem, the Ardennes and participating in Operation Varsity – the Allied crossing of the Rhine.

As the Allies pushed further into enemy territory, the flying distance from England became too great and so new airfields were either constructed or captured airfields refurbished. The Pathfinder School soon moved away to Hampshire and the maintenance units, needed nearer the front lines, gradually departed to new bases on the continent.

September 1944 would see big changes in the Ninth and the knock-on was felt at North Witham. Firstly, the IX TCC transferred from the Ninth AF to the First Allied Airborne Army, and as a result, the Air Depot title was changed to IX Troop Carrier Service Wing (Provisional), which was re-assigned to aid and supply the new Troop Carrier Groups (TCG) now based in France. To accomplish this new role, groups often used borrowed or war-weary C-47s, C-46 (Commandos) or C-109s (converted B-24 Liberators) to fulfil their role. Secondly, the Pathfinder School was re-designated IX Troop Carrier Pathfinder Group (Provisional) and they moved away from North Witham to their new base at Chalgrove near Oxford. Now much quieter, life otherwise carried on at North Witham, but gradually the UK-based maintenance and repair work slowed down, and before long its fate was sealed and the airfield began the long wind-down that many of these unique places suffered.

By the war’s end the last American personnel had pulled out and the site was handed back to the RAF’s 40 Group who, after using it for a brief spell as a maintenance depot themselves, placed it under care and maintenance. It was used as a munitions and hardware store until 1948, and then finally, in 1956, it was closed by the Ministry and the site sold two years later.

Photograph of North Witham taken on 17th January 1947. The technical site and barrack sites are at the top left, the bomb dump is bottom left. (IWM RAF_CPE_UK_1932_FP_1221)

The site, intact as it was, was returned to the Forestry Commission who planted a range of new trees around the site, covering the vast areas of grass. The technical area was developed into a small industrial unit and perhaps most sadly the watch office left to decay and fall apart.

Today the three runways and perimeter track still exist almost in their entirety, and remarkably, in generally good condition. Largely overgrown with weeds and small trees, the remainder is well hidden obscuring what little there is in the way of buildings – most being demolished and the remains left piled up where they stood. However, a T2 hangar is now used on the industrial estate and the watch office still stands tucked away amongst the trees and undergrowth. This area is a favourite place for dog walkers, and because of its runways, it is accessible for prams and pushchairs. Whilst here, I spoke to quite a few people, remarkably none of them knew of the site’s historical significance let alone the office’s existence!

Today the watch office remains open to the elements. Surrounded by used tyres and in constant threat of the impending industrial complex over the fence, its future is uncertain. Access stairs have been removed, but an entrance has been made by piling tyres up to the door – presumably by those wishing to enter and ‘explore’ further. Little evidence of its history can be seen from the outside, even the rendering has been removed, and so, any possible personal links with the past are more than likely now gone.

DSCF1273

The view of the main runway from outside the tower.

Returning back to the main public entrance along the perimeter track, a number of dispersal pens can be found; overgrown but relatively intact, they are a further sign that even here, war was never very far away.

North Witham was one of those ‘backroom boys’ whose contribution, whilst extremely important, is little known about. The work carried out here not only helped to maintain a strong and reliable fighting force, but one that spearheaded the frontal invasion of Normandy. It served as a cold and perhaps uncomfortable home to many brave troops, many of whom took the fight direct to Nazi Germany.

Standing here today, it is quiet and strangely surreal – you can almost hear the roar of engines. Looking along its enormous runways you get an eerie feeling – how many troops also stood here, spending their last few hours in this quiet place. Looking around now, it is difficult to imagine the immense work that went on here, the gathering of equipment as preparations were made for the big push into Normandy on that famous June night.

North Witham is truly a remarkable place, hidden away amongst the trees as a giant time capsule, a monument to those who lived, worked and died during that turbulent time in 1944-45.

After leaving North Witham, we return to the main A1 road and head south. Any journey here can not avoid briefly mentioning RAF Wittering, its Harrier still standing proudly outside the main gate. All went quiet here following the Government cutbacks of December 2010, but flying has now returned in the form of Grob Trainers – a small reprieve for this historic site. Wittering can seen later in Trail 37.

Another view along the main runway.

Another view along the main runway.

Sadly in May 2015, Twyford Woods was the scene of a large illegal rave, over 1000 people attended the event where a number of arrests were made in the violent altercations that took place*4. A sad day that would turn the souls of those who sacrificed themselves for the freedom we take for granted so very easily today.

(North Witham was originally visited in early 2013)

Links and sources

*1 American Air Museum in Britain

*2 C-47A #42-93098 itself was later lost whilst flying with the 439th Troop Carrier Group (TCG) on September 18th 1944, whilst flying in support of Operation ‘Market Garden‘ in Holland.

*3 Superb footage of Crouch and his crew as they depart from North Witham is available on-line here, it also shows the Watch Tower in its former glory.

*4 A report of the event is available on the BBC News website.