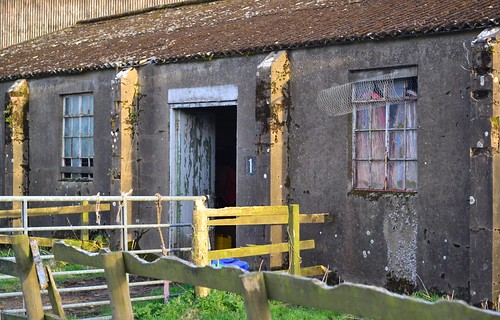
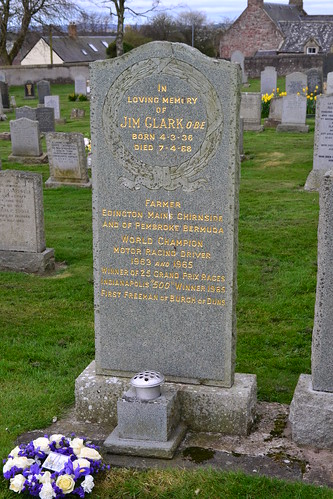
Trail 52 – RAF Bottesford and the bizarre accident that killed five airmen.

In this next trail we turn westward and head to the Midlands towards Nottingham and Leicester. Here we take in an airfield that was part of the RAF’s Bomber Command, and whilst it is an airfield that saw only a small number of squadrons operating from it, it nonetheless has a very significant story to tell.  Now a successful industrial park, much of the site remains – albeit behind a security gate and fencing. This airfield was home to both the RAF and the USAAF and played an important part in the fight against Nazi Germany. Today we visit the former airfield RAF Bottesford.

RAF Bottesford (Station 481)

RAF Bottesford was built in the period 1940 / 41 by the major airfield builder George Wimpey & Co. Ltd. It was known more locally as Normanton after the small village that lies on the south-western corner of the site, and although a Leicestershire airfield, it actually straddles both Leicestershire, Nottingham and Lincolnshire. As a new bomber airfield, it was the first in the area to be built with concrete surfaces, a welcome break from the problematic grassed surfaces that Bomber Command had been fighting against before.

In 1941 Bottesford would open under the control of No. 5 Group, a group formerly headed by Air Chief Marshal Sir Arthur Harris, who had seen the group carry out anti-shipping sweeps over the North Sea and leaflet drops over Germany. Now under the guidance of Air Chief Marshal Sir John Slessor, No. 5 Group was able to muster a considerable number of heavy bombers capable of reaching Germany’s heartland.

As a bomber airfield Bottesford had a wide range of technical buildings, three concrete runways, one of 2,000 yds (after being extended) and two just short of 1,500 yds, all 50 yds wide and linked by a perimeter track. The technical site with its various support buildings lay to the north-west of the airfield with the bomb site to the east, and accommodation areas dispersed to the north-east beyond the airfield perimeter.

Bottesford would accommodate around 2,500 personnel of mixed rank, both male and female, in conditions that were often described as ‘poor’, the site suffering from extensive rain and lack of quality drainage as the Operational Records would show *1.

Around the airfield there would eventually be 50 dispersals, half of these being constructed initially as ‘frying pan’ hardstands, and then with the introduction of the improved ‘spectacle hardstand’, this number was doubled by 1945.

Aircraft maintenance would initially be in four hangars, but these were also increased to ten in total, giving a mix of T2 and B1 designs. An unusual design feature of Bottesford was that some of these dispersals, and later hangars, were across a public road and, like RAF Foulsham (Trail 22), a gate system operated by RAF Police would allow the road to be closed off when aircraft were moved into or out of the area. The airfield would therefore, undergo quite a major change during its operational life.

Aerial photograph of Bottesford airfield looking west, the technical site is bottom right, 8 June 1942. Photograph taken by No. 1 Photographic Reconnaissance Unit, sortie number RAF/HLA/590. English Heritage (RAF Photography).

RAF photo reconnaissance photo taken on 8 June 1942. Compare this to the photograph taken three years later (below)*2

Aerial photograph of Bottesford airfield looking east, the technical site with seven T2 hangars, control tower and airfield code are top left, the bomb dump is on the right, 30 May 1945. Photograph taken by No. 544 Squadron, sortie number RAF/106G/LA/203. English Heritage (RAF Photography).

Bottesford 1945 *3

Only three operational front line RAF units would operate from Bottesford, the first being 207 Squadron flying the Avro Manchester, arriving on November 17th 1941, the same month as production of the Manchester ceased. Their arrival would also coincide with the arrival of 1524 (BEAM Approach Training) Flight operating the Airspeed Oxford.

207 Sqn were reformed as a new squadron at the beginning of November 1940, taking on the ill-fated Avro Manchester MK.I, before arriving here at Bottesford a year later. The first squadron to operate the type, they were soon to discover it had major issues, and so poor was the Manchester, that by the Spring of 1942 it was being withdrawn, replaced by its more successful sister the Lancaster. After its promising introduction into Bomber Command in late 1940, it became clear that the Manchester was going to become a troublesome aircraft. With engine seizures often followed by fires, it was very much under-powered even though it had what were in essence, two V12 engines mounted in one single engine.  Bearing failures led to engines failing, and already working at its limits, the Rolls-Royce Vulture engine was not able to keep the Manchester aloft without great skill from the crew.

After a period of bedding in and conversion of the crews to the new Manchester, the new year at Bottesford would start off badly, seeing the first casualty for 207 Sqn, on the night of 9th January 1942. On this mission, Manchester MK.I L7322 piloted by F/O G Bayley, would crash after being hit by flak on operations to Brest. There were 151 aircraft on this mission, with this aircraft being the only causality in which only three of the crew’s bodies were ever recovered.

The transition from the Manchester to the Lancaster would not be straight forward for 207 Sqn. Whilst on training flights, Lancaster MK.I ‘EM-G’ R5501 would collide in  mid-air with a Magister from RAF Cranwell, four crewmen would lose their lives along with the pilot of the Magister. Then on the 8th April, a second Lancaster would suffer problems when ‘EM-Z’ R5498 experienced fuel starvation in both starboard engines causing them to cut out. The aircraft crashed close to Normanton Lodge on the north-south boundary on approach to Bottesford’s main runway. Fortunately no one was seriously injured in the accident.

A third training accident occurred on the night of May 24th 1942, when Lancaster R5617 hit the ground in poor visibility near to Tavistock in Devon. In the resultant crash, four of the crew were killed whilst two further crewmen were injured. It was proving to be  a difficult transition for the crews of 207 Sqn.

The first operational loss of a 207 Sqn Lancaster came on the night of June 3rd / 4th, when ‘EM-Y’ R5847 was shot down whilst on a mission to Bremen in north-west Germany. During the flight, the aircraft were attacked by German night fighters. As a result a number of aircraft from various squadrons were lost, including this one flown by pilot W/O C. Watney, who along with all his crew, were killed.

With the last mission by a Manchester taking place on the night of June 25th / 26th, 1942 would be a difficult year for 207 Sqn, losing four Manchesters and twenty-five Lancasters, which when added to the twenty Manchesters lost in 1941, proved that things were not going well for the 5 Group squadron at Bottesford.
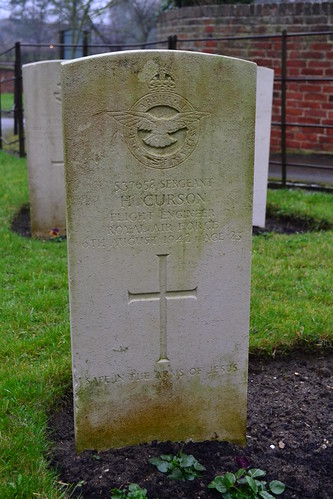
RAF Bottesford

Sgt. Harold Curson (s/n: 537658) was killed in a bizarre accident at Bottesford when a Manchester landed on top of a Lancaster destroying the aircraft and killing three of its crew.

Perhaps one of the most bizarre accidents to happen at Bottesford, occurred on August 6th 1942, when Manchester L7385 landed very badly. Somehow, the aircraft ended up on top of a Lancaster, R5550 who was also engaged in training operations. The accident was so severe, that two of the crew in the Manchester and three of the crew in the Lancaster were killed. The remaining five crewmen, whilst not killed in the accident, all sustained various degrees of injury.

Then in September 1942, 207 Sqn were transferred from Bottesford to nearby Langar, the satellite airfield for Bottesford. This would be the first of many moves that would last into early 1950 when the squadron was finally disbanded whilst operating the Avro Lincoln. The squadron’s tie with Avro had finally come to an end (207 Sqn would reform several times eventually being disbanded in the mid 1980s).

The October / November 1942 then saw two further Bomber Command squadrons move into this Leicester airfield, those of 90 Squadron and 467 Squadron.

Reformed here after being disbanded and absorbed into 1653 HCU the previous February, 90 Sqn brought with them the other great heavy bomber, the Stirling.

An enormous aircraft, the Stirling also failed to live up to its promise, suffering from a poor ceiling and often being targeted by fighters when in mass formations. The Stirlings were eventually pulled out of front line operations and moved to transport and SOE operations, such were their high losses.

At the end of the year once the squadron was fully manned and organised, No. 90 Sqn departed Bottesford taking the Mk.Is to RAF Ridgewell, where they continued on in the bomber role. The only casualty for 90 Sqn during this short time occurring on the very same day they moved when ‘WP-D’ BK625 crash landed at Ridgewell airfield.

Also during the month of November 1942, on the 24th, 467 Squadron (RAAF) joined 90 Sqn, in a move that saw the return of the Lancaster MK.I and MK.III, these crews must have been the envy of those who struggled with the mighty Stirling in their sister unit. Formed on the 7th November at RAF Scampton under the command of W/Cdr. C. Gomm DFC No. 5 Group, 467 Sqn were another short-lived squadron eventually being disbanded on September 30th 1945 at Metheringham airfield in Lincolnshire.

In the first days of their formation there were initially sixteen complete aircrews, divided into two flights: ‘A’ commanded by Acting S/Ldr. D Green DFC and ‘B’ Flight with Acting S/Ldr. A. Pappe DFC. As yet though, they had an insufficient number of aircraft to accommodate all the crews.

After arriving at Bottesford, 467 Sqn battled with lack of equipment and poor weather which hindered both training and flying activities. A number of dances were held to make the Australians and New Zealand crews “feel at home”,  and a visit was made by Air Marshal Williams (RAAF). At the end of the month, aircraft numbers totalled just seven.

By the end of December new aircraft had been delivered and the Lancaster total stood at nineteen, but poor weather continued to hamper flying. Early January saw the first sign of any operational action at Bottesford, which occurred on the night of January 2nd / 3rd 1943. Five crews were assigned to a ‘Gardening’ sortie, laying mines, which excited the ground crews who were keen to see their aircraft finally participating in operations. It wouldn’t be until January 17th / 18th that 467 Sqn would finally venture into German territory laden with bombs. A mission that took them to the heart of Germany and Berlin.
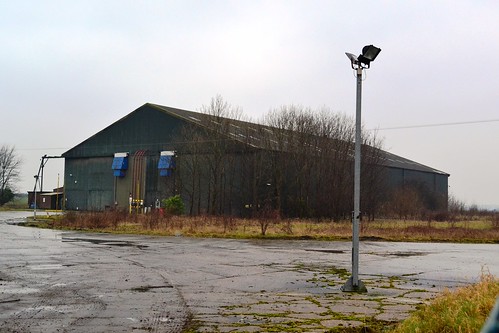
RAF Bottesford

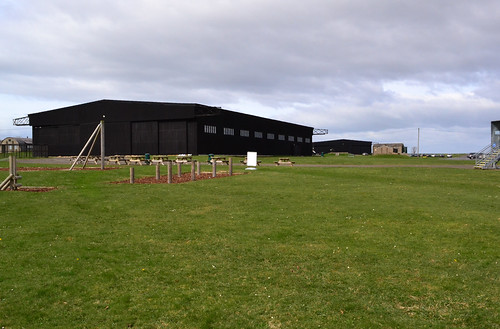
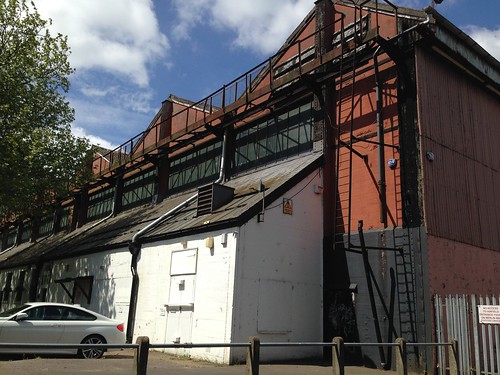
One of Bottesford’s hangars in use today.

With great excitement nine Australian crews, who were keen to show what they were capable of, took off from Bottesford to hit the target. The mission was considered a ‘disappointment’, damage to the target being very light due to both haze and lack of good radar. Target Indicators were used for the first time on this mission and it was the first all four-engined sortie. On their return flight, Sgt. Broemeling, the rear-gunner of F/Lt. Thiele’s crew was found unconscious, he had suffered from oxygen starvation and even after diving the aircraft to a safe breathing height and giving artificial resuscitation, he was declared dead on arrival at Bottesford.

A second night saw 187 RAF bombers from No. 1, 4 and 5 Groups in a subsequent raid that, like the previous night, also resulted in poor results.  Bombing saw little damage on the ground but twenty-two aircraft were lost. One of these aircraft being from 467 Sqn, that of Lancaster ‘PO-N’ W4378, which was piloted by a New Zealander, Sgt. K Aicken. Sgt Aicken had been one of the original pilots at 467’s formation. All seven crewmen from ‘PO-N’ were killed that night.

The next casualties would occur a month later, in a mission that saw 338 RAF heavies attack the port of Wihelmshaven in northern Germany. With the mission considered a ‘failure’, outdated maps were blamed, pathfinders marking the target area inaccurately as a result. The raid would also be notable for the loss of two Bottesford Lancasters; ED525 and ED529. On board the second aircraft were two crewmen Sgt. Robert Sinden (s/n: 577701) and Sgt. Derek Arnold Booth (RAFVR) (s/n: 1378781) who were just 18 and 17 years old respectively – the youngest crewmen to lose their lives in Bomber Command’s campaign of 1943. None of the fourteen men were ever found, their aircraft lost without trace.

A year after their arrival 467 Sqn then departed Bottesford heading for RAF Waddington, a point at which the RAF handed Bottesford over to the Americans in answer to their call for airfields to support the forthcoming invasion of the continent. 467 Sqn would go on to fight under Bomber Command, and in that month a special Lancaster would join the Sqn, that of R5868 ‘PO-S’ which went on to be the first Lancaster to reach the 100 mission milestone completing a total of 137 before the war’s end. She sat outside RAF Scampton as a gate guard after the war but has thankfully ended her days as the centre piece of the Bomber Command Hall at the RAF Museum in Hendon.*4
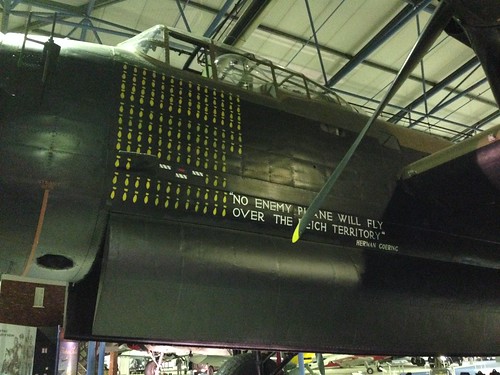
RAF Museum Hendon

‘S-Sugar’ a former 467 Sqn Lancaster stands in the RAF Museum, Hendon. Note the incorrect Spelling of ‘Hermann’ beneath the quote.

As one of a cluster in the area (North Witham (Trail 3), Spanhoe (Trail 6), Barkston Heath and Langar amongst others), Bottesford would become a home to the Glider units of the US Troop Carrier Command (TCC).

The airfield (renamed Station 481) would become the headquarters of the 50th Troop Carrier Wing (TCW), Ninth Air Force, and used as a staging post for new C-47 units arriving from the United States. The 50th remained here at Bottesford until April 1944 at which point they moved south to Exeter in their final preparations for the Normandy invasion.

This deployment would see a number of American units arrive, be organised and transfer to their own bases elsewhere, these included the eight squadrons of the 436th Troop Carrier Group (TCG) and the 440th Troop Carrier Group (TCG).

The 436th TCG were made up of the four squadrons:79th Troop Carrier Squadron (TCS), 80th TCS, 81st TCS and 82nd TCS, all flying C-47 aircraft. The Group was only one year old when they arrived at Bottesford, and their introduction to the war would be a baptism of fire.

The cramped barracks of the 436th TCG and 440th TCG at Bottesford. (IWM – FRE 3354)

Whilst primarily training and organising themselves at Bottesford they would go on to take part in the Normandy invasion, dropping paratroops early in the morning of June 6th 1944 into the Normandy arena. In the afternoon, they returned with gliders, again dropping them behind enemy lines to supply and support those already fighting on the ground. A further trip the following morning saw the group awarded a Distinguished Unit Citation (DUC) for their action over the Normandy landing zones. Before the war’s end the 436th would take part in four major allied airborne operations, dropping units of both the 82nd and the 101st Airborne.

The 440th, like the 436th, were a very young unit, only being activated the previous July, and like the 436th, their introduction would be a memorable one. Dropping paratroops of the 101st Airborne into Carentan on D-Day, followed by fuel, food and ammunition the next; for their action they too were awarded a DUC. The 440th would also take part in the Battle of the Bulge supplying troops at Bastogne and later the crossing of the Rhine.

Whilst both units were only here at Bottesford a short time, they undoubtedly played a major part in the Allied invasion and all major airborne battles on the continent, a point that Bottesford should be remembered for.

The 436th moved to Membury whilst the 440th moved to Exeter in a mass move with the 50th TCW. After this, the US brought in a Glider repair and maintenance unit, who only stayed here for a short time before they too departed for pastures new. This then left Bottesford surplus to American requirements, and so in July 1944 it was handed back to the RAF and 5 Group once more.

This transfer would see the last flying unit form here at Bottesford – the death knell was beginning to ring its ghostly tones.  The RAF’s 1668 Heavy Conversion Unit (HCU) formed on the 28th, brought back the heavy bomber, the Lancaster MK.I. Working with the HCU were the 1321 Bomber (Defence) Training Flight consisting of mainly Beaufighter and Spitfire aircraft, who operated here until 1st November 1944 when they were absorbed into 1668 and 1669 HCUs. The HCU used these aircraft for fighter affiliation tasks and heavy bomber training.

As a training unit there would be many accidents, either due to aircraft problems or pilot error, including the first major accident on 12th December 1944 where fire tore through the port wing of Lancaster MK.III JA908. Diverted to East Kirkby the Lancaster attempted a landing but damaged a wheel, and had to crash-land in a field near to the airfield. Whilst no-one was killed in the crash, eight aircrew were injured in the resultant fire.

In the August 1945, the HCU moved to Cottesmore and there was no longer a need for Bottesford as an operational airfield. Surplus to requirements it was placed into care and maintenance, and used to store surplus equipment including ammunition before being closed and sold to the farmer who’s been using it since 1962.

As with all RAF / USAAF airfields a number other flying units operated from Bottesford, maintenance units, RAF squadrons and Glider units all played their part in its rich tapestry of wartime history. A history that provided one of the largest numbers of hangars collectively, and one that saw many young men come and go, many not coming back at all.

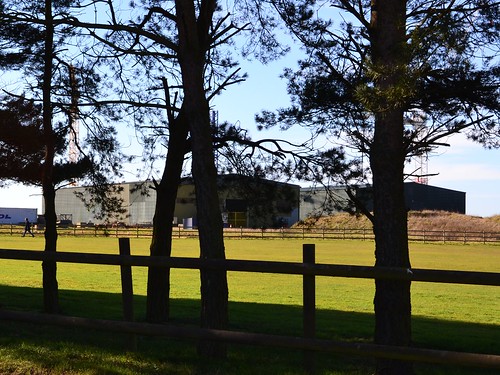
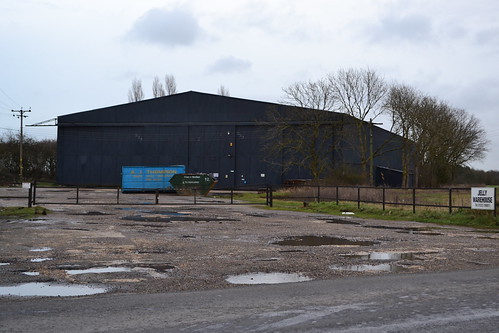
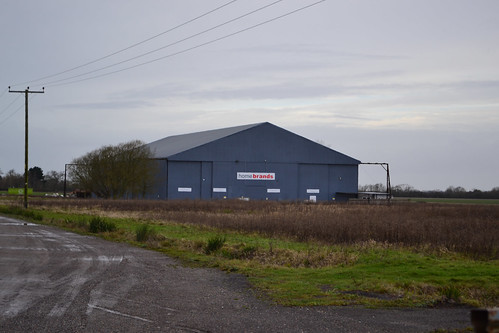
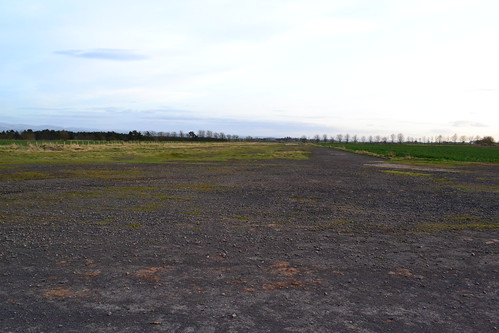
Today Bottesford is a thriving industrial and agricultural park, the farmer using large parts of it but the technical site being used by a number of industrial companies. The hangars are still present and in use, as are the runways now used for storage of vehicles rather than Lancasters, Stirlings, Manchesters or C-47s. The watch office has been refurbished and is used as offices, and several of the original buildings still remain in various states of disrepair. A flag of remembrance was hoisted outside the office in May 1995 and veterans have visited the site to pay their respects.

With access to the site through a security gate, you are left with some poor views from public roads, but the local church does have a small number of graves and a memorial which includes a book of remembrance.

Bottesford may have only been in existence for a short period, but it saw many aircraft and many crews, a mix of international airmen who brought new life to this small village on the border of three counties.
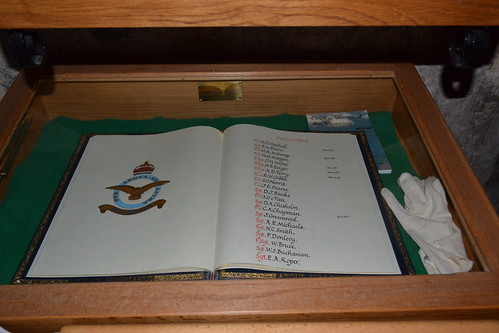
RAF Bottesford

A book of remembrance sits in the local church St. Mary the Virgin along with a small number of graves.

Links and sources

*1 AIR\271930\1 Operational Record Book 467 RAAF (Royal Australian Air Force) Summary of Events (National Archives).

*2 Source Imperial War Museum photo ref: RAF_HLA_590_V_6004

*3 Source Imperial War Museum photo ref: RAF_106G_LA_203_RP_3093

*4 The AVRO Heritage Museum Website has details of ‘S for Sugar’ and her journey to Hendon.

Defence of the Realm, Tony Wilkins takes a detailed look at the Avro Manchester.

The Bottesford Living History Group have a detailed website with photographs and personal accounts and is worth visiting.
The Development of Britain’s Airfields (Part 7).

Whilst the runway’s remains one of the biggest features of an airfield, perhaps one of the most discussed and certainly visible is the hangar. Large sheds used to maintain aircraft, many still dominate the skyline today, used by farmers and industrial companies, they are massive buildings, but yet many remain classed as temporary or even transportable!

The development of these huge buildings is another that lasted many years, and whilst similar in layout and design, they are as complicated and as varied as any other building found on Britain’s airfields.

Hangars and Aircraft Sheds.

The topic of aircraft hangars is well versed in a large number of books and internet references. They, like the runways, can explain much about the history and use of an airfield, being the largest single building on any airfield site. Distinguishing features between hangar types is often difficult to see, many now re-clad or updated with modern features, doors or materials, even the differences between some designs is so small, without technical drawings or measurements, ascertaining the type can be all but impossible.

Hangars (or aircraft sheds as they were initially called) have been fairly constant in design, however, different services used different types, Admiralty seaplane sheds for example, were primarily side opening, whereas RAF hangars were generally front opening. Design and construction was undertaken by numerous companies (Herbertson & Co. Ltd., Nortons Ltd., Teeside Bridge and Engineering Co. Ltd., and Sir William Arrol & Co.) and even Handley Page Aircraft Co. and Boulton & Paul dabbled with the idea. With so many forms being used, it is a topic both detailed and extremely wide.

This is not therefore, intended to describe each and every hangar ever built (Second World War Air Ministry designs alone covered more than 56 types!), but more a general realisation of the huge development they undertook during this expansion and wartime period on RAF / USAAF airfields. Figures quoted here are generally rounded.

In order to understand the changes in aircraft hangars we need to briefly look at those of the First World War, where aircraft were stored in ‘sheds’, often made from canvas covering a wooden frame, or as a more permanent construction, completely wooden sheds with sliding doors. Later on these were built using metal (iron in particular) and were designed to be permanent, capable of housing several aircraft at a time.

The First World War hangars were varied and often crude, some little more than glorified tents, but through development famous names such as the Bessonneau and Hervieu were created toward the end of the war. Hangars became so large that specialist units had to be created solely to transport, erect and maintain them, and their use became more widespread.

The most common hangar of this period, the Bessonneau, was the first standard transportable hangar used on Royal Air Force airfields. Modern forms of it are still in use today, using different materials, they are quick to erect and offer reasonable protection from the weather outside.

The Bessonneau was a wooden frame structure covered in canvas. It was a simplistic design, able to be erected in as little as two days by a group of 20 skilled men. Heavy canvas doors open at one end allowing aircraft to be moved in and out with relative ease. The problem with these hangars was that the canvas was prone to freezing in winter and therefore becoming difficult to use.

There were two models of the Bessonneau built, differing only in their length – either 79 feet or 118 feet – but both were 65 feet wide.

The interwar and early war years were perhaps understandably,  the years in which the greatest hangar development occurred. The Air Ministry – the body overseeing the works – decided upon a system of ‘structure type’ using names and designations such as, Type ‘A’, ‘B’, ‘C’, Bellman, ‘T2’, etc., and just like the expansion period schemes, they progressed through this system as new developments came about.

The first type was the Type ‘A’, a permanent design, originating in 1924, it was used well into the 1930s when it was gradually replaced during the expansion period. Some examples did last well into the war and even beyond, for example, North Weald, one of the first airfields to be allocated a Type ‘A’, still uses one today.

Type A Hangar

Type A Hangar at North Weald. One of the first stations to have these types of Hangar, it has workshops attached to the Hangar side.

The Type ‘A’ is probably the first to represent the modern hangar, doors at both ends in leaves of four running on rails. Workshops are attached to the hangar side, something that was discontinued as Britain entered the war. Walls were reinforced with concrete to protect from bomb splinters, and they were built 249 feet long and 122 feet wide.

During the late 1920s, the Air Ministry published requirements for new heavy bombers, and these would require new hangars in which to maintain them. In response, the Ministry then updated the Type ‘A’ hangar to the Type ‘B’. In essence a larger version of the Type ‘A’, (160 ft span and 273 ft in length) the ‘B’ was named the ‘Goliath‘ with only three being built (each being a different length). One of these was at RAF Martlesham Heath and is still used today on what is now the industrial park. Like the Type ‘A’, the roof of the ‘B’ is possibly its most discernible feature, a series of trusses along its length crossing laterally over the roof.

With expansion period demands increasing, further developments were needed, and it was envisaged that an increasing bomber size would be needed if substantial bomb loads were to be delivered deep into the continent. The current size of hangar was now considered too restrictive and so a new buildings would be needed. The requirements of the Air Ministry was for a hangar with a span of 150 feet and length of 300 feet. With these in place, new aircraft specifications could be issued.

The Type ‘C’, (designed in 1934) as it was designated, would become the dominant building on any airfield and therefore visible from quite a distance. As airfield designs were subject to scrutiny by the Society for the Preservation of Rural England, local objections were taken into account during the design process. To appease any  objections, the steel frame was covered with local brick or stone, keeping it inline with other buildings not only on the airfield, but houses and buildings erected locally.

Most airfields during the expansion period were built with these hangars on site, and naturally went through a series of developments and improvements. This means, that there are many different forms of the Type ‘C’: gabled roof, hipped rafter and reinforced concrete. Another modified version of the ‘C’ appeared in 1938 and was designated the ‘C1’ (or ‘Protected’), this was an austerity measure development, reducing the amount of material used by lowering the roof height by 5 feet – internal metal work was also left partially exposed. Both the ‘C’ and ‘C1’, continued to be built with offices, workshops and aircrew accommodation attached to the hangar side, the idea being that it was more efficient to do so for the repair of the aircraft inside. As these were larger in width and length than their predecessors, they would have six leaf doors also sliding on top and bottom rails.

RAF Upwood

Type C at the former RAF Upwood.

1936 saw a dramatic change in hangar design, with two new requirements being issued by the Air Ministry. Firstly, storage space was now running out and so new facilities were required. These Aircraft Storage Unit Stations (ASU) would need their own hangar type, and so a requirement for these was put forward. Also at this time, the Ministry put out a demand for transportable hangars, these would replace the ageing Bessonneaus of the First World War. The response to these demands were three storage hangars and two temporary hangars.

Storage Hangars.

The Type ‘D’, ‘E’ and ‘L’ Hangars, were a development used specifically by the ASU stations, and they were not generally built on front line operational airfields. They were virtually identical in size to the Type ‘C’, but each type was marginally bigger in span 150 ft, 160 ft and 167 ft than the previous model, and all were the same length at 300 feet. The three types were different from previous hangars in that they had curved roofs, allowing the ‘E’ and ‘L’ to be covered with soil for protection and camouflage (the ‘D’ had straight side walls and therefore could not be covered). ASUs were built to assemble and disassemble aircraft for shipment to operational airfields in Britain or overseas. Aircraft were stored, in varying degrees of assembly within these units, and heavy hoists were often used to store aircraft ‘tail up’. However, with the outbreak of war, aircraft storage was thought better dispersed around the airfield and not concentrated in one space, so this method of storing aircraft was abandoned. Many of these hangars still remain today, used by small industrial units or for farm storage.

The next two types, the ‘J’ and ‘K’, were virtually identical in design, again with curved roofs, they were used for storage of aircraft. The ‘J’ can be found on many operational airfields, built in conjunction with other main hangars (Waterbeach is a very good example of this combination), whilst the ‘K’ was built on ASU stations. The design came in as a result of Expansion Scheme M, and was as a result of the call for 2,550 front line aircraft by March 1942.

The main difference between the two, (other than their location) was in the roof structure, the ‘K’ having lifting tackle rails along its width, while the ‘J’ were along its length. The ‘K’, being used for storage of aircraft, didn’t have any windows, where as the ‘J’ did as offices and workshops were in use constantly. Like previous hangars, the ‘J’ and ‘K’ both had a span of 150 ft and a length of 300 ft.

RAF Waterbeach 'J' Hangar

A ‘J’ hangar located at RAF Waterbeach.

Transportable hangars.

The 1936 transportable hangar requirement, asked for a hangar that could be easily erected and didn’t require a permanent base. It also asked for doors at both ends and needed to be simplistic in design, with parts being interchangeable. These hangers also saw the separating of the office/workshop facilities previously built onto the side of the hangars, these now being located in buildings in the technical and administrative areas. After considering numerous designs, two were chosen and ultimately built.

The first of these, and the primary choice, was the Bellman. Designed by an engineer within the Works Directorate, N.S. Bellman, they were smaller than previous hangars (88ft span and 175 ft on RAF bases) and could be built in under 500 hours by a dozen men. So successful, were they, that over 400 were built between 1938 and 1940 across a wide range of airfield types. Some of these examples even appeared in Russia.

Bellman Aircraft shed

Bellman Aircraft sheds at the former RAF Bircham Newton

The second design, was the Callender (later Callender-Hamilton with modifications) Hangar, designed by the bridge design company Callender Cable and Construction. These had a span of 90 clear feet, with a length of 185 ft, and were used on both RAF and RNAS airfields. There were only eight of these built before the outbreak of war, examples of which appear at East Fortune, further examples with lower roof clearances (17 ft) being purchased after 1940. The Callender-Hamilton are best recognised by their lattice-work on the top door rails.

Callender-Hamilton Hangar East Fortune National Museum of Flight

Callender-Hamilton Hangar East Fortune National Museum of Flight

As the war approached, 1939 – 1940 saw a transition period between ‘permanent’ and ‘temporary’ buildings, although many of these temporary buildings still stand today! Because of this change, many airfields had various hangars built, something that often gives a mix of hangar designs on one airfield which can cause confusion as to its age and origin. However, from this point on, all wartime hangars were designed as temporary hangars, designed with short lives and easily assembled / disassembled.

By 1940, the Bellman was considered too small for the RAF’s requirements and a new design was going to be needed. An agreement between the Air Ministry and Teeside Bridge & Engineering resulted in the ‘T’ series of hangars, perhaps the most well-known of the hangar designs.

The ‘T’ series covers a wide range of (temporary or transportable) hangars, each slightly different to the previous, but designed as three main types; T1 (90 ft span), T2 (113 ft) and T3 (66 ft). The length of each hangar varied depending upon local requirements and the number of additional bays added as needed. The design number e.g T2 (26) indicated the number of bays (26) and hence the length.

The ‘T’ range were a diverse and complicated range, the ‘T2’ being sub split into 5 variants (T2, T2 Heavy Duty, TFB (flying Boat), TFBHD (flying boat heavy-duty) and T2MCS (marine craft shed), so the identification of each being difficult without measuring equipment.

RAF Wratting Common

A T2 hangar at RAF Wratting Common.

On first inspection the ‘T2’ and Bellman look virtually identical, both lightweight, steel lattice frames with metal side panels. The main distinctions are that the Bellman doors are flush with the top of the side panelling whereas the ‘T2’ has an extra level of panelling and so are not flush. The other difference is the lattice frame inside the roof, the ‘T2’ has only diagonal braces whereas the Bellman has vertical braces in addition to the diagonals. Both hangars have six leaf doors on sliding rails supported both top and bottom, allowing full width access.

A final addition to the ‘T2’ were the Ministry of Aircraft Production Hangars the Type ‘A’ (A1 & A2) and Type ‘B’ (B1 & B2) built in the mid war years 1942-43 and funded by the Ministry of Aircraft Production. These hangars, not to be confused with the type ‘A’ and ‘B’ of the 1920s, were designed specifically for the repair of damaged aircraft especially operational aircraft on their own airfield. They were also erected at ASUs, and Satellite Landing Grounds (SLG).

RAF Wratting Common

A B1 at RAF Wratting Common an RAF bomber station.

The ‘B1’ and ‘B2’ were built specifically at Bomber Command airfields for the repair of damaged bombers thus eliminating the need to transport them long distances to specialist repair depots. Designed by T. Bedford Consulting Engineers they were eventually found on virtually all Bomber Command airfields by the end of the war and were manned by civilian repair organisations. Examples of both the ‘T2’ and ‘B1’ can be found in use at Wratting Common.

‘A1’ and ‘A2’ hangars on the other hand, whilst similar in design – metal cladding on metal frames – were slightly smaller and found only on aircraft factory airfields. Thus again there are virtually two identical hangars designated primarily by their location!

The last hangar to be commonly found on RAF / USAAF airfields were the blister hangar. A hangar of a temporary nature that usually used a curved metal frame covered in metal sheeting. The Blister hangar was the brainchild of architects and consulting engineers Norman & Dawbarn and William C. Inman of Miskins & Sons, and was designed to accommodate small span aircraft ideally fighters dispersed around the perimeter of airfields. Maintenance or storage could easily be carried in these hangars, and they could easily and quickly be erected, no base or foundations being required before hand.

These types of hangar came in three designs, the standard blister, (timber construction), over type (light welded steel) and Extra Over (also light welded steel), and ranged in span from 45 – 70 feet, A further type built was that of Double extra Over and Dorman Long, a separate design similar in shape but securely bolted to foundations. Many of these hangars have now gone, the majority being dismantled and sold off, only to be erected elsewhere on farmland well away from their original location. The father of a friend of mine, was employed in this very role, one day finding a Spitfire inside a blister hangar which nobody claimed to own!

By the end of the war, in excess of 900 ‘T2’ hangars were erected on British airfields including those built abroad. In 2004 it was thought there were about 100*7 left surviving on MOD property in Britain. A number have also survived on farmland used to store foodstuffs or machinery, or industrial sites. The ‘T2’ remained the main hangar in use by both the RAF and USAAF during the war, appearing on all Class ‘A’ airfields, occasionally with other models also being present. A number of other older models also continue to serve even to this day. Considering many of these were built as temporary buildings, they have survived remarkably well and are testament to the engineering design of the pre and early war years.

This is by no means an exhaustive list of those hangars that were built during the period 1918 – 1945 (other examples include the: Aeroplane Twin Shed; RFC Sheds; Seaplane Sheds; General Service Sheds; Plane Stores; Running Sheds; Lamella (a German idea built in Britain); Hinaldi; Main Hangars; Lamson Hangars; Fromson Hangars; Robins Hangars; Butler (a US design); Merton; ‘S’ type Hangars (RNAS); Pentad Hangar and Boulton & Paul Hangars and of course post war examples such as the Gaydon), but hopefully it has shone a glimmer of light on these remarkable structures that often dominated the skyline and that remain the centrepiece of many a disused airfield today.

In the next section we shall look at that other main iconic building in airfield design, the watch office.

Sources and further reading. 

*7Technical Bulletin 02/02 “World War II Hangars – Guide to Hangar Identification” Ministry of Defence (February 2002).

RAF Stradishall – The early years.

Moving on from RAF Chedburgh, we continue south-west along the A143 to another former bomber airfield, and the parent station of Chedburgh. This next site has a history that dates back to the late 1930s and is one that has many of its original buildings still in situ, many thankfully still being used albeit by a completely different organisation.

The next stop on this trail is the historically famous airfield the former RAF Stradishall.

RAF Stradishall.

RAF Stradishall has a rather unique history, it was one of the first to be built during the expansion period of Britain’s Air Force beginning in 1935.  A series of Schemes, this programme was to develop the RAF over a period of years to prepare it for the forth coming war; a series of schemes that continued well into the war and created the basis of what we see today around Britain’s forgotten landscape.

This first scheme, Scheme ‘A’ (adopted by the Government in July 1934), set the bench mark by which all future schemes would develop, and called for a front line total of 1,544 aircraft within the following five years. Of these aircraft, 1,252 would be allocated specifically for ‘home defence’. This scheme brought military aviation back to the north of England, and to the eastern counties of Norfolk and Suffolk. Under this scheme, a number of airfields would be built or developed, of which Marham (the first completed under these schemes), Feltwell and Stradishall were among the first. These airfields were designed as “non-dispersed” airfields, where all domestic sites were located close to the main airfield site, and not spread about the surrounding area as was common practice in later airfield designs. At this stage, the dangers of an air attack were not being whole heartedly considered, and such an attack could have proven devastating if bombs had been accurately dropped.

Thus in 1938 Stradishall was born, its neo-Georgian style buildings built-in line with common agreements and local features. Within the grounds of the airfield accommodation blocks provided rooms for just over 2,500 personnel of mixed rank, and all tightly packed in within the main airfield site.

In these pre-war years, the development of hard runways and large airfields was a new phenomena, hard surfaces being a new aspect still very much a topic of considerable controversy. By now, Bomber Command had realised that the new era of bombers would call for hard runways on its airfields, and so they pushed the Government on allowing these to be developed. However, before any firm decisions could be made, trials would need to be carried out to determine whether or not they were indeed needed and if so, how they should be best constructed.

The test to determine these needs was to take a Whitley bomber, laden to equal its full operational weight, and taxi it across a grassed surface.  A rather primitive assessment, it was intended to ascertain the effects of the aircraft on the ground beneath. Trials were first carried out at Farnborough and then Odiham, and these were generally successful, the Whitley only bogging down on recently disturbed soils. Further trials were then carried out here at Stradishall in March 1938, and the results were a little more mixed. Whilst no take offs or landings took place during these trials, the general agreement was that more powerful bombers would have no problems using grassed surfaces, as long as the ground was properly prepared and well maintained. All well and good when the soils were dry and well-drained.

However, Dowding continued to press home the need for hard surfaces, and by April 1939, it had finally been recognised by the Air Ministry that Dowding was indeed right. A number of fighter and bomber airfields were then designated to have hard runways, of which Stradishall was one. These initial runways were only 800 yards long and 50 yards wide, extended later that year to 1,000 yards long, as aircraft were repeatedly running off the ends of the runways on to the grassed areas. Over the years Stradishall would be expanded and further developed, its longest runway eventually extending to 2,000 yards.

Stradishall was also one of the first batch of airfields to have provisions for the new idea of dispersing aircraft around the perimeter. To meet this requirement, hard stands were created to take parked aircraft between sorties, thus avoiding the pre-war practice of collective storage, and so reducing the risk of damage should an attacking force arrive – a practice not necessarily extended to the accommodation! By the end of development, Stradishall would have a total of 36 hardstands of mixed types, the extension of the runway being responsible for the removal and subsequent replacement of some. For maintenance, five ‘C’ type hangars and three ‘T2’ hangars were built, again standard designs that would be later superseded as the need required.

As Stradishall was one of this first batch of new airfields, it would also be used for trials of airfield camouflaging, particularly as the now large concrete expanses would reveal the tell-tale sign of a military airfield. On wet days the sun would shine off these surfaces making the site highly visible for some considerable distance. Initial steps at Stradishall used fine coloured slag chippings added to the surface of the paved areas. Whilst generally successful, and initially adopted at many bomber stations, Fighter Command refused the idea as too many aircraft were suffering burst or damaged tyres as a result of the sharp stones being used. Something that is reflected in many casualty records of airfields around the country.

RAF Stradishall

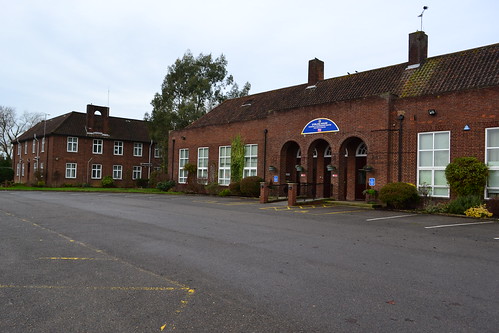
The Type ‘B’ Officers Mess at Stradishall is now a Prison Officers Training Facility. The Officers quarters are located in wings on either side of the mess hall.

On opening Stradishall would fall under the command of 3 Group Bomber Command, and would operate as an RAF airfield until as late as 1970, being home to 27 different operational front line squadrons during this time. Many of these would be formed here and many, particularly those post-war, would be disbanded here, giving Stradishall a long and diverse history.

The first squadrons to arrive did so on March 10th 1938. No. 9 Sqn and No. 148 Sqn (RAF) arriving with Heyford III and the Vickers Wellesley respectively. 148 Sqn replaced these outdated Wellesleys with the Heyfords in November, and then again replacing these with both the Wellington and Anson before departing for Harwell on September 6th 1939. No. 9 Sqn also replaced their aircraft with Wellingtons in January 1939, themselves departing on July 7th that same year.

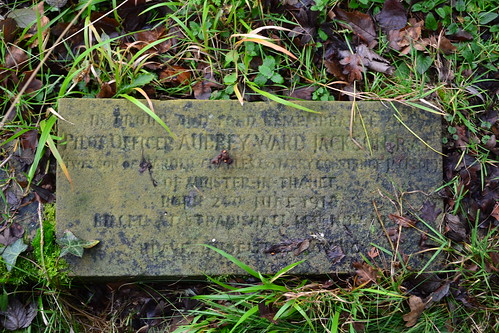
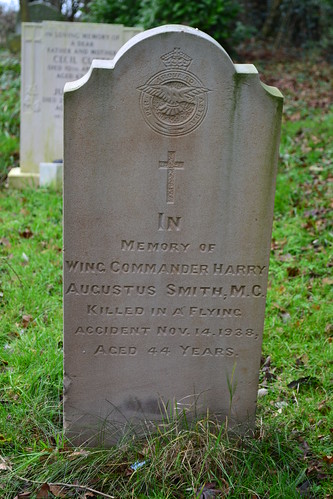
It was during a night training flight, on November 14th 1938, that Wing Commander Harry A. Smith MC along with his navigator Pilot Officer Aubrey W. Jackson would be killed in Heyford III K5194, when the aircraft undershot the airfield striking trees outside the airfield boundary. The crash was so forceful that the aircraft burst into flames killing both airmen.

Wing Commander Smith MC qualified as a pilot whilst in the Royal Flying Corps in 1916, and was the first of his rank to be killed since the inception of Bomber Command in July 1936. He had been awarded the Military Cross ‘for gallantry and distinguished service in the field‘ in 1918.

Pilot Officer Jackson was appointed for a Short Service Commission in January 1937, and later a Permanent Commission. He was only 20 years old at the time of his death.

Both crewmen are buried in Stradishall’s local cemetery.

St. Margaret of Antioch, Stradishall

A very much less than grand grave stone marks the plot of P.O. Aubrey W. Jackson, killed on November 14th 1938 on a night training flight.

St. Margaret of Antioch, Stradishall

Wing Commander Smith, killed alongside P.O. Jackson on a night training flight. He was the first of his rank to die since the formation of Bomber Command.

Two more squadrons arrived here in 1939. No. 75 Sqn operated the Wellington MK. I from July, departing here just after the outbreak of war in September, and 236 Sqn flying Blenheims between the end of October and December that same year. 236 Sqn were reformed here after being disbanded in 1919, and after replacing the Night-Fighter Blenheims with Beaufighters, they went on with the type until the end of the war and disbandment once more. Almost simultaneously, 254 Squadron reformed here in October 1939, also with Blenheims. They remained here building up to strength before moving to RAF Sutton Bridge in Lincolnshire in December – one of many ‘short stay’ units to operate from Stradishall during its life.

This pattern would set the general precedence for the coming years, with bizarrely, 1940 seeing what must have been one of the shortest lived squadrons of the war. No. 148 Sqn being reformed on April 30th with Wellingtons only to be disbanded some twenty days later!

This year saw three further squadrons arrive at Stradishall: 150 Sqn on June 15th, with the Fairy Battle (the only single engined front line aircraft to be used here during the war), whilst on their way to RAF Newton; a detachment of Wellington MK.IC from 311 Sqn based at East Wretham (Sept); and 214 Sqn flying three variants of Wellington between 14th February 1940 and 28th April 1942. No. 214 Sqn would be the main unit to operate from here during this part of the war, and would suffer a high number of casualties whilst here.

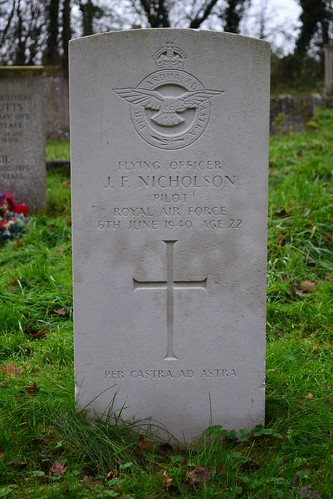
On June 6th 1940, 214 Sqn Wellington IA ‘N2993’ piloted by F/O. John F. Nicholson (s/n 70501), would take off on a routine night flying practice flight. During the flight, it is thought that F/O. Nicholson became blinded by searchlights throwing the aircraft out of control. Unable to regain that control, the aircraft came down near to Ely, Cambridgeshire, killing the five crewmen along with an additional Leading Aircraftman (LAC) Maurice Peling who had joined them for the flight. A tragic accident that needlessly took the lives of many young men. F/O. Nicholson is buried in the local cemetery at Stradishall, whilst the remainder of the crew are buried in different cemeteries scattered around the country.

St. Margaret of Antioch, Stradishall

F/O. J. Nicholson was killed when he lost control of his Wellington on the night of June 6th 1940.

214 Sqn began operations from Stradishall on the night of June 14th/15th, the day German forces began entering Paris. This first raid was to the Black Forest region of Germany, a mission that was relatively uneventful.

Joining 214 Sqn at Stradishall was another unit, 138 Sqn*1 between December 1941 and March 1942. Flying a mix of aircraft, including the Lysander, Whitley, and later: Liberator, Stirling and Halifax, they would perform duties associated with the Special Operations Executive (SOE) carrying out clandestine missions dropping agents behind enemy lines.

It was one of these aircraft, Lysander III T1508, that crashed in January, nosing over near to the French town of Issoudun, a medieval town that bordered the regions of occupied France and ‘free’ France. The towns people protected many wanted resistance supporters, and so it was the scene of many heroic acts. From this particular accident, Squadron Leader J. Nesbit-Dufort managed to escape, evading capture and eventually returning to England where he was awarded the DSO for his actions. Needing to destroy the aircraft, locals pushed the Lysander onto nearby railway lines where it was obliterated after being hit by a passing train*2. It is believed that this was the first Lysander to be lost on these clandestine operations.

This night of January 28th/29th 1942, was a particularly bad night for Stradishall, with three aircraft being lost, two from 138 Squadron and one from 214 Squadron. Thirteen souls were lost that night none of which have any known grave.

1942 would also see a short one month stay by the Wellingtons of 101 Squadron, a detachment of 109 Squadron, and the accommodation of 215 Squadron’s ground echelon. Formed at Newmarket, the ground crews were posted to India whilst the air echelons were formed up at Waterbeach joining them with Wellingtons in April.

An updating of Wellington MK.Is with the MK.VI saw the remainder of 109 Squadron move into Stradishall, only leaving a small detachment at Upper Heyford – a residency that only lasted 4 months between April and July 1942. As 109 Sqn left, Stradishall was joined by the Heavy Conversion Unit 1657 HCU.

Formed as a bomber training unit through the merger of No. 7, 101, 149 and 218 Squadron Conversion Flights and 1427 (Training Flight), it would also operate the Stirling, and later the Lancaster along with some smaller aircraft such as the Airspeed Oxford. They would remain here until late 1944 when they too were finally disbanded. This meant that 1943 was quieter than usual, there wasn’t any sign of the previous ebbing and flowing that had taken place in the preceding years.

With a focus on training, few of these aircraft were used for ‘operational’ sorties until the closing stages of the war. That said, there were still a number of accidents and crashes that resulted in injury. A number of these were due to technical issues, engine failure, engine fires or undercarriage problems, some were due to pilot error. One of the earliest incidents here was that of Stirling MK.I W7470 which crashed, after suffering engine problems over County Durham. The accident killed two crewmen and injured a further two.

After a short spell at Honnington, 214 Sqn would join 1657 HCU, also replacing the Wellington with the ill-fated Short Stirling MK.I in April 1942. But the last flights of the Wellington would not be a good one. The night of April 1st/2nd 1942 would go down as 214 Sqn’s worst on record, and one that would prove devastating to the crews left behind.

In part two of RAF Stradishall, we look at the later war years, the terribly sad events that scarred 214 Squadron, and Stradishall’s post war development. The dawning of the jet age.

4th June 1944 – Death of a Lancaster Crew

On June 3rd 1944, Lancaster ND841 ‘F2-D’ piloted by F/O. George. A. Young (s/n: 134149) RAFVR 635 Squadron, was detailed to attack Calais as part of the preparations for D-Day. There would be eight other aircraft from RAF Downham Market also detailed for the mission and take off would be late that evening.

The mission as a whole would involve 127 Lancasters and 8 Mosquitoes of No.1, 3 and 8 Groups and the targets would be the gun batteries at both Calais and Wimerereux. It was a  diversionary raid as part of Operation “Fortitude South“, to fool the Germans into believing the invasion would occur in the Pas-de-Calais region.

At 28 minutes past midnight, F/O. Young lined the Lancaster up on the runway, opened the throttles and began the long run down the runway. As the Lancaster approached take off, it began to swing striking the roof of a B1 Hangar. In an uncontrollable state the aircraft crashed just outside the airfield killing all on board.

All other eight aircraft took off and returned safely after having dropped their bombs.

On board Lancaster F2-D that night was:

Pilot: F.O. George Ambrose Young, aged 24 (s/n: 134149) RAFVR.
Flight Engineer: Sgt. Thomas Snowball, aged 32 (s/n: 1100769) RAFVR
Navigator: F.Sgt. Howard Pritchard, aged 22 (s/n: 1578502) RAFVR
Bomb Aimer: F.O. Walter Thomas Olyott, aged 21 (s/n: 151238). RAFVR
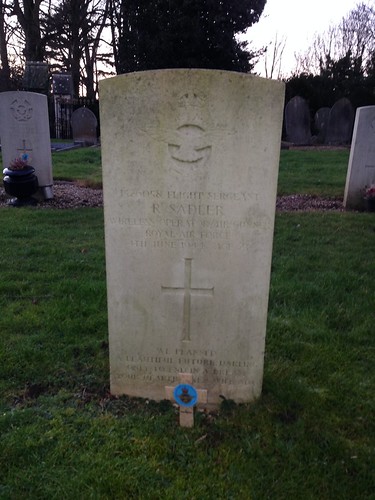
Wireless Operator / Gunner: F.Sgt. Robert Sadler, aged 23 (s/n: 1526058). RAFVR
Air Gunner: F.Sgt. Stanley Wharton, aged 30 (s/n: 1578013) RAFVR
Air Gunner: F.Sgt. Charles Patrick Nallen, aged 20 (s/n: 427537) RAAF

The Operations record book (AIR 27/2155/7) for that day simply  states:

3.6.44  ‘D’ F/O Young G.A. hit hangar after taking off and crashed on airfield when large bomb exploded and the crew all killed.  8 aircraft returned to base .

Three of the crew are buried in Kings Walk Cemetery, Downham Market, a short distance from the airfield.

Downham Market Cemetery

F.Sgt. Stanley Wharton (RAFVR)

Downham Market Cemetery

F.Sgt. Robert Sadler (RAFVR)

Downham Market Cemetery

F.O. Walter Thomas Olyott (RAFVR)

RAF Chedburgh – An appalling loss of life.

In this next trail, we start just a few miles to the south-west of Bury St. Edmunds in Suffolk, where we visit a number of airfields that were associated with the heavy bombers of the RAF’s Bomber Command.

Our first stop, although a satellite, more than earned its rightful place in the history books of aviation. It is an airfield where large numbers of the ill-fated Stirling flew many missions over occupied Europe, where the staggering statistics of lost men and machines speak for themselves.

Now little more than fields and a small industrial estate, the remnants of this wartime airfield stand as reminders of those dark days in the 1940s when night after night, young men flew enormous machines over enemy territory to drop their deadly payload on heavily defended industrial targets.

We begin our next trip at the former airfield RAF Chedburgh, home to the mighty four-engined bombers of No. 3 Group Bomber Command of the Royal Air Force.

RAF Chedburgh.

Built in 1942 (by John Laing and Son Ltd) as a satellite for RAF Stradishall, Chedburgh would be built to the Class A specification, a later addition to the RAF’s war effort. Being a bomber station Chedburgh would have three runways made of concrete, the initial construction being one of 2,000 yards and two of 1,400 yards, all the standard 50 yards wide, as was the standard specification brought in during 1941. Later on, these would be extended giving Chedburgh much longer runways than many of its counterparts, i.e. one at 3,000 yards and two at 2,000 yards. Having runways this long, meant that heavy bombers could use the site when in trouble, something that Chedburgh would get used to very quickly.

With the village of Chedburgh to the north of the site, directly opposite the main gate; the technical area along the north-eastern side of the main runway, and the bomb store to the east, Chedburgh would have two T2 hangars, a B1 and later on 3 glider hangars. Dotted around the perimeter track were a number of dispersals comprising 34 pan styles and 2 looped.

RAF Chedburgh

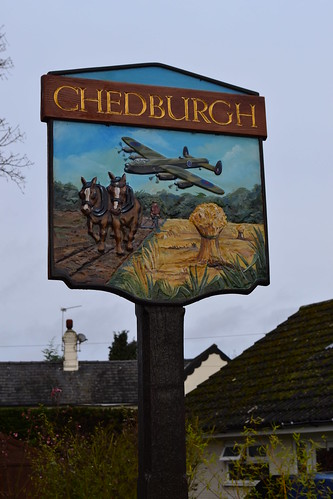
Chedburgh village sign reflects it aviation history.

Whilst housing only two major squadrons 214 Squadron and 620 Squadron, it would also be home to a small number of other operational units, 218, 301, 304 Sqns and 1653 Heavy Conversion Unit (HCU).

Opening under the control of No. 3 Group, on September 7th 1942, the first resident unit was 214 Squadron (RAF) flying the Stirling MK. I, a model they operated until as late as February 1944. The bulk of the unit arrived in the October, with operations beginning very soon after. Within four months they would begin replacing some of these models with the upgraded MK.III, also operating these until the beginning of 1944 and after transferring to RAF Downham Market in Norfolk.

As with many airfields at this time, the arrival of personnel preceded the completion of the works, development continuing well into the operational time of its residents, something that would cause a problem in the coming months.

It was in March of 1943 that the first casualties would occur, the night of March 1st/2nd being a baptism of fire for 214 Sqn. Stirling MK. I (R9143) BU-E piloted by F/S. J. Lyall (RCAF) would be hit by flak, she was badly damaged, and then abandoned by her crew. As he descended from the stricken aircraft, F/O. Hotson (RNZAF) would be hit by a splintering shell – the wounding he received as a result would be fatal. The remainder of the crew all escaped the aircraft safely but were later captured by the Germans and incarcerated. A multi-national crew, this loss was to be followed just two nights later with the loss of another Stirling, ‘BU-C’, but this time none of the seven crewmen were to survive.

Then on the next night, 5th/6th March, whilst on operations to Essen (the 100,000th sortie by RAF aircraft), Stirling BK662 ‘BU-K’ crashed into the North Sea about 30 km north-northwest of Ijmuiden. Only one of the crew, Air Gunner Sgt. William H. Trotter (s/n: 1128255) was ever found, the rest of the crew remaining ‘missing in action’. This was the first Stirling to be listed as such since the squadron’s operations began. This raid would prove devastating, taking the lives of 75 RAF airmen, but the War Office considered it a major success in terms of  industrial damage to the German war machine. The targeted Krupps factory, which sat in the centre of over 100 acres of industrialised area, was devastated by both accurate marking and then the subsequent bombing.

Throughout this month there were further loses to the squadron: Stirlings ‘BU-Q’ and  ‘BU-A’ (in which F/S. D Moore (RCAF) and Sgt. T. Wilson were both awarded the George medal for saving the life of their companion Sgt. J. Flack), along with ‘BU-M’ were all lost; ‘BU-M’ losing all but one crewman. Another aircraft, ‘BU-L’, lost all seven aircrew  on the night of March 27th/28th, and closing March off, was a collision between Stirlings BK663 and EF362, which left several more crewmen either injured or dead. Although many losses were as a direct result of flak or night fighters, the cracks were beginning to show, and the poor performance of the Stirling was becoming evermore apparent.

It was during this year on 17th June 1943, that Chedburgh’s second main operational unit would be formed, 620 Sqn (RAF), also carrying out bomber operations, again with the Stirling MK. I and later in the August, the MK. III. Also part of 3 Group Bomber Command, 620 Sqn were created through the streamlining of 214 Sqn and 149 Sqn at nearby Lakenheath. The move reduced each of the two former squadrons from three flights to two,  releasing ‘C’ Flight of 214 Sqn who were already stationed here at Chedburgh.

RAF Chedburgh

Parts of the perimeter track and runways remain as tracks used for storage.

As many of these crews were already well established and experienced, there would be no delay in commencing operations, the first sortie occurring on the night of the 19th June 1943 – two days after their formation. The first casualties occurred three days later on the night of 22nd/23rd June 1943, just a few days into their operational campaign. There then followed five months of heavy operational activity, a period in which the Stirling and its crews would be pushed to the very limit and beyond. The shortcomings of the aircraft being realised further more.

Being on a partially built airfield would be the cause of the demise of Stirling EF336 (QS-D) which swung on take off and ran into the partially constructed perimeter track. The uneven surface caused the undercarriage to collapse, and whilst there were no injuries to the crew, the aircraft was written off.

The poor service ceiling of the Stirling led to several aircraft being damaged through falling bombs from aircraft flying above. A number of Stirlings were recorded returning to bases, including Chedburgh, with damage to the air frames, damage caused by these falling ‘friendly’ bombs!  However, the extent of this damage did give great credit to the aircraft, showing both its robustness and strength in design; something that often gets forgotten when talking about the Stirling in operations.

The next few months for 620 Sqn would be filled with a mix of operational sorties, mining operations (Gardening) and training flights, including both ‘Bullseye‘ and ‘Eric‘; testing the home defence searchlight and AA batteries both at night and during the day. During a fighter affiliation exercise on July 2nd, two 620 Squadron aircraft collided, ‘EF394’ (QS-V) and BK724 (QS-Y)  killing fifteen and injuring two. One of those killed, Flight Mechanic AIC Arthur Haigh (s/n: 1768277) was only 18 years old, and one of five ground crew who were aboard the two aircraft that day.

Both 214 Sqn and 620 Sqn would go on for the next few months taking part in some of the war’s largest bomber missions including Hamburg, Essen and Remscheid. A number of aircraft would be lost and many aircrew along with them. The worst recorded night for 620 Sqn was the night operation on August 27th/28th, 1943 to Nuremberg, when three aircraft were shot down, all Stirling MK.IIIs: BF576 (QS-F) piloted by Sgt. Frank Eeles (s/n: 1531789); EE942 (QS-R) piloted by Flt. Sgt. John F. Nichols (s/n: 1318759) and EF451 (QS-D) piloted by Sgt. William H. Duroe (s/n: 658365). These three losses accounted for sixteen deaths and five taken as POWs, there were no other survivors.

The last 214 Sqn Stirling to be written off during bombing missions occurred on the night of November 22nd/23rd, 1943. Whilst on a mission to Berlin, Stirling EF445 (BU-J) was hit by flak, attacked by a FW-190 and then suffered icing. The resultant damage along with a lack of fuel, caused the pilot to ditch in the North Sea with the loss of two crewmen: pilot F/S. George A. Atkinson (s/n: 1485104) and Sgt. W. Sweeney (RCAF) (s/n: R/79844).

620’s stay at Chedburgh would be fairly short-lived, taking part in their final operation on the night of November 19th/20th, 1943 to Leverkusen. They then departed Chedburgh at the end of that month after suffering a heavy toll on their numbers and a devastating start to their war. By now the limitations of the Stirling were very well-known, and it was already being replaced by the much favoured Lancaster. In the short five months it had existed, the squadron had lost eighteen of its aircraft in operations, and a further six in accidents, statistics that are however, overshadowed by the loss of ninety-three lives. 620 Sqn left both Chedburgh and Bomber Command to join other units at RAF Leicester East and the Allied Expeditionary Air Force in November, where the unit was to perform Airborne operations along side 196 Sqn and 1665 Heavy Conversion Unit (HCU). A role that 620 performed for the remainder of the war.

With their departure came the arrival of another Stirling squadron, 1653 HCU, a Stirling training unit rather than a front line operational squadron. A month later 214 Sqn would also leave Chedburgh taking their Stirlings to Downham Market and then onto Sculthorpe where they replaced them with the B-17 Flying Fortress.

A P-51 Mustang (5Q-Q, serial number 42-106672) of the 504th Fighter Squadron, 339th Fighter Group, that has crash landed at Chedburgh, 18 May 1944. (IWM FRE 2784)

1653 HCU, as a training unit, would also have it share of accidents and losses, many due to technical problems, but some due to pilot error. A number of accidents were caused by tyres blowing, and some were caused by engine failures, the bravery of these pilots in dealing with these matters being no less than exemplary. One such incident being that of F/O. Hannah and his crew, who took off at 20:50 on the evening of November 3rd 1944, on a radar training flight. Immediately after take off both port engines cut out, something that was almost fatal in a Stirling. The aircraft, virtually uncontrollable, was heading towards a row of cottages but the crew managed to turn it  away missing the houses but colliding with a row of trees instead. All of the crew were injured to varying degrees – one fatally. Sgt. Eddie (RCAF) dying in the resultant crash.

After a year of being at Chedburgh, 1653 HCU would also depart (December 1944) by which time the Lancaster was well and truly the main bomber of the RAF. This late stage of the war would not be the end of Chedburgh though, Bomber Command retaining its use, sending the Lancasters I and III of 218 (Gold Coast)*1 Squadron here from RAF Methwold.

On December 2nd 1944 the first ground units began to arrive, with flying personnel arriving on the 5th, after much-needed runway repairs were completed. The airfield reopened with the arrival of eighteen Lancasters, formed into three new flights, of which thirteen would undertake operations on the 8th, to the railway yards at Duisburg – their first from Chedburgh. Both this mission and that of the 11th to the marshalling yards at Osterfeld, were heavily restricted by thick cloud, and so G-H navigation aids were used in conjunction with ‘Oboe‘.

For the majority of the remainder of the war Bomber Command continued its strategic missions against German cities, with marshalling yards and oil refineries being other major targets. It was of course this continued use of bomber aircraft against what was now a demoralised and weakened German population, that led to the outcry over Harris’s continued attacks on German cities. A controversial action that led to his move away from the lime light at the war’s end, and the lack of recognition for bomber commands efforts throughout the conflict.

218 Sqn would continue on though. The winter of 1944 / 45 proving to be one of the worst weather wise, many missions were either scrubbed or carried out in poor weather. On the night of January 1st/2nd 1945, one hundred and forty-six aircraft of No. 3 Group were tasked with the attack on Vohwinkel railway yards. During the attack in which 218 Sqn were a part, two aircraft were hit by heavy anti-aircraft fire from American guns below. One of these was 218 Sqn Lancaster MK. I PB768 (XH-B) piloted by 20 yr old Australian F/O. Robert G. Grivell. The accuracy of these guns was ironically excellent, hitting the aircraft not once but twice, causing it to spin uncontrollably toward the ground. All but one of the crew were killed in the ensuing crash.

It was during this period that the RAF began daylight bombing missions too, such was the poor state of the defending Luftwaffe. Numerous missions over the next weeks led to attacks on the coking plants at both Datteln and Hattingen, repeated again on March 17th in attacks at Huls (and Dortmund). Hattingen was again attacked by 218 Sqn aircraft on the 18th without loss.

ROYAL AIR FORCE BOMBER COMMAND, 1942-1945.

Mechanics at work on an engine of Lancaster B Mk. III, (LM577) ‘HA-Q’ “Edith”, of No. 218 Squadron. On March 19th 1945, this aircraft was hit by flak over Gelsenkirchen damaging the rear turret and injuring the gunner’s eye. LM577 went on to complete more flying hours than any other Lancaster on the station.(© IWM (CH 15460))

The remainder of the war would see 218 Sqn fly from Chedburgh, completing many missions until the war’s end. During Operation ‘Manna‘ in which the German Army lifted an embargo on food transport into Holland, ten Lancasters of 218 Squadron dropped food supplies to the starving Dutch below. Understandably April had seen fewer operations than in previous months, but with May seeing many more food trips to the Hague, 218 Squadron leapt to the top of the leader board for operational tours, overtaking both 77 Sqn and 115 Sqn their closest friendly ‘competitors’. With further flights under ‘Manna‘, and then repatriation flights under both ‘Dodge‘ and ‘Exodus‘ 218 Sqn continued to operate the long haul flights into European territory.

During August the big wind down began, and the Lancasters were gradually flown out of Chedburgh for disposal. Then on the 10th, 218 (Gold Coast) Squadron was finally disbanded, and the various crews sent home to their respective territories across the globe.

On August 27th 1945, the last two Lancasters departed Chedburgh, and all was very quiet for those left behind. Then in September, two Polish bomber squadrons arrived, both 301 and 304 Sqns remaining here until they were also disbanded a year later on December 18th, 1946; their Warwicks, Wellingtons and Halifaxes being no doubt scrapped. Whilst here, the Polish squadrons flew long-range transport flights, retaining at least some link to the heavy aircraft and long-range flights that had been common only a year or so before.

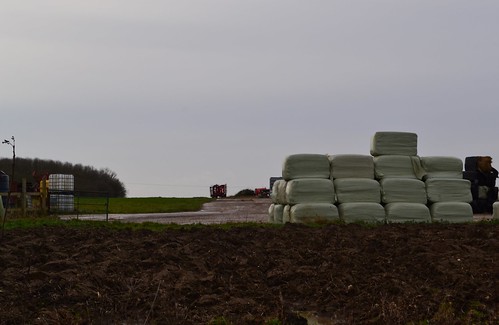
Over the remaining years the airfield, like many, has reduced to both agriculture and industrial use. The watch Office has been heavily modified and lies hidden within an industrial complex that has completely taken over the former technical site. A number of these original buildings still survive and visible from the main A143 Bury St. Edmunds to Haverhill road, the road that separates the airfield from the village opposite. The runways and perimeter tracks, visible only in small parts, are mere concrete platforms, now used to store farm produce and machinery, rather than the lumbering bombers of RAF Bomber Command.

The huts used to house the 1,600 RAF personnel and 240 WAAFs, have all been removed, as have the thirty-six hardstands – the airfield site now being completely agricultural.

RAF Chedburgh

Some technical buildings remain in use today.

Whilst Chedburgh was only built as a satellite airfield, by the end of the war it had been witness to many great sacrifices. Eighty-three aircraft had been lost on operations, all but 12 being Stirlings; eighteen from 620 Sqn and fifty from 214 Sqn. For a period of only fourteen months for 214 Sqn and five for 620 Sqn, this was an appalling loss of life, and one that was sadly mirrored by many bomber squadrons across the British Isles in the 1940s.

Sources and further reading

Much of the specific detail for these loses came from the Chorley, W.R., “Bomber Command Losses series”, published by Midland Counties Publications.

*1 A number of books are available on this squadron. One written by Ron Warburton, ‘Ron’s War‘ chronicles the life of a Flight Engineer of a Lancaster in 218 (Gold Coast) Sqn whilst at Chedburgh in 1945. It is published by RW Press, and available online. ISBN-13: 978-0983178804

A second book is also available, “From St Vith to Victory: 218 (Gold Coast) Squadron and the Campaign Against Nazi Germany“, written by Stephen Smith, and published by Pen and Sword Aviation in 2010 (ISBN10 1473855403). It details the life of 218 (Gold Coast Sqn) from its inception through to its disbandment in 1945.

A blog has also been set up dedicated to those who served in 218 (Gold Coast) Sqn and it gives a detailed history from 1936-1945. It has also been created by Stephen Smith who has also published other books relating to 218 Sqn including “A Short War” and “A Stirling Effort” which relates specifically to their time at RAF Downham Market.  https://218squadron.wordpress.com/

Trail 44 – Kent (Part 3) – Sir Barnes Wallis – His Later Years.

We continue, in Trail 44, looking at the life of Sir Barnes Wallis, a man known for his expertise in engineering and design. Following on from his early works in airship design, we now turn to his Second World War and post war work.

With the outbreak of the Second World War, new designs of aircraft and weapons were much-needed. Wallis’s geodesic design, as used in the R100, had been noticed by another Vickers designer Rex Pierson, who arranged for Wallis to transfer to Weybridge, where they formed a new team – Pierson working on the general design of the aircraft with Wallis designing the internal structures. This was a team that produced a number of notable designs including both the Wellesley and the Wellington; both of which utilised Wallis’s geodetic design in both the fuselage and wing construction.

What made Wallis’s idea so revolutionary was that the design made the air frame both light-weight and strong, and by having the bearers as part of the skin, it left more room inside the structure thus allowing for more fuel or ‘cargo’. An idea that helped provide greater gas storage for the R100.

Whilst both the Wellesley and the Wellington went on to be successful in the early stages of the war (11,400 Wellingtons saw service), they were both withdrawn from front line service by the mid war years, being replaced by more modern and advanced aircraft that could fly further and carry much larger payloads.

Saddened by the rising death toll, Wallis put many of his efforts into shortening the war. His idea was that if you attack and destroy the heart of production, then your enemy would have nothing to fight with; in this case, its power supply. To this end he started investigating the idea of breaching the dams of the Ruhr.

Wallis’s idea was to place an explosive device against the wall of the dam, thus utilising the water’s own pressure to fracture and break open the dam. Conventional bombing was not suitable as it was too difficult to place a large bomb accurately and sufficiently close enough to the dam to cause any significant damage. His idea, he said, was “childishly simple”.

Using the idea that spherical objects bounce across water, like stones thrown from a beach, he determined that a bomb could be skimmed across the reservoir over torpedo nets and strike the dam. A backward spin, induced by a motor in the aircraft’s fuselage, would force the bomb to keep to the dam wall where a detonator would explode the bomb at a predetermined depth, similar in fashion to a naval depth charge. The idea was simple in practical terms, ‘skip shot’ being used with great success by sailors in Nelson’s navy;  but it was going to be a long haul, to not only build such a weapon, the aircraft to drop it, nor train the expert crews to fly the aircraft; but to simply convince the Ministry of Aircraft Production that it was in fact feasible.

Wallis began performing a number of tests, first at his home using marbles and baths, then at Chesil Beach in Dorset. Both the Navy and the Ministry were interested when shown a film of the bomb in action, each wanting it for their own specific target; the Navy for the Tirpitz, and the Ministry for the dams. Wallis still determined to use it on the dams, carried out two projects side-by-side,  “Upkeep” for the dams, and “Highball” for the Navy*3.

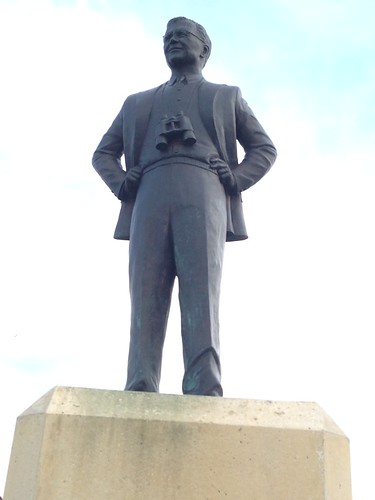
“Upkeep” was initially spherical, and the first drop from a modified Lancaster took place in April 1943 at Reculver near to Herne Bay, where this statue is located. He persevered with aircraft heights, speeds and bomb design modifications, carefully honing them until on April 29th 1943, only three weeks before the actual attack, the bomb finally worked for the first time.

Wallis’s plan could now be put into action, and with a new squadron of the RAF’s elite bomber crews put in place, the stage was set and the dams of Ruhr Valley would be the target.

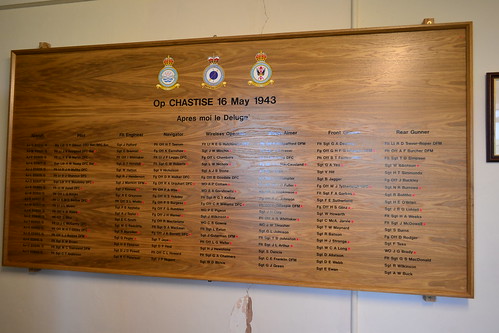
The attack on the dams have become legendary, and of the 19 aircraft of 617 Squadron that took off that May evening in 1943, only 11 returned, some after sustaining considerable damage. Operation Chastise saw two of the three dams, the Mohne and Eder, successfully breached and the third, the Sorpe, severely damaged forcing the Germans to partially drain it for safety.

Scampton September 2015 (17)

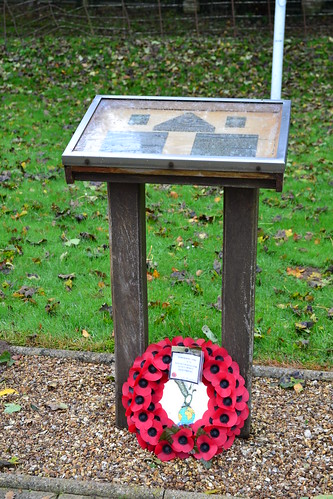
The names of the crews of 617 Squadron at RAF Scampton. Those with poppies next to them, did not return.

Following the success of Operation Chastise, Wallis went on to develop other bombs capable of devastating results. His initial plan, a Ten ton (22,000lb) bomb, had to be scaled back to 12,000lb as there was no aircraft capable of dropping it at that time. Codenamed ‘Tallboy’, it would be a deep penetration bomb 21 feet in length with a hardened steel case and 4 inches of steel in the nose. The bomb contained 5200lbs of high explosive Torpex (similar to that used in the Kennedy Aphrodite mission) and would have a terminal velocity of around 750 miles per hour.

The idea of Tallboy, was to create a deep underground crater into which structures would either fall or be rendered irreparable. With a time fuse that could be set to sixty minutes after release, it was used on strategic targets such as the Samur Railway Tunnel in France, rendering the tunnel useless as it had to be closed for a considerable amount of time.

The crater made by Barnes Wallis’s Tallboy bomb above the Samur Railway Tunnel, 9th June 1944. *4

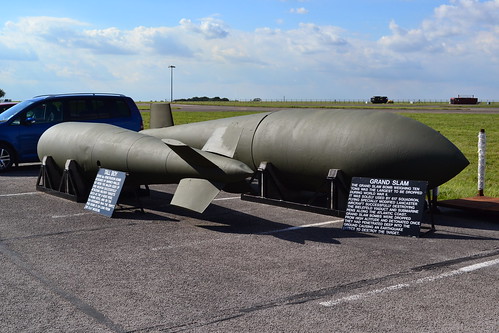
Soon after this, Wallis began developing his Ten Ton bomb, the “Grand Slam”, a mighty 26ft in length, it weighed 22,000lb, and would impact the ground at near supersonic speeds. Wallis’s design was such that the bomb could penetrate through 20 feet of solid concrete or 130 feet of earth, where it would explode creating a mini earthquake. It was this earthquake that would rock the foundations of buildings and structures, or simply suck them into a crater of massive proportions*5.

Production of the Grand Slam was slow though. It took two days for the casting to cool and then after machining, it took a further month for the molten Torpex  to set and cool. The first use of the Grand Slam occurred on 14th March 1945 against the Bielefeld Viaduct in Germany, on which one Grand Slam and 27 Tallboys were dropped. Unsurprisingly, the viaduct collapsed and the railway was put out of action.

Wallis had created more exceptionally devastating weapons, they were so successful that 854 Tallboys and 41 Grand Slams were dropped by the war’s end.

Scampton September 2015 (4)

The Tallboy and Grand Slam bombs, designed by Barnes Wallis.

Post war, Wallis carried on with his design and investigations into aerodynamics and flight. He was convinced that achieving supersonic flight with the greatest economy was the way forward, and in particular variable geometry wings. The government was keen to catch up with the U.S., awarding Vickers £500,000 to carry out research into supersonic flight. Wallis’s project received some of this money, and he researched unmanned supersonic flight in the form of surface-to-air missiles. Codenamed ‘Wild Goose‘ (later ‘Green Lizard’) the project ran to 1954 when it was terminated.

Wallis continued with his research into swing wing designs, his first being the JC9, a single seat aircraft 46 feet in length. It was produced but never completed and was scrapped before it ever got off the ground. Wallis wasn’t put off though, and he continued on developing the ‘Swallow’, a swing wing aircraft that could reach speeds of Mach 2.5 in model wind tunnel investigations.

In its bomber form it would have been equivalent in size to the American B-1, with a crew of 4 or 5, and a cruising speed of Mach 2. It would have a range of 5,000 miles whilst carrying a single Red Beard nuclear bomb.

Whilst not selected to meet the R.A.F.’s OR.330 (Operational Requirement 330), which was eventually awarded to TSR.2, they were interested enough for him to proceed until the 1957 Defence White Paper put an end to the project, and it was cancelled.

Looking for funding Wallis turned to the U.S. hoping they would grant him sufficient funds to continue his work. After many meetings between Wallis and the U.S American Mutual Weapons Development Program at NASA’s Langley research facility, he came away disappointed and saddened that the Americans used his ideas without granting him any funding.

American research continued, eventually developing into the successful General Dynamics F-111 ‘Aardvark’, the world’s first production swing-wing combat aircraft.

Wallis continued with other supersonic and hypersonic investigations; designs were drawn up for an aircraft capable of Mach 4-5, using a series of variable winglets to link subsonic, supersonic and hypersonic flights, many however, never went beyond the drawing board.

Wallis didn’t stop there, he continued with many great inspirational projects: the Stratosphere Chamber, a test chamber where by simulated impacts on aircraft travelling at 70,000 feet could be safely tested and analysed; the Parkes Telescope, a radio telescope in New South Wales; the Momentum Bomb, a nuclear bomb designed to be released at low-level and high-speed, enabling the release aircraft to escape the blast safely, and in the 1960s, a High Pressure Submarine designed to dive deeply beyond the range of current detection.

In recognition of his work, Wallis was knighted in 1968, and he was also made an Honorary Fellow of the Royal Aeronautical Society.

Wallis, after working beyond his forced retirement, died at the age of 83, on 30th October 1979, in Effingham, Surrey. He is buried in the local church, St Lawrence’s Church, in Effingham, a village he contributed greatly to. He was the church secretary for eight years, and an Effingham Parish Councillor, serving as Chairman for 10 years. He was also the Chairman of the Local Housing Association, which helped the poor and elderly of the village to find or build homes; and as a fanatical cricketer, he was Chairman of the KGV Management Committee who negotiated the landscaping of the “bowl” cricket ground, so good was the surface, it was used as a substitute for the Oval in London.

There are numerous memorials and dedications around the country to Wallis, and there is no doubt that he was both an incredible engineer and inventor who made a major contribution to not only the war, but British and world aviation in general.

His statue at Herne Bay overlooks Reculver where the first “Upkeep” bomb was dropped by a Lancaster bomber during the Second World War, and it is a fine tribute to this remarkable man on this trail.

Barnes Wallis at Work

Sir Barnes Neville Wallis.

From here, we continue to travel east, toward the coastal town of Margate. A few miles away is the now closed Manston airport, formerly RAF Manston, an airfield that is rich in History, and one that closed causing such ill feeling amongst many.

Sources and further reading

*3 The Mail online published a report on the discovery of a Highball bomb found in Loch Striven, Scotland in July 2017.

*4 Photo © IWM (CL 4322)

*5 The Independent news website– “Secrets of the devastation caused by Grand Slam, the largest WWII bomb ever tested in the UK.” Published 22/1/14

The Barnes Wallis Foundation website has a great deal of information, pictures and clips of Barnes Wallis.

A list of memorials, current examples of both Upkeep and Highball bombs, and displays of material linked to Barnes Wallis, is available through the Sir Barnes Wallis (unofficial) website.


Trail 44 – Kent (Part 3) – Sir Barnes Wallis – His Early Years

After visiting the many museums and former airfields in the southern and central parts of Kent (Trail 4 and Trail 18) we now turn north and head to the northern coastline. Here we overlook the entrance to the Thames estuary, the Maunsell Forts – designed to protect the approaches to London and the east coast – and then take a short trip along the coastline of northern Kent. Our first stop is not an airfield nor a museum, it is a statue of the designer of one of the world’s most incredible weapons – the bouncing bomb. Our first short stop is at Herne Bay, and the statue of Sir Barnes Wallis.

Sir Barnes Wallis – Herne Bay

Sir Barnes Wallis

The Barnes Wallis statue located at the eastern end of the town overlooking the sea at Reculver.

There cannot be a person alive who has not seen, or know about, the famous Dambusters raid made by 617 Sqn. It is a story deeply embedded in history, one of the most daring raids ever made using incredible ideas, skill and tenacity. There is so much written about both it, and the man behind the idea – Sir Barnes Neville Wallis CBE FRS RDI FRAeS – a man famous for his engineering prowess and in particular the famous ‘Bouncing Bomb’ that was used by Guy Gibson’s 617 Squadron in that daring raid of 16th May 1943. But there is so much more to Barnes Wallis than the Bouncing bombs; he made a huge contribution to British Aviation, weaponry of the Second World War, and later on in his life, supersonic and hypersonic air travel.

He is certainly one the Britain’s more notable designers, and has memorials, statues and plaques spread across the length and breadth of the country in his honour. But he was not just a designer of the Bouncing bomb, his talent for engineering and design led him through a series of moves that enabled him to excel and become a major part of British history.

Born on 26th September 1887 in Ripley, Derbyshire, he was educated at Christ’s Hospital in Horsham, he went on to study engineering in London, and shortly afterwards moving to the Isle of Wight. With the First World War looming, he was offered a chance to work on airship designs – an innovative design that would become widely used by the Naval forces of both the U.K. and Germany.

Wallis cut his teeth in marine engines as an engineer and draughtsman. He began his career in the London’s shipyards, moving to the Isle of Wight after which he broke into airship design. He followed a colleague he had met whilst working as a draughtsman with John Samuel White’s shipyard, together they would design His Majesty’s Airship No.9 (HMA 9).

The design process of HMA 9 was dynamic to say the least. Early non-rigid airships were proving to be very successful, and the new rigids that were coming in – whilst larger and more capable of travelling longer distances with greater payloads – were becoming the target for successive quarrels between the government and the Admiralty. World unrest and political turmoil was delaying their development even though plans for HMA 9 had already been drawn up.

Joining with his colleague, H.B. Pratt in April 1913, at the engineering company Vickers, the two designers began drawing up plans for a new rigid based along the lines of the German Zeppelin. HMA 9 would be a step forward from the ill-fated HMA No. 1 “Mayfly”, and would take several years to complete. Further ‘interference’ from the Admiralty (One Winston Churchill) led to the order being cancelled but then reinstated during 1915. The final construction of the 526 ft. long airship was on 28th June 1916, but its first flight didn’t take place until the following November, when it became the first British rigid airship to take to the Skies.

HMA 9 (author unknown*1)

With this Wallis had made his mark, and whilst HMA 9 remained classed as an ‘experimental’ airship with only 198 hours and 16 minutes of air time, she was a major step forward in British airship design and technology.

The Pratt and Wallis partnership were to go on and create another design, improving on the rigids that have previously been based on Zeppelin designs, in the form of the R80. Created through the pressure of war, the R80 would have to be designed and built inside readily available sheds as both steel and labour were in very short supply. Even before design or construction could begin there were barriers facing the duo.

Construction started in 1917, but with the end of the war in 1918, there was little future as a military airship for R80. Dithering by the Air Ministry led to the initial cancellation of the project, forcing the work to carry on along a commercial basis until the project was reinstated once more. With this reinstatement, military modifications, such as gun positions, were added to the airship once again. With construction completed in 1920, she made her first flight that summer. However, after sustaining structural damage she was returned to the sheds where repair work was carried out, and a year later R80 took to the air once again. After a brief spell of use by the U.S. Navy for training purposes, R80 was taken to Pulham airship base in Norfolk and eventually scrapped. Wallis’s design had lasted for four years and had only flown for 73 hours.

However, undaunted by these setbacks, the Vickers partnership of Pratt and Wallis went on to develop further designs. In the 1920s, a project known as the 1924 Imperial Airship Scheme, was set up where by a Government sponsored developer would compete against a commercial developer, and the ‘best of both’ would be used to create a new innovative design of airship that would traverse the globe. This new design, would offer both passenger and mail deliveries faster than any current methods at that time.

The Government backed design (built at the Royal Airship Works at Cardington) would compete against Vickers with Wallis as the now Chief Designer.

The brief was for a craft that could transport 100 passengers at a speed of 70 knots over a range of 3,000 miles. Whilst both designs were similar in size and overall shape, they could not have been more different. Wallis, designing the R.100, used a mathematical geodetic wire mesh which gave a greater gas volume than the Government’s R101, which was primarily of stainless steel and a more classic design. This geodesic design was revolutionary, strong and lightweight, it would prove a great success and emerge again in Wallis’s future.

Built at the Howden site a few miles west of Hull, the R100 was designed with as few parts as possible to cut down on both costs and weight; indeed R100 had only 13 longitudinal girders half that of previous designs. Wallis’s design was so far-reaching it only used around 50 different main parts.

The design plan of Wallis’ R-100 airship (author unknown*2

The 1920s in Britain were very difficult years, with the economy facing depression and deflation, strikes were common place, and the R100 was not immune to them. Continued strikes by the workers at the site repeatedly held back construction, but eventually, on 16th December 1929, Wallis’s R100 made its maiden flight. After further trials and slight modifications to its tail, the R100 was ready. Then came a test of endurance for the airship, a flight to Canada, a flight that saw the R100 cover a journey of 3,364 miles in just under 79 hours. Welcomed as heroes, the return journey would be even quicker. Boosted by the prevailing Gulf Stream, R100 made a crossing of 2,995 miles in four minutes under 58 hours. The gauntlet had been thrown, and Wallis’s airship would be hard to beat.

The R101 would face a similar flight of endurance, this time to India, and it would use many of the same crew such was the shortage of experienced men. On October 4th 1930, R101 left its mooring at Cardington for India. Whilst over France she encountered terrible weather, a violent storm caused her to crash, whereupon she burst into flames and was destroyed with all but six of the 54 passengers and crew being killed.

The airship competition became a ‘one horse race’, but an inspection of the outer covering of Wallis’s R100 revealed excessive wear, only cured by replacing the skin, an expense the project could barely swallow. With plans already in place for the R102, the project was in jeopardy, and eventually, even after offers from the U.S. Government, it was deemed too expensive, and by 1932 R100, the worlds largest airship and most advanced of its time, had been scrapped and the parts sold off.

Wallis’s airship career had now come to an end, but his prowess and innovation as a designer had been proven, he had set the bench mark that others would find hard to follow.

In the next part, we look at the work carried out by Wallis both during the Second World War and in the later years of his life.

Sources and further reading

*1 Photo from The Airship Heritage Trust website.

*2 ibid

RAF Bardney to become a Shooting Range

After the closure of many of Britain’s wartime airfields, many were returned to agriculture or converted for use by light industry. Some were completely removed and some developed into housing. RAF Bardney, located a few miles to the east of Lincoln, has since been one of those used for a multitude of light industrial and agricultural uses and has been the recent subject of a planning application.

Bardney was home to three RAF squadrons during World War Two: Nos 9, (April 1943 – July 1945);  No. 227, who were reformed here at Bardney from ‘A’ flight of No. 9 Sqn and ‘B’ flight of 619 Sqn, staying for two weeks in October 1944; and finally No. 189 Sqn (April – October 1945) – all three squadrons operated the Lancaster MKI and MKIII.

During their stay here, No. 9 Sqn operated as part of 5 Group Bomber Command, using the Squadron code ‘WS’, and after moving in from nearby Waddington, they carried out a number of operations into the German heartland losing fifty-nine aircraft during 1943, half of which were whilst based here at Bardney.

The first fatality occurred on April 30th, when Lancaster III WS-R, ‘KD838’ was lost without trace in an operation to Essen. None of the seven crew members were ever found nor was there ever any trace of the aircraft.

9 Squadron was a mix of nationalities: British, Australian, Canadian, Rhodesian and Trinidadian. As with KD838, a large number of these crews were lost without trace, and as such, have no known grave – their memories being carved into the walls of the Runnymede Memorial.

ROYAL AIR FORCE BOMBER COMMAND, 1942-1945.

Lancaster Mk III, ED831 ‘WS-H’, of No 9 Squadron RAF, flown by Squadron Leader A M Hobbs RNZAF and his crew, at Bardney. © IWM (CH 10405)

In the dying stages of the war, Bardney was used by the RAF’s Bomber Command Film Unit, flying Lancasters and Mosquitoes, the unit was itself eventually disbanded at Upwood later in the same year.

Post war Bardney was used  as a Thor missiles base by No. 106 Squadron (July 1959 – May 1963), before its eventual closure and final disposal.

A planning application was originally submitted in September 2016 for a:

“Change of use and conversion of existing agricultural land and associated outbuildings to provide an outdoor activities centre providing archery, air rifle shooting, axe throwing, combat archery and zombie training, and the construction of earth bunds to a maximum height of 3.0metres (bunds already constructed), in accordance with the amended plans received by the Local Planning Authority on 15th November 2016”.

Objections were put forward by local people and comments made by other interested bodies such as Environmental Health, Health and Safety and the Economic Development Team. Permission was initially granted in December that year. There are certain conditions in the terms of the decision, but it seems more than likely that the development will progress as planned.

The proposal and supporting documents can be found on the East Lindsey District Council Planning site.

The story first appeared in ‘Lincolnshire Live‘ news report on May 27th 2017.

Sqn. Ldr. Ian Willoughby Bazalgette (RAFVR) VC

RAF Downham Market was one of a small number of airfields that were home to the RAF’s Pathfinder Squadrons. Elite airmen who would lead formations of heavy bombers into some of the most heavily defended areas of the Reich, often against insurmountable odds and always at great risk to themselves. The Pathfinders produced some remarkable flyers and many, many heroes. Of all the crews who flew with 8 Group PFF, only three were rewarded for their valour and gallantry with the highest possible accolade, the Victoria Cross. One of those went Posthumously to Sqn. Ldr. I. W. Bazalgette, whose long and distinguished career led him to achieving 58 missions before his death. Based at RAF Downham Market, Bazalgette, would become legendary, flying his Lancaster bomber in pursuit of victory against a tyranny beyond all evil.

Ian Willoughby Bazalgette.jpg

Sqn Leader Ian Bazalgette (RAFVR) died August 4th 1944, a few days before his 26th Birthday.*1

Squadron Leader Ian Willoughby “Baz” Bazalgette was born on October 19th 1918 in Calgary, Canada and was the youngest of three children. His parents decided to move to England in 1924 when he was six, settling in New Malden, Surrey on the outskirts of London.

During his school life he developed a passion for music, and in particular Classical Music, which he immersed himself in spending hours listening to and writing about.

As a teenager, he would have his first real battle, that of tuberculosis, which meant he would have to undergo four long months of hospital treatment. Bazalgette’s strength and determination would see him pull though this, a strength and determination that would go on to show itself on a number of occasions later on during his RAF career. 

Prior to the outbreak of war, Bazalgette decided to enlist, applying to, and being accepted by, the Royal Artillery; achieving a commission as Second Lieutenant within a year. This new role took him to the outskirts of Edinburgh operating a radar searchlight, protecting both the city, and the Forth Estuary from Luftwaffe bombers. Dissatisfied with the routine of searchlight activities, he decided to give up this role, and whilst on a trip into nearby Edinburgh in March 1941, he applied to the Royal Air Force Volunteer Reserves. His application was accepted and in the following July, he received his first posting to a training unit – 22 Elementary Flying Training School at Cambridge.

Throughout his training Bazalgette showed great tenacity and promise, quickly passing  a number of stringent and difficult flying tests. Flying solo for the first time during August, gave him the opportunity he had been longing for. His flying skills impressed his seniors so much that on the 28th, he passed the C.O.s test taking just 30 minutes to complete the flight. Upon passing, he was graded as an ‘above average’ pilot by his examiners.

Bazalgette was then transferred to Cranwell where he trained on Airspeed Oxfords. At Cranwell he achieved his wings, and after a short break, he was sent to Scampton and 18 Beam Approach School. Bazalgette eventually left Scampton, heading towards his first operational unit, 25 Operational Training Unit, where he would form his first crew.

Informal crewing up was very much encouraged by the RAF, but those that didn’t manage the task were allocated crew members by the relevant staff at the various bases; Bazalgette had no problems in finding his own.

Whilst at the OTU, Bazalgette would have his first experience of heavy bombers flying the Vickers Wellington; a remarkable aircraft that used Barnes Wallis’ geodesic construction in Rex Pierson’s design.  Bazalgette and his crew competed a range of training flights whilst at 25 OTU, including air gunnery and bombing practice, all of which they passed. On September 18th 1942, after accumulating some 223 hours as a pilot, Bazalgette received his first posting to a fully operational Squadron, 115 Squadron at RAF Marham, Norfolk, he was off to war.

The very next day he flew “Second Dickie” assisting an experienced crew tackling the rigours of an operational sortie to Saarbrucken. Two days later he was back out, but this time laying mines on a ‘Gardening’ mission shortly before the squadron moved to nearby RAF Mildenhall in Suffolk. It was here that Bazalgette would fly his first operational mission as a pilot leading his own crew.

After moving to East Wretham, 115 squadron then began the task of replacing their Wellingtons with Stirlings, and Bazalgette was sent to 1567 Operational Conversion Unit (OCU) to convert to the big heavy four-engined aircraft. Between him completing the course and returning to East Wretham though the Stirling had been superseded, proving to be a poor performer in conflict zones. Bazalgette would now get his chance to fly the legendary Lancaster.

On the 3rd April 1943, Bazalgette was awarded the DFC, and the same strength and determination that had got him though tuberculosis would get him through his tour of 30 missions. On completion, as was customary at this point, he and his crew were separated and scattered across a range of new squadrons within the Air Force.

Bazalgette was sent back to Scotland and RAF Lossiemouth where he reluctantly trained new bomber pilots, a position he disliked immensely. He pleaded for postings to an operational unit, a plea that was eventually granted in April 1944, and a posting to RAF Warboys and the Pathfinder Conversion Unit.

From here he transferred with a new crew to 635 Squadron at RAF Downham Market, in Norfolk, a few miles west of Marham the very station he had spent his early days at with 115 Sqn.

As a model crew, he was looked up to by others at Downham Market. He would go on to fly 58 missions in total, two off his score of two tours of duty.

However, his 58th mission would be his last. On August 4th 1944, Lancaster ‘M’ for Mother would not be listed for duty, but an absent crew left an opening that Bazalgette and his crew jumped at. It was a decision that would change their lives forever.

On that day, Bazalgette would fly Lancaster Mk III, F2-‘T’ for Tommy, not their usual aircraft but it was ready, fuelled and bombed up. The aircraft was known for a history of mechanical problems, its usual pilot tending to work the engines much harder than necessary, but it was a choice of stay on the ground or fly the mission: for Bazalgette and the crew of ‘M’ for Mother it was an easy choice.

The mission for the day was as Master Bomber of the Pathfinder squadron to identify and mark a V1 storage site at Trossy St. Maximin, a heavily defended area to the north of Paris. Take off was set for 11:00, over the next fifteen minutes at five-minute intervals, 14 Lancasters of 635 Sqn would leave Downham Market heading for France. The weather was less than 3/10 cloud over the target, excellent for the determined and accurate anti-aircraft gunners below. On the second run in to the target, the Master Bomber and Deputy Master bomber were both hit, one being downed (PA983 F2-A piloted by F/L. R. W. Beveridge) and the second forced to return home, leaving Bazalgette as the lead aircraft.

Flak was incredibly intense and his aircraft repeatedly hit. The starboard wing was struck causing damage to both engines, subsequently putting them both out of action. In the wing the fuel tanks caught fire, fuel poured into the rear of the fuselage and the situation becomes desperate. The bomb aimer was mortally wounded, his arm barely recognisable due to his injuries, but Bazalgette managed to reach the target, drop both his markers and his bombs, whereupon the aircraft began a steep spin toward the ground below. As the situation worsened, he gave the order to bail out, all but three; Bazalgette, F/Lt. I. A. Hibbert and F/Sgt. V. V. R. Leader are left.

Bazalgette continued to fight with the controls and quite remarkably managed to keep the stricken bomber flying long enough to avoid the French village of Senantes. Unable to maintain height, the aircraft finally hit the ground, resting momentarily before exploding in a massive fireball killing all those remaining on board.

Once the ferocious fire subsided, locals were able to reach the wreck and remove the bodies of both Leeder and Hibbert. Bazalgette’s remains were not found until the air frame was removed, some days later.

For his bravery and sacrifice, Ian Bazalgette was awarded the V.C., the highest honour for military personnel. The London Gazette, of 14th August 1945, published the following:

On 4th August 1944 Squadron Leader Bazalgette was “Master bomber” of a Pathfinder Squadron detailed to mark an important target for the main bomber force. When nearing the target his Lancaster was seriously damaged and set on fire by anti-aircraft fire; the bomb aimer was badly wounded. As the deputy “Master bomber” had already been shot down, the success of the attack depended on Squadron Leader Bazalgette who despite appalling conditions in his burning aircraft pressed on gallantly, bombed, and marked the target accurately. That the attack was successful was due to his magnificent effort. The condition of the aircraft had by now become so bad that Squadron Leader Bazalgette ordered his crew to leave the aircraft by parachute. He attempted the almost hopeless task of landing the crippled and blazing aircraft to save the wounded bomb aimer, and one air-gunner, who had been overcome by fumes. With superb skill and taking great care to avoid a French village, be brought the aircraft safely down. Unfortunately it then exploded and this gallant officer and his two comrades perished. His heroic sacrifice marked the climax of a long career of operations against the enemy. He always chose the more dangerous and exacting roles. His courage and devotion to duty were beyond praise.

Ian Bazalgette’s sacrifice marked the end of a career covering an incredible 58 operational missions. His courage, determination and devotion to duty going way beyond those expected of any serving officer. With him that day on ‘T’ for Tommy were: Sgt. G. R. Turner; F/L. G. Goddard; F/L. I. A. Hibbert DFC; F/O. C. R. Godfrey DFC; F/S. V. V. R. Leeder (RAAF) and F/O. D. Cameron DFM. Of the four men who manged to get out of the aircraft: Turner, Goddard, Godfrey and Cameron, all managed to evade capture*2.

In his honour, Bazalgette has a Garden in New Malden, Surrey named after him, a school in Calgary, the ‘Ian Bazalgette Junior High School’, and at the Bomber Command Museum of Canada, an Avro Lancaster, FM159, was painted in the markings of his aircraft; the Lancaster was dedicated in 1990. At the ceremony, Bazalgette’s sister, Mrs. E. Broderick, unveiled a commemorative plaque whilst the aircraft itself was unveiled by two of Bazalgette’s former crew members, Chuck Godfrey DFC and George Turner, both of whom were with him of that fateful night.

Outside the church of St. Mary’s at Bexwell close to the accommodation sites of Downham airfield, stands a small memorial in his name. Laying beside him is the memorial of another V.C. winner Arthur Aaron, who was also based at RAF Downham Market during the Second World War.

Ian Bazalgette was one of those many young men who sacrificed their lives in the hope of saving others. He dedication to duty, determination to win and above all, his value of other’s led to a tragic and sad end, that shall forever be remembered in the hearts and minds of those who lived through those terrible years 1939-45.

RAF Downham Market

The memorial at St. Mary’s Church Bexwell.

RAF Downham Market appears in Trail 7: Northwest Norfolk.

There is a book written listing every operation of 635 Sqn whilst at RAF Downham Market, with crew details, aircraft profiles and mission aerial photographs. It is an amazing record and the result of three years work. The author Christopher Coverdale, is also on the committee aiming to construct the new memorial at RAF Downham Market.

Notes and Further Reading.

Coverdale C. ‘Pathfinders 635 Squadron – definitive history March 1944 – September 1945‘ Published by Pathfinder Publishing, 2009. ISBN: 978-0-9561145-0-1

The Bomber Command Museum of Canada website has a detailed account of the restoration of Lancaster FM159.

*1 Photo IWM – CH 15911 in the public domain.

*2 Chorley, W. R. ‘Bomber Command Losses of the Second World War‘ Vol 5, 1944, 1997

Other records of heroism and crew stories can be found on the Heroic Tales page.

The Borders – RAF Charterhall (Part 3)

We carry on from Part 2 of Trail 41 for the final Part of RAF Charterhall. An airfield that had become known as ‘Slaughterhall’ it was about to see a new breed of aircraft, perhaps even a turn in luck.

RAF Charterhall

The main runway at Charterhall looking south.

The night of May 27th – 28th 1944 was a heavy night for Bomber Command, with large numbers of four engined heavies attacking targets in Germany.  On their return, ten Lancaster bombers were diverted to Charterhall, the first time the four engined bombers would use the airfield, but not the last. On the 8th June, another seven were to arrive, also diverted on their return from the continent. Then in July, a Halifax was diverted here after sustaining heavy flak damage over Helioland. The pilot, P/O W. Stewart of the RCAF and navigator P/O K. Evans (RAF) were both awarded DFCs for their action whilst badly injured, such was the determination to get all the crew and aircraft back safely.

July to October saw an increase in flying and an increase in accidents. July ‘led the way’ with heavy landings, burst tyres, ground collisions and engine failures being common place. The majority of these incidents were Beaufighter MKIIfs, some were visiting or passing aircraft who suffered problems and had to divert. Charterhall saw a mix of Lysanders, Barracuders, Beauforts, Wellingtons and Hurricanes all use Charterhall as a safe haven.

As the threat of attack was now diminishing, a reorganisation of the O.T.Us would see 9 Group disband in September that year. The responsibility of 54 O.T.U (now flying mainly Mosquitoes) and Charterhall would now pass to 12 Group.

Eventually 1944 turned to 1945 and the year that saw for 17 fatal crashes also saw 54 O.T.U. take on more aircraft and more crews.

January 1945 was incredibly harsh in terms of weather and the cold. Training new crews on new radar meant that Wellingtons were brought into Charterhall. Small teams of pupils would take turns to operate the radar to detect Hurricane ‘targets’. These new models increased the air frame numbers at Charterhall to 123 by the end of January.

RAF Charterhall

‘No. 1’ Building on the Technical site.

By now the allies were winding their way into Germany, pressure was increased by Bomber Command and so more heavies were to find Charterhall a refuge when the weather closed in. On the 15th February a large ‘Gardening’ operation led to 12 heavies landing at Charterhall along with four Mosquitoes who had been flying with them over Norway. All these aircraft were able to return to their various bases at Skipton-On-Swale, Leeming and Little Snoring the next day.

Two days later, more aircraft were to find Charterhall (and Winfield) needed. Some 266 aircrews – an incredible influx for one night – were going to need bedding – billiard tables, sofas and chairs suddenly became in very short supply.

The poor weather continued well into the year and snow caused some ‘minor’ accidents at Charterhall. The first confirmed death was not until early March and others were to follow. By May the war had come to an end and operations began to wind down. Winfield was closed and crews returned to Charterhall. Beaufighters were gradually sold, scrapped or moved elsewhere, and by August the last aircraft had left.

March would see the last fatalities at Charterhall, both in Mosquitoes on the 25th and 29th. In the former, the aircraft was in a high-speed vertical crash and the latter the pilot, Flight Lieutenant Cole (s/n125484), overshot the runway and crashed his Mosquito FBVI (HR297) a mile south of the airfield. He was 22.

Apart from a small detachment of crews from 770 Squadron Naval Air Branch carrying out trials, operations began slowing down. After VJ day, the Mosquito numbers were also wound down, only fifty-one aircraft remained by the end of August.

In September the order came through to vacate Charterhall and the packing began. By the end of the month 54 O.T.U. had all but vacated leaving Charterhall quiet once more. The last eighty aircraft consisting of: Mosquito VI,  XVII and NF30s, Martinets, an Oxford, Miles Master II, Ansons, Hurricane IICs and Wellington XVIIIs were flown out for the final time, 54 O.T.U. had played its part and their end lay ahead.

In the three years that Charterhall had been in operation, they had passed over 800 crews for night fighter operations, they had suffered over 330 accidents, 56 of which had resulted in deaths. During this time crews had flown just short of 92, 000 hours flying time day and night, with almost a third being carried out at night. Had it not been for this unit, the heavy bombers of Bomber Command may well have suffered even greater losses, the determined and deadly night fighters of the Luftwaffe may have had a much wider and easier reign over our skies and the losses we quote today would be even higher.

But the withdrawal of 54 O.T.U. was not the demise of Charterhall. For a short period it was set up as No 3 Armament Practice Station, designed to support and train fighter pilots in the art of gunnery. During its period here November 1945 – March 1947 it would see a range of aircraft types grace the runways of Charterhall.

The first units were the Spitfire IXB of 130 squadron from December 1st 1945 – January 24th 1946, followed by 165 Squadron’s Spitfire IXE between 30th December and January 24th 1946. On the day these two squadrons moved out, Charterhall entered a new era as the jet engines of Meteor F3s arrived under the command of 263 Squadron. After staying for one month they left, allowing the Mustang IVs of 303 (Polish) Squadron to utilise the airfield. Each of these squadrons followed a course which included air-to-air target practice, ground attack, bombing and dive bombing techniques.

Following the completion of the course 303 pulled out and the order was given to close No. 3 Armament Practice Station and wind Charterhall down for good. The RAF sent no further flying units here and apart from a detachment of Mosquitoes from 772 Squadron of the Fleet Air Arm, by the following summer, it had closed. The final spin of the airscrew had taken place.

Post war, the airfield was left, the runways and buildings remained intact and the airfield was used by small light aircraft. Gradually though it fell into disrepair, used mainly for agriculture, it had a new lease of life when on Saturday May 31st, 1952, the airfield saw its first motor race using sections of the perimeter track and runways. A two-mile track became the proving ground for a number of the worlds most famous racing drivers including: Sir Stirling Moss, Jackie Stewart O.B.E., Roy Salvadori, Sir John Arthur ‘Jack’ Brabham, AO, OBE, Giuseppe “Nino” Farina and local boy Jim Clark O.B.E. Clark cut his racing teeth at Charterhall, eventually winning 25 Grand Prix races and the Indianapolis 500 in 1965. His grave lies in nearby Chirnside cemetery alongside his mother and father. Charterhall also saw the appearance of Scotland’s first organised sports car team, ‘Ecurie Ecosse’, using Jaguar cars*4. Racing occurred here until 1969, when the current owners took over the site.

The RAF then returned briefly in late 1976 undertaking trials of the Rapier ground-to-air missile system, in which a range of fast jets including Jaguars and Phantoms would participate. These lasted a month which would see the last and final RAF involvement end.

The owners reinvigorated the site providing a venue for rally sport events which started again in 1986. Eventually on March 30th, 2013, the last ever race was run and motor sport stopped for good and so another era finally came to a close.*5

RAF Charterhall

Jim Clark’s grave stone at Chirnside.

Today a section at the western end of the main runway is still available for use by light aircraft (with prior permission) and the main technical area is home to the Co-op Grain store, a facility which has a number of large stores for drying and storage of grain.

Accessing the site is from the B6460 where a memorial stands to the crews who passed through Charterhall and in particular Flight Lieutenant Hillary and Flight Sgt. Fison, who died in such tragic circumstances. A track leads all the way to the airfield site, which was the main entrance to the airfield. A good quantity of buildings still stand here on the technical site along with two of the original hangars. All of these are used for storage or stabling of animals including horses and are rather rundown. The perimeter track and runways are complete but their surfaces are breaking up and in a poor state of repair.

These buildings are a remarkable and poignant reminder of the tragic but significant years that Charterhall prepared and developed crews for the night fighter squadrons of the RAF. Hundreds passed through here, for many it was a difficult twelve weeks, for some it ended abruptly and decisively. Not known for its comforts, it was a pivotal station in the Second World War and indeed also for many years after for the those who went on to become some of the world’s most famous motor racing drivers.

Many airmen came and stayed, sixteen of them who were killed on active service whilst at Charterhall are buried in the nearby cemetery at Fogo, a short distance to the north of the airfield. Many are from around the commonwealth who came here to help and were never to return.

After leaving Charterhall, we head a little further east to Charterhall’s satellite and a site that had strong links with the forces of Poland. Remembered here is an usual mascot, a bear known as ‘Wojtek’. We stop off a few miles away at the satellite that was RAF Winfield.

Sources and further reading

*4 Obituary of Bill Dobson: ‘Ecurie Ecosse’ racing driver in ‘The Scotsman‘ newspaper 21st October 2008.

*5 A news report of the event can be read on ‘The Berwickshire News‘ Newspaper, 28th March 2013.