The 392nd – The Highest Degree of Bombs on Target.

In the northern reaches of Norfolk lies an airfield that was the most northerly American base of the Second World War in East Anglia. Of all its crews that flew on the first mission, only four were still around to fly on the 200th a year or so later. This airfield was home to only one operational flying group, a group that was cited for its incredible bombing accuracy over occupied Europe. In this trip, we visit Station 118, otherwise known as RAF Wendling.

 RAF Wendling (Station 118)

On 15th January 1943, a new bomb Group was formed at Davis-Monthan Field in Arizona, it would be the 392nd BG and would consist of four squadrons: the 576th, 577th, 578th and 579th Bomb Squadrons. On completion of its training, the 392nd would leave the United States, and fly across the Atlantic to their new base in England. These four squadrons would be the first to operate the newly updated B-24 ‘H’ model ‘Liberators’; an improvement of the previous variants by the addition of a motorised front turret, improved waist gun positions and a new retractable belly turret. The supporting ground echelons had left the United States, sailing on the Queen Elizabeth from New York, much earlier, and before the group had received these newer models. As a result, they had neither received any training, or gained any experience with these new updated variants. The arrival of these new aircraft would therefore be met with some surprise, followed by a steep learning curve supported by additional training programmes.

The first B-24s of the 392nd arrived at Wendling, Norfolk, on 15th August 1943, and would soon be joined by the 44th at nearby Shipdham, the 389th at Hethel and the 93rd at Hardwick; four Groups that would be combined to form the Second Bombardment Wing (later 2nd Bombardment Division)*1. Battle hardened from fighting in the Mediterranean Theatre, these other three groups knew only too well the dangers of bombing missions, all having suffered some heavy losses themselves already.

Wendling’s Watch office before it was modified (see below) (IWM FRE 1670).

During September 1943,  the 392nd joined with these other three units flying missions under Operation ‘Starkey‘; probing German defences and gauging their responses to massed allied attacks on coastal regions. Largely uneventful they went on to undertake diversionary missions over the North Sea, the first three being escorted by fighters, and without incident. On the fourth however, the fighters were withheld and the bombers struck out alone.

On this particular flight, 4th October, 1943, the 392nd would gain their first real taste of war, and it would be an initiation they would rather forget. During the battle over thirty Luftwaffe fighters would shoot down four B-24s with the loss of forty-three crew members. A further eleven were injured in the remaining bombers that managed to continue flying and return home – it was not a good start for the 392nd.

Licking its wounds, they would then be combined with more experienced units, flying multiple missions as far as the Baltic regions before returning to diversionary raids again later that month. Viewed with some misgivings by crews, these ‘H’ model Liberators were soon found to be heavier, slower and less responsive at the higher altitudes these deeper missions were flown at.

The 392nd would take part in many of the Second World War’s fiercest operations; oil refineries at Gelsenkirchen, Osnabruck’s marshalling yards and factories at both Brunswick and Kassel were just some targets on the long list that entered the 392nd’s operations records book.
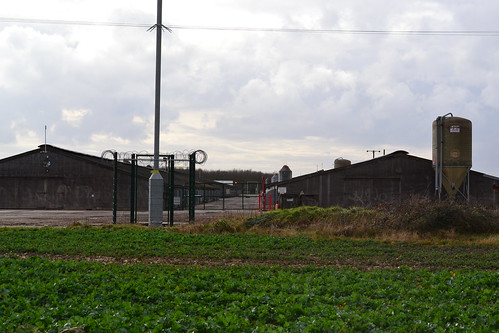
RAF Wendling (Beeston)

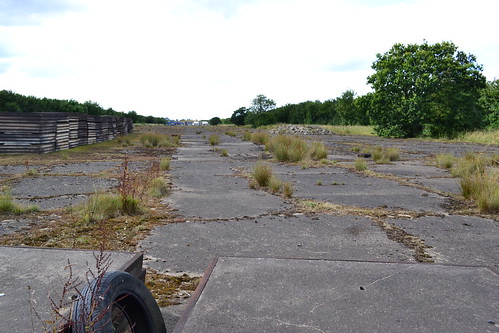
Wendling’s runway looking West.

The massive effort of ‘Big Week’ of February 20 – 25th saw the 392nd in action over Gotha, in an operation that won them a DUC for their part. Upon entering enemy airspace, the formation was relentlessly attacked by Fw-190s, Me 110s and Ju 88s using a mix of gun, rockets, air-to-air bombing and even trailing bombs to disrupt and destroy the groups. Ironically it was the very same twin-engined aircraft and component factory that was the intended target that day; a focus of the Second Bomb Division in an operation that saw the lead section, headed by aircraft of the 2nd Combat Wing, bomb in error due to the bombardier collapsing onto his bomb release as a result of oxygen starvation. Unrelenting the 392nd carried on. They realised and ignored the major error, and flew on to drop 98% of their bombs within 2,000 feet of the intended target. This highly accurate bombing came at a high cost though, Missing Air Crew Reports  (MACR) indicate seven aircraft were lost, with another thirteen sustaining battle damage.

The 392nd would carry on, with further battles taking their deadly toll on both crews and aircraft. In March that same year, the 392nd would turn their attention to Friedrichshafen – a target that would claim further lives and be the most costly yet.

Even before entering into enemy territory, losses would be incurred. Flying in close formation, two B-24s flew too close – one through the prop wash of another – which caused them to collide bringing both aircraft down.  One of those B-24s #42-109824 ‘Late Date II‘, lost half of its crew.

Despite good weather over the target the attack on Friedrichshafen in southern Germany, would have to be led by pathfinders. In an attempt to foil the attackers, the Germans released enormous quantities of smoke, enveloping the town and concealing it from the prying eyes high above. Of the forty-three bombers to fall that day, half were from the 14th Combat Wing of which fourteen came from the 392nd. Despite losses elsewhere, this would prove to be the worst mission for the 392nd, in all some 150 crew men were lost that day.

Bombing targets in Europe was never straight forward and bombs often fell well away from the intended site. On one rather unfortunate occasion at the end of March, the 392nd joined the 44th BG in mistakenly bombing Schaffhausen, a town in neutral Switzerland. The event that not only deeply upset the Swiss, but heavily fed the Nazi’s determined propaganda machine.

Eventually March, and its terrible statistics, was behind them. The 392nd would then spend the reminder of 1944 supporting ground troops, bombing coastal defences in the lead up to D-day (their 100th mission), airfields and V-weapons sites in ‘NOBALL‘ operations. Like many of their counterparts they would support the St. Lo breakout, and hit transport and supply routes during the cold weeks of the Battle of the Bulge.

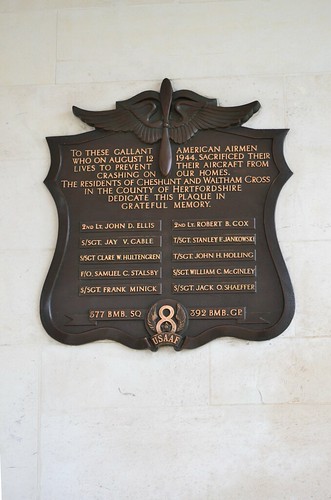
It was during this time, on 12th August 1944 that heroic pilot, 2nd Lt. John D. Ellis, flying B-24H #42-95023, would manage to steer his stricken aircraft away from a residential area at Cheshunt, some 15 miles north of London,  crashing the aircraft near to what is now the A10 road. Sadly all on board were killed in the incident but undoubtedly the lives of many civilians were saved, and a memorial in their memory lies in the nearby library at Cheshunt and on the wall at Madingley, the American War Cemetery, Cambridge.
DSC_0572

The Memorial Plaque at the American War Cemetery, Madingley, Cambridgeshire.

This was not to be the only accident that the 392nd (nor any other B-24 unit) were to suffer. Crews were finding that these heavier machines were difficult to get out of if hit by flak or attacking fighters. Ferocious fires in the wing tanks and fuselage were leading to many losses, and in particular, the pilots who after fighting to keep aircraft stable long enough for crewmen to jump out, were then finding it viciously spinning the moment they let go of the controls.

On February 16th 1945 Liberator #42-95031 ‘Mary Louise‘ flown by 1st Lt. Albert J. Novik, was hit by falling bombs from another aircraft flying above him. After wrestling for some four and half hours to keep the aircraft flying, he ordered the crew out and then attempted to leave the aircraft himself. This event occurred only a month after a similar incident where he had managed to dive through the open bomb bay to safety. In this instance though, Novik was pinned to the roof as the bomber, half its tail plane missing, spun violently towards the Norfolk landscape beneath. Eventually, after a 7,000 ft fall, he was released from this centrifugal grip by a change in the aircraft’s direction. He managed to crawl down from his position and throw himself out through the bomb bay just seconds before the aircraft exploded, sending burning aircraft parts tumbling all around him. For his actions Novik was awarded the DFC, but many others were not quite so lucky, and perished in these huge lumbering giants of the sky.

On April 25th 1945, Mission 285, the 392nd BG prepared for what would be their last mission of the war. The Target, Hallein Austria. Not only would it end the 392nd’s aerial campaign, but that of the Eighth Air Force, bringing the air war in Europe to an end for the American units based in England.

By then, the 392nd had conducted some 285 missions with a high rate of loss, some 184 aircraft in total, with over 800 young men killed in action. They had dropped around 17,500 tons of bombs on some of the highest prestige targets in the German heartland. The group was cited by Major General James Hodges for its degree of accuracy for bombs on target – higher than any other unit of the 2nd Air Division over 100 consecutive missions. Operations had ranged from Norway to southern France and as far as the Baltic and advancing Russian armies at Swinemunde. Over 9,000 decorations were handed out to both air and ground crews for bravery and dedication.

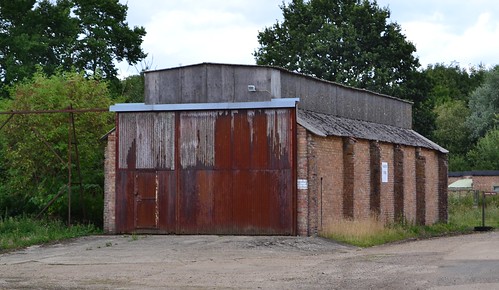
Bomb dump buildings

One of several bomb dump buildings now a nature reserve.

After flying food supply missions to the starving Dutch, the 392nd departed Wendling and the site closed down, remaining dormant until it’s disposal in 1963/4.

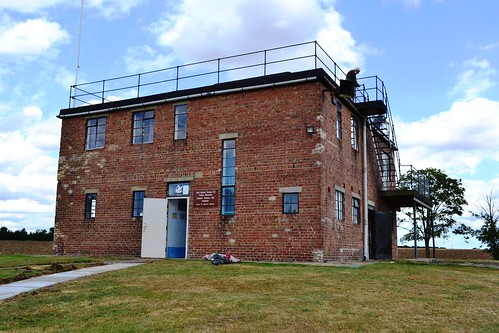
RAF Wendling, otherwise known as Beeston from the nearby village, was classified as Station 118 by the Americans. Initially intended as an RAF Bomber base it was updated during the winter of 1942/43 opening in the summer of 1943. It would have 3 concrete runways of class ‘A’ specification, one of 2000 yards and two of 1,400 yards. The bomb dump which survives today as a nature reserve, was to the south-east, whilst the technical area is to the north-west. Two T2 hangars were located near to these sites and the watch office (drawing 5852/41) seems to have been modified in 1943 with the addition of what may have been a Uni-Seco control room (1200/43). Originally built with an adjoining Nissen hut (operations / briefing room) this is now encompassed within another more modern building, and is not visible from the outside.

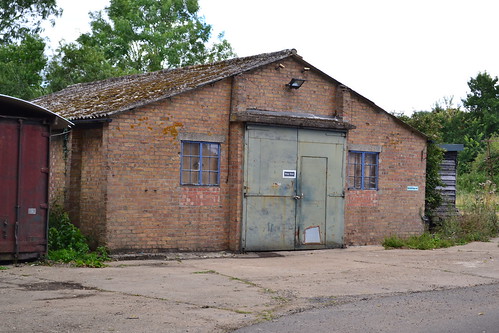
Around the perimeter were a mix of ‘pan’ (28) and ‘spectacle’ (26) style hardstands, all of which have since been removed or built upon. The technical area, housing a range of: stores, workshops, huts and associated buildings, were to the north-west also. Interestingly, Wendling used Orlit huts, built by the Orlit Company of West Drayton, a mix of panel and concrete posts they were more economical than the British Concrete Foundation (BCF) huts initially ordered by the Ministry of Works.

Today, parts of two of the main runways still survive, housing turkey farms these buildings synonymous with Norfolk. The third was removed and the perimeter track has been reduced to a path. The bomb dump is part of a local nature reserve which has very limited parking, but access to the remaining buildings there is straight forward. Many of the buildings from the remaining twelve accommodation sites have been removed, however a number are still believed to be standing bound in heavy undergrowth, or used by local businesses. One currently retains a huge mural covering an entire wall, with evidence of others also within the same building.

DSC_0114

A stunning memorial now stands in memory of those who served.

Unfortunately when I visited Wendling, daylight ran out forcing me to make a retreat and head for home – a return visit is certainly planned for later. Like many other airfields in this part of the country, losses were high, and the toll on human life dramatic, both here, ‘back home’ and of course, beneath the many thousands of tons of high explosives that were dropped over occupied Europe. Now a high number of these sites house turkey farms, small industrial units or have simply been dug up, and forgotten. I hope, that we never forget and that they all get the honour and respect they deserve.

On a last note, there is a remarkable memorial in the Village of Beeston to the west of the airfield site. This is in itself worth a visit. Not only does it mention the 392nd, but all the auxiliary units stationed on the base, something we often forget when considering the Second World War. A nice and moving end to the trip.

DSC_0117

Memorial to the 392nd BG at Wendling.

Notes and further reading.

Wendling forms part of Trail 10.

*1 September 1943 saw a reorganisation of the US Eighth Air Force, and in September, the ‘Wings’ designation was changed to ‘Divisions’. Then in early 1944, a further reorganisation led to further strategic changes of the Air Force, one of which, saw the 44th and 392nd join with the 492nd to form the 14th Combat Wing, 2nd Bomb Division. Both  the 389th and the 93rd became part of the 2nd and 20th Combat Wings respectively.

A detailed website covering every mission, aircraft and most crew members offers a good deal of information and supporting photographs. It is well worth a visit for further more detailed information .
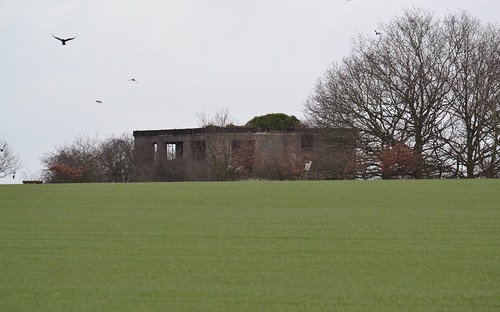
RAF North Pickenham – The Worst Record of the Eighth

There were many airfields in the eastern region of England during the Second World War, and countless crews were lost flying in combat operations. Undeterred and undaunted by these losses, many continued the brave fight to release Europe from the evil grip that was slowly strangling it. Loses were high, but at one particular airfield, the loses of one Group were the highest, and of those that came here, few were to return home alive.

In Trail 9 we visit RAF North Pickenham, an airfield with a short life, but one with a terrible tale of loss and sacrifice.

RAF North Pickenham (Station 143)

RAF North Pickenham was built in the later part of the Second World War (1943/44) and was officially handed over to the USAAF, 492nd Bomb Group (BG), on May 22nd 1944, by an RAF Officer during a ceremonial hand-over parade. This handover would see the culmination of USAAF takeovers of British Airfields – some sixty-six in all. America’s ‘friendly invasion’, would result in eighty-two major operational units moving to the UK, all of which would occupy some seventy-seven military sites in total.

RAF North Pickenham (Station 143) was built with three concrete runways, 50 ‘spectacle’ style hardstands and a substantial bomb store to the north-west. Accommodation for the crews, was divided into a: communal site (site 3), mess site (site 4), six officers’ quarters (sites 6 to 11) and a sick quarters (site 5). Three further sites, 12-14, consisted of a small sentry post, sewage disposal site and H.F.D.F station. All the accommodation areas were to the eastern side of the airfield well away from the extended bomb store to the west.

The 492nd were a new unit, only being activated in the previous October. On arrival in the UK in April, they were assigned to the 2nd Bomb Division, 14th Combat Wing and sent to RAF North Pickenham where they entered combat on May 11th 1944. The main body of the ground echelon was formed with personnel taken from units already in the U.K. whilst the air echelons were trained states-side and then ferried across the southern Atlantic route.

This first mission, which took the 492nd to marshalling yards in north-eastern France, saw 364 B-24s of the 2nd and 3rd Bomb Divisions combine with 536 fighters over occupied Europe. Whilst relatively uneventful for the 492nd, two B-24s did run out of fuel on their return journey; the first, B-24J #44-4087 “Sweet Chariot” crashing at Bury St. Edmunds, whilst the second, came to grief at West Wittering in Sussex. Thankfully, only one crewman was lost (3 were injured), but he was to be the first of the many casualties of the 492nd’s operational war.

RAF North Pickenham

Operations Block, North Pickenham

Throughout the month of May, the 492nd operated against industrial targets in Germany, and being a new unit, their loses would be high. On May 19th 1944, a week into operations, they suffered their first major casualties, eight aircraft in total, all shot down in operations over Brunswick. Loses were not only happening in air either, only two days later, on May 21st, two B-24s collided on the ground whilst taxing -‘What’s Next Doc‘ struck ‘Irishman’s Shanty‘ – causing the former to be written off. It was not a good omen for the 492nd.

In the following month, on June 20th, a massed 2nd Bomb Division formation attacked Politz, an attack that saw the 492nd lose a further fourteen aircraft, six of which managed to limp to Sweden before finally coming down.

Things then went from bad to worse for the 492nd, but undaunted and undeterred, they would continue their quest, attacking V-weapons sites, coastal batteries, and other defences along the Normandy coast. Apart from supporting the St. Lo breakout on July 25th, they continued to attack targets in the German homeland for the remainder of what would be their brief existence.

RAF North Pickenham

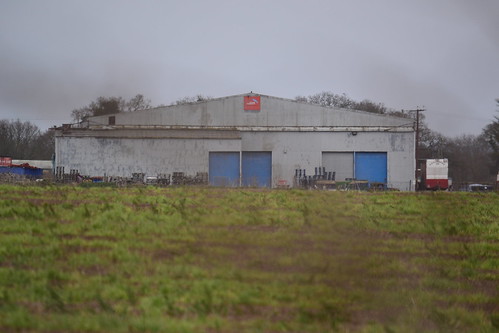
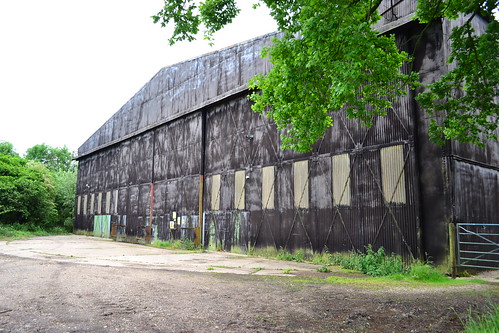
North Pickenham’s last remaining hangar before it was burnt down in 2014.*1

Consisting of the 856th, 857th, 858th and 859th Bomb Squadrons, they were not to fare well at all. In total, the 492nd would carry out sixty-six missions accumulating just over 1,600 sorties. During these operations, they would lose fifty-seven aircraft (including six non-operationally) which was the highest loss of any B-24 unit of the entire Eighth Air Force. Talk of ‘blame’ for these losses was rife; some blamed the aircraft’s all metal finish, saying it attracted fighter attention, others pinned loses on the Luftwaffe’s determination to bring down one single group, whilst another placed it solely at the inability of the crews to fly in neat well-structured formations. Whatever the reasons, it was certain that the 492nd were often ‘Tail-end Charlies‘ finding themselves in the weakest and most vulnerable positions of the formations – easy pickings for the now determined and desperate Luftwaffe pilots.

With loses continuing to climb and talk of a jinxed group spreading, an order came though on August 5th 1944 for the 492nd to withdraw from combat missions and take over ‘Carpetbagger‘ operations previously being performed by the 801st at RAF Harrington.  This order would not end the 492nd’s increasing casualties though. On the following day, another two B-24s would both collide on approach to the airfield. #44-4016 ‘Sugar-n-Spice‘ and #42-50719 ‘Sans Souci‘ struck each other causing them both to crash. The accident resulted in the loss of eleven crewmen with another nine injured.

Finally, on 7th August the order was put in place and after the last mission that day, the move began. This reshuffle of numbers and crews was in reality the disbandment of the 492nd, the crews and ground staff being spread far and wide and the 492nd name being transferred to an already well established unit – the 801st.

The loss of these personnel gave North Pickenham a short respite from the rigours of war. But it would only be short. Within a few days, conflict would return as yet another B-24 unit, the 491st Bomb Group, would move in.

Originally designated to reside at North Pickenham, they were instead directed to RAF Metfield, primarily due to the immense progress that the 492nd had made in their training programme. Whilst there must have been concerns around the jinxed airfield, in terms of operational records, the 491st were to be quite the reverse of the 492nd. The 491st arrived at North Pickenham on the 15th August, and continued with their operations over occupied Europe. Like their previous counterparts, they focused on industrial targets in Germany, flying deep in to the heart of the Reich: Berlin, Hamburg, Cologne. Gelsenkirchen, Hannover and Magdeburg.

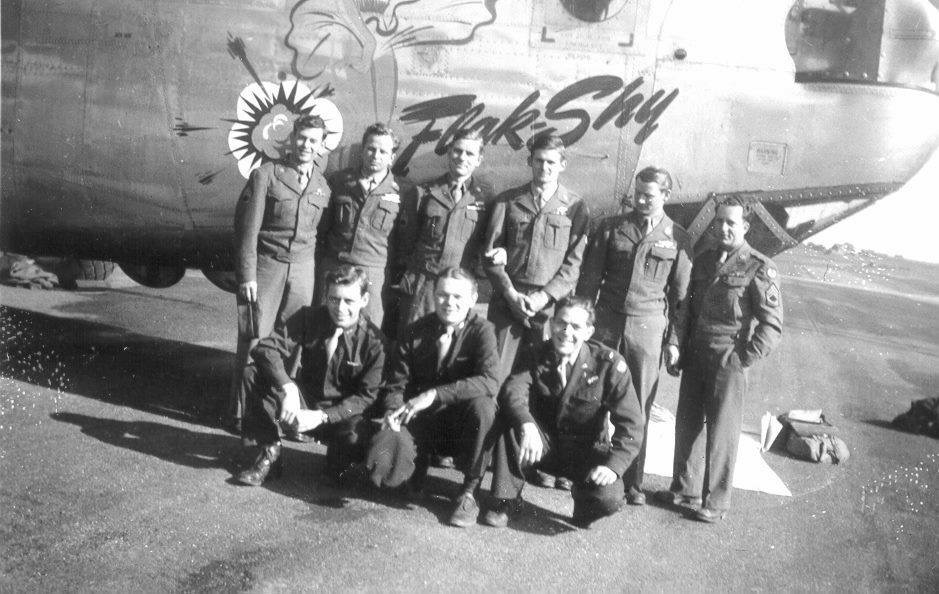
Ben Glidden front left pilot of ‘Flak Shy’ 491BG (Photo John Glidden)

It was on one of these missions, on November 26th 1944, that they were awarded a Distinguished Unit Citation (D.U.C.) for successfully bombing their target in Misburg despite very heavy loses from a prolonged and determined German counter attack. Out of the original 27 aircraft that set out from North Pickenham that day, 15 were lost to enemy action.

As 1944 turned into 1945 the appalling European weather set in. The cold snows of the 1944/45 winter were one of the worst on record, as troops in the Ardennes and ground crews of the Allied Air Forces were to find out to their discomfort.

Many bombing missions were scrubbed, often at the last-minute, but desperate attempts were regularly made to not only get supplies through, but to bomb strategic positions held by the Germans. On January 5th 1945, heavy snows fell across England and in an attempt to attack German positions, two B-24s of the 491st took off from North Pickenham with disastrous results.

The two aircraft, B-24 #44-40165 ‘Rage in Heaven‘ the unit’s assembly ship, and B-24J #42-50793, both crashed just after take off, with considerable loss of life. As a result, the decision was then made for the 491st to abandon any further attempts to get aircraft airborne, and their part in this operation was cancelled. Even though some 1,000 aircraft of the 1st, 2nd and 3rd Air Divisions would get aloft that day, January 5th would become a black day and notoriously famous for a number of such incidents across the English countryside.

The remains of B-24 #42-50793 lay in the heavy snows of North Pickenham following a crash on January 5th 1945.  One of two 491st aircraft that crashed that day in snow storms. (IWM FRE 8588)

Eventually by April 1945, “The Ringmasters” as they had become known, had amassed over 5000 sorties, dropping over 12,000 tons of bombs, for the loss of only 47 aircraft on operational missions over occupied Europe. In June and July, after cessation of conflict, they began their withdrawal and a gradual return to the United States. A few days of ‘R and R’ then led to their inactivation on September 8th 1945.

After the group left North Pickenham, no other flying squadrons were based here, neither American or RAF, but a brief residency of Thor missiles operated by 220 Sqn between 22nd July 1959 and 10th July 1963, saw the site brought back to life momentarily. Finally, a last reprieve in 1965 saw testing of the Kestrel VTOL aircraft which of course became famous as the Harrier, one of the many British Jet Aircraft to see combat operations in the post war eras.

After the Kestrel trials were over, the site was closed and sold off, returning to a mix of poultry farming, and light industry. Many of the hardstands were removed, buildings left to deteriorate and the perimeter track reduced to a fraction of its former self. As time has gone on wind turbines have sprouted up across the open landscape making good use of the winds that blow across the Norfolk countryside.

RAF North Pickenham

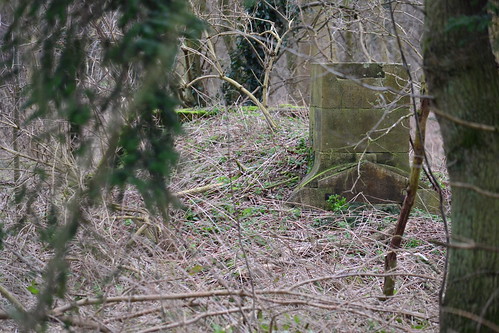
“Stanton” shelter located at South Pickenham.

Despite this decline, there are still signs of this once busy station to see. If approaching from the south, you will pass through South Pickenham first. Follow the leafy road toward the village, but keep a sharp eye open for amongst the trees are a series of “Stanton” air raid shelters of which there are five in total. Many of these are only visible by the escape hatches serving the top of the shelter. These were part of the domestic site that once served the airfield.

Some of these shelters are easily accessible being a few feet from the roadside, but as always, caution is the key word when visiting, and remember the laws of trespass! Moving further on, take a left and you pass a small collection of buildings on the right hand side.

These are the operations block and the store for the American  Norden M7 bomb sight. In a very poor state of repair, they once played a major role in the American offensive over Nazi Germany, – there must be many stories held within their crumbling and decaying walls. Continue past the buildings and you arrive at a ‘T’ junction. Turning right will take you to the airfield, now an industrial site and turkey farm. Access from here is both limited and private. Instead turn left, follow the road along, and then join the B1077. Turn right and drive for a mile or two, the airfield is on your right. A suitable parking space allows views across the field where its enormity can be truly understood. Now containing many turkey sheds along its runways, the outline is distinct and relatively clear considering its age. Up until November 2014 one of the original hangars still remained*1 fire destroying the structure, and what was left then subsequently removed. A number of ordnance huts mark the former location of the bomb dump, these can still be seen in the foreground from this high vantage point. The Watch Office, built to design 12779/41, was demolished many years ago but stood opposite you and to the right.

It is also possible to view the main runway. By driving around the site via Swaffham, or retracing your steps though the village, the best view is from the northern end of the airfield on the road from Swaffham to Bradenham, close to the village where the base gets its name. Substantial is size, these runways have fared remarkably well and the sheer size of them easily discernible from the views at this end.

North Pickenham may truly fit the description of ‘ghost’ airfield, its chequered history includes not only one of the worst fatality records of the whole eighth Air Force, but it also attracted a lot of Luftwaffe attention. In excess of 200 German bombs were dropped on it during its short and rather dramatic wartime life. Handed over to the Americans in May 1944, it was the 66th and final one to be so, thus ending a remarkable chapter in world history.

A memorial to the servicemen who flew from North Pickenham, lays silently in the village on the edge of a new housing development. Wreaths from nearby RAF Lakenheath enforce the link between the current American Air Force and Norfolk’s legendary flying history.

On leaving the remnants and stories of North Pickenham, we continue south-east, toward the former RAF Watton, another now extinguished British airfield.

DSC_0056

Memorial dedicated to those who flew from, and never returned to, North Pickenham.

North Pickenham was originally visited in early 2014, this post has since been updated.

*1 This hangar was burnt down in November 2014. My thanks to the anonymous reader for the updates and corrections.

Sqn. Ldr. Leonard Trent VC – RAF Methwold.

RAF Methwold was a small airfield that was never intended to be a major player in the Second World War, yet it would see some remarkable achievements performed by the people who were stationed there.

Once such notable person was Squadron Leader Leonard Trent V.C., who, on 3rd May 1943, took a squadron of Lockheed Venturas on a ‘Ramrod’ Mission to attack an electricity power station on the northern side of Amsterdam.

As part of a larger attack, it would not be a mission central to Bomber Command’s overall bombing strategy, but more a mission of support and encouragement to the resistance fighters bravely fighting in occupied Holland.

Trent (N.Z.248i), born in Nelson, New Zealand on 14th April 1915, achieved his wings with the RNZAF in Christchurch in May 1938, a month before sailing to England and a role with the Royal Air Force.

At the outbreak of war he was sent with No. 15 Squadron flying Fairy Battles, to France to carry out photo-reconnaissance sorties over occupied territory. The squadron then moved back to England (RAF Wyton) and changed their Fairy Battles for Bristol Blenheim IVs.

After carrying out a number of low-level attacks, he was awarded a DFC for his part in the air war over Belgium, after which he became a flying instructor for RAF crews.

Wing Commander G J “Chopper” Grindell (centre), Commanding Officer of No. 487 Squadron RNZAF, with his two flight commanders in front of a Lockheed Ventura at Methwold, Norfolk. On his left is the ‘A’ Flight commander, Squadron Leader T Turnbull, and on his right is the commander of ‘B’ Flight, Squadron Leader L H Trent. (IWM)*1

In 1942 he returned to operational duties as a newly promoted Squadron Leader taking command of B Flight, 487 (NZ) Squadron at Feltwell. At the time 487 were part of No. 2 Group and were in the process of replacing their Blenheims with Venturas. The squadron moved from Feltwell to Methwold in early April 1943. Little did they know that only a month later, the Squadron’s Operations Record Book would read: “This is a very black day in the Squadron history…a better set of boys could not be met in 30 years. Everybody is still feeling dazed by the news.”

As an experienced pilot Trent would fly several low-level missions over the low countries, using an aircraft that was originally designed around a small passenger aircraft back in the United States. Whilst having powerful engines, Venturas suffered from poor manoeuvrability and a heavy air frame, these two failings combined with its rather ‘fat’ appearance, earned it the name “flying pig”.

Loses in Ventura operations would be high, and this was reflected nowhere else than on the very mission that Trent would fly on May 3rd 1943.

On that day fourteen Venturas of 487 Sqn were detailed to attack a target in Amsterdam, however only twelve aircraft actually took off, all at 16:43 from RAF Methwold. These aircraft were all part of a much wider operation, one that would involve an escort of nine RAF fighter squadrons. Timing was therefore crucial, as was low-level flying and maintaining the element of surprise. Within five minutes of their departure though, ‘EG-Q’ piloted by Sgt. A. Baker, would return after losing the crew escape hatch. This left eleven aircraft to carry on to the target.

A diversionary attack carried out by aircraft of 12 Group flying ahead of the main formation flew in too high, too soon, thus losing the surprise and alerting the defenders of the impending attack. Caught out by low fuel, many of the escorting fighters had to then leave thus reducing the overall effectiveness of the defensive escorting force. The Luftwaffe, now ready and waiting, had scrambled numerous fighters, a deadly cocktail of FW-190s and Bf-109s. The squadron record book reports an estimated “80+ ” enemy aircraft in the locality of the attacking Venturas.

From this point on things went very badly for 487 Sqn.

As they crossed the Dutch coast Ventura ‘AJ478’ (EG-A) was attacked and shot down by Luftwaffe fighters. Ditching in the sea the crew took to a life raft where Sgt. T Warner, injured in the attack, died of his injuries. Committing his body to the sea the remaining three would be captured and become prisoners of war. Warner’s body would wash up two days later on a Dutch beach and be buried in the small town of Bergen op Zoom – all four were from New Zealand.

A second aircraft, ‘AE916’ (EG-C) was also very badly shot up by the pouncing fighters. However, it managed to return to England landing at their former base RAF Feltwell. The pilot and navigator were both unhurt, but the wireless operator and air gunner were both badly wounded, and were immediately taken directly the RAF hospital at Ely, Cambridgeshire. The aircraft was so badly damaged in the attack that it was written off. For their actions the pilot (F/Lt. Duffill) and navigator (F.O. Starkie) were both awarded the DFC, whilst the wireless operator (Sgt. Turnbull) and gunner (Sgt. Neill) the DFM.  Dufill later went on to become the managing director of Humbrol paints, a company renowned for its paint and modelling supplies.

Pressing on to the target, the casualties got worse and the loss rate increased.

Firstly, Ventura ‘AE684’ (EG-B) was shot down at 17:45 near Bennebroek with the loss of two; at the same time ‘AE731’ (EG-O) was shot down  just north of Vijfhuizen, three crewmen were captured but the fourth, Sgt. Tatam, died. Five minutes later at 17:50, ‘AE780’ (EG-S) was lost, with only one crew member surviving – the aircraft crashing into the suburbs of Amsterdam. Within three more minutes, a fourth aircraft of this group would go down; ‘AE713’ (EG-T) was hit, also causing it to crash in the northern suburbs of Amsterdam, this time killing all on board. By 18:00 there were only two of the eleven aircraft left, ‘AJ209’ (EG-V) flown by Squadron Leader Leonard Trent, and ‘AE716’ (EG-U) flown by F.O. T. Baynton.

Baynton’s aircraft, ‘EG-U’, would then be shot down by fighters causing it to crash in the outskirts of Amsterdam, also killing all four on board. Squadron Leader Trent, seeing all around him fall from the sky, pressed on. Flying toward the target he dropped his bombs and then turned away. Trent bravely and coolly defended his aircraft, shooting down a Bf-109 with his forward facing guns. Shortly after, he too was hit, the aircraft badly damaged, spiralled earthward uncontrollably, breaking up as it did so, throwing both Trent and his navigator F.L. V. Philips, out of the falling wreckage.

Both Trent and Philips were later captured and taken prisoner, the other two crew members; F.O. R. Thomas and Sgt. G. Trenery, both lost their lives in the crash.

One further aircraft, ‘AJ200’ (EG-G) piloted by New Zealander Sgt. J Sharp was thought to crash 3 km west of Schiphol, with only Sharp surviving; whilst the remaining two unaccounted aircraft, ‘AE956’ (EG-H) and ‘AE 798’ (EG-D), were lost over the sea on the way to the target. All eight crewmen were presumed killed, two of them being washed up several days later on the Dutch coast. The remainder were never heard from again.

In the space of only a few minutes, eleven aircraft had been attacked and ten shot down with the loss of 28 young RAF lives.

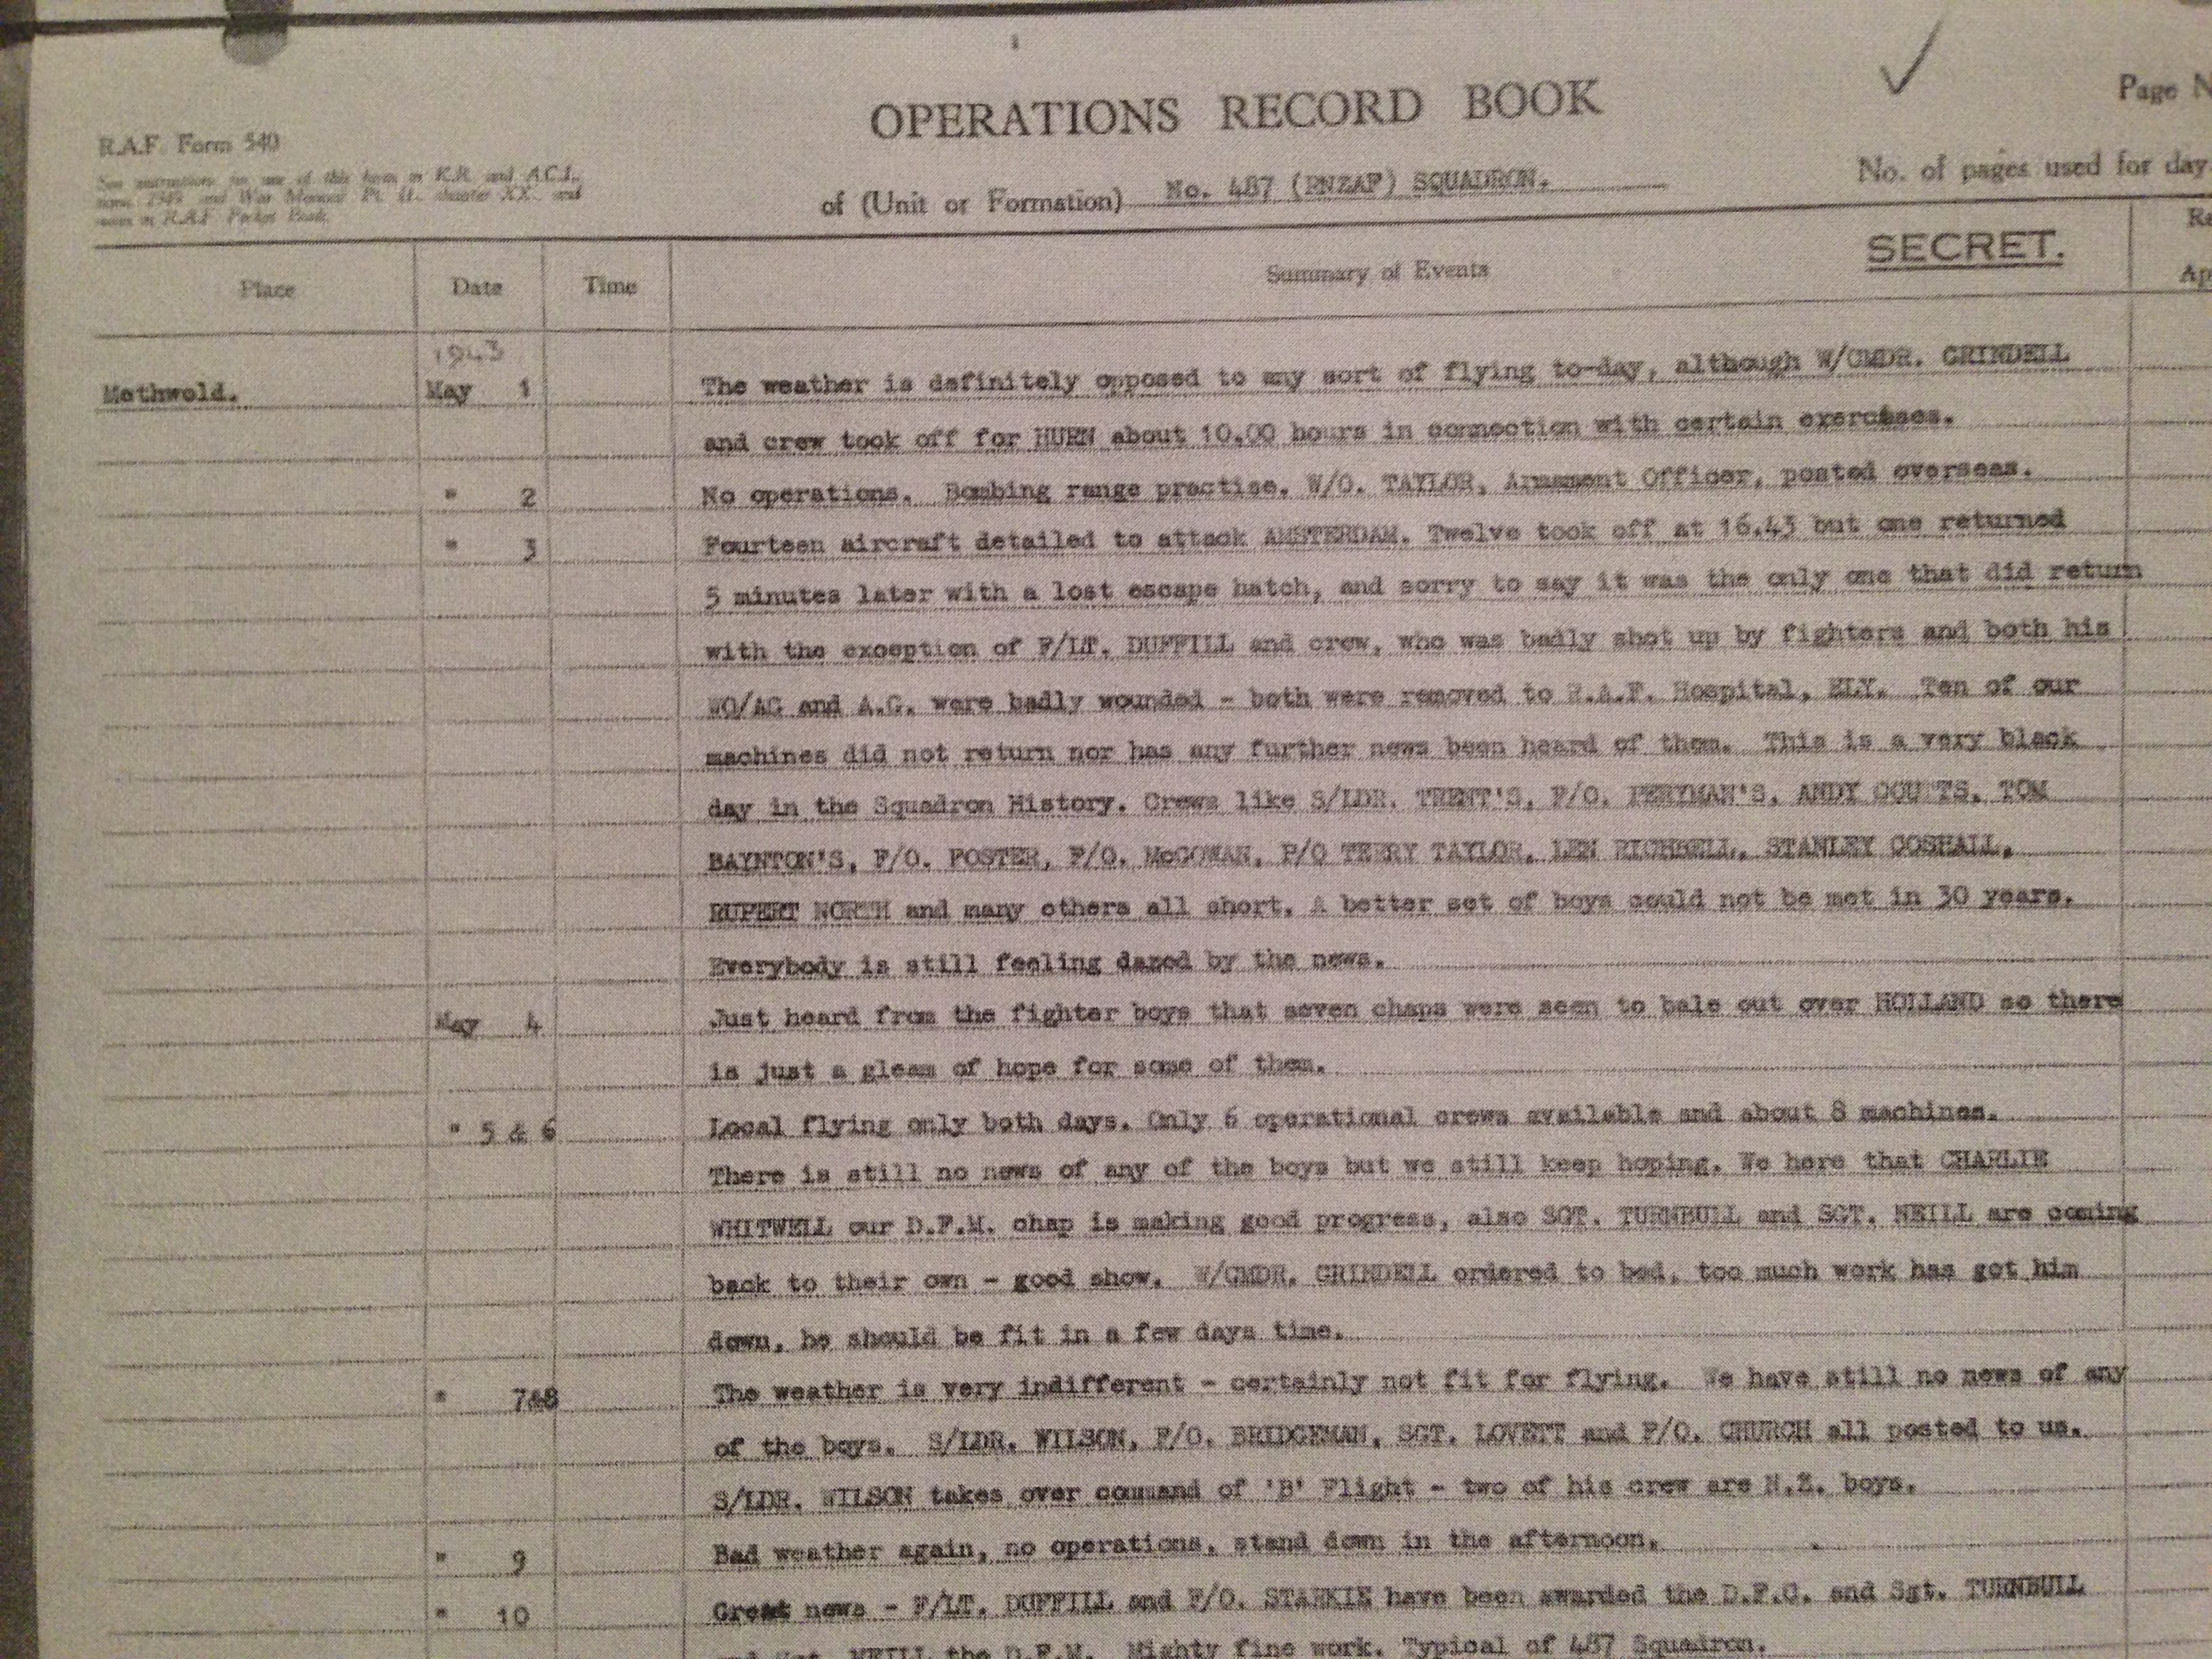
operations-record-page

The Operations Record Book for May 3rd 1943, shows the depth of feeling felt by the crews at Methwold following the disastrous mission. (Crown Copyright*2)

Trent spent the remainder of the war in Stalag Luft III where he participated in the ‘Great Escape‘. Only on his eventual return to England did the full and disastrous story of what had happened come out. He was awarded the Victoria Cross for his leadership in ensuring the bomb run was completed despite heavy enemy resistance and very high losses. The London Gazette published his citation on Friday 1st March 1946, in the Third Supplement which said:

“Before taking off, Squadron Leader Trent told the deputy leader that he was going over the target, whatever ‘happened…”

It later went on to say…

“On this, his 24th sortie, Squadron Leader Trent showed outstanding leadership. Such was the trust placed in this gallant officer that the other pilots followed him unwaveringly. His cool, unflinching courage and devotion to duty in the face of overwhelming odds, rank with the finest examples of these virtues.” *3

A determined attack, it was flawed from the moment the preceding force were spotted. The Venturas, woefully inadequate and unprotected, were literary cut down from the sky. Fighters escorting the Venturas confirmed seeing seven parachutes from the aircraft, but the scale of the loss was a blow so devastating, it left only six operational crews in the entire squadron.

For many days after, the Operational Record Books indicated “no news of the boys“, and as new crews and aircraft arrived, prayers for their return faded, but hopes for a return to operational status rose. Following a number of training flights, the next operational mission would finally take place on May 23rd, a mission that was a total success, and one that must have boosted the morale of the squadron immensely.

This mission was a disaster for the Royal Air Force and for Methwold in particular. The loss of life dealt a huge blow to the community both on, and around the base. In memory of these gallant young men, many of whom were never found, their names are inscribed on the Runnymede memorial, whilst those whose bodies were recovered, remain scattered in various graves across the Dutch countryside.

May their memories live for evermore.

RAF Methwold appears in Trail 8.

Sources and further reading.

*1 Photo source The Imperial War Museum Collections

*2 AIR\27\1935\13

*3  The London Gazette: (Supplement) no. 37486. p. 1179. 26 February 1946. Retrieved 29th January 2017

AIR\27\1935\13 – Operational Records Book (summary), The National Archives

AIR\27\1935\14 – Operational Records Book (work carried out), The National Archives

Chorley, W.R., Bomber Command Losses, 1943, Midland Counties, 1996

Debach Museum

On a recent trail in Suffolk, I was lucky enough to be able to visit two terrific museums both situated in the former Watch Offices of U.S.A.A.F bomber bases.

The second of these was at the former base at RAF Debach.

Like many of these sites the airfield and tower fell into disrepair after the war and remained so for many years, gradually deteriorating in the extremes of the British weather. By 1960, vegetation had taken hold and the building had become derelict.

But in the mid 1990s, the land owner decided to invest in the tower and with help from volunteers began a major restoration project that would not only restore it to its former glory, but make it into a memorial and museum to the crews and staff who lived, served and died whilst on active service at RAF Debach.

Usually open on Sunday’s, and Wednesday’s by appointment, I had the delightful opportunity to be given a personal guided tour of the site by the knowledgeable and dedicated wife of the current land owner.

Debach Airfield and Museum

1940s inside the Watch Office

The volunteers of the site were there, busy working away, and were more than happy to chat providing one of the warmest welcomes I’ve ever had the pleasure of.

The site today is a busy working farm, and any self-respecting visitor will appreciate the work, time and money that has been poured into this site. Not just the tower, but the cafe, the various buildings that remain, the enormous and varied collection of memorabilia and working vehicles hat have been collected and resorted to full working order.

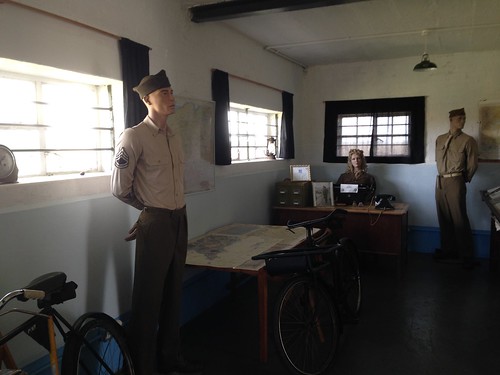
The tower itself has been returned to what it would have been like during its use in the late 1940s. Each room filled with original equipment (where possible) sourced from around the world. Old photographs have been used as references and provide excellent comparisons to the current displays.

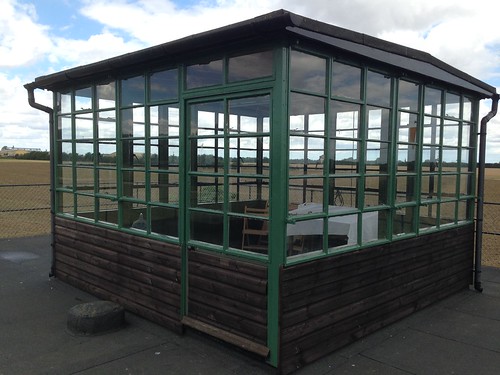
The glass house has been rebuilt, and as with other towers, provides excellent views over the former site. What a sight it must have been to stand here watching the bombers return from their daylight missions over Europe.

Debach Airfield and Museum

The ‘Glass House’ on top of the Watch Office.

The main room houses a number of dressed mannequins, radio sets and wartime artefacts set out as it would have been; whilst other rooms contain personal effects, electronic equipment, administration equipment, maps and the like. Photographs around the building tell the more personal stories of Debach airfield during the war.

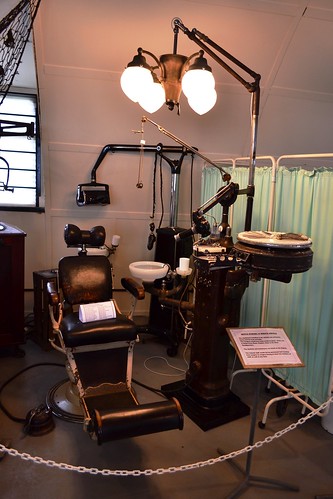
Outside, one of the former huts now houses what has to be one of, if not the biggest collections of original nursing and dental equipment around. An entire dental room is on display each item having been bought by the owners over a number of years. Much of this equipment having been hidden away and not generally on show elsewhere.

Debach Airfield and Museum

Debach houses one of the finest collections of dental equipment around.

The usual array of uniforms, weapons and artefacts gathered from the airfield can also be found, along with a collection of toys and gifts made by POWs kept here post war. This collection is thought to be the biggest in the eastern region.

Also found here is an original Queen Mary trailer now converted in to a small cinema which shows films from the era, giving further insights and experiences of life in the 1940s.

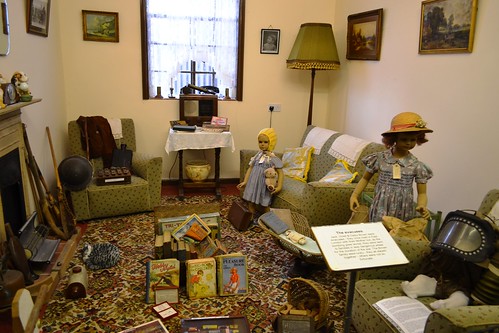
Another original building, the former fire tender shed, is now a collection of household materials and artefacts depicting various rooms of a house during the Second World War. For anyone interested in domestic life in the 1940s this is a must.

Debach Airfield and Museum

One of the many rooms depicting war and post war domestic life.

Many of the original buildings on the technical site remain, the dingy shed, parachute store and stores huts, and whilst many are used for storing farm machinery, one does hold a large number of working second world war vehicles. I was lucky enough to have them start one of these up and the noise was incredible. These vehicles just ooze power!

Not being a knowledgeable vehicle buff myself, several of the volunteers gladly took timeout to explain the history and uses of each one and allowed me the freedom to wander around them.

Debach Airfield and Museum

One of the many restored vehicles that run today.

Other buildings contain further vehicles, again all restored and running. Aircraft parts and a B-17 engine recovered after 57 years are also on view, along with more Second World War artefacts that fill these rooms.

Even though the technical site is a working farm, there are no unrealistic restrictions to access and as a visitor you are warmly welcomed to wander.

Across the road, only a short walk away, is the memorial. This has been laid outside the former headquarters building, which is now used by a small industrial unit.  Again I was invited in, and allowed to peruse the photographs and record boards that adorn the walls. These photos show the building as it was during the war and make for very interesting viewing.

Debach museum is a fascinating and well run museum where a friendly welcome, excellent facilities and enormous collection of Second World War equipment is fabulously displayed, I simply cannot recommend it enough.

For further information, event listing and opening times visit the museum website.

RAF Debach – Home of Helton’s Hellcats.

As we depart Framlingham we head a short distance away to the south-west, to another U.S Bomber base also with a remarkable museum. As we head towards Ipswich we arrive at Debach, the former base of the 493rd BG(H) and a group named after its commander Col. Elbert Helton, “Helton’s Hellcats.”

RAF Debach (Station 152).

Debach was one of the last bases to be built during the war, hence its life span was relatively short. Construction began in 1943 opening in 1944 and was constructed by the 820th Engineer Battalion (Aviation) whose headquarters were at Great Barrington in the Cotswolds.

The 820th arrived, by boat, at Glasgow, unprepared but warned about the ‘English reserve‘ that they were likely to encounter. After travelling by train to Debach they were kept ‘on base’ sleeping in tents that were arranged around the airfield they were intending to build. Against orders, the men then decided it was time to see what England was all about and set off along its leafy lanes with thatched cottages and chocolate box views. Their first real taste of England came at the local pub ‘The Dog‘ in Grundisburgh, which sat across a wooden bridge from the local village green.

A traditional pub, it had served the locals for centuries, and to the Americans, it was stuck there. Old men with pipes sat in the corners while oak beams held the low ceilings just above the GI’s heads.

Debach Airfield and Museum

Part of the runway at Debach, cracking and breaking up, built by the 820th Engineer Battalion, it once resounded to the roar of heavy bombers.

After thinking they had entered a weird new world, the GIs tried the beers, all of them, to find one that suited the American taste buds the best. Before long, word spread, and the pub empty on their arrival, quickly filled with inquisitive English people, interested in seeing what these Americans were really like.

After an evening of much talk and drinking, the GI’s left for their tented homes, their first introduction to the British being a polite and pleasant affair. By the end of the evening the pub had run out of beer, the first time such a thing had happened in its 450 year old history.

Debach as a Class ‘A’ site, had three concrete runways, the main running slightly off north/east-south/west, the second east-west, and the third slightly off north-south.  The runway patterns at Debach were slightly different to the norm in that the cross of the ‘A’ was at the base rather than part way up, but the various lengths were as per other Class ‘A’ models.

A perimeter track with 50 spectacle hardstands joined the thresholds of each runway, with the bomb store to the south-east and the accommodation, admin and technical areas all spread along the western side. The airfield site encompassed the medieval site of Thistledon Hall, a three-moated house that has historical features dating back to the late 16th and early 17th Century. A building that was demolished by the 820th Engineer Battalion to make way for the airfield.

Accommodation was split over 6 officer and enlisted crewmen sites, two WAAF sites, a sick quarters and admin block that granted access to the main airfield. The majority of the buildings were Nissen huts, with some Romneys, a blister hanger for the gunnery trainer and two T2 hangars.

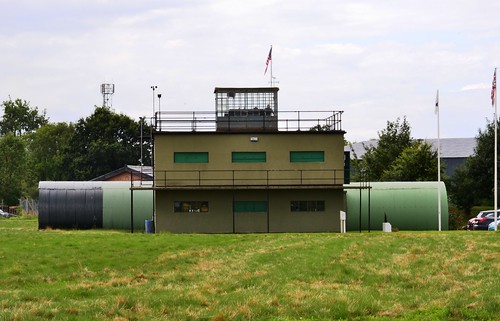
The watch office was of the standard wartime design, built to drawing 12779/41 later adapted to take the much smaller windows as per the updated drawing 343/43. This gave it a slightly different appearance to non-modified towers of the time.

In the technical area, Debach had the usual range of buildings, stores and supply huts, however, the parachute store was almost unique in that it had its own drying room attached – perhaps as a result of the late building of the site. Like many of the forty-one airfields built to house the USAAF heavy bombers, Debach cost nearly £1,000,000 to construct, a small amount compared to the £645, 000,000 it cost to build all 250 US airfields in the UK*.

The mid war years saw a dramatic and rapid build up of the Eighth Air Force on British soil. This build up had seen huge numbers of both men and machinery arrive via Atlantic routes, many coming through the large ports at Greenock or Liverpool. The 40th, and last group to be assigned to the ‘Mighty Eighth’, would be the 493rd Bombardment Group (Heavy) and they would be assigned to RAF Debach.

Debach Airfield and Museum

The perimeter track forms access for farm vehicles.

The 493rd would be a relatively short-lived unit, moving from their training ground at McCook Army Airfield in Nebraska, to their headquarters at Elveldon Hall, and Debach airfield. They remained here until their return to Sioux Falls post war. Their entire service would last just short of 2 years. Following their activation in November 1943, they had their ground echelons assigned in early 1944 with the air echelons joining in the following May. Ground crews were pulled in from other units to form these ground echelons, with additional support coming over from the U.S arriving at Liverpool on the USS Brazil. The 493rd were initially assigned the mighty ‘Olive-Drab’ B-24H ‘Liberator’  a lumbering giant of the skies it was loved by many and loathed by some.

Their inauguration would be a baptism of fire, celebrations overshadowed by events taking place overseas. On the morning of Tuesday 6th June 1944, high spirits took the crews of the 860th, 861st, 862nd and 863rd Bombardment squadrons high above the beaches of Normandy. Joining some 11,000 other aircraft, this 3rd Air Division unit would aim to soften up German gun defences dug in along the Normandy beach head. As the allies moved inland, the 493rd would go on to target key bridges and airfields, German strongholds around St. Lo and Caen. Other strategic targets further inland would include marshalling yards, manufacturing plants and the heavily defended oil plants at Merseberg.

Cpl. Kenneth Blair died in a tragic accident on July 8th 1944. He is buried in the Cambridge American Cemetery, Madingley.*1

Losses in battle are often more ‘acceptable’ than losses though accidents, and Debach would have its share of both. On July 8th 1944 only a month after their first mission, Cpl. Kenneth Blair (s/n: 39692721) of the 18th Weather Squadron, 493rd BG would be killed in a tragic accident that involved him walking into the spinning propeller of a running B-24. Only minutes before, he had received good news that took him  to his ultimate and tragic death.

The last mission to see the 493rd using B-24s was on August 24th, when fifty-two B-24s and 383 B-17s attacked Kiel in Germany. Within two weeks crews were using the formidable B-17G ‘Flying Fortress’, an aircraft that took them back to the German Heartland. Using these aircraft they went on to support the allied push through Holland to Arnhem, and in the fight back against Von Rundstedt’s last-ditch attempt to push back the Allies in the Ardennes.

Debach Airfield and Museum

The parachute room was rare with its addition of a separate drying area.

Late 1944 was a difficult time for the crews of the Air Forces. many of the airfields in the UK were shrouded in fog, causing many operations to be cancelled at late notice. Those that did go ahead were largely ineffective until finally, the clouds lifted and the fog dispersed. The frustration for the crews must have been immense.

It was during this time that one crew had a very lucky escape in an event that was reflected on many airfields across England. On December 12th, whilst on the 493rd’s third trip to Darmstadt, B-17 #43-38219 ‘Devil’s Own‘ suffered an engine problem that resulted in an intense fire on the port wing. In an attempt to extinguish the fire, the pilot, Lt. John E. DeWitt, put the aircraft into a dive. This proved fruitless and with little choice left he decided to bring the stricken aircraft back to Debach. The fire had now become so intense that there was an almost certain chance that the wing would separate from the fuselage. The resulting crash would have most certainly led to the deaths of the crew and those on the ground below.

DeWitt flew straight in to Debach narrowly missing parked aircraft and vehicles. The crew abandoned the B-17 and within moments the entire bomb load exploded in an explosion that was so severe that the nearby hangar doors were blown completely off their rails. The aircraft was blown apart and pieces spread across a wide area.

With fires still burning, ‘Devil’s Own‘ is scattered across a wide area of Debach. (IWM)

The weather at this time was to play its own part in Debach’s history. Even though it was a relatively new airfield, the frost and cold worked its way into the runway surfaces, and with continued heavy use, it began to break up. New runways were the only answer and so as soon as the aircraft left to attack Uim on March 1st, the ground echelons and servicing units began the arduous task of moving every possible piece of machinery and all supplies over to a temporary base at Little Walden. The 493rd would fly twenty missions from this site as the runways of Debach were removed and then relaid. Remarkably the entire event went with out a single hitch.

In 1945, the 493rd went on to  support the Rhine crossing softening up defences along the German borders, but by the end of April, their bombing war was over, their last mission was carried out on the 20th April 1945 in which they attacked the marshalling yards at Nauen just 38 km west of Berlin. An event that would take their bomb load tally to 11,733 tons in 4,871 sorties. For the remainder of the war the 493rd took part in operation Mania, dropping food in six missions over Holland. Further revival flights took the 493rd to Austria on four occasions in the last days of May 1945.

In the following month the ground echelons returned via the Queen Elizabeth to New York whilst the air echelons flew back in the following July and August. Following thirty days rest and recuperation the unit was disbanded. Debach was now devoid of aircraft and the empty accommodation blocks became a site for both German and Italian Prisoners of War, and displaced persons.

Post war, Debach fell into disrepair. It was eventually sold to the current landowner after the T2s were removed and the runways largely dug up for the lucrative road hardcore. Many of the technical buildings were left and, as with the watch tower, they were in a very poor state of repair.

Debach Airfield and Museum

The Watch Office is now a superbly restored museum dedicated to those who served at Debach.

Debach is now a busy farm, the watch tower has been superbly refurbished as have many of the remaining buildings. It now forms the 493d BG museum which houses an incredible amount of memorabilia and wartime stories. It also has a remarkable collection of toys and other items made by prisoners of war and is thought to be the largest collection in the East Anglia region.

Debach is a working farm and the museum is only open at limited times. However, the curators and farm owners are happy to oblige visitors, my self having a personal guided tour of the museum during the summer of 2016. Much of the perimeter track is still there, sections of the runways are also there in part  and allow for the landing of light aircraft during special occasions; but these are amongst the farm grounds and generally off-limits to the public. Then technical area has several buildings used for storage of farm material and a wide collection of military vehicles and memorabilia. The parachute and dingy store are still present as are former motor transport shed and other stores; as a visitor you are able to wander these at will.

If you leave through via main entrance (itself the original airfield entrance) cross the road, walk along the track, on your right you will find the former headquarters building which is now a small industrial unit, this is where you will find the memorial. I was invited in to the building to browse, again freely, at the various photos and mission charts that adorned the walls. These give a fascinating insight into the lives of those at Debach.

When you leave here, head north, (left) turn right at the main road and pass the Clopton Commercial Park (the northern most end of the main and secondary runway, which is still visible beneath the many huts built upon them now). Turn right into Debach village, the village sign is on your left. Depicting a B-17 flying over the village, it has at its base a dedication to those who served and died at the base. Behind the houses to your right are where many of the hardstands upon which the B-17s would have stood. These are now gone beneath the homes of the local residents. Continue on and then turn first right, this road is the old perimeter track and takes you to the end of the secondary runway. From here you can see along its length and width which is still full width today. The decay is obvious though and large cracks filled with small bushes are a sign of its impending demise. This road, still using the perimeter track, then takes you round toward the end of the main runway and away from the site.

Debach Airfield and Museum

The Dingy Store is one of the many buildings in use today storing farm machinery.

Whilst only being around for a short period of time, Debach has, like so many of these wartime airfields, its own unique stories to tell. It has a history that is part of a time so dramatic that it has become a monument to human ingenuity, planning and suffering.

Almost forgotten and abandoned for good, Debach has been painstakingly and lovingly restored to represent a superb monument to those who fought and died from his airfield. The dedication of the owners is second to none, their passion for the site reflected in the warm welcome you receive when visiting. The small group of volunteers that work so tirelessly to keep it open, enables it to stand today as a reminder of so many events that occurred in the dreadful years leading up to end of the conflict in 1945.

Links and further reading.

Whilst in the village, the now closed church of All Saints also has a memorial in its graveyard.

The 493rd Museum website has all the details of the site and the museum opening hours.

*Wilson, K., “Blood and Fears – How America’s Bomber Boys and Girls in England Won Their War.”,  Weiden & Nicolson. 2016

*1 Photo from IWM image UPL 20040

Arbib, Robert S, “Here we are together: The Notebook of an American Soldier in Britain.”, Longmans, Green And Co. (1946)

Remembrance Sunday 2016

Today I attended my local Church for the Remembrance Sunday service. In the cemetery are 50, very mixed nationality, Second World War graves: English, Canadian, New Zealand, Australian, Polish and German. Walking distance from where we were stood is a former RAF airfield where many of these young men died carrying out their duties in the service of their country.

The vicar spoke of remembrance, reflection and forgiveness and mentioned one startling fact; in the two world wars, a period of only 30 years apart, some 50 million people died. A staggering figure.

One of the hymns we sang was written by Richard Bewes, and was based on Psalm 46. The tune is better known as ‘The Dambusters’.

1. God is our strength and refuge,
our present help in trouble;
and we therefore will not fear,
though the earth should change!
Though mountains shake and tremble,
though swirling floods are raging,
God the Lord of hosts is with us evermore!

2.There is a flowing river,
within God’s holy city;
God is in the midst of her – she shall not be moved!
God’s help is swiftly given,
thrones vanish at his presence
God the lord of hosts is with us evermore!

3.Come, see the works of our maker,
learn of his deeds all-powerful;
wars will cease across the world where he shatters the spear!
Be still and know your creator,
uplift him in the nations-
God the lord of hosts is with us evermore!

May the sacrifices of those people never be forgotten.

London Feb 2015 003

Parham Museum – A Great Day Out.

Located in the old refurbished Watch Tower at RAF Framlingham is the museum of the 390th Bombardment Group (H). Parham airfield, as it is more commonly known, was home to the heavy B-17s of the U.S.A.A.F from 1943 to 1945 (see Trail 39) and the museum tells of the many people who were stationed at Framlingham during this time.

The airfield was sold off after the war and the tower left to deteriorate for some 30 years. A small group of volunteers then got together and raised enough funds to transform the building into what it is today, finally opening its doors in 1976.

Tower

The former Watch Tower, now refurbished, holds a remarkable and historical collection.

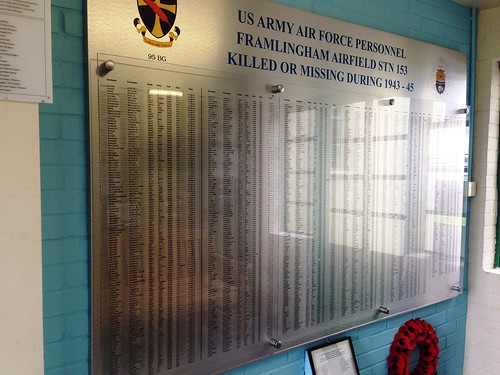
The entrance located next to the small car park, displays a large board, on which lists all those who flew from Framlingham and never returned, 729 in all, and a further 754 who were taken as prisoners of war. The seemingly endless list of names being a stark reminder of the losses that occurred flying from Framlingham.

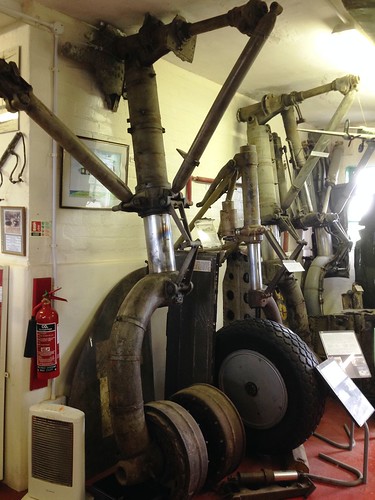
The main museum is split into two layers, the ground floor housing the many heavier and larger artefacts, including engines (a Wright Cyclone from a B-17 and a Merlin from a Mosquito NF.II to name but two), and aircraft and undercarriage parts from both fighters and heavy bombers. The upper floor, houses a large diorama, with an array of uniforms and photographs of life at RAF Framlingham. A doorway allows access to the balcony and further steps to the ‘glass house’ on the roof. With fantastic views over what is left of the airfield, you can only imagine what it was like standing here as the bombers took off or returned following a mission over occupied Europe. With an adjoining Quonset hut remodelled as a barrack room to represent what it would have been like during the time that the 390th were here, the whole experience gives a good insight into airfield life during the Second World War.

A further hut tells the unique story of the Resistance Organisation, in a thoughtful and meaningful way. Personal items, documents, photographs and examples of equipment, all add to the fascinating story of this most secret organisation.

July 2016 034

A number of undercarriage parts stand against the wall on the lower floor.

A further room off here houses the wall of remembrance, a chapel to go and pay your respects. The number of signatures from veterans and their families show the immense interest in retracing the steps of lost loved ones.

Wall of remebrance signed by visiting vets

The wall of remembrance has been signed by visiting veterans.

Perhaps some of the more unusual exhibits in the museum are the top, and tail turrets from a B-24  Liberator and a further Frazer-Nash top turret from a Short Stirling of the R.A.F, all refurbished from what was basically scrap metal. Also on the upper floor, is what is believed to be parts of the bomb bay from Joe Kennedy’s adapted B-24 (PBY) Liberator that blew up on the Anvil mission over Suffolk, killing both Kennedy and his co pilot “Bud” Willy – a very rare find indeed.

Uniforms, documents and some of the more unusual aspects of the air war are nicely displayed in glass cabinets throughout the building and all add up to a fascinating trip back to the 1940s.

July 2016 088

More than just a list of names, those who never returned or who taken prisoner are listed – over 1,400 crew members.

A further bonus for anyone interested in the aviation war is the ‘research room’, where you can access hundreds of records, both print and electronic, pertaining to the people who were based at RAF Framlingham during the war, a very useful addition to any small museum.

A good cafe that sells a range of products, refreshments and food, finishes the day off nicely. All in all, the museum and the very helpful volunteers at Framlingham, tell a remarkable story of the air war and of the people who were based here. To top it all off it is free, but donations are as always, very much welcomed, and in my opinion, exceedingly well-earned.

Parham museum is open Sundays and Bank Holiday Mondays, April – October and Wednesdays (June – August). The website has further details.

M/Sgt. Hewitt Dunn – Flew 104 missions.

RAF Framlingham (Parham) otherwise known as Station 153, achieved a remarkable record, or rather one man in particular did. His name was Hewitt Dunn, a Master Sergeant in the U.S.A.A.F and later the U.S.A.F.

Known as “Buck” he would achieve the remarkable record of completing 104 missions with the 390th Bombardment Group (Heavy) – a record that astounded many as life expectancy in a heavy bomber was short, and few survived beyond one tour of 30 missions.

Hewitt Tomlinson Dunn (s/n 13065206) was born on July 14th 1920. He progressed through school to join the Air Corps where he was assigned to the 390th Bombardment Group (Heavy), 13th Combat Wing, 3rd Air Division, Eighth Air Force, as a gunner in December 1943.

His first mission was with the 569th Bombardment Squadron in the following January. He completed his first gruelling tour of 30 missions by April that year, upon which he immediately applied for a further tour that he would complete by the summer of 1944. His attitude of ‘its not over until its won’, would see him accept a further remarkable third tour, virtually unheard of for a heavy bomber crew member.

On Friday, April 6th 1945, mission 930, an armada of aircraft of the U.S.A.A.F would strike at the marshalling yards in Leipzig, Germany. Inside B-17 #43-38663, ‘The Great McGinty‘, was Hewitt Dunn.

After the mission Dunn described how earlier at the morning briefing, he, like so many of his colleagues, had been a little ‘nervous’. Then, when the curtain was pulled back, their nervousness was justified, Leipzig – the 390th had been there before.

Many crews in that briefing would look to Dunn for signs of anguish, if he remained steady and relaxed, they knew it would be ‘easy’, if he sat forward, then it was going to be a difficult one. The atmosphere must have been tense.

Luckily, unlike other missions into the German heartland, this one turned out to be ‘just another mission’ a ‘milk run’. Much to the huge relief of those in command of the 390th, all aircraft returned safely.

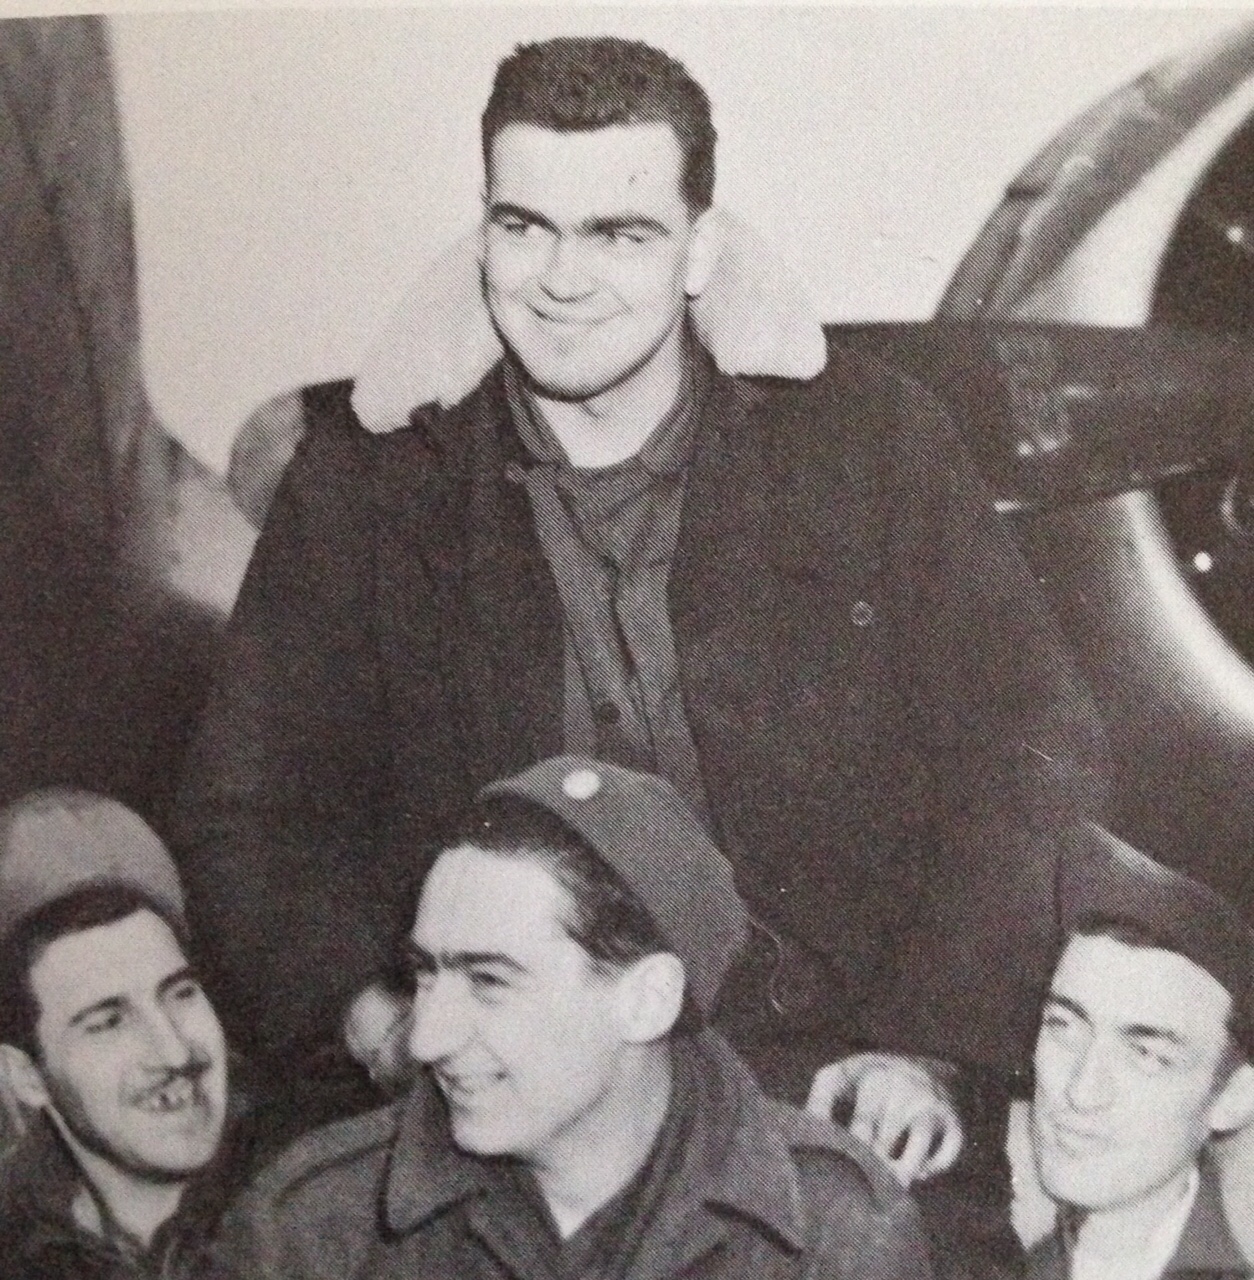
On his arrival back at Framlingham, Dunn was greeted by cheering crowds, ground crews lifted him high in their air carrying him triumphantly away from his aircraft, it was a heroes welcome.

By the time the war had finished, Dunn had flown in 104 missions, he had been a tail gunner on twenty-six missions, twice a top-turret gunner, a waist gunner and the remainder as togglier (Bombardier). He had flown over Berlin nine times, he claimed a FW-190 shot down and had amassed an impressive array of medals for his bravery and actions, and all at just 24 years old.

Post war, he continued to fly as an Instructor Gunner for B-52s in the 328th Bomb Squadron, 93rd Strategic Bomb Wing, at Castle Air Force Base in California. Here he was described as “quiet and reserved” and never talked about his war experiences. He was “handsome man with black hair”, and only when he wore his dress uniform, did others realise how well decorated he was.

Dunn was considered a rock by those who knew him and perhaps immortal, but he was not, and on June 15th , 1961 after flying for a further 64 flights, he was killed. Details of his death are sketchy, but the man who had flown in more missions than any other person in the Eighth Air Force and had gone to train others in that very role, was highly decorated. He was looked up to and liked by those who knew him.

Following his death a service was held in Merced, California, his body was then taken to Arlington National Cemetery in Washington D.C. where he was finally laid to rest in grave number 3675, section 28.

For a man who achieved so much in his fighting career, little exists about him or his achievements. Maybe, by the end of the war, records were no longer needed, tales of dedication and bravery were no longer useful propaganda. Whatever the reason, Hewitt Dunn’s name should be heavily embossed in the history books of the Second World War.

hewiit-dunn

Hewitt Dunn on return from his 100th mission, April 1945 (IWM)

Hewitt Dunn’s medal tally:

– Air Force Longevity Service Award with 3 oak leaf clusters
– Air Medal with 13 oak leaf clusters (2 silver, 3 bronze)
– Air Medal with 7 oak leaf clusters (1 silver, 2 bronze)
– American Campaign Medal
– Distinguished Flying Cross with 1 oak leaf cluster
– Good Conduct Medal
– National Defence Service Medal
– Silver Star
– World War II Victory Medal
– European-African-Middle Eastern Campaign Medal with 1 bronze star
– European-African-Middle Eastern Campaign Medal with 1 silver star

Hewitt Dunn’s story is one of many featured here.

RAF Hethel – from Africa to Norfolk

As we leave both Swanton Morley and Hingham behind, we head directly east crossing the main A11 toward Wymondham and Mulbarton. Here we visit another former USAAF base now home to Lotus cars. We stop off at RAF Hethel.

RAF Hethel (Station 114)

RAF Hethel was initially designed for the RAF but, like so many airfields of the Second World War, it was transferred very quickly to the USAAF for use by the bombers of the  Eighth Air Force. Construction of the site began in 1941 and wasn’t complete when the first units arrived in 1942.

The ground echelons of the 320th BG arrived at Hethel in September, poised and ready for training. Travelling across the northern sea route, they arrived long before the air echelons who, due to extremely bad weather, had to divert from their designated route to the longer Southern route, via Africa. As this was considerably further to fly, many of the B-26s, of these units did not arrive until well into the December.

A dramatic picture of B-24 Liberator ’44-40085′ “Z-Bar” of the 389th BG after crash landing at Hethel. It was hit by British Flak and on trying to land, crashed into a radar building. Surprisingly all the crew escaped. 22nd April 1944 (IWM)

Training of these raw crews became the responsibility of the Eighth Air Force – and raw they certainly were. The 320th had only been active since June 23rd that year, and within  weeks they would be posted to North Africa once suitable airfields had been secured.

Construction work continued on Hethel throughout the latter stages of 1942 and into 1943; the number of hardstands rose from the original 36 to 50 giving a mix of both ‘spectacle’ and ‘frying pan’ types dotted around the three concrete runways. The main runway ran north-east to south-west with two smaller runways traversing east-west and north-west to south-east respectively. A large bomb store was located to the north-west, the opposite side to both the technical and accommodation areas both of which were to the south-eastern side of the airfield. That all important commodity, fuel, was stored to the south, and three T2 hangars would eventually provide room for aircraft maintenance away from the bitter 1940’s winters.

With the 320th away in North Africa, Hethel was operationally quiet, but the summer of 1943 would once again bring changes.

Oil had long been considered a major target, reduce your enemies oil supplies and you reduce their ability to function. Stopping these supplies however, was going to be no easy task. The mighty German war machine was using oil located in the far eastern regions of Europe, located at the very edge of any major allied aircraft’s range. This gave the Luftwaffe plenty of time to attack, on both the inward and outward journeys. With round trips in excess of 2,000 miles, they would be dangerous and difficult missions for any crews. Polesti in Romania would become synonymous with oil production and a major target for the allied forces. To reach it, crews would have to fly from North Africa at very low-level, something they had not even thought possible let alone trained for in B-24s. In the summer a plan was hatched to do just that, a low-level bomber raid by B-24 Liberators of the Eighth and Ninth Air Force launched from bases in North Africa.

Hethel and the 389th would play their part in this daring plan. The first vanguard of the 389th led by Brigadier General Jack Wood, arrived at Hethel on June 11th 1943, followed by the air echelons of the four squadrons: 564th, 565th, 566th and 567th over the next two weeks. The ground echelons travelling by ship, would arrive some time later. Urgency was the key word and so as to not lose valuable training time, ground crews were drafted in from nearby Shipdham (93rd BG) and Hardwick’s 44th BG.

This change in tactics, from high-level to low certainly perplexed the crews of the 389th. New top-secret bomb sights had been trialled over The Wash to the north of the Norfolk coast and they had been successful in their operation. Extensive training operations were put in place to prepare the crews for the forthcoming operations. So intense was this low-level training, that two B-24Ds collided over East Anglia, ’42-40687′ piloted by 1st Lt. Edward Fowble, and ’42-40774′ “Heaven Can Wait” piloted by 1st Lt. Harold James, struck each other. Whilst both aircraft managed to return to Hethel, one of the navigators, 2nd Lt. Charles Quantrell sadly lost his life. Eventually on the 31st June, the crews left Hethel, to join those they had worked so hard with, they flew via Portreath to their destination in Libya. From here they would undertake a multitude of missions including the support of the Sicily invasion before going on to attack the infamous oil refineries at Polesti. Whilst in Libya the 389th would earn many distinctions including a posthumous Medal of Honour to Lt. Lloyd H. Hughes (s/n 0-666292) for his determination in dropping his bombs on target even though his B-24 was burning ferociously. The 389th would also receive the Distinguished Unit Citation (DUC) from Lt. General Spaatz and hence forth become known as “The Sky Scorpions“.

Former RAF Hethel

One of the remaining buildings on the Accommodation site.

Whilst the main sections of the 389th were out in Libya, the remaining Hethel units were reduced to training and Air-Sea rescue missions, ironically searching for downed B-17 crews, something the Liberator would prove to be invaluable at.

With the return of the Africa detachments, the Bomb Group  was complete again, and missions over occupied Europe could begin once more from Hethel. Their first contribution to this new phase was to attack Leeuwarden, but cloud cover forced them to find alternative targets on which they unleashed their devastating load. With operation STARKEY about to commence, the 389th were ordered to target the Luftwaffe airfields in the St. Omer region, and then again six days later they visited St. Andre De L’Eure. The next day, the 389th were informed that they would be returning to North Africa this time in support of the Salerno beachhead. A blow to those crews who had only recently arrived here at Hethel.

With the group split again, Hethel based units would continue the fight on. As the renamed 2nd Bombardment Division, they now carried a large Black ‘C’ enclosed in a white circle on their tail fins and starboard wingtip, they would also fly the updated ‘H’ model B-24. With a nose turret, more experienced crews had their reservations about these aircraft, slower and heavier they were also colder due to gaps in the turret surrounds.

A number of strategic missions took these aircraft over occupied Europe many deep across the German Heartland. As 1943 drew to a close the 389th would attack dock yards at Vegesack, Danzig and Wilhelmshaven; targets at Munster, Breman, Emden and Kiel to name but a few. It was at Emden that the Luftwaffe fighters were trialling a new weapon, a bomb dangled on 100 feet of wire to catch the bombers. A rather poor attempt it nevertheless caused great concern for pilots having to fly through wires hanging in an already busy sky. To bring 1943 to a close, on the 30th and 31st December, the 389th were part of further large formations attacking both Ludwigshafen on the Rhine and the airfield at St. Jean D’Angeley respectively.

Former RAF Hethel

Views of the former Technical site, now under the ownership of Lotus cars. The grey line across the centre of the photograph is the former runway now a testing track.

A new year brought little change, but with the introduction of H2X-equipped aircraft, bombing became more accurate, and new targets were identified; ‘No Ball’ operations began and attacks on German cities increased. Late February saw the 389th in action during ‘Big Week’, an operation designed to cripple the German aircraft industry by targeting both aircraft and component manufacturing sites.

With the lead up to D-day, operations would occur almost every day from June 2nd up to June 29th, there would be only six days in this month period where no missions were flown by the 389th.

November 1944 would bring another devastating blow to the crews of Hethel. A collision between B-24J ’42-50452′ ‘Earthquake Magoon‘ and another B-24J ’44-10513’ on November 21st over the local parish of Carelton Rode, saw the loss of 17 of the 20 crew men. A devastating blow that highlighted the need for good communication and careful flying in these close quarters.

Missions carried on and as the war drew to a close, fighter attacks became less effective but even more daring. Pockets of resistance were becoming a ‘nuisance’ and the need for the further ports led to an attack in the Bordeaux region. On April 14th 1945, 1,161 heavy bombers were sent to the area. The 2nd Air Division accounted for 336 of these aircraft, of which only two were lost; B-24J ’42-50774′ “Stand By” and B-24J ’42-51233′ “The Bigast Boid“.

In “The Bigast Boid” of the 567th BS, was pilot 2nd Lt. Edward Bush and his nine other crew members. The aircraft was seemingly hit by friendly fire from B-17s flying above, completely severing the aircraft in half at the trailing edge of the wing, resulting in total loss of control. In the subsequent crash all ten crew members were killed. Other pilots from the 389th who witnessed the accident, attributed the fires and crash to flares being dropped from higher flying B-17s, – such was the danger of flying in tight formations.

Leon J Nowicki, and engineer of the 389th Bomb Group with the nose art of a B-24 Liberator (serial number 42-51233 nicknamed

Leon J Nowicki, engineer of the 389th BG with the B-24 “The Bigast Boid”. The aircraft would be lost to ‘friendly fire’ on April 14th 1945.  (IWM)

Eleven days later on April 25th, 1945 the 389th BG flew its final mission. The last target to receive the attention of the four squadrons was Salsburg, an operation that closed the books on 321 operational missions in five different versions of B-24. In total they dropped 17,548 tons of ordnance, lost 116 aircraft as Missing in action and claimed 209 enemy aircraft shot down. In 1945 they were awarded ‘best squadron’ on efficiency, an award that clearly reflected their attitude and dedication to the war effort.

With the departure of the air echelon at the end of May 1945 and the ground echelons from Bristol, the unit was given 30 days ‘R and R’ before inactivation in September. Hethel like so many airfields was then handed back to RAF Fighter Command who stationed a small number of Squadrons here before disbanding them. In September 1945, 65 Sqn and 126 Sqn were here with Mustang IVs. 65 Sqn stayed taking on Spitfire LF XVI E models before moving to Spilsby in early 1946. 126 Sqn left, had a months stay at Bradwell bay and then returned here, also taking the Spitfire LF XVI E and eventual disbandment in the following March.

Five Polish squadrons then came to Hethel. During the period March to December 1946: 302, 303, 308, 316 and 317 each stayed bringing with them Spitfire XVIs / Es, Mustang IIIs, and IVs, before all being disbanded in the December 1946.

Some technical activity on the site became almost token in comparison and eventually, after being used for repatriation and displaced persons purposes, Hethel was closed and sold off. After laying dormant for a number of years, the majority of the site was bought by Lotus Cars, the company who own the ‘airfield’ today using part of the main runway and perimeter track for testing their high performance cars. The remaining accommodation areas were bought back by the local farmer and are now used for chicken farming, or left allowing the woods to envelop what is left of the accommodation sites.

Former RAF Hethel

A T2 Hangar moved to the northern side of the airfield. One of the better ‘accessible’ features of Hethel.

Considering the role of the Lotus factory, access is generally good. Look for signs for ‘Lotus Engineering’ and drive along the road passing the Lotus site. This was the main entrance to the airfield, separating the ten accommodation and defence sites (on your right) from the main airfield to your left. On the right hand side are some of the former Defence site buildings, now used by small industrial units, the Lotus factory taking over the main technical area including the control tower. On your left is one of the original three hangars. Continue on past the Lotus entrance along the road as far as you can. To your right is a wood, this once housed Communal Site 1 and beyond this the other accommodation sites. A footpath allows access through here where a small number of buildings can be seen albeit enveloped in very dense undergrowth. The road along here eventually turns into a farm, and private property, however, the chapel and Gymnasium are located along this road and have since been turned into a museum. Access to the museum is through this gate. Beyond, the road turns into a footpath and utilises the former perimeter track linking to the main runway to the north. This runs alongside the track now used by Lotus.

From here turn back, return to the main road and turn right. Follow the road parallel to the former east-west runway and turn right. Keep going following the road round, eventually you come to another T2 Hangar. Not originally erected here, it was moved at some point from elsewhere, but is perhaps one of the better examples of airfield archaeology left on the site that is ‘accessible’.

Whilst the majority of Hethel has been removed or utilised by Lotus, it makes for a fascinating trip. The museum, run by volunteers, opens infrequently but I believe offers a fabulous insight into life on the base during the war. One of the more stunning aspects of the exhibition is a number of murals painted in 1944 by “Bud” Doyle. A small memorial is also located at the museum in honour of those who served here.

Hethel was once a heaving airfield, it has now taken on a new sound, but the memories of those brave young men still linger in the Norfolk air; the trees sway to the tunes of their music and their lives rest peacefully at last, honoured in the churches of the nearby Norfolk villages.

Sources and notes

While in the area, visit All Saints Church at Hethel, a memorial headstone dedicated to the crews of Hethel is located in the churchyard with a Roll of Honour inside the church itself. It also contains a Roll of Honour and extracts from ‘The Attlebridge Diaries’, for those who flew as part of the 466th BG from nearby RAF Attlebridge.

A plaque and small stained glass window in All Saints Church, Carelton Rode, commemorates the deaths of the seventeen airmen killed in a mid-air collision in November 1944.

The Hethel Museum was closed on my visit, but a blog site gives some details of the exhibits along with the restricted opening time information.

I recommend: Freeman, R.A., “The Mighty Eighth“, published by Arms and Armour, 1986 which has proven to be a valuable source of background information.

Also Joe Baugher’s website, for serial numbers of the USAAF aircraft.

Here lay the names of 150,000 RAF Personnel.

If you are in London, maybe taking in a show or visiting one of the many museums London has to offer, perhaps visiting the RAF Museum at Hendon or as I was, the Imperial War Museum in Lambeth, this is an ideal place to stop off and take time out. Its stained outer walls and hectic surroundings hint at nothing inside this remarkable building.

St. Clement Danes Church – London

St. Clement Danes church stands almost oddly in the centre of London in the Strand, surrounded on all sides by traffic; like an island it offers sanctuary and peace yet its history is far from peaceful.

St. Clement Danes - Church of the RAF

The view toward the Altar. The floor contains nearly 900 Squadron badges of the Royal Air Force.

It reputedly dates back to the Ninth Century AD following the expulsion of the Danes from the City of London, in the late 870s, by King Alfred. As a gesture, he allowed Danes who had English wives to remain nearby, allowing them to dedicate the local church to St. Clement of the Danes. Ever since this time, a church has remained, albeit in part, on this very site.

August 2016 009

The ‘Rosette’ of Commonwealth Air Force Badges embedded into the floor.

In the 1300s and then again in the late 1600s it was rebuilt, the second time influenced by the great Sir Christopher Wren – notable for his designs of buildings both in and outside of London. Regarded as being Britain’s most influential architect of all time, he designed many famous buildings such as the Library at Trinity College and the Royal Hospital at Chelsea. Wren also redesigned both Kensington and Hampton Court Palaces – his influences stretched far and wide.

Of course Wren’s ultimate master-piece was St. Paul’s Cathedral in London, a structure that reflected both his skill, vision and personality.

During the Great Fire of London in 1666, eighty-seven churches were destroyed in London, but only fifty-two were subsequently rebuilt. Whilst not directly damaged by the fire, St. Clement Danes was included in that list due to its very poor condition and Wren was invited to undertake the huge task.

St. Clement Danes - Church of the RAF

The Memorial to all the Polish airmen who served with the Royal Air Force during World War II.

It then stood just short of 300 years before incendiary bombs of the Luftwaffe destroyed it in May 1941. Leaving nothing but a few walls and the tower, Wren’s design had been reduced to ashes and rubble.

For over ten years it lay in ruins, until it was decided to raise funds and rebuild it. In 1958, following a national appeal by the Royal Air Force, St. Clement Danes was officially opened and dedicated as the Central Church of the Royal Air Force in memory of all those who fought and died whilst in RAF service, and to ‘serve as a perpetual shrine of remembrance’ to them all.

In completing the restoration, every branch of the RAF was included. At the entrance of the church, is the rosette of the Commonwealth made up of all the Air Forces badges of the Commonwealth countries, each of which flew with RAF crews during the conflicts. Beyond the rosette, the floor from the north aisle to the south aisle of the Nave contains nearly 900 squadron badges each one made in Welsh Slate and embedded into the floor.

Around the walls of the church, four on each side and two to the front, are ten Books of Remembrance from 1915 to the present day, in which are listed 150,000 names of those who died whilst in RAF service. A further book on the west wall, contains a further 16,000 names of USAAF personnel killed whilst based in the United Kingdom during the Second World War.

St. Clement Danes - Church of the RAF

Ten Books of Remembrance contain 150,000 names of those who died in RAF Service 1915 – the present day. A further book contains 16,000 names of USAAF airmen who were killed.

On either side of the Altar, are boards and badges dedicated to every branch of the RAF. Two boards list the names of those who were awarded the Victoria Cross and others the George Cross. Other slate badges represent the various units to serve and support the main fighter and bomber groups, including: RAF Training units, Fighter Control units, Maintenance units, University Air Squadrons, Medical units, Communication squadrons, Groups, Colleges and Sectors.

In the North Aisle, a further memorial, also embedded into the floor, remembers those who escaped the Nazi tyranny in Poland and joined the RAF to carry on the fight during World War II. Each Polish Squadron is represented in a beautifully designed memorial around which is written:

“I have fought a good fight, I have finished my course’ I have kept the faith”

Smaller dedications can also be found around the church, such as the Mosquito Aircrew Association, dedicated to both air and ground crews of the mighty ‘Wooden-Wonder’. Some of these memorials are in the form of gifts of thanks many of which come from other nations as their own tribute to those who came from so far away to give their lives in the name of freedom and democracy.

So next time you’re in London, take time out from the hustle and bustle of the West-end, make your way to the Strand ( a fifteen minute bus journey from the IWM) and visit this peaceful retreat.

St. Clement Danes is open every day to the public, so that those who gave the ultimate sacrifice may live on for eternity.