M/Sgt. Hewitt Dunn – Flew 104 missions.

RAF Framlingham (Parham) otherwise known as Station 153, achieved a remarkable record, or rather one man in particular did. His name was Hewitt Dunn, a Master Sergeant in the U.S.A.A.F and later the U.S.A.F.

Known as “Buck” he would achieve the remarkable record of completing 104 missions with the 390th Bombardment Group (Heavy) – a record that astounded many as life expectancy in a heavy bomber was short, and few survived beyond one tour of 30 missions.

Hewitt Tomlinson Dunn (s/n 13065206) was born on July 14th 1920. He progressed through school to join the Air Corps where he was assigned to the 390th Bombardment Group (Heavy), 13th Combat Wing, 3rd Air Division, Eighth Air Force, as a gunner in December 1943.

His first mission was with the 569th Bombardment Squadron in the following January. He completed his first gruelling tour of 30 missions by April that year, upon which he immediately applied for a further tour that he would complete by the summer of 1944. His attitude of ‘its not over until its won’, would see him accept a further remarkable third tour, virtually unheard of for a heavy bomber crew member.

On Friday, April 6th 1945, mission 930, an armada of aircraft of the U.S.A.A.F would strike at the marshalling yards in Leipzig, Germany. Inside B-17 #43-38663, ‘The Great McGinty‘, was Hewitt Dunn.

After the mission Dunn described how earlier at the morning briefing, he, like so many of his colleagues, had been a little ‘nervous’. Then, when the curtain was pulled back, their nervousness was justified, Leipzig – the 390th had been there before.

Many crews in that briefing would look to Dunn for signs of anguish, if he remained steady and relaxed, they knew it would be ‘easy’, if he sat forward, then it was going to be a difficult one. The atmosphere must have been tense.

Luckily, unlike other missions into the German heartland, this one turned out to be ‘just another mission’ a ‘milk run’. Much to the huge relief of those in command of the 390th, all aircraft returned safely.

On his arrival back at Framlingham, Dunn was greeted by cheering crowds, ground crews lifted him high in their air carrying him triumphantly away from his aircraft, it was a heroes welcome.

By the time the war had finished, Dunn had flown in 104 missions, he had been a tail gunner on twenty-six missions, twice a top-turret gunner, a waist gunner and the remainder as togglier (Bombardier). He had flown over Berlin nine times, he claimed a FW-190 shot down and had amassed an impressive array of medals for his bravery and actions, and all at just 24 years old.

Post war, he continued to fly as an Instructor Gunner for B-52s in the 328th Bomb Squadron, 93rd Strategic Bomb Wing, at Castle Air Force Base in California. Here he was described as “quiet and reserved” and never talked about his war experiences. He was “handsome man with black hair”, and only when he wore his dress uniform, did others realise how well decorated he was.

Dunn was considered a rock by those who knew him and perhaps immortal, but he was not, and on June 15th , 1961 after flying for a further 64 flights, he was killed. Details of his death are sketchy, but the man who had flown in more missions than any other person in the Eighth Air Force and had gone to train others in that very role, was highly decorated. He was looked up to and liked by those who knew him.

Following his death a service was held in Merced, California, his body was then taken to Arlington National Cemetery in Washington D.C. where he was finally laid to rest in grave number 3675, section 28.

For a man who achieved so much in his fighting career, little exists about him or his achievements. Maybe, by the end of the war, records were no longer needed, tales of dedication and bravery were no longer useful propaganda. Whatever the reason, Hewitt Dunn’s name should be heavily embossed in the history books of the Second World War.

hewiit-dunn

Hewitt Dunn on return from his 100th mission, April 1945 (IWM)

Hewitt Dunn’s medal tally:

– Air Force Longevity Service Award with 3 oak leaf clusters
– Air Medal with 13 oak leaf clusters (2 silver, 3 bronze)
– Air Medal with 7 oak leaf clusters (1 silver, 2 bronze)
– American Campaign Medal
– Distinguished Flying Cross with 1 oak leaf cluster
– Good Conduct Medal
– National Defence Service Medal
– Silver Star
– World War II Victory Medal
– European-African-Middle Eastern Campaign Medal with 1 bronze star
– European-African-Middle Eastern Campaign Medal with 1 silver star

Hewitt Dunn’s story is one of many featured here.

RAF Framlingham & the 390th BG – Masters of the Air

In Trail 39 we turn south once more and return to Suffolk, to the southern most regions of East Anglia, to an area known for its outstanding beauty and its stunning coastline. It is also an area rich in both Second World War and Cold War history. Perhaps better known for its fighter and light bomber stations, it was also the location for several heavy bomber bases, each one with its own fascinating story to tell.

We start off this trail at the former site of American base at RAF Framlingham.

RAF Framlingham (Station 153)

RAF Framlingham is actually closer to the village of Parham than it is the town of Framlingham, hence it was also known as RAF Parham – a name that it became synonymous with. Built as a class ‘A’ bomber station its official American designation was Station 153.

Building work commenced in 1942, and as with most large bomber stations it was designed to the Class A specification to include: three concrete runways (one of  6,400 ft and two of 4,400 feet in length), an adjoining perimeter track that linked fifty ‘pan style’ dispersals; two T-2 hangars (one to the west with the technical site and one to the south-east) and accommodation for some 3,000 personnel dispersed in 10 sites to the south-west of the airfield.  A  further sewage treatment plant dealt with the site’s waste.

The main runway ran east-west and to the eastern end sat the bomb store, a large area that included: a pyrotechnic store, fusing point, incendiary store and small arms store – all encircled by a concrete roadway.

Peri track looking north toward tech area (A)

Part of the Perimeter track at the southern end of the airfield. To the right was the crew rest rooms, locker and drying rooms.

The administration site sat between the main technical site and accommodation areas all located to the south-west side of the airfield.

Opened in 1943, the first residents were the B-17s of 95th Bomb Group which consisted of four bomb squadrons: the 334th, 335th, 336th and the 412th. Flying a tail code of a square ‘B’ they initially formed part of the 4th Bomb Wing, changing to the 13th Combat Wing, 3rd Air Division of the Eighth Air Force in September 1943 following the reorganisation of the U.S. Air Force in Europe.

Following their inception and constitution on 28th January 1942 and subsequent activation in June, they moved from their training ground at Barksdale Field, Louisiana, through Oregon, Washington and eventually to Rapid City Air force Base in South Dakota. They began their move across the Atlantic in the spring of 1943, taking the southern route via Florida arriving at Alconbury and then moving on directly to Framlingham in early May/June that year. It was whilst stationed at Alconbury though that they would have their first few encounters of the war, and they would not all be plain sailing.

On May 27th, 1943 just 14 days after their first mission, ground crews were loading 500 lb bombs onto a 334th BS B-17 ’42-29685′ when the bombs inexplicably detonated, the Alconbury landscape was instantly turned to utter carnage and devastation. The blast was so severe that it killed eighteen men (another later died of his injuries), injured twenty-one seriously and fourteen others slightly.  The B-17 involved was completely destroyed and very little of its remains could be found in or around the huge crater that was left deep in the Alconbury soil. Three other aircraft, 42-29808, 42-29706 and 42-29833, all sat within 500 feet of the explosion, were severely damaged and subsequently scrapped. In total, fifteen B-17s were damaged by the blast, it was a major blow to the 95th and a terrible start to their war.

There then followed a transition period in which the group moved to Framlingham. During this time operations would continue from both airfields leaving the squadrons split between the two bases. The first few missions were relatively light in terms of numbers of aircraft lost, however, on June 13th 1943, they were part of a ‘small’ force of seventy-six B-17s targeting Kiel’s U-boat yards. This was to be no easy run for the 95th, a total of twenty-two aircraft were lost on this raid and of the eighteen aircraft who set off from Framlingham in the lead section, two aborted and only six made it back. In one of the lead planes, was the newly appointed Brigadier General Nathan Bedford Forrest as observer. Riddled with bullet holes, his aircraft plummeted from of the sky with the majority of its tail plane missing and one of its engines ablaze. His body was never found and he became the first U.S. General causality of the war. In total, the raid resulted in 236 crewmen being listed as either missing, killed or wounded – this would be the 95th’s heaviest and most costly mission of the entire war.

A view from the tower looking East to West.

Two days after this mission the group would depart Framlingham and move to RAF Horham a few miles north-west, where they remained for the remainder of the war. The majority of the crews would probably be pleased to move away leaving behind many terrible memories and lost friends. However, the tide would turn and they would go on to gain a remarkable reputation and make a number of USAAF records. They would be the only Eighth Air Force group to achieve three Distinguished Unit Citations (DUC), and be the first group to bomb Berlin. They also claimed the highest number of enemy aircraft shot down by any bomb group and they would be the group to suffer the last aircraft loss (on a mission) of the war – all quite remarkable considering their devastating introduction to the European Theatre.

As the 95th departed Framlingham so moved in the 390th BG.

The 390th BG like the 95th and 100th were part of the 13th Combat Wing, 3rd Air Division. They too were a new Group, only being formed themselves early in 1943. The 390th BG was made up of four B-17 bomb squadrons: the 568th, 569th, 570th and 571st, and at initial full strength consisted of just short of 400 personnel. They formed part of the larger second wave of USAAF influxes who were all new recruits and whose arrival in the U.K. would double the size of the USAAF’s presence overnight.

Old hands of the Mighty Eighth, took great pride in teasing these new recruits whose bravado and cockiness would soon be knocked out of them by the more experienced Luftwaffe fighter pilots.

The 390th would create quite a stir in the Suffolk countryside and not just because of their ‘smooth taking’, ‘endless supply of chocolate’ and ‘upbeat music’. Up until now, the ‘smuggling’ of pets into American airbases had been by-and-large ignored, but with the 390th came a Honey Bear, a beast that quite frequently escaped only to be confronted by rather bemused locals! There would be however, despite all this frivolity, no rest period for the crews, and operations would start the 12th August 1943, less than a month after they arrived.

B-17 Flying Fortresses of the 390th Bomb Group in flight over Framlingham. Handwritten caption on reverse: '390BG.'

B-17s of the 390th BG over RAF Framlingham (IWM)

The latter parts of 1943 saw a lot of poor weather over both the U.K. and the continent, and this combined with the heavy use of smoke screens by the Germans, prevented large numbers of bombers finding their targets. As a result, many crews sought targets of opportunity thus breaking up strong defensive formations. The eager Luftwaffe pilots made good use of this, taking advantage of broken formations and poor defences. As a result, the bombers of this new influx would receive many heavy casualties and August 12th was to become the second heaviest loss of life in the American air war so far.

1943 would be a busy time for the 390th, within a few days and on the anniversary of the U.S. VIII Air Force’s first European operation, they would attack the Messerschmitt factory at Regensburg, a mission for which they would receive their first Distinguished Unit Citation (DUC).

The operation would be a blood bath. On that day 147 B-17s took off with the 390th forming the high squadron in the first formation. For over an hour and a half, multiple fighters of the Luftwaffe attacked the formations which were split by delayed arrivals, and large gaps in the formation. Compounded with this was the fact that the escorting P-47s had to return home leaving the formations largely undefended. With no fighter escort the bombers became easy prey and the numbers of blood-thirsty attacks increased. The rear and low formations of the force were decimated and departing P-47 fighter crews could only look on in horror.

Over the target, skies cleared and bombing accuracy was excellent, but it was the 390th that would excel. Of the seven groups to attack, the 390th manged to get 58% of its bombs within 1000 ft of the target and 94% within 2000 ft, a remarkable achievement for a fledgling group. Flying on, they passed over the Alps and across Italy onto North Africa where they landed – their first shuttle mission was complete. The run in to the target and subsequent journey to North Africa would create multiple records; two B-17s, one of which belonged to the 390th, sought sanctuary in neutral Switzerland, the first of any group to do so. But the journey across Europe had been difficult and it would cost the lives of six B-17 crews – it had truly been a hard-won DUC.

Two months and some 20 missions later, they would repeat this epic achievement. On October 14th 1943, they took part in the second major attack on Schweinfurt, a target whose name alone put the fear of God into many crews. The route that day would take them across some of the most notorious Flak black spots, Aachen, Frankfurt, Bad Kissingen and Schweinfurt itself. On top of that, Luftwaffe fighters would be hungry for blood, many crew members knew this would be a one way trip.

Take off was at 10:00am, and the Third Air Division would provide 154 aircraft, but again due to mechanical problems and poor weather, the formation were scattered across the sky and defences were weak. As they crossed the channel enemy aircraft were few and far between, giving false hopes to rookie crews who were cruising 20,000 feet above the ground. Eventually at around 1:00pm the escorts left and the waiting Luftwaffe crews stepped in. All hell broke loose. Rockets, timed bombs and heavy machine gun fire riddled the B-17 formations – Schweinfurt was going to live up to its reputation. After fending off relentless attacks by the Luftwaffe, the formation reached their target and all 390th aircraft managed to bomb with an accuracy of 51% of the MPI (Mean Point of Impact). For this they received their second DUC – the newbies were rapidly becoming masters of the air.

July 2016 019

The widest section of runway, now a mere fraction of its former self.

1943 would draw to a close, and the optimism of many ‘successful’ raids over the Reich would bring the dawn of 1944.  Big week in February saw the massed attacks on the German aircraft production factories, and in March, the 390th attacked Berlin. During this raid B-17 ’42-30713′ “Phyllis Marie” made an emergency landing only to be captured intact by the Luftwaffe and flown under KG200. It was later found in Bavaria.

Other major targets for the 390th this year included Frankfurt marshalling yards, Cologne, Mannheim, the navel yards at Bremen and the oil refineries at Mersburg. In 1944 the 390th softened the German defences along the Atlantic coast just fifteen minutes before the invasion force landed in June. They followed up the advance by supporting the allied break out at St. Lo.

During August 1944, the 390th flew a round mission that took them for the second time to a Russian airfield. After refuelling and rearming, they attacked the oil refineries at Trzebinia (later famed with the POW’s ‘death march’ across western Europe) and then back to Russia. Three days later they flew to North Africa, depositing high explosives in Romania, and then four days after that, the return trip to Framlingham bombing Toulouse on the way.

The cold winter of 1944 would become well-known for its snow and ice, a period in which almost as many aircraft were lost to ice as to enemy action. On December 27th, the cold would claim B-17 ’42-107010′ “Gloria-Ann II” of the 569th BS. A build up of ice would bring her down within a minute of taking off and the ensuing explosion of fuel and bombs would cause a fire from which nine crew members would perish. Houses in the vicinity of Parham were also damaged but there were no local casualties and the aircraft would be salvaged and reborn as “Close Crop“.

B-17G-35-VE #42-97849

Battle damage was often severe, here B-17G #42-97849 “Liberty Bell” of the 570th BS, shows extensive damage to her tail section. (IWM)

In the early months of 1945 the Ardennes was also gripped in this terrible fog and cold. The 390th took off in support of the paratroopers locked in the Belgium forests, bombing strategic targets beyond the Ardennes, they cut German lines preventing further supplies reaching the front.

By 1945 it was no longer a rare occurrence for bombers to have exceeded the 100 mission milestone, for the crews however, it was a target to avoid. For the 390th, April 1945 would see the first US airman to surpass the 100 mission mark achieved solely whilst operating in the European theatre. Hewitt Dunn, acting as bombardier (Togglier) was the first US Eighth AF airman to surpass 100 missions in an operational span that started in January 1944 and that had seen him in virtually every position of an operational B-17, and over virtually every high risk target in occupied Europe – he was just 24 years old.

Gradually the summer sun came and with it clear skies. Allied air operations increased and soon the end was in sight for Nazi Germany, but air accidents and US losses would still continue. On landing his B-17 “Chapel in the Sky“, Murrell Corder ground looped his aircraft to prevent crashing into other parked B-17s. In doing so, he clipped the wings of “Satan’s Second Sister” severely damaging both aircraft, thankfully though, there were no casualties.

At the end of the war the 390th left Framlingham and returned to the United States. They had received two Distinguished Unit Citations, had the highest enemy aircraft claim of any unit on one single mission and reached the first 100th mission of any aircrew member. Their tally had amounted to 300 missions in which they had dropped over 19,000 tons of bombs. They had definitely earned their place in the Framlingham history books.

On departure, Framlingham was given back to the RAF who used it as a transit camp to help with the relocation of displaced Polish people. It was then closed in the late 1940s and sold back to the local farmer, with whom it remains today.

A small consortium of volunteers have manged to rebuild the control tower into a fabulous museum, displaying a wide variety of aircraft and airfield parts, and personal stories from those at Framlingham. They have also refurbished a couple of Nissen huts, recreating life in a barrack room as it would have been during the Second World War, and displaying articles and stories from the resistance organisation.

As for the airfield, much of the perimeter track remains as do long sections of the runways as farm tracks. The public road today passes through the centre of the airfield dissecting the technical area from the bomb store. From the northern most end a footpath allows you to walk along the north-western section of the perimeter track, currently used by a road repair company for storing stone chippings and lorries. The hardstands have been removed and piles of rubble contain evidence of drainage and electrical supply pipes. From the road at this point you can also see a small section of the main runway – now holding piggery sheds – which has virtually all been removed. From the western side of the perimeter track you can look along the north-west to south-east runway, a mere fraction of its former self, it is barely wide enough for a tractor let alone a heavily laden B-17 and her crew.

Returning to the museum front takes you along the widest part of this runway. A small section at almost full width, it gives you an indication of the 150 feet of concrete that makes up these great structures, and an insight into what they would have been like during the mid 1940s.

Tower 4

The Watch office is now a refurbished museum and highly recommended.

Behind the museum stands one of the hangars, this along with the tower are the two most discernible buildings left on site. Many of the accommodation buildings are now gone, and what is left is difficult to see. A footpath does allow access across the bomb store – now a wooded area, but if walking from the north, it is virtually impossible to park a car due to the very narrow and tight roads in the area.

Like many of Britain’s airfields Framlingham holds a wealth of stories in its midsts. The near constant roar of B-17s flying daily missions over occupied Europe are now whispers in the trees. The museum, a lone statue, gazes silently over the remains of the airfield offering views of ghostly silhouettes as they lumber passed on their way to a world gradually being forgotten. Framlingham and the 390th, have definitely earned their place in the world’s history books.

Whilst in the area, take a short trip to Framlingham town, below the castle, is St Michael’s church and above the door a 390th Group Hatchment in honour of those who served at Framlingham.

From here, we travel south-west toward Ipswich and stop at another USAAF base also with a fabulous museum. We go to RAF Debach – home of the 493rd BG(H).

Notes, sources and further reading.

*Photos exist of what appears to be a Type ‘J’ or ‘K’ hangar on the site. This does not appear on the airfield drawings however and its origin is as yet unknown.

A number of sources were used to research the history of RAF Framlingham and the 390th, they are highly recommended for further information. They include:

The 390th Memorial Museum website.

Veronico. N., “Bloody Skies“, Stackpole Books, 2014

Freeman, R., “The Mighty Eighth“, Arms and Armour Press, 1986

Freeman, R,. “The B-17 Flying Fortress Story“, Arms and Armour Press, 1998

RAF Hethel – from Africa to Norfolk

As we leave both Swanton Morley and Hingham behind, we head directly east crossing the main A11 toward Wymondham and Mulbarton. Here we visit another former USAAF base now home to Lotus cars. We stop off at RAF Hethel.

RAF Hethel (Station 114)

RAF Hethel was initially designed for the RAF but, like so many airfields of the Second World War, it was transferred very quickly to the USAAF for use by the bombers of the  Eighth Air Force. Construction of the site began in 1941 and wasn’t complete when the first units arrived in 1942.

The ground echelons of the 320th BG arrived at Hethel in September, poised and ready for training. Travelling across the northern sea route, they arrived long before the air echelons who, due to extremely bad weather, had to divert from their designated route to the longer Southern route, via Africa. As this was considerably further to fly, many of the B-26s, of these units did not arrive until well into the December.

A dramatic picture of B-24 Liberator ’44-40085′ “Z-Bar” of the 389th BG after crash landing at Hethel. It was hit by British Flak and on trying to land, crashed into a radar building. Surprisingly all the crew escaped. 22nd April 1944 (IWM)

Training of these raw crews became the responsibility of the Eighth Air Force – and raw they certainly were. The 320th had only been active since June 23rd that year, and within  weeks they would be posted to North Africa once suitable airfields had been secured.

Construction work continued on Hethel throughout the latter stages of 1942 and into 1943; the number of hardstands rose from the original 36 to 50 giving a mix of both ‘spectacle’ and ‘frying pan’ types dotted around the three concrete runways. The main runway ran north-east to south-west with two smaller runways traversing east-west and north-west to south-east respectively. A large bomb store was located to the north-west, the opposite side to both the technical and accommodation areas both of which were to the south-eastern side of the airfield. That all important commodity, fuel, was stored to the south, and three T2 hangars would eventually provide room for aircraft maintenance away from the bitter 1940’s winters.

With the 320th away in North Africa, Hethel was operationally quiet, but the summer of 1943 would once again bring changes.

Oil had long been considered a major target, reduce your enemies oil supplies and you reduce their ability to function. Stopping these supplies however, was going to be no easy task. The mighty German war machine was using oil located in the far eastern regions of Europe, located at the very edge of any major allied aircraft’s range. This gave the Luftwaffe plenty of time to attack, on both the inward and outward journeys. With round trips in excess of 2,000 miles, they would be dangerous and difficult missions for any crews. Polesti in Romania would become synonymous with oil production and a major target for the allied forces. To reach it, crews would have to fly from North Africa at very low-level, something they had not even thought possible let alone trained for in B-24s. In the summer a plan was hatched to do just that, a low-level bomber raid by B-24 Liberators of the Eighth and Ninth Air Force launched from bases in North Africa.

Hethel and the 389th would play their part in this daring plan. The first vanguard of the 389th led by Brigadier General Jack Wood, arrived at Hethel on June 11th 1943, followed by the air echelons of the four squadrons: 564th, 565th, 566th and 567th over the next two weeks. The ground echelons travelling by ship, would arrive some time later. Urgency was the key word and so as to not lose valuable training time, ground crews were drafted in from nearby Shipdham (93rd BG) and Hardwick’s 44th BG.

This change in tactics, from high-level to low certainly perplexed the crews of the 389th. New top-secret bomb sights had been trialled over The Wash to the north of the Norfolk coast and they had been successful in their operation. Extensive training operations were put in place to prepare the crews for the forthcoming operations. So intense was this low-level training, that two B-24Ds collided over East Anglia, ’42-40687′ piloted by 1st Lt. Edward Fowble, and ’42-40774′ “Heaven Can Wait” piloted by 1st Lt. Harold James, struck each other. Whilst both aircraft managed to return to Hethel, one of the navigators, 2nd Lt. Charles Quantrell sadly lost his life. Eventually on the 31st June, the crews left Hethel, to join those they had worked so hard with, they flew via Portreath to their destination in Libya. From here they would undertake a multitude of missions including the support of the Sicily invasion before going on to attack the infamous oil refineries at Polesti. Whilst in Libya the 389th would earn many distinctions including a posthumous Medal of Honour to Lt. Lloyd H. Hughes (s/n 0-666292) for his determination in dropping his bombs on target even though his B-24 was burning ferociously. The 389th would also receive the Distinguished Unit Citation (DUC) from Lt. General Spaatz and hence forth become known as “The Sky Scorpions“.

Former RAF Hethel

One of the remaining buildings on the Accommodation site.

Whilst the main sections of the 389th were out in Libya, the remaining Hethel units were reduced to training and Air-Sea rescue missions, ironically searching for downed B-17 crews, something the Liberator would prove to be invaluable at.

With the return of the Africa detachments, the Bomb Group  was complete again, and missions over occupied Europe could begin once more from Hethel. Their first contribution to this new phase was to attack Leeuwarden, but cloud cover forced them to find alternative targets on which they unleashed their devastating load. With operation STARKEY about to commence, the 389th were ordered to target the Luftwaffe airfields in the St. Omer region, and then again six days later they visited St. Andre De L’Eure. The next day, the 389th were informed that they would be returning to North Africa this time in support of the Salerno beachhead. A blow to those crews who had only recently arrived here at Hethel.

With the group split again, Hethel based units would continue the fight on. As the renamed 2nd Bombardment Division, they now carried a large Black ‘C’ enclosed in a white circle on their tail fins and starboard wingtip, they would also fly the updated ‘H’ model B-24. With a nose turret, more experienced crews had their reservations about these aircraft, slower and heavier they were also colder due to gaps in the turret surrounds.

A number of strategic missions took these aircraft over occupied Europe many deep across the German Heartland. As 1943 drew to a close the 389th would attack dock yards at Vegesack, Danzig and Wilhelmshaven; targets at Munster, Breman, Emden and Kiel to name but a few. It was at Emden that the Luftwaffe fighters were trialling a new weapon, a bomb dangled on 100 feet of wire to catch the bombers. A rather poor attempt it nevertheless caused great concern for pilots having to fly through wires hanging in an already busy sky. To bring 1943 to a close, on the 30th and 31st December, the 389th were part of further large formations attacking both Ludwigshafen on the Rhine and the airfield at St. Jean D’Angeley respectively.

Former RAF Hethel

Views of the former Technical site, now under the ownership of Lotus cars. The grey line across the centre of the photograph is the former runway now a testing track.

A new year brought little change, but with the introduction of H2X-equipped aircraft, bombing became more accurate, and new targets were identified; ‘No Ball’ operations began and attacks on German cities increased. Late February saw the 389th in action during ‘Big Week’, an operation designed to cripple the German aircraft industry by targeting both aircraft and component manufacturing sites.

With the lead up to D-day, operations would occur almost every day from June 2nd up to June 29th, there would be only six days in this month period where no missions were flown by the 389th.

November 1944 would bring another devastating blow to the crews of Hethel. A collision between B-24J ’42-50452′ ‘Earthquake Magoon‘ and another B-24J ’44-10513’ on November 21st over the local parish of Carelton Rode, saw the loss of 17 of the 20 crew men. A devastating blow that highlighted the need for good communication and careful flying in these close quarters.

Missions carried on and as the war drew to a close, fighter attacks became less effective but even more daring. Pockets of resistance were becoming a ‘nuisance’ and the need for the further ports led to an attack in the Bordeaux region. On April 14th 1945, 1,161 heavy bombers were sent to the area. The 2nd Air Division accounted for 336 of these aircraft, of which only two were lost; B-24J ’42-50774′ “Stand By” and B-24J ’42-51233′ “The Bigast Boid“.

In “The Bigast Boid” of the 567th BS, was pilot 2nd Lt. Edward Bush and his nine other crew members. The aircraft was seemingly hit by friendly fire from B-17s flying above, completely severing the aircraft in half at the trailing edge of the wing, resulting in total loss of control. In the subsequent crash all ten crew members were killed. Other pilots from the 389th who witnessed the accident, attributed the fires and crash to flares being dropped from higher flying B-17s, – such was the danger of flying in tight formations.

Leon J Nowicki, and engineer of the 389th Bomb Group with the nose art of a B-24 Liberator (serial number 42-51233 nicknamed

Leon J Nowicki, engineer of the 389th BG with the B-24 “The Bigast Boid”. The aircraft would be lost to ‘friendly fire’ on April 14th 1945.  (IWM)

Eleven days later on April 25th, 1945 the 389th BG flew its final mission. The last target to receive the attention of the four squadrons was Salsburg, an operation that closed the books on 321 operational missions in five different versions of B-24. In total they dropped 17,548 tons of ordnance, lost 116 aircraft as Missing in action and claimed 209 enemy aircraft shot down. In 1945 they were awarded ‘best squadron’ on efficiency, an award that clearly reflected their attitude and dedication to the war effort.

With the departure of the air echelon at the end of May 1945 and the ground echelons from Bristol, the unit was given 30 days ‘R and R’ before inactivation in September. Hethel like so many airfields was then handed back to RAF Fighter Command who stationed a small number of Squadrons here before disbanding them. In September 1945, 65 Sqn and 126 Sqn were here with Mustang IVs. 65 Sqn stayed taking on Spitfire LF XVI E models before moving to Spilsby in early 1946. 126 Sqn left, had a months stay at Bradwell bay and then returned here, also taking the Spitfire LF XVI E and eventual disbandment in the following March.

Five Polish squadrons then came to Hethel. During the period March to December 1946: 302, 303, 308, 316 and 317 each stayed bringing with them Spitfire XVIs / Es, Mustang IIIs, and IVs, before all being disbanded in the December 1946.

Some technical activity on the site became almost token in comparison and eventually, after being used for repatriation and displaced persons purposes, Hethel was closed and sold off. After laying dormant for a number of years, the majority of the site was bought by Lotus Cars, the company who own the ‘airfield’ today using part of the main runway and perimeter track for testing their high performance cars. The remaining accommodation areas were bought back by the local farmer and are now used for chicken farming, or left allowing the woods to envelop what is left of the accommodation sites.

Former RAF Hethel

A T2 Hangar moved to the northern side of the airfield. One of the better ‘accessible’ features of Hethel.

Considering the role of the Lotus factory, access is generally good. Look for signs for ‘Lotus Engineering’ and drive along the road passing the Lotus site. This was the main entrance to the airfield, separating the ten accommodation and defence sites (on your right) from the main airfield to your left. On the right hand side are some of the former Defence site buildings, now used by small industrial units, the Lotus factory taking over the main technical area including the control tower. On your left is one of the original three hangars. Continue on past the Lotus entrance along the road as far as you can. To your right is a wood, this once housed Communal Site 1 and beyond this the other accommodation sites. A footpath allows access through here where a small number of buildings can be seen albeit enveloped in very dense undergrowth. The road along here eventually turns into a farm, and private property, however, the chapel and Gymnasium are located along this road and have since been turned into a museum. Access to the museum is through this gate. Beyond, the road turns into a footpath and utilises the former perimeter track linking to the main runway to the north. This runs alongside the track now used by Lotus.

From here turn back, return to the main road and turn right. Follow the road parallel to the former east-west runway and turn right. Keep going following the road round, eventually you come to another T2 Hangar. Not originally erected here, it was moved at some point from elsewhere, but is perhaps one of the better examples of airfield archaeology left on the site that is ‘accessible’.

Whilst the majority of Hethel has been removed or utilised by Lotus, it makes for a fascinating trip. The museum, run by volunteers, opens infrequently but I believe offers a fabulous insight into life on the base during the war. One of the more stunning aspects of the exhibition is a number of murals painted in 1944 by “Bud” Doyle. A small memorial is also located at the museum in honour of those who served here.

Hethel was once a heaving airfield, it has now taken on a new sound, but the memories of those brave young men still linger in the Norfolk air; the trees sway to the tunes of their music and their lives rest peacefully at last, honoured in the churches of the nearby Norfolk villages.

Sources and notes

While in the area, visit All Saints Church at Hethel, a memorial headstone dedicated to the crews of Hethel is located in the churchyard with a Roll of Honour inside the church itself. It also contains a Roll of Honour and extracts from ‘The Attlebridge Diaries’, for those who flew as part of the 466th BG from nearby RAF Attlebridge.

A plaque and small stained glass window in All Saints Church, Carelton Rode, commemorates the deaths of the seventeen airmen killed in a mid-air collision in November 1944.

The Hethel Museum was closed on my visit, but a blog site gives some details of the exhibits along with the restricted opening time information.

I recommend: Freeman, R.A., “The Mighty Eighth“, published by Arms and Armour, 1986 which has proven to be a valuable source of background information.

Also Joe Baugher’s website, for serial numbers of the USAAF aircraft.

Spanhoe Airfield – into the Jaws of Death

RAF Spanhoe (Station 493)

With the BEF evacuation at Dunkirk, some thought that the war was over and that the mighty Nazi war machine was undefeatable. Poised on the edge France, a mere 20 or so miles from the English coast, the armies of the Wehrmacht were waiting ready to pounce and invade England. For Britain though, the defences came up and the determination to defeat this evil regime grew even stronger.

Defeat in the air during the Battle of Britain reversed the fortunes of Germany. Then the Japanese attack on Pearl Harbour in the Pacific, which led to the United States joining the war, set the scene for a new and vigorous joint front that would lead to the eventual invasion of occupied Europe, and ultimately the freedom for those held in the grip of the Nazi tyranny.

Plans for the invasion were never far from the thoughts of those in power – even in the darkest hours of both Dunkirk and the Battle for the British homeland. To complete this enormous task, an operation of unprecedented size and complexity would be needed. Vehicles, troops and supplies would all needed to be ferried across the English Channel, a massive air armada would have to fly thousands of young men to the continent. To succeed in this auspicious and daring operation, a number of both training and operational airfields would need to be built, and in 1943 Spanhoe was born.

Known originally as RAF Wakerley (and also referred to as Harringworth or Spanhoe Lodge) it was handed over to the U.S.A.A.F. and designated Station 493.

RAF Spanhoe Lodge

Remaining buildings on the Technical site at Spanhoe Lodge.

Located in the county of Northamptonshire, it would be a huge site with three concrete runways, the longest of which was 6000 ft. Two smaller intersecting runways were of 4,200 ft and all three were a huge 150 ft wide. A total of 50 spectacle hardstands were spread around the perimeter track whilst the tower, built to a 1941 design (12779/41), was located to the south of the airfield between the technical area and main airfield. Such was the design of the airfield, that the tower was located a good distance away from the main runway to the north. The technical area included a small number of Quonset huts, temporary brick-built buildings and two T2 hangars. Instructional and training buildings included a Synthetic Navigation Classroom (2075/43) designed with the most up-to-date projection and synthetic training instruments possible. These buildings were made more distinct by the two glazed astrodomes located at one end of the building which could be used on nights when stars were visible.

As Spanhoe was originally built as a bomber station, a bomb and pyrotechnic store was built on the eastern side of the airfield with three huge fuel stores, one to the north and two others to the west, all capable of holding 72,000 gallons of aviation fuel each.

Accommodation for the crews and ground staff was widely spread to the south amongst the local woods and fields, and consisted of numerous cold Quonset huts – but for the residents, Spanhoe was considered nothing special to write home about.

The first U.S. units to arrive were the Troop Carriers the of the 315th Troop Carrier Group (TCG), whose journey from the United States was not as straightforward as most.

Whilst on their way over the north Atlantic route, they were hit by bad weather and had to be diverted to Greenland. Here they stayed for over a month scouring the seas for downed aircraft and dropping supplies to the crews before they were rescued.

Eventually the 315th made England and began a series of training operations. A small detachment were sent to Algiers to assist in the dropping of supplies to troops in the Sicily and Italy campaigns before returning to the main squadron in the U.K. The 315th arrived at Spanhoe on 7th February 1944 now part of the Ninth Air Force,  IX Troop Carrier Command, 52nd Troop Carrier Wing. They operated two versions of the adapted Douglas DC-3; the C-47 Skytrain and the C-53 Skytrooper transport aircraft. Four Troop Carrier Squadrons (TCS) would use Spanhoe: the 34th, 43rd, 309th and 310th, and would all operate purely as paratroop carriers.

C-47 Skytrains of the 315th Troop Carrier Group in flight. Handwritten caption on reverse: 'C-47 Skytrain. 315 TCG over Lincolnshire. C-47 before 1944.'Image actually shows Harringworth Viaduct. RAF Spanhoe, the home field of the two Aircraft, is slightly out of shot to the left, making this right on the border of Rutland & Northamptonshire.

C-47 Skytrains of the 315th Troop Carrier Group in flight. over the Harringworth Viaduct. RAF Spanhoe, the home of the two Aircraft is just out of shot. (IWM – FRE 3396)

For the next few months they would train in preparation for the forthcoming D-day landings in which they would rehearse both formation flying at night and night paratroop drops with the 82nd Airborne; the unit the 315th would take to drop zones behind enemy lines in Normandy. These preparations were relentless, and not without casualties. The 315th were considered as one of the ‘weaker’ elements of the air invasion force, and would carry out drops nightly until the paratroops had completed their full quota of jumps and all were finally classed as ‘proficient’. The majority of these jumps were however, carried out in clear weather, a point that had not been factored into the final decision.

Flying at night would, unsurprisingly, claim  lives and this was brought home when on the night of May 11th-12th, two aircraft from the 315th’s sister group the 316th, collided during combined operations, killing fourteen airmen.

Even with all this training and a very high aircraft maintenance programme, there were many factors that could affect the outcome of operations. Some 40% of crews had only recently arrived before operations, and thus were not a party to a large part of the training missions.  Of the 924 crews that were designated for the operations, 20% had only had minimal training and 75% had never actually been under fire. The airborne crews were not well prepared.

On the third day of June the order came through to paint invasion stripes on the aircraft. These three white and two black stripes, each two feet wide, were designed to enable the recognition of allied aircraft who were sworn to radio silence over the invasion zones. D-Day was now imminent.

The 52nd’s mission would involve all the other groups of the Wing, taking aircraft from: Barkston Heath (61st TCG), Folkingham (313th TCG) Saltby (314th TCG) and Cottesmore (316th TCG) as well as eleven other paratroop and glider-towing units of the U.S. Ninth Air Force and fifteen RAF Squadrons – it was going to be an incredible sight.

315th C-47 landing at Spanhoe. On the ground can be seen the 315th’s C-109 (converted B-24) tanker . (Knight Collection)

Forty-eight aircraft took off from Spanhoe and formed up with the other Groups at checkpoint ‘ATLANTA’, they continued on toward Bristol turning south at checkpoint ‘CLEVELAND’ . They flew crossed the south coast at Portland and headed out toward Guernsey. The route would then take them north of the island where the 52nd would turn east and head over the Cherbourg Peninsula. They would drop their load of heavily laden paratroops south of Utah beach to capture the important town of St. Mere-Eglise. A ten-mile wide corridor would be filled with aircraft and gliders.

Over the drop zone the aircraft encountered cloud and heavy flak. Whilst a quarter received damage, all but one were able to return to England, the last being lost over the drop zone. For their efforts that night, the 315th TCG was awarded the Distinguished Unit Citation, the only one they would receive during the war.

After D-day, units of the 315th continued to drop supplies to the advancing troops, a default role they carried out for much of the war.

Tragedy was to rear its ugly head again and strike down Spanhoe crews. In July 1944, 369 Polish paratroopers arrived for training as part of Operation ‘Burden’. This involved thirty-three C-47s of the 309th TCS, fully loaded flying in formation at around 1,300 ft. The aim of the flight was to drop the Polish Paratroops at a drop zone (DZ) over R.A.F. Wittering.

RAF Spanhoe Lodge

One of the few overgrown buildings at the entrance to Spanhoe Lodge.

Shortly before arriving at the DZ near to the Village of Tinwell, two aircraft made deadly contact and both plummeted to the ground. Twenty-six paratroops and eight crewmen were killed that day, the only survivor was Corporal Thomas Chambers who jumped from an open door. Eyewitness accounts tell of “soil soaked in aviation fuel”, and bodies strapped to part open parachutes as many tried to jump as the aircraft fell. This tragic accident was a devastating blow to the Polish troops especially as they had not yet been able to prove themselves in combat and one that ultimately led to the disbandment of the section and reabsorption into other units.*1

The 315th’s next major combat mission would be ‘Market Garden‘ on September 17th, 1944, another event that led to many tragedies. On the initial day, ninety aircraft left Spanhoe with 354 Paratroops of the U.S. 82nd Airborne, the following day another fifty-four aircraft took British paratroops and then on the third day they were to take Polish troops. However, bad weather continually caused the cancellation of the Polish operations and even with attempts at take-offs, it wasn’t to be. Finally on September 23rd good skies returned and operations could once more be carried out. During all this time, the Polish troops were loaded and unloaded, stores under the wings of the C-47s were added and then removed, it became so frustrating that one Polish paratrooper, unable to cope with the stress and anticipation of operations, fatally shot himself.

Later that month, another plan was hatched to resupply the beleaguered troops in Holland. The idea was to land large numbers of C-47s on different airfields close to Nijmegen. Not sure if they had been secured, or even taken, the daring mission went ahead. Escorting fighters and ground attack aircraft neutralised anti-aircraft positions around the airfields allowing hundreds of C-47s to land, deposit their supplies and take off again, in a mission that took over six hours to complete. In total: jeeps, trailers, motorcycles, fuel, ammunition, rations and 882 new troops were all delivered safely without the loss of a single transport aircraft – a remarkable feat.

Further supplies were dropped to troops during both the Battle of the Bulge and Operation Varsity – the crossing of the Rhine – in March 1945. During this operation, the 315th would drop more British paratroopers near Wesel, Germany, a mission that would cost 19 aircraft with a further 36 badly damaged.

By now the Allies were in Germany and the Troop Carrier units were able to move to France leaving their U.K. bases behind. This departure signalled the operational end for Spanhoe and all military flying at the airfield would now cease.

Two months later the 253rd Maintenance Unit arrived and prepared Spanhoe for the receiving of thousands of military vehicles that would soon be arriving from the continent. Now surplus to requirements, they would either be scrapped or sold off, Spanhoe became a huge car park and at its height, would accommodate 17,500 vehicles. For the next two years trucks, trailers and jeeps of all shapes and sizes would pass through, until in 1947 the unit left and the site was closed for good and eventually sold off.

This was not the end for Spanhoe though. Aviation and controversy would return again for a fleeting moment on August 12th 1960, with the crash of Vickers Valiant BK1 ‘XD864’ of 7 Squadron RAF. The aircraft, piloted by Flt. Lt. Brian Wickham, took off from its base at nearby RAF Wittering, turned and crashed on Spanhoe airfield just three minutes after take off. The official board of enquiry concluded that the accident was caused by pilot error and that Flt. Lt. Wickham, was guilty of “blameworthy negligence”. The Boards findings were investigated by an independent body who successfully identified major flaws in both the analysis and the Boards subsequent findings.  Sadly no review of the accident or the Boards decision has ever taken place since.

Spanhoe Lodge

Spanhoe was the home of the 315th Troop Carrier Group, part of the 52nd Troop Carrier Wing, Ninth Air Force.

Spanhoe was then turned into a limestone quarry by new owners, the runways and the majority of the perimeter track was dug up and the substrate was removed. The majority of the buildings were demolished but a few were left and now survive as small industrial units involved in, amongst other things, aircraft maintenance and preservation work. A private flying club has also started up and small light aircraft now use what remains of the southern section of the perimeter track and technical area.

The main entrance to the airfield is no longer grand, and in no way reflects the events that once took place here. From this point you can see some of the original technical buildings and hidden behind the thicket, what was possibly a picket post. A footpath though the nearby woods allows access to the remains of eastern end of the main runway and perimeter track, other than this little is accessible without permission.

Outside the main entrance are two memorials consisting of a modern board detailing the group and squadron codes, and a stone obelisk listing the names of those crew members who failed to come home. Both are well cared for if not a little weathered.

DSC_0159

Spanhoe Lodge memorial

Spanhoe leaves a legacy, for both good reasons and bad. The crews that left here taking hundreds of young men into the jaws of death showed great bravery and skill. Determination to be the best and perform at the limits were driving factors behind their successes. Relentless training led to the deaths of many who had never even seen combat, and the scars of these events linger in what remains of the airfield today. Thankfully for the time being, the spirit of aviation lives on, and Spanhoe clings to the edge, each last gasp of breath a reminder of those brave men who flew defenceless in those daring and dangerous missions over occupied Europe.

On leaving Spanhoe, return to the main road, keeping the airfield to your left, join the A43, and then turn right and then immediately left. Follow signs to Oundle and Kings Cliffe and our next destination, the former airfield at Kings Cliffe, an airfield with its own modern controversies.

Spanhoe features as part of Trail 6, ‘American Ghosts’.

Sources and Further Reading

*1 A list of those killed in the Tinwell Crash can be found via this Dutch website for Polish War Graves.

The 315th TCG has a detailed website with regular newsletters and photographs.

RAF Swanton Morley – Small but rich in history.

In this Trail, we return to Norfolk and take in three former airfields each of notable historical value. Our first is probably better known as an Army barracks than it is an RAF airfield, but, for the duration of the Second World War, it would be home to a number of different aircraft types and to a range of international crews. Amongst the many residents here would be those from Poland, the Netherlands, Australia and New Zealand. We start our journey at the former RAF Swanton Morley.

RAF Swanton Morley

Following the end of hostilities in 1918, Britain’s defences and in particular the RAF, were cut back dramatically. From around 250,000 personnel (the worlds largest air force) to just under 30,000 by the early 1920s, the reductions were both severe and widespread. Political in-fighting between the three armed forces and the Government had seen the RAF lose out significantly, and under the terms of the ‘Ten year Rule’, expansion was prevented, and so little could be done to redress the declining situation.

During the 1930s, world developments (and in particular those in Germany) raised the threat of yet another war, at which point the Government realised that Britain’s defences were now totally inadequate and in dire need of redevelopment and expansion.

Their response was a series of expansion ‘schemes’  which would not only reshape the organisation of the RAF, but would cater for the huge increase in numbers of personnel that would be required to raise an adequate fighting force .

Considered lacking in direction by many, these early schemes surprisingly paid little attention to future needs, and so no real provision was made for supporting aspects such as training, maintenance or supply.

Scheme A, approved in July 1934, would set the bench mark at 84 home-based squadrons, a figure that was still woefully inadequate compared to the might that was building up across the channel. Each scheme would build on and replace the former, taking into account layout, new developments and the materials available – but all under the monetary restrictions of the 1930’s depression.

By the time war came, Scheme ‘M’ had been implemented (November 7th 1938), which called for 163 home based squadrons involving 2,500 aircraft for Britain’s home defence. It was under this scheme that Swanton Morley would be built.*1.

Initially designed as a fighter station, construction began in 1939, and one of the criteria for this scheme was to include type ‘C’ hangars. However, being incomplete by the outbreak of war, it was caught in the transition period between temporary and permanent aircraft storage. The ‘C’ types were cancelled in favour of three ‘J’ types, only one of which was actually built – this left Swanton Morley with considerably less hangar space than was actually required. Unfinished, the airfield opened on September 17th 1940 under the ownership of No. 2 Group Bomber Command.

As war broke out, a small detachment of 107 Squadron Blenheim IVs were based here. 107 Sqn were widely spread with other detachments at: Lossiemouth, Newmarket, Hunsdon, Horsham St. Faith and Ipswich, whilst the main squadron was based at RAF Wattisham. As part of 83 Wing, 107 would be joined by a further detachment from 110 Sqn the following month, also bringing the twin-engined Blenheim IV.

It was a No. 2 group aircraft that famously made the first sortie over the German frontier on the very day war broke out, and then on the second day, Monday September 4th 1939, a flight of four 107 Sqn aircraft and one 110 Sqn all from RAF Wattisham, dropped the first salvo of bombs on German ships at Wilhelmshaven . It was from one of these aircraft (Blenheim IV ‘N6240’) that Observer, Sergeant George Booth, and AC1 L. J. Slattery would become the first British Prisoners of War, captured when their Blenheim was shot down by German defences. None of the five aircraft returned, a rather disastrous start to the war for the RAF.*2

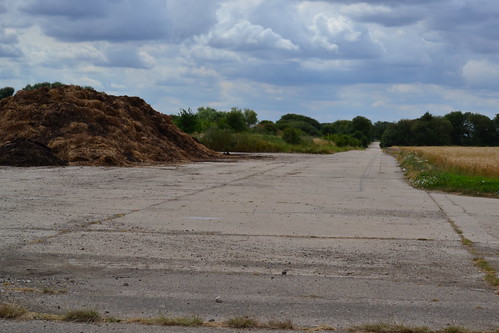
Work continued at Swanton Morley throughout the next two to three years, and eventually accommodation blocks were raised, hard perimeter tracks laid and four T2 hangars erected. Around twenty hardstands were created although many aircraft were still dispersed on the grassed areas around the technical site. A bomb store was developed to the south, and lighting added to the three runways, but despite of all the improvements, upgrades and developments, it was felt Swanton Morley did not warrant having any hard runways and so they continued to remain as grass.

It wasn’t until the end of October 1940, that Swanton Morley would have its own squadron of aircraft, 105 Squadron arrived bringing their Blenheim IVs to compliment those of 107 Sqn and 110 Sqn. With two detachments at Lossiemouth and Luqa (Malta), 105 would take part in anti-shipping sorties and attacks on targets in the low countries. A successful unit they swapped these for the Mosquito IV in November 1941, becoming the first operational squadron to receive these highly manoeuvrable aircraft, taking them to nearby Horsham St. Faith in the following month.

ROYAL AIR FORCE BOMBER COMMAND, 1939-1941.

A Blenheim of 105 Squadron passing over a fiercely burning enemy merchant vessel (© IWM (C 1940)

One of Swanton Morley’s earliest casualties was a 105 squadron aircraft, piloted by F/O. D. Murray DFC with Sgt’s C. Gavin and T. Robson. The aircraft, Blenheim IV ‘T1890’, was brought down over Brussels with the loss of all three crew members.

It was during August of 1941, that the first of many units would arrive – No. 152 Squadron. Like so many other squadrons around the country, their stay was to be short-lived taking their Spitfire IIAs to Coltishall the following December.

Coinciding with 105’s departure, was 226 Squadron’s arrival. At the end of December 1941, 226 Sqn would bring a new twin-engined aircraft to the grounds of Swanton Morley, the Douglas Boston. The Mk III was proving to be a formidable medium bomber and night-fighter, featuring improved armour, larger fuel tanks and its two Wright Twin Cyclone engines providing 1,600hp each. 226 Sqn were to later replace the MKIIIs with the MKIIIAs in January 1943 under the lend-lease agreement and then very shortly afterwards, with the B-25 Mitchell II. 226 Sqn operated these aircraft for almost a year at Swanton Morley before moving on to Hartford Bridge and the continent in 1944, thus becoming Swanton Morley’s longest standing squadron.

It was with 226 Squadron that the United States would make its mark on the war. On June 29th 1942, with both Eisenhower and Churchill present, twelve RAF Boston IIIs were sent to bomb the Marshalling yards at Hazebrouck, one of these aircraft (AL743) was flown by an all American crew. A rather ‘unofficial’ entry into the conflict, it was made more formal on Independence day, July 4th 1942 when six U.S. crews joined 226 Squadron in a low-level attack against Luftwaffe airfields in Holland. Twelve RAF aircraft took off a few minutes after 07:00 hrs and flew low and fast over the North Sea toward Holland. After splitting up to attack their designated targets, one group encountered severe flak and was badly beaten, one aircraft crashing whilst another had an engine knocked out. Before the pilot could regain control, the aircraft, Boston AL750, scraped the ground coming remarkably close to a complete disaster. However, the pilot Major Charles Kegelman, managed to regain control and nurse the stricken aircraft back to Swanton Morley. Of the twelve Bostons sent out, two U.S. and one RAF crewed aircraft failed to return. A baptism of fire that resulted in a 30% loss of the U.S. Air Force contingency. For their bravery, three DFCs were awarded to the U.S. crews, with Major Kegelman receiving a D.S.C. from Major Gen. Dwight D. Eisenhower, American commander in the European war theatre. This made Major Kegelman the first member of the United States forces in Europe to be decorated for gallantry against the enemy.

Whilst not the first U.S. involvement nor their first casualties of the war, their actions did officially bring the United States into the European conflict.

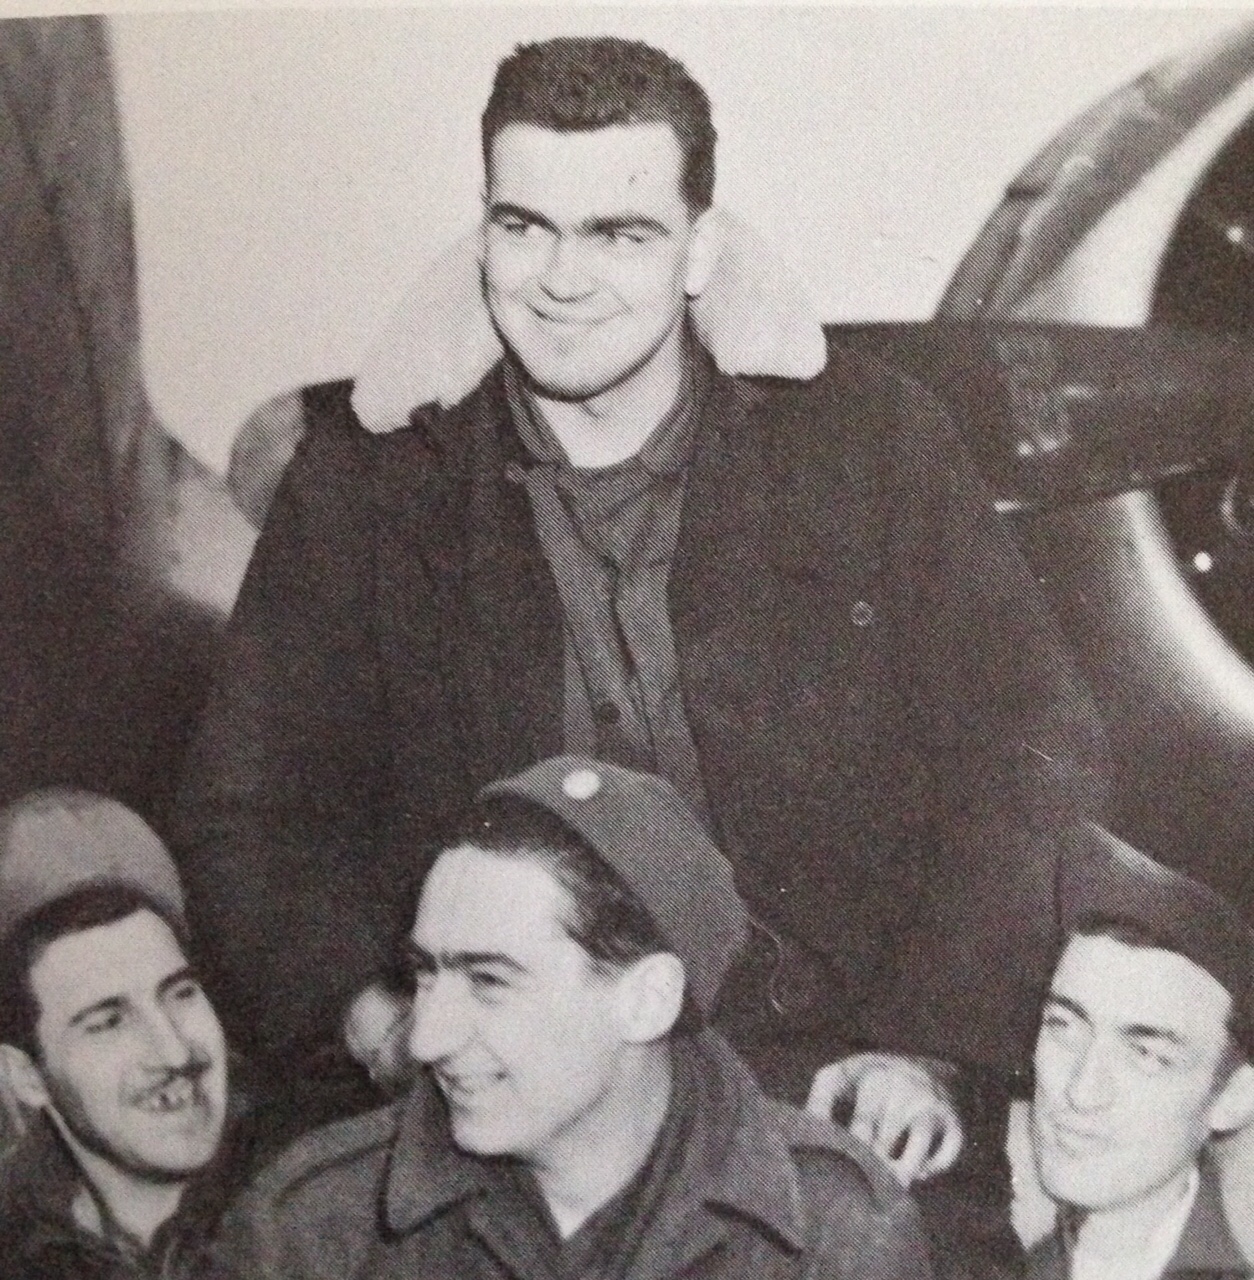
Sergeant Bennie Cunningham, Technical-Sergeant Robert Golay, Major Charles C Kegelman and Lieutenant Randall Dorton in front of a Boston bomber. (Roger Freeman Collection IWM)

1943 would go on to prove to be an eventful year for Swanton Morley. With the Allied invasions plans taking shape, a new force was needed to support those destined to take to the Normandy beaches. The creation of the Second Tactical Air Force (TAF) in November 1943, was designed to meet that challenge and with it came changes at Swanton Morley.

Ownership now passed from Bomber Command to the Second TAF, and many units that would operate from here were part of that force. Following a relatively short stay by 88 Squadron (30th March 1943 – 19th August 1943) flying both the Boston III and IIIA, No. 305 (Weilkopolski) Squadron would arrive bringing the first Polish crews to Swanton Morley. Being the fourth and final Polish bomber squadron to be formed, they arrived in early September bringing Wellington MK Xs with them. Whilst serving in Bomber Command, the Polish had amassed some 1,117 sorties in which they had lost 136 brave young men as either killed or captured.

After arrival here, 305 Sqn changed their Wellingtons for Mitchell IIs and in line with the Second TAF objectives, began attacking targets around the Cap Griz Nez region. Being daylight operations, this was something new for the Polish crews, but one they relished and carried out well. In November after only being at Swanton Morley for two months, the Polish crews left leaving 226 Sqn with only a small detachment of 98 Squadron Mitchells for company.

At the end of 1943, three days after Christmas, No. 3 Squadron arrived bringing  a new breed of aircraft with them – the single-engined Typhoon IB, which they kept at Swanton Morley until February 14th 1944. No. 3 Sqn had been one of three founder squadrons of the Royal Flying Corp in 1912 and they remain one of the few squadrons to retain an active role today, flying the aircraft’s namesake, the modern Eurofighter Typhoon.

Whilst here at Swanton Morley, No. 3 Sqn carried out duties that the ill-fated Hawker Typhoon performed well at, low-level ground attack and anti-shipping roles. Dogged by development problems – engines fires and deadly levels of Carbon Monoxide in the cockpit – the Typhoons suffered terrible problems throughout their wartime service, subsequently virtually every model was scrapped at the end of war.

February 1944 was all change again at Swanton Morley. A detachment of 107 Squadron would return after a couple of years absence, and with their arrival came the departure of 226 Sqn after just over two years of being at Swanton. On the thirteenth of that month, they left for Hartford Bridge in Hampshire, in preparations for the Allied invasion at Normandy.

In the two months that followed, Swanton Morley began its wind down, a move signified by a number of short stay units. Each of these would however bring a wide range of nationalities, including crews from the Australian unit No. 464 (RAAF) Sqn, from 25th March 1944 to 9th April 1944. Then came 180 Sqn (12 – 26th April 1944) a short-lived unit that survived just under four years before disbandment only to be reformed as No. 69 Sqn.

Coinciding with 180 Sqn was the Auxiliary Squadron, No. 613 Sqn with Mosquito VIs. This too would disband at the end of the war also to reform as 69 Squadron. Then as April drew to a close another international unit would arrive and depart, a New Zealand unit, No. 487 Sqn (RNZAF)  also bringing Mosquito VIs – an aircraft they used in conjunction with 464 Sqn in the attack on the Amiens prison earlier on.

Finally for two weeks in May 1944 (6th – 18th), a dutch contingency arrived in the form of No. 320 Squadron. 320 Sqn was formed out of evacuated Dutch airmen along with a handful of Fokker T-VIIIW seaplanes which they used until spares were no longer available. Here at Swanton Morley they had lost their seaplanes and were now flying Mitchell IIs, wreaking their revenge by attacking enemy communication lines and airfields. After the war the crews of this unit were transferred to the Royal Netherlands Navy and 320 was disbanded as an RAF unit.

ROYAL AIR FORCE: 1939-1945: COASTAL COMMAND

Before arriving at Swanton Morley, No. 320 Sqn flew a handful of Fokker T-VIIIW float-planes, that they had brought with them when the Netherlands fell to the Germans. Here, one is being serviced at Pembroke Dock, August 1940. (© IWM (CH 1042)

Coinciding with the invasion of Normandy in June 1944, the Bomber Support Development Unit (BSDU) transferred across from RAF Foulsham. Developed under the wing of 100 Group, they used a range of aircraft to investigate and develop electronic counter measures and radar technologies for aircraft.  At Swanton Morley, this involved nine Mosquitoes, MK XIX and XXX, to operate in both operational and non-operational duties. The BSDU (and 100 Group) were responsible for a range of electronic devices including Serrate, Hookah, Perfectos and Mandrel to name but a few, and were involved in some 114 operations, claiming  five air-to-air victories.

The USAAF were to play another small and final part in the life of Swanton Morley, when on 25th July 1944, B-24H ’41-29402′ “The Mad Monk” of the 786th BS, 466th BG, took off from nearby Attlebridge. It clipped some trees causing it to crash-land at Swanton-Morley; the aircraft was so severely damaged it was condemned and salvaged for spares.

Another near disaster was averted at Swanton Morley when Mosquito NFXXX (MM797) of the BSDU crashed after take off on the night of 2nd-3rd January 1945. On take off, with a full fuel load, the port engine began leaking glycol at a furious rate. Too low to bail out, the pilot, Flt. Lt. Harry White DFC, put the aircraft down on the frozen ground. After both pilot and co-pilot were pulled from the wreckage by local farmers, the aircraft exploded creating a ferocious fireball that destroyed the air frame completely.

Eventually the war came to a close, the ‘Window’ research station was transferred to the BSDU and in the summer 100 Group was disbanded. With that Swanton Morley fell quiet and no further operational units would serve from here.

In the closing months of 1946, No. 4 Radio School moved in using Avro’s Anson, and Percival’s Proctor and Prentice aircraft. Various ground units also used the site but gradually flying all but ceased. Eventually on September 15th 1995, Battle of Britain day, the RAF Ensign was lowered and RAF Swanton Morley was officially closed. A small private micro-light club took over part of the site, but in 1996 the Army claimed the airfield forcing the club to close. It remains in the hands of the Army today as the ‘Robertson Barracks’, named after Field Marshal Sir William Robertson and no flying takes place.

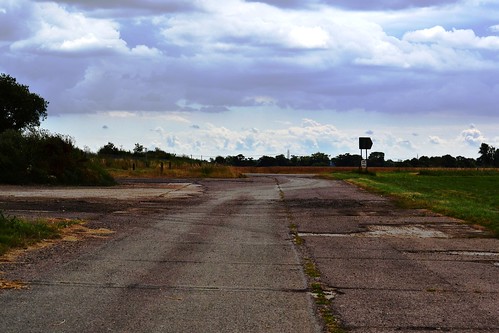
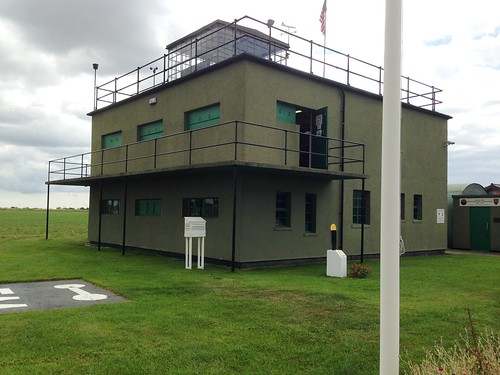
Swanton Morley’s history was fairly rare, in that it never had any concrete runways and boasted to be one of the longest lasting Worlds War 2 grassed airfields. It had, at its peak, one – ‘J’ Type hangar and four – ‘T2’ hangars. Its watch office, built to drawing 5845/39, included a Met Section and is now thankfully, a Grade II listed building making it one of the best originally preserved examples of Watch Office designs.

Swanton Morley june 2016 (3)

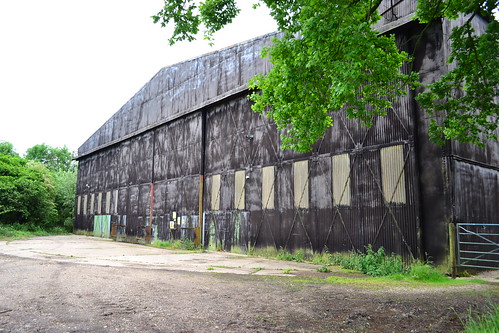
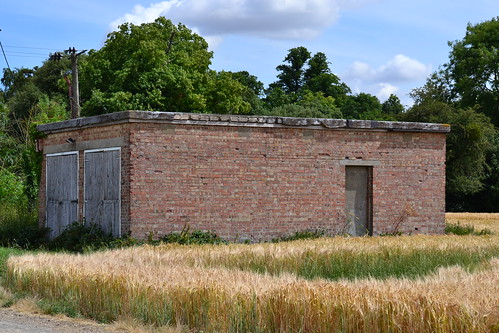
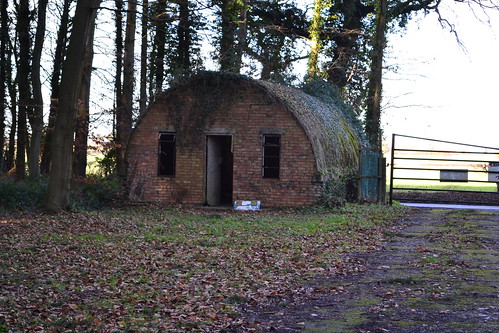
Swanton Morley had four T type hangars. All but one have been demolished. This one remains in private ownership.

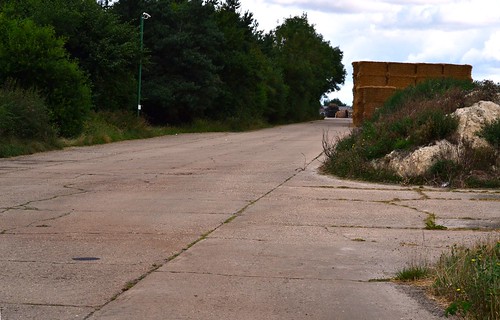
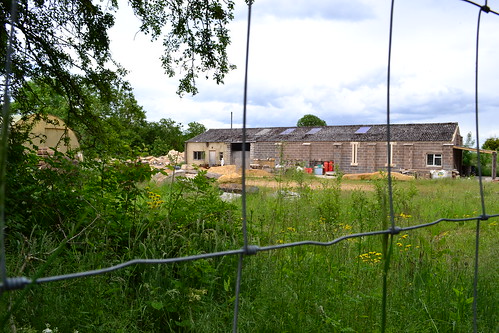
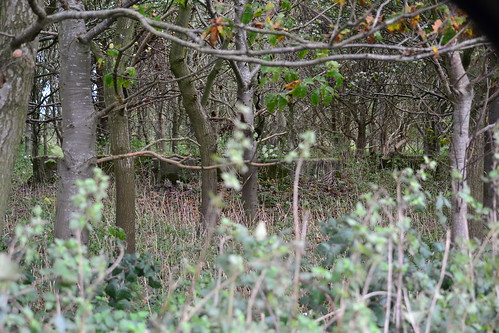
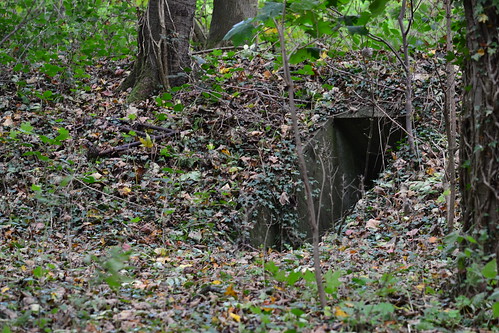
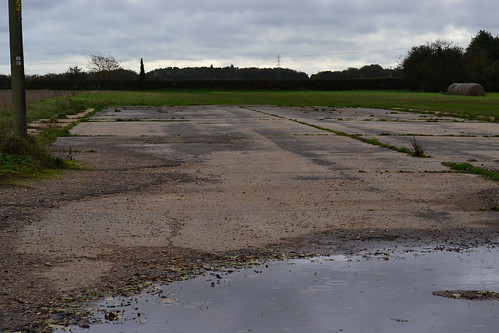
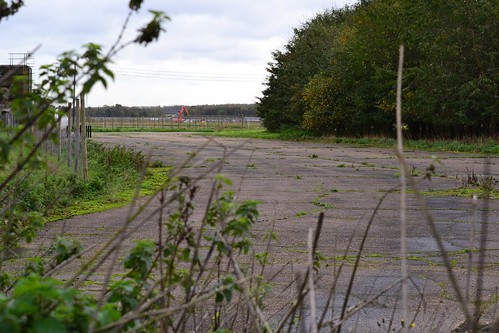
Many of the original buildings have gone and either their concrete bases left or more modern replacements put in their place. Some of the concrete pathways have been removed as have all the dispersal pans. The bomb store is now a field and all but one of the hangars were demolished – the remaining one being re-clad.  A number of pill boxes and air-defence structures also remain, but like the main airfield site it is all securely kept behind very high fences and armed guards.

The public highway circumnavigates Swanton Morley, but views are best achieved from the main entrance. As with all active military sites there is a no stopping rule, but as you pass, careful observations will reveal some of the main buildings of the accommodation area.

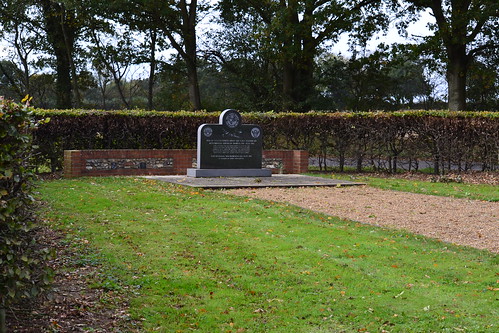
Swanton Morley retains some if its historical features, and they are all in the care of either the Army or the local farmer. As the MOD holds this site, many of these features are well hidden from public view, but for now at least, this along with the preservation order on the watch office, does at least mean Swanton Morley’s past is in part ‘protected’ for future generations.

From Swanton Morley we visit two more airfields in the area, Hethel, a USAAF base with its own museum and Hingham an airfield that had possibly the shortest life of any UK airfield.

Sources and further reading

*1 Royal Air Force Historical Journal No. 35

*2 Chorley, W.R., “Bomber Command Losses of the Second World War, V1, 1939-40″, Classic, 1992

Norfolk Heritage Website

Freeman, R.A., “The Mighty Eighth“, Arms & Armour, 1970

Bowman, M., “100 Group (Bomber Support)”, Pen & Sword, 2006

RAF Wittering – a history rooted deep in the First World War.

You can’t look at the remnants of RAF Collyweston (Trail 37), without taking in RAF Wittering. Renowned for its Harrier Squadrons, RAF Wittering was an airfield that fell quiet as a result of the Government cutbacks that affected all the armed forces in December 2010. Sadly it meant the loss of the RAF’s Harrier fleet, an aircraft that had been stunning the crowds at air shows both here and overseas from many years. The Harrier remains one of the few RAF/RN jets to have proven itself in a combat environment, when it took on the Argentinian Air Force in the war over the Falkland Islands in 1982. However, the Harrier squadrons were just one small part of Wittering’s long and established history.

RAF Wittering.

RAF Wittering dates back to the First World War, its roots set in 1916 when an airfield was built on the site then known as Wittering Heath. Stamford Airfield, as it was then designated, was to initially operate BE12 aircraft in the anti-Zeppelin role, acting in conjunction with their main force of 38 Squadron at Melton Mowbray. These aircraft would eventually, in turn, be replaced by BE2e, FE2b and FE2d aircraft. During this time a small detachment from 90 Sqn would also be stationed at Wittering, but their stay would be short, between August and September 1918 – they were also flying the FE2b.

AERIAL VIEWS IN THE UNITED KINGDOM 1941-1942

Wittering airfield taken early in the Second World War. The A1 road can be seen to the east of the airfield. © IWM (HU 91901)

As the war progressed, Stamford became the training ground for new recruits, forming No1. Training Depot Stamford whilst a short distance to the west a second station was established at Easton on the Hill, operating as No. 5 Training depot. These two sites operated only a stones throw apart but both totally independent of each other. Eventually with the formation of the Royal Air Force on April 1st 1918, Stamford would become RAF Wittering and Easton on the Hill – RAF Collyweston.

RAF Wittering had been born. It would go on to be one of the RAF’s most significant airfields operating in excess of 36 active flying squadrons. Some of these would be formed here, some disbanded and many pass through in transit to other sites around the country. The aircraft here would range from Royal Aircraft Factory Biplanes to Whirlwind HAR 10 Helicopters, Boulton Paul Defiants through Supermarine’s Spitfire to Hawker Hunters; Hawker Siddely Harriers, Vickers mighty Valiant and Handley Page’s ‘V’ bomber the Victor, would all operate from here during its long life.

Following cessation of the First World War, Wittering was placed under care and maintenance, looked after and cared for until 1926 when the Central Flying School moved in from their previous base at Upavon.

The post war years were turbulent times for the RAF, having not only to fight off Government cutbacks and spending caps, but the Government’s tendency to favour both the Navy and the Army in terms of a national defence force. Since the war’s end, over 23,000 officers, 21,000 cadets and 227,000 other ranks would be lost from the RAF’s service. The landing grounds that had been used to fight off Germany’s mighty Zeppelins, along with vast quantities of material and machinery, were disposed of at near give-away prices. The fact that any force  had been kept at all was down primarily to the determination and foresight of one Hugh Trenchard who would himself rise to the rank of  Marshal of the Royal Air Force in 1927.

As global tensions grew in the 1920s and British interests abroad were put at risk, a review was called for of Britain’s defence forces. The review concluded that some 52 squadrons would be needed to provide a sustainable and strong Home Defence Force that would not only be capable of holding back any force that should take desires on Britain, but could also respond adequately by taking the fight to the enemy.

So in the mid 1920s the RAF’s expansion began.  The first four Auxiliary Air Force squadrons were formed along with the first of the University Air Squadrons (UAS). A combined Air Force Cadet College and flying training school was established at Cranwell along with the Air Force Staff College at Andover, – the fledgling Royal Air Force was making its first proper steps in the right direction.

Further tensions in the 1930’s brought home the need to develop and increase the Air Force. The not so subtle build up across the channel with increasing tensions in Germany, meant that she was rapidly becoming a major threat. Now woefully under manned, the Government poured money and manpower into improving the stature of the Royal Air Force.

With design and engineering pioneering the way in long distance flight, speed and manoeuvrability, new models of aircraft were being designed. Monoplanes were the way forward and with Britain winning the Schneider Trophy for the final time, the way ahead was set for aircraft capable of incredible speeds and performance.

With war looming, Wittering was about to come into its own receiving its first operational squadrons both 23 Sqn and 213 Sqn in May 1938. By the end of the following year, Wittering would be designated Sector Station of 12 Group whose responsibilities stretched from the boundaries of London in the south, to the Welsh border in the west, Liverpool and Hull in the north and the entire eastern counties.  Wittering units would be responsible for a wedge through the middle of this sector running from the North Sea coast to Wales.

In that same year, Spitfire Is of 610 Sqn Auxiliary Air Force joined the recently arrived Blenheim IFs and Hurricane Is before they headed south to Biggin Hill in support the BEF’s evacuation from Dunkirk in May 1940.

Wittering was really too far north to be able to effectively participate in the either the Battle of Britain or the defence of London; fuel and journey times would have left her fighters at a disadvantage, so Wittering concentrated on both resting and reforming battle worn units from the south, and defending the industrial Midlands and the north.  Her units would become key in the night fighter role, protecting the eastern and North Sea routes from the Luftwaffe – a role in which her squadrons would learn and develop very quickly.

23 Squadron were key in this very role. Dispersing their Blenheims at Collyweston, they shared Wittering with Hurricanes of 32 and 229 sqn, Spitfires of 74 and 266 Sqn and Defiants detached from 264 Sqn. These fighter versions of the Blenheim benefited from the addition of a bolt-on underbelly gun-blister housing four .303 machine guns; but they lacked any technologically advanced radar or Airborne Intercept (AI) mechanisms and so relied heavily on visual identification, referred to in the ranks as ‘Eyeball Mark One’!

23 Squadron would fly a number of patrols from Wittering, intermixed with sections being detached to RAF Digby for night flying co-operation duties on a weekly rotation basis. Few of these night patrols proved to be fruitful however, and many enemy aircraft escaped simply because they could not be found in the dark skies.

To improve kill rates, carefully drawn up patrol lines were set up fanning outward from Wittering. Often, pilots would use distant searchlights as a guide to locating the enemy intruders, however, this had its dangers and some RAF crews were lost because they too found themselves illuminated in the dark night sky, only to become victim to the enemy or the over eager A-A crews below. One such incident occurred on the night of 18th June 1940 when Blenheim L1458 ‘YP-S’ crashed near RAF Sutton Bridge as a result of being shot down by a He111 from KG4 that it was attacking. In getting close to the Heinkel, the Blenheim was itself caught in the local searchlight and the Heinkel returned fire. The pilot Sergeant A.C. Close, died as a result of the crash whilst the air gunner, LAC L. R. Karasek bailed out at low-level and was taken to Sutton Bridge and treated for his injuries*1.

The autumn of 1940 saw further changes at Wittering. In August, 266 Squadron arrived using various models of Spitfire, whilst in September, 23 Squadron departed moving to RAF Ford. Then in came No. 1 Sqn, the oldest RAF squadron, with Hurricane MKIs. Battle hardened from the fall of France and a summer of fighting in the skies over Kent, they remained here until the end of the year before returning south in the defence of London once more.

It was around this time too that a detachment of Hurricanes from 151 Sqn would arrive from RAF Digby, a station Wittering worked very closely with. After a short period these were replaced by Defiant Is also participating in the night fighter role. One determined and perhaps aggressive pilot, Flt Lt Richard Payne Stevens DSO, DFC would bring an element of mythical mystery to the flight as the squadron moved through Hurricane IICs, Defiants IIs and onto Mosquito IIs before the now permanent squadron left for Colerne in April 1943.

Using nothing more than his remarkable night vision, he would become the greatest scoring night fight pilot during the Blitz, downing a total of 12 Luftwaffe bombers in his black Hurricane.

In November / December 1940, 25 squadron came in bringing with them the much improved, faster and better AI equipped Beaufighter IF. In addition, a single Beaufighter MKII was also deployed here purely for evaluation purposes. A rarer Merlin engined model, R2277, it was credited with the shooting down of  a Ju88 on the night of June 22nd 1941 when piloted by F.O. Michael Herrick and his radar operator F.O. Yeoman. It was later stuck off in June and remains the only Merlin powered model to enter the books of 25 Sqn*2.

AIRCRAFT OF THE ROYAL AIR FORCE 1939-1945: BRISTOL TYPE 156 BEAUFIGHTER.

Similar to R2277, Beaufighter R2270 was the first Merlin powered prototype MK IIF, © IWM (MH 4560)

At the end of 1940 a new commander arrived, Group Captain Basil Embry, who disliked the Defiant as a night fighter and considered Wittering too poorly designed for a night fighter station. He set about devising a plan to join adjacent Collyweston and Wittering together to develop and create a single airfield with a new much longer hard runway to replace the grass ones used until now. The expansion was completed in record time, Embry by-passing the more conventional channels of procedure.

In July 1941, the Beaufighters of 25 Sqn were replaced by the Douglas (Boston) Havoc Mk Is, an aircraft they took to Ballyhalbert (Ireland) in the following January.

The summer of 1941 would also see another new experimental model arrive. In conjunction with operations at RAF Hunsdon, the rather ill-fated Turbinlite project was put into operation here. Elements of the 1451 Flight were formed into a new squadron designated 1453 Air Target Illumination Flight, a concept that involved bolting an enormous 800,000 watt lamp to the front of the aircraft. As these modified Havocs were now much heavier, they could not carry any weapons and so relied upon an escorting Hurricane, Defiant or Spitfire to shoot down the enemy once located by the massive 950 ft wide beam of light. On October 22nd 1941, 151 squadron carried out its first official Turbinlite operation.

Fighter command decided to establish 10 dedicated Turbinlite squadrons in total, numbered 530 sqn- 539 sqn, they all became operational on either the 2nd or 8th of September 1942. On the 2nd, 532 was formed at Wittering using a combination of 1453 Flight and Hurricanes from both 486 Squadron and various Operational Training Units (OTU). The rather poor performance and low success rate however, meant that all these units were disbanded in one fell swoop on January 25th 1943*3.

It was part way though these operations (April 1942) that 151, released from their restrictive Turbinlite operations, replaced their Defiant IIs with the new ‘Wooden Wonder’ the Mosquito NFII. Only the second squadron to use them, they were to prove a formidable weapons platform and a deadly night fighter. The night skies were now a prime hunting ground and partly as a result of the Mosquito successes, the number of Luftwaffe intrusions began to reduce.

The turn of 1942/3 wold see further changes at Wittering with many short stays by 118, 288 (on Detachment), 349, 141, 91 and 438 Sqn taking Wittering through the new year. 151 remained until April moving off to Colerne and new model Mosquitoes, 141 who replaced them brought more Beaufighters in the form of VIFs. With increased engine power, more fuel and a capacity for increased bomb loads, the VIFs had modified noses to accommodate the new AI radar. Now the hunters were taking the war to Germany and intruder missions began to take place.

During this time Wittering was also home to No 1426 (Enemy Aircraft) Flight, utilising the former RAF Collyweston site which evaluated captured enemy aircraft. A remarkable unit they flew captured aircraft around the many bases of the RAF and USAAF for crews to examine.

As the war drew to a close, sorties began to get fewer and fewer, and operational flying at Wittering would all but stop. Other than the P-38s and latterly P-51s of the USAAF 55th Fighter squadron –  who had been sharing Wittering with their RAF counterparts – Wittering became operationally quiet.

Eventually the war ended and various units used Wittering for training and experimental work. Post war 1946, 23 Squadron was reformed here from the ashes of 219 Sqn, taking their Mosquito NF30 to Lubeck almost immediately. A range of squadrons using various piston-engined aircraft passed through Wittering and two reception centres were set up to receive incoming POWs from the continent. By the end of 1948 all aircraft had left , and it returned to its roots once more becoming the home of No. 1 Initial Training School, Flying Training Command.

In the early 1950s, Wittering was placed under care and maintenance whilst upgrading work was carried out to its runways. During August 1953 both Lincoln bombers and Canberras (B.2, B.6, PR7) would operate overseas from here – these included detachments at the infamous Christmas Island.

Further Canberras of both 76 and 40 Squadron would fly from Wittering and in 1955 Wittering entered the atomic age with the arrival of the Vickers Valiant. Operations using conventional bombs were seen during the Suez crisis in 1956, when Valiants from No 138 Sqn flew 24 missions against targets in Egypt. Two other squadrons would fly the enormous but less favoured ‘V’ bomber: 49 and 7 squadrons, and it would be 49 Squadron who would take Britain forward as a nuclear nation when in 1956 a Valiant B.1 dropped Atomic bombs on both the Maralinga Range (Central Australia) and in 1957 a total of 6 Hydrogen bombs over Malden Island. During this time the aircraft were operating as detachments from Wittering, again on Christmas Island in the Pacific.

RAF VALIANTS FOR CHRISTMAS ISLAND TESTS

Vickers Valiant bomber crews of No. 49 Squadron RAF about to leave RAF Wittering for Christmas Island in the Pacific to take part in Britain’s nuclear tests, March 1957. © IWM (C(AM) 2466)

With no decrease in the perceived threat from the Warsaw Pact, the  ‘V’ bomber force would continue from Wittering for a few more years . The Valiant being replaced by the Victor B.2 and later B.2Rs of 139 and 100 Squadron, who had themselves been disbanded in September 1959 to reform at Wittering in May 1962.

In December and September 1968 respectively both these squadrons were disbanded and Wittering would then enter the dawn of vertical take off and landing. A short stay by Westland Whirlwinds HAR.10s of 230 Squadron led to the arrival of probably one of the most famous aircraft in aviation – the Harrier.

In August / July 1969 No. 1 Squadron returned to Wittering, its first time since the 1940s. Wittering became famous as ‘The Home of the Harrier’ and its fame would spread far and wide. With combat success most famously in the Falklands campaign and later the Balkans, Serbia and Kosovo, it would go on to serve Wittering well flying the GR.1, GR.3, GR.5 and GR.7  before moving away to Cottesmore and disbandment in December 2010.

The only other units to fly from here (less any training squadrons) were 4 Squadron flying both the Hunter FGA.9 and Harrier GR.1, 45 Squadron and 58 Squadron both flying the Hunter FGA.9 until they were disbanded on the same day 26th July 1976.

With that flying ceased at Wittering, but it remained an active military base operating a number of logistics units including a wide range of logistical support organisations. It is also home to the RAF’s bomb disposal squadron 5131 (BD) Sqn.

Further reorganisation of flying training units has been Wittering’s saviour. Today 100 years after its inception, and after a 6 year gap, flying has finally returned to Wittering, with the re-introduction of flying training units from No.3 and 6 Flying Training Schools, relocating here from both RAF Wyton and RAF Cranwell.

It would seem that Wittering has gone full circle again, not once, but twice, with its history rooted deep in the First World War, it has always been one of the RAF’s most important airfields. It has trained aircrews, defending these shores against the night terrors of two World Wars, and its crews have defended us against invading forces both here and in British Territories far off. Wittering forces have provided a strong and powerful peace-keeping force across the globe and even today it plays a major part in support, training and defence against those who wish to cause harm to both British sovereignty and democracy.

Note: As a fully active military site, much of Wittering is understandably hidden behind high fences and trees. When passing along the main A1, the main gate, and some buildings are visible, but stopping is not permitted. There are other places to the rear of the airfield but views are limited and little can be gained from using them. Permission should be sought before approaching the site.

Sources and further reading.

*1 Commonwealth War Graves Commission Website
– Battle of Britain London Monument website
– Traces of World War 2 Website

*2 Goodrum, A, “No Place for Chivalry” Grubb Street, 2005

*3 Mosquito W4087 flew as Turbinlite aircraft at Wittering February 5th 1943 – Source: Jefford, C.G.RAF Squadrons – 2nd Edition“, Airlife, 2001

MOD UK – Website

RAF Great Dunmow – In the shadow of Stansted Airport.

In Trail 33, we continue to explore the county of Essex. Touching the outskirts of London to the south and Suffolk to the north, it has an aviation history that has lasted over two world wars.

After visiting both Matching Green and Andrews Field, we travel a few miles west back again toward Stansted Airport.

Our next stop is Great Dunmow.

RAF Great Dunmow (Station 164)

Great Dunmow is another former airfield that sits in the shadow of nearby Stansted airport, itself a former World War 2 airfield. Dunmow was home to only two RAF units, 190 Squadron (RAF) and 620 Squadron (RAF) operating Stirling IVs and latterly the Halifax III and VII. It was also used by the USAAF flying B26 Marauders under the 386th BG.

Great Dunmow, had a multitude of names: Little Easton,  Easton Lodge and Great Easton due to its close proximity to all three locations. It was designated Station 164 by the Americans but became more commonly known as Great Dunmow.

RAF Great Dunmow

The Village sign depicts its wartime heritage.

Not built until mid-way through the war (1942-43) by the US Army’s 818th Engineer Battalion (Aviation), the American units of the 386thBG were the first to move in.

It would have three runways (concrete and wood chip), with the main one running north-west / south-east and 6,000ft in length. The second and third runways ran east-west and north-east \ south-west and were both 4,200 ft in length. The main technical and administrative areas were to the north side in which one of the airfield’s two T2 hangars were located. A bomb store was situated to the east and was capable of storing in excess of 800 tons of bombs. Dispersals consisted of 50 loop style hardstands around the concrete perimeter track. The staff accommodation sites were dispersed over 12 sites all to the north around the Easton Lodge, referred to by crews as ‘The Big House’*1. Two Mess sites, two WAAF sites, a sick quarters, an officers and four airmen sites housed a huge number of personnel – even parts of the house itself were used. A communal site provided a number of small shops selling local produce and groceries.

RAF Great Dunmow

The secondary runway (N/E-S/W) disappears into the distance. This section is the only part in full width. The tree line marks the third E-W runway.

The 386th BG (M) were activated mid-war, on December 1st 1942 at MacDill Field, Florida, and arrived in England with their olive and grey B-26s in the following June. Their journey to Great Dunmow would take them via both RAF Snetterton Heath and RAF Boxted. For four months they would operate under the control of the Eighth Air Force, swapping in October 1943, to the 99th Combat Wing of the Ninth Air Force. Consisting of four Medium Bomb Squadrons: 552nd (code RG), 553rd (AN), 554th (RU) and 555th (YA), they would focus their attention on airfields, marshalling yards and gun batteries. Over the winter of 1943-44 they targeted V weapon sites, along France’s coast, and attacked enemy airfields during the ‘Big-Week’ campaign of February 1944.

During the Normandy invasion, they targeted bridges and Luftwaffe airfields, coastal batteries, fuel and munitions supplies, they preceded the allied forces as they moved inland; supported ground troops at Caen and St. Lo in July 1944, earning themselves a Distinguished Unit Citation (DUC) for their actions. As the allies moved deeper into France, they were then free to move to the continent allowing them to reach further afield and support the advance toward and into Germany itself.

A crashed B-26 Marauder (AN-J, serial number 41-31585) nicknamed

B-26 Marauder ‘AN-J’, (s/n 41-31585) nicknamed “Blazing Heat” of the 553rd BS, 386th BG, 23rd June 1944.  balances on its nose after making a crash landing at Great Dunmow. (IWM)

In total, the 386th would fly 257 missions from Dunmow, operating between 24th September 1943 and 2nd October 1944, in an aircraft that earned itself a rather distasteful name for being unreliable and difficult to fly. Later versions having both larger wingspans and flying surfaces, partly cured this problem, but in the hands of a good crew, they were deemed no more ‘dangerous’ than any other bomber of that time. In fact, a number of Marauders were known to return home in an incredible condition, after taking a substantial beating at the hands of both flak and fighter attention.

After the 386th left Dunmow, it was handed over to the RAF and the first unit to arrive was 190 Squadron (RAF) with the Stirling IV. Pulled out of bomber squadrons for its ‘poor’ record, they were used by various units for both mine laying activities and glider-tug operations. Arriving from Fairford they stayed here until July 1946 whereupon 190 Sqn was disbanded. During this time they also flew the Halifax III and later the Halifax VII – an aircraft that was proven in combat and also as a transport machine. With a history that extended back to the First World War, 190 Sqn operated as a Glider-tug unit taking Horsa gliders to a number of prestige targets;  both Normandy, during the D-Day invasion, and Arnhem during the ill-fated Rhine crossing of Operation Market Garden. They flew fuel and supplies to advancing troops and carried out a number of transport duties as the war drew to a close.

The changeover between the exiting Americans and the arriving British was seen as an ideal opportunity to gather ‘supplies’ by the locals. Many tins of rationed food and other ‘luxuries’ left by the U.S. airmen were deemed ‘fair-game’ and ‘removed’ in the intervening days. Dennis Williams*2 book ‘Stirlings in Action with the Airborne Forces’ describes in detail how the incoming airmen were surprised by the extent of the items left by the Americans.

Four days after 190’s arrival, 620 Sqn also arrived at Dunmow, along with all their respective Echelons. Like their partners, they also came from RAF Fairford flying the Stirling IV. A former bomber squadron, they cut their teeth at RAF Chedburgh, then in November 1943 they transferred across to the Airborne Forces. Also flying glider operations, they too swapped their Stirlings for Halifax A.VIIs in July 1945 before moving off to the Middle East post war. Similarly, 620 Sqn flew troops into some of the most dangerous war zones, losing a number of crews and aircraft along the way.

Both 620 and 190 Sqn returned to operations soon after their arrival, flying SOE operations, glider training sorties across the UK and dropping equipment into occupied territory. As can be imagined these dangerous operations were not without their problems. A number of aircraft were lost and even during training flights, losses were still incurred.

On the 21st November 1944, Stirling LK276 crashed killing all seven crew members. It was initially thought that the pilot either failed to read his altimeter correctly causing the aircraft to strike trees and power lines, or he took his attention away from the instruments in front. Subsequent reports however, show eye witnesses claiming to have seen a following night fighter. Again contradictions in statements were not helpful and no conclusive decision could be reached. The court of enquiry ruled that it was an accident and so the case was closed. Whatever the cause was, it was a major blow to the crews at Great Dunmow.

RAF Great Dunmow

The Administrative site is now used by the local farmer and small ‘industrial’ units. The crew briefing room (front) stands in front of the intelligence block. The main Operations block has gone but the station offices are still here.

Being so far south, Great Dunmow offered a safe haven for some returning bombers. On November 5th 1944, whilst on their return from mission 166 over Frankfurt, the 401st were diverted to the Great Dunmow as bad weather had closed in over Deenethorpe. An eye-witness account describes two B-17s ‘colliding’ on the runway, whilst other records suggest the two B-17s crash landed both suffering from extensive flak damage.  Records show one of them as B-17G ’42-102674′ flown by 2nd Lt. William F. Grimm  and the other as B-17 ’42-31662′ flown by 1st Lt. Leland R. Hayes. However this particular aircraft (42-31662) was known to be ‘Fancy Nancy IV‘ flown by Walter Cox which did not crash at Dunmow, going on to serve to the war’s end. As with many war records, it can be difficult ascertain total accuracy and an anomaly has occurred here somewhere.*3

Both 190 and 620 Sqns continued on in SOE operations, including their first to Norway on the night of November 6th/7th 1944.  Both operations were seen as failures but it would highlight the difficulties of flying for four hours to often heavily fog-laden environments and back again.

Poor weather dogged this part of the country especially in the early 1940s. The airfield was in a poor condition and a great deal of work had to be carried out to assist operations. Lighting, repairs to the runways and drainage were all severe problems and all needed urgent and immediate attention. Conditions therefore were not good. Successive cold winters and the continual mud, left some with very ‘unsavoury’ memories. Working in bitter cold weather outside certainly became a challenge for hard pressed ground-crews.

A number of operations involved Dunmow aircraft over the next few months, but they were mainly confined to practice flights towing Horsa gliders. Then in late March 1945, Operation ‘Varsity’ began. The drive into Germany required 21,000 troops, 1,800 transport aircraft and over 1,300 gliders. The base was sealed off from the outside world, only air-tests and spoof flights were scheduled, and then on the morning of the 24th March 1945 60 aircraft were lined up along the runways ready to go.

Anti-aircraft fire was heavy and conditions poor over the drop zone, but all 190 Sqn and 620 Sqn aircraft returned – some with damage. They seem to fair far better than the gliders though of which some 80% were damaged by flak – many severely.

Toward the end of the war, both squadrons dropped supplies and recovered POWs from the now free Europe. It was an emotional time for all but accidents and losses still occurred and crews still died.

In July 1945 620 Sqn received the Halifax A.VII and finally in January 1946 it would be all change for Great Dunmow. 620 Sqn were posted to Aqir in Palestine; 190 Squadron was disbanded and the unit renumbered as 295 Squadron and sent to Tarrant Rushton – this was the end for Great Dunmow. The airfield was used as a vehicle storage unit until 1948, at which point it was closed for good. The tower and major buildings were demolished, the concrete dug up for hardcore for the new road, and the remainder returned to agriculture, a state it survives in today.

As with many airfields today, there is little left to see in the way of buildings and infrastructure at Dunmow airfield. A memorial stands alongside the B1256 road a few miles to the south side of the airfield site and an adjacent footpath takes you through what was the bomb store on to the airfield itself.  By driving from here to the village of Little Easton, you can more easily access the site from the northern side, by far the better option. Drive through the small village of little Easton, past the quaint village duck pond and on toward Little Easton Manor. Much of the grounds of the Manor were the accommodation areas and now as an estate once more, is (at the time of writing) up for sale for a cool £5,000,000.

Before arriving at the manor – which shows little of its aviation history – there is a small tourist sign and access to the adjacent fields. Stop here. The footpath to your left crosses the airfield utilising  much of the remaining perimeter track. This path is an old access road to the airfield and takes you up to the threshold of the former second runway (N/E-S/W).  It is a short walk but once there the full width of the runway can be seen, and when looking on, so to can the length (albeit cut short). The only part that is full width, the enormity of these tracks is staggering. The path then leads off to the west through the field strangely enough only feet from the usable but broken and much narrower perimeter track. At the end of this path, you arrive at the threshold of the third (E-W) runway. Now only a single farm track; the length is in its entirety but again standing at this point you can see how long the runways were. The path then crosses over the southern half of the airfield away to the south but there is little to be gained from taking this route, other than to know you have walked where many crews would have spent their time.  The dispersals that once stood here are now long gone and no trace remains of their existence.

If you continue east the path splits again and the one turning south takes you through the former bomb store and onto the afore-mentioned memorial. Now a quarry, the store is supplied by the perimeter track which is used by lorries to transport materials. Turning back on yourself it is possible to walk along the perimeter track back to your starting point. Along these paths are signs of the concrete that once carried the B-26s, Stirlings and Halifaxes, much narrower now, their significance little more than a farm track. Away to your right, was the former ‘dump’ or Marauder graveyard, where scrapped B-26s were left to rot.

Return to the road and walk from here west toward the lodge. After a few minutes you arrive at the former airfield entrance. The airfield sub-station marks the entrance and a footpath takes you along the road onto the airfield site. The technical area would be to your left and right, with one of the T2 hangars to your left. Follow the path as it crosses the field and you arrive where the tower once stood. There is no sign of it now, but the path takes you right though the spot where so many decisions were made and aircraft counted back. The path then leads on through the airfield and  joins the third (E-W) runway at its centre. largely overgrown with trees, the line is clearly evident, but again evidence of the concrete structure lay  scattered along the edges of this once gigantic pathway.

RAF Great Dunmow

The airfield substation marks the airfield entrance.

Turn back again and through the technical area. Hovering over the tress to your left you will be able to see the current control tower and landing aircraft at Stansted airport – a mere stones throw away. Also to your left are a small group of farm buildings , amongst them a blister hangar that appears to have been moved here after the war. Beyond these and accessible from the roadway, a small collection of administrative buildings remain now used by the local farmer and as small industrial units. By walking along the road these are accessible and perfectly visible from the roadway.

The road from here continues on and takes you into where the  main accommodation sites once stood. Much of this is private land but traversed in places by small bridal ways and footpaths. Immediately opposite was the mess site 4 and further along the road the sick quarters. The remaining accommodation sites were to the north of here amongst the now dense forests that have replaced them. To the north of these woods was the sewage plant that once served the airfield. It has now been replaced by a more a modern unit but its location is still precise.   Various tracks lead into private land from here, but they are the original tracks for the various accommodation sites that once housed the crews and staff of this once busy base.

Return to your car and drive back to Little Easton stopping at the church  (St. Mary the Virgin). Inside at the back of the church on the north wall are two beautiful widows that commemorate the service of those stationed here at Great Dunmow – both RAF and USAAF. Primarily focusing on the USAAF, they depict a number of scenes – each reflecting the daily lives of the airmen. Some show them holding hands with the civilian children, others preparing for and returning from flight; Marauders in the ‘Missing man’ formation, and two hands clasped together as a sign of American and British unity – each one is beautifully presented and well maintained. One of the windows depicts ‘peace and tranquillity’, whilst the other called “The Window of the Crusaders”; depicts the role played by the 386th. Plaques, rolls of honour and information boards give great detail about the lives of those who were stationed here for those short periods during the Second World War.

August 2015 007

One of two stained glass windows in Little Easton church.

Great Dunmow served an important role during the Second World War. Today its historical significance is in no way played down. Whilst the majority of the airfield is now crops, ‘free access’ allows you to revisit those days of the Second World War, to walk in the footsteps of heroes, to experience the sight of a welcome runway as a returning bomber would. The huts and church windows stand as reminders of those who, whilst so young, gave their all in the name of freedom and democracy.

Notes and further reading

*1The Big House, was the former Estate of Frances, Countess of Warwick, who was regularly visited by the Prince of Wales, who later became King Edward VII. A railway halt was built outside the house to accommodate these visits.

*2 Williams Dennis, Stirlings in Action with the Airborne Forces, Pen and Sword Aviation, 2008 – this book provides an in-depth look at life within both 620 Squadron and 190 Squadron whilst at RAF Great Dunmow. It is highly recommended as a follow-up to the activities of these two units whilst here and abroad.

*3 See the 401st BG website for details of these aircraft and missions, including the original mission reports.

Church Memorial Honours 28 Airmen

The skies of East Anglia were once busy and alive with the throbbing of radial and piston engines. The dangers of war were constant, and until aircraft were safely on the ground,  danger and risk were always present. This is no more evident than in the large All Saints Church, Carleton Rode, Norfolk.

Although not strictly speaking in Carleton Rode, All Saints Church houses a plaque that is dedicated to the crews of  four aircraft that collided in two separate collisions over the parish during the Second World War.

The Church itself is a historic building dating back to the 13th Century. It was modified in the 19th Century following a collapse of the tall tower. This restoration work gives the visitor the impression that this large church was a built with an unnatural small tower, but this was not so.

All Saints Carelton Rode

The memorial board at All Saints Church, Carleton Rode, gives the names of those who died in the two collisions. The top board contain the names of the 389th BG; the bottom, those of the 453rd BG.

The memorial itself hangs on the north wall inside All Saints, along with wreaths presented by local organisations including representations from the American base at RAF Alconbury.

The two collisions occurred on separate occasions and involved aircraft from both nearby RAF Hethel and RAF Old Buckenham.

Both incidents involved crews of the 2nd Air Division, Eighth Air Force. The first took place on November 21st 1944, followed a few months later, on February 9th 1945, by the second. The casualties of the first, were from the 566th BS, (389th BG) flying from RAF Hethel, and the second involved crews from the 734th BS, (453rd BG (H)) flying from RAF Old Buckenham. In all 28 airmen lost their lives in these two very tragic accidents.

The 566th BS were activated Christmas Eve 1942, and were assigned to the 389th BG, Second Air Division, Eighth Air Force. On arrival in England they were sent to RAF Hethel (Station 114) in Norfolk where they would participate in the air campaign over occupied Europe.

On November 21st 1944, the 389th were preparing for a mission to bomb the oil plants at Hamburg, Germany. Liberator B-24J, s/n 42-50452  ‘Earthquake McGoon’*1, piloted by Lt. Alfred Brooks took off to formate high above the Norfolk countryside. A second Liberator, B-24J, s/n 44-10513, piloted by 1st Lt. J. E. Rhine took off to join the same formation. The entire raid would involve a colossal 366 B-24 ‘Liberators’, along with 177 fighter-escorts involving both P-47 ‘Thunderbolts’ and P-51 ‘Mustangs’ – a formidable number of aircraft to have in the sky at any one time.

As the aircraft were joining the formation, the two B-24s collided, resulting in both aircraft crashing to the ground. Brooks was the only survivor from his aircraft, whilst there were only two survivors from ‘10513’. In total seventeen of the aircrew died that day in the resultant crash.

The crew who lost their lives that day were:

1st Lt James E. Rhine, s/n: 0-820824, *
1st Lt J.W.  Safier.
2nd Lt D.R. Bromer.
2nd Lt J.E. Ryles.
2nd Lt. N.R. Snodgrass
Tech/Sgt. William M. Bucher, s/n: 36814876, *
Tech/Sgt. E.G. Forester
Tech/Sgt. Stanley H. Smith, s/n: 11082353, *
Tech/Sgt. Harold M. Thompson, s/n: 39092072, *
Staff/Sgt. Walter D. Brewer, s/n: 34872455, *
Staff/Sgt. Julius Heitler, s/n: 42041178, *
Staff/Sgt. Carl V. Hughes, s/n: 34021953,*
Staff/Sgt. R.W. Krouskup
Staff/Sgt. F.L. Landrum
Staff/Sgt.  W.E. Leatherwood
Staff/Sgt. H.W. Looy
Staff/Sgt. W.C.Sawyer

*Seven of these men are buried in the Cambridge American Cemetery, five of whom were presented the Purple Heart.

All Saints Carelton Rode

A small window also remembers the 17 men killed in November 1944.

The second incident occurred on February 9th 1945, and involved two aircraft from RAF Old Buckenham.

The 734th BS flew as part of the 453 BG, 2nd Air Division, Eighth Air Force. They were activated on 1st June 1943, moving to England during the December of that year. Their trip took them from Wendover Field, Utah, to Idaho, California and onto Old Buckenham. Throughout the war they would operate as  a strategic bomber group attacking many high prestige targets across Germany.

On February 9th 1945, two B-24s, 42-95102, ‘Spirit Of Notre Dame‘ and 42-50703 ‘Worry Bird‘ took off as part of a 313 strong force of B-24s to attack the Rothensee oil plant at Magdeburg, along with any targets of opportunity. Escorted by 151 P-51 ‘Mustangs’, they successfully bombed the target using H2X and returned home.

As the bombers were approaching Old Buckenham, the two aircraft collided and ‘Worry Bird‘ crashed in a fire-ball, within a mere hundred yards of the runway. ‘Spirit Of Notre Dame‘ on the other hand recovered from the collision making a safe landing at Old Buckenham. In the resultant crash, all 11 crews members of ‘Worry Bird‘ tragically lost their lives.

The crew of ‘Worry Bird‘ were:

1st Lt. RQ.Rollins
2nd Lt. Earl E. Check, s/n: 2005832, *
1st Lt. Max E. Stump, s/n: 0-718979, *
Tech/Sgt. J.P. Eubank
Tech/Sgt. E.W.Amburn
Staff/Sgt.J.E.Sharp
Staff/Sgt.R.W.Adkins
Staff/Sgt. E.T Soine
Staff/Sgt. D.E.Robertson
Staff/Sgt. E.C.Erker
Staff/Sgt. W.L. Starbuck

*Two of these men are buried in the Cambridge American Cemetery, one of whom was presented the Purple Heart.

This memorial reminds us of the dangers faced on a daily basis by young crews of the armed Air Forces during the Second World War. On these two days, 28 young men lost their lives in tragic accidents, that left a lasting scar on not only their bases, but their families and the local communities as well.

Notes:

All the crew members who lost their lives are remembered in the Saint Paul’s Cathedral Roll of Honour.

*1 in some references the aircraft name is given as ‘Earthquake Magoon‘.

466th Bomb Group – a Disastrous start to the War.

The area around Attlebridge is steeped in historical value, archaeological finds have dated inhabitants of the area going back as far as prehistoric times; the Romans, Anglo Saxons and Normans have all left their remnants and marks. So too, has more modern man.

RAF Attlebridge (Station 120)

Initially built as a satellite for Swanton Morley, Attlebridge would eventually pass into the hands of the USAAF, receiving the designation Station 120 . As a satellite it was built with less ‘quality’ features than standard ‘A’ Class airfields, but this would not prevent its development or use by a range of single, twin and four engined aircraft of both the RAF and USAAF.

RAF Attlebridge, which became the home airfield of the 466th Bomb Group, earlier in the war when the RAF still owned the station. The control tower is to the left of the windsock. Handwritten caption on image:

RAF Attlebridge Watch Office with Ops Room, the photo is believed to have been taken before the USAAF moved in. The office is a Type ‘A’ design (17821/40). and would have later additions to bring it up to improved standards.   (IWM)

Opened in 1941, initial occupants were the dispersed Blenheim IVs of 105 Sqn from the parent airfield RAF Swanton Morley. Operating anti-shipping roles, they were originally state-of-the-art aircraft but were quickly left behind in the development stakes as the war progressed. Their failings were soon revealed in front line operations and so activities were reduced to low-level attacks on shipping and coastal targets.

No. 88 Sqn (RAF) were the first permanent residents of Attlebridge. Having replaced their Blenheim IVs for Bostons IIIs in the previous July, they brought these new and updated American built aircraft to Attlebridge to continue the low-level attacks on the European continent. 88 Sqn would operate various model s of the Boston right up until their departure the following year and then subsequent disbandment later in 1945.

These were infant years for Attlebridge, and it was soon realised that upgrading was going to be needed if it was to be a serious contender. So reconstruction work began and the site was upgraded with new concrete runways, improved perimeters tracks and dispersal points.

Across the Atlantic, the American’s began their immense build-up, and in the Autumn of 1942, Martin’s controversial B-26 ‘Marauders‘ were flown in via the northern Atlantic route. Both Attlebridge and nearby-by Horsham St. Faith received the new crews. A period of training was undertaken that consisted of low-level flights across the English countryside, but Attlebridge remained a back-seat airfield, acting as a staging post before the Marauders along with the Twelfth Air Force, moved on to the Mediterranean Theatre.

USAAF Station 120

One of the many structures that remain swamped by undergrowth.

Little happened following their departure; the construction work was completed and the RAF returned with another American built model, the B-25 ‘Mitchell II’. 320 Sqn (one of three Dutch squadrons) brought these with them from RAF Methwold in the western regions of Norfolk; they stayed here until August 1943 undertaking a small number of operations in low-level raids.

A spate of Luftwaffe attacks on the East Anglian coast instigated a short stay by Typhoons of 247 Sqn (RAF) which saw them use Attlebridge as a stepping stone, moving through 12 airfields in as many months, a pattern that would continue well into 1947.

At this point, Attlebridge was assigned to the Eighth Air Force and further reconstruction of the airfield began. Improvements to the runways were made, new perimeter tracks, dispersals and technical areas were all added. The three original runways of 1,220, 1,120 and 1,080 yards, were by now increased to the standard 2,000 and two of 1,400 yards accordingly, each being 50 yards wide.

To accommodate the expected influx of 3000 crews and support staff, the accommodation sites would be increased to a total of 11: two communal; a WAAF site; sick quarters; a mix of officers, sergeants and enlisted airmen quarters and a sewage treatments works. Aircraft would be dispersed around a mix of both original and new ‘spectacle’ and ‘pan style’ hard stands, over 60 in total, with two T2 hangars and a blister hanger providing maintenance shelters. A larger bomb store – located to the east, would also accommodate the huge tonnage of bombs that was going to be required in the forthcoming onslaught over occupied Europe.

The scene was set and in February 1944, the Skies over Norfolk would reverberate with the sound of America’s most-produced, four-engined ‘heavy’ bomber.

USAAF Station 120

One of the many air-raid shelters that can be seen around the area.

The only major Group to be stationed at Attlebridge was the 466th Bomb Group, 96th Combat Wing, 2nd Air Division, who arrived in early 1944.

The 466th BG were constituted on 19th May 1943, being activated in August that year. They flew Consolidated’s B-24 ‘Liberator‘ in the ‘H’, ‘J’, ‘L’ and ‘M’ models, and was made of four Bomb Squadrons: the 784th BS (code T9), the 785th BS (code 2U), the 786th BS (code U8) and the 787th BS (code 6L). The 466th would be nicknamed “The Flying Deck” and they would operate solely from Attlebridge.

In February-March 1944 the 466th moved in. The air echelon transferred via the southern ferry route to England, the ground echelon taking the Queen Mary to Greenock. They were new, inexperienced in combat, and as ‘rookies’ this would be a major factor in their disastrous start to the war.

USAAF Station 120

Many parts of the runways and dispersals remain in full width.

Their maiden operation, a mission to Berlin, on March 22nd 1944 would very quickly bring home the dangers of aerial warfare and close formation flying. Even though fighter attacks were non-existent, two B-24s were to collide with the loss of 13 of the two crews. B-24H ’41-29434′ “Terry and the Pirates” collided with B-24H ’41-29416 “Rebel Yell” after “Rebel Yell” was hit by flak. The resultant collision caused both aircraft to fall from the sky and crash West of Oranienburg, in Germany.

On the second operation, the following day, two more B-24s collided over Osterburg, and again heavy casualties were incurred. Onboard one of the aircraft, – B-24H ’41-29466 ‘Dark Rhapsody‘ – were three replacement crew members: Robert A. Gum (C/P), Bogan Radich (R/O) and Aleck A. Amich (TG), it was Amich’s first and only mission – suffering from his injuries, he died three days later in hospital. The two B-24s crashed into or near the Zuiderzee, in the north-west of Holland, where fuselage parts of ‘Dark Rhapsody‘ were later recovered in 1981. Only three of either crew survived taken as prisoners of war.

USAF Station 120

A memorial stands to the south-west overlooking the former technical site.

Then a third collision on the 27th March meant that six aircraft had been lost in five days with little or no enemy intervention. It was not a good start for the freshman of the 466th!

In an attempt to reduce these collisions, which occurred throughout the war, war-weary B24s were stripped of their armaments, painted bright colours and patterns, and lit up so formating aircraft could identify their correct path and position in the formation. Known as ‘Forming Ships’, ‘Circus Leaders’, ‘Judas Goats’ or more commonly ‘Assembly Ships’; they were painted in bizarre patterns and carried a huge quantity of pyrotechnics, that itself being a danger to the operating crews. Many units operated their own assembly ships for this purpose, the 466th using a former 44th BG B-24 ’41-24109′ painted entirely in red zigzags.

The 466th BG would recover from this terrible start and go on to operate in a strategic bombing role, attacking targets such as: Liege; Brunswick; the Bohlen oil refineries; Kempten aircraft plants; Hamburg; Saarbrucken; Misburg and airfields at St. Trond. They supported the Normandy landings, the St. Lo breakout, hit communication and transport links during the Battle of the Bulge, and supported the Rhine Crossing. They would fly their last mission on April 25th 1945.

The 466th BG would not suffer as badly as many of the other groups did. Their initial entrance in the war marred by losses, would soon fade away. By the war’s end they would complete a total 232 missions, a remarkable achievement in just over one year. A total of 5,762 operational sorties would see 12,914 tons of bombs dropped on enemy positions. They would lose ‘only’ 47 aircraft in action with a further 24 others being lost as ‘other’ loses. The 785th BS had the enviable record of 55 consecutive missions without loss, but the 466th were to also suffer the last aircrew casualties of the entire Eighth Air Force.

last crew shot down 21 apr 45 10kia

The last crew to be shot down over Germany, taken 21st April 1945, 10 of the crew were killed. Standing Left to Right: John C. Murphy (RN), John A. Perella (N), John A. Regan (CP), Richard J. Farrington (P), George E. Noe (PN), Chris Manners (B) Kneeling Left to Right: Robert E. Peterson (TG), John C. Brennan (WG), Jerome Barrett (FE), Howard G. Goodner (R/O), Albert Seraydarian (G) Only Manners and Seraydarian were able to bail out. .(IWM.)

After the USAAF pulled out, Attlebridge was returned to RAF ownership, it was put under care and maintenance and retained until sold off in 1959.  It is now owned by the Bernard Matthews company and as with many of the airfields that adorn Norfolk, they are now used to house Turkey sheds.

DSC_0064

Views along one of the runways

The main runways and perimeter track of the airfield are very much evident and in a good state. As this is private ground, access is not permitted, but good views across the tracks can be gained from the local road. There were minimal visible signs of standing buildings, but the control tower was extended and is used by the management of the site.  More careful probing will reveal signs of buildings and  the bomb shelters laying waste amongst the trees. It is possible to drive round the entire site, being only feet from the perimeter track at any one time. Amongst these trees evidence can be seen of the airfields perimeter track. Odd derelict buildings lay swamped by vegetation and trees. At entrances to the site, good views along the runways give a perspective of the size of the place. Hard standings and concrete dispersal pens lay on either side of the road, now used to store sugar beet and other produce cultivated by the local farmers.

The accommodation sites, widely spread to the south-east, have little in the way of visible structures, although some huts are still used by small businesses and remain in reasonable condition.

The blister hanger still stands, although it is now showing signs of wear and its life may well be limited. Whilst large parts of the airfield have survived and survived well, many of the spectacle dispersals have been reduced, in some areas completely removed, presumably for hardcore, and only the tracks through the bomb store remain through the trees.

The western end of the main runway, perimeter track and connected dispersals have all been removed, the public road (Breck Road) now cutting through what was the main technical area. It is the only part that utilises any of the original perimeter track.

It is along this road, only feet from one of the dispersals, that there is a memorial dedicated to the crews of the airfield who served here.  A well-kept memorial, it portrays a Liberator of the 466th, 2nd Division, 8th Air force, ‘The Flying Deck’ and the badges of each of the four bombardment squadrons. It tells of the combat missions over Normandy, France, the Rhineland and the Ardennes. Dedicated in 1992, 50 years after the end of hostilities, it serves as a little reminder of those brave souls, who gave their all from this small part of Norfolk.

Attlebridge had the dubious honour of having the last crew to be shot down over Germany fly from it. As with other sites, its easy to picture a bustling base, aircraft rumbling along preparing to take off on what may be their last flight. Where man once stood, turkeys now breed.

USAAF Station 120

One of the Dispersal pans at Attlebridge.

Whilst visiting Attlebridge, it is worth taking a short journey westward to Hockering Wood, a site of Special Scientific Interest and one that is also steeped in history. More recently, it served as a massive bomb store, and evidence of its activities still remain.

(Attlebridge was visited in 2014 this page has been revised.)

Attlebridge forms a Trail taking in a number of airfields in this region all of which are covered in Trail 7.


Hockering Wood Bomb Store, Norfolk

With the increase in airfield construction and the demand for greater quantities of munitions, additional bomb storage became a problem during the Second World War. Bomb sites needed to be close enough to the airfields so that stores could be transferred quickly, but far enough away so as to not cause problems should an attack happen at either the airfield or at the store.

Apart from the major underground stores bought and secured in the 1930s, the War Office planned an additional nine above ground ‘Ammunition Parks’ at the outbreak of war*1. They were to add a further two more once the war had started and following the realisation that nine would not be sufficient to meet the demands of the air war over Europe.

Each of these parks were initially designed to hold a total of 1,000 tons of ordnance, but it was quickly realised that this too was not going to be anyway near sufficient and the capacity was soon raised to 10,000 tons.

Any store, needless to say, had to be safe, secure and well hidden from prying eyes, all of which presented the War Office with numerous problems. The initial pre-war sites relied upon the strength of the design to protect them but it was then thought better to use concealment as a way of protecting them and so the latter two sites did just this.

About one mile from RAF Attlebridge (Station 120) in Norfolk, stands one of these two sites. Located in Hockering Wood, now a site of Special Scientific Interest, it not only houses some of the rarest plants and animals in Norfolk but across the country as well.

Hockering Wood is one of the largest ancient, semi-natural woodlands in Norfolk, its ponds provide habitats for the protected Great Crested Newt, and a rare mix of soils support an ecological range that is remarkably unusual for Norfolk. It also contains a moated site believed to date as far back as the middle ages.

Yet with all this fauna and flora thriving, it is hard to believe that during the Second World War, this was an enormous bomb store capable of accommodating 8,400 tons of High Explosive (H.E.) bombs and 840 tons of incendiary bombs. A number of hardstandings, huts, component stores, staffing blocks and open sites, were spread out across the site, each linked by 9 foot (18 foot by adjoining H.E. groups) tar sprayed, metal roads that followed the natural contours of the wood. Whilst the general layout and design of each of these sites were similar, each construction team would have a certain amount of autonomy in the decision-making depending upon the conditions at each site. At Hockering, this would take into account the drainage, natural ditches, tree cover and natural barriers that existed there at the time. The requirement being that all natural features were to be retained as much as possible.

The H.E. bombs and ordinary small arms ammunition (S.A.A.) would be stored on hardstands, with the S.A.A. sited between the H.E. in the wooded area. The incendiaries, components stores and pyrotechnics would be stored in 36′ x 16′ Nissen huts, with some of the incendiaries on open land. The original plan was for the pyrotechnics to be grouped together in 6 huts per group, whilst the component stores would be in pairs. This provided a total of 17,000ft of storage for small arms, and over 20,000ft for pyrotechnics. Tail units, not fitted to the bombs until arming, were stored in an area covering 36,750ft.  In addition to this at Hockering, there were two extra accommodation sites also planned in just beyond the perimeter fence should there be an overspill at nearby Attlebridge.

Access to the site was limited and controlled. Three public roads were closed off and entrance along these roads was by pass only – security was understandably high.

The site designed in the early 1940s, and designated as a ‘Forward Ammunition Depot’, was originally built to supply RAF units of 2 Group Bomber Command, and was under the control of No. 231 Maintenance Unit. It was built in the latter part of 1942, opening in early 1943 closing in 1945 at the end of the war. At its height it is thought to have served both USAAF and RAF units.

The tracks that led around the store are still there today, hidden beneath years of vegetation and soil build up. Foundations from many of the huts are still evident and even the odd building still stands as a reminder of the work that took place here all those years ago.

As with many of these historic sites though, mother nature has a way of claiming them back. Careful ecological management ensures the public get to enjoy the site whilst protecting the rare species that continue to thrive there.

A quiet and unassuming site today, it was once a hive of activity that supplied the bombs and bullets that brought death and destruction upon our enemy. It is somewhat reassuring to know that we can once again enjoy the peace and tranquillity that it now brings.

Hockering Wood Bomb Store

One of the more complete huts on the edge of Hockering Wood.

Sources and further reading
*1 Wikipedia has a full list of all the designated ammunition parks.

The technical information was obtained from the plan drawing MC/97/42 Sheet B.