Loss of Wellington Z1327 – 17th February 1942

On February 17th 1942 a cross-country training flight was planned in which the crew of No. 460 Squadron RAF would fly from their base at RAF Breighton in the East Riding of Yorkshire, to Peterborough, Harwell, Pershore, Sywell and then back to Breighton.

At 19:20 the Wellington MK.IV ‘Z1327’ (listed in the operational record books as V1327) took off. On board were a crew consisting of all Sergeants: Sgt. James Henry Ware  (RAAF) (s/n: 402897), Sgt. Robert Litchfield Tresidder (RAAF) (s/n: 402894), Sgt. William Leonard Ashplant (RAFVR) (s/n: 1170676), Sgt. Cyril Caradoe Davies (RAFVR) (s/n: 1052270), Sgt. Frederick Dutton (RAFVR) (s/n: 1006728) – the youngest member – and Sgt. Cyril Raymond Dickeson (RAFVR) (s/n: 1292128), a mix of pilots, wireless operators, observers and Air Gunners.

The initial part of the flight went according to plan and contact was made between the ground Station at RAF Holme-upon-Spalding Moor at 22:22 hours moments before the aircraft crashed into a hillside killing all on board. In the fire that followed the crash as Farnley Tyas near to Huddersfield, the Vickers Wellington was also destroyed being written off charge shortly after. It is thought that the aircraft was off course by almost 40 miles and may have been looking for landmarks, when it hit the roof of a cottage  sending it crashing into the hillside.

This was the first 460 Sqn fatality since the squadron was formed in the previous November. Four of the crew remain buried together at All Saint’s Church, on the hill overlooking the village of Holme-upon-Spalding Moor.

All Saint's Church

Sgt. C.R. Dickeson (RAFVR)

All Saint's Church

Sgt. W.L. Ashplant (RAFVR)

All Saint's Church

Sgt. R. L. Tresidder (RAAF)

All Saint's Church

Sgt. J. H. Ware  (RAAF)

Sources:

AIR 27/1907/1 National Archives.

The 446th BG (H), “The Bungay Buckaroos” – Part 2

In part 1 of this Trail (Trail 14) we saw how Bungay had grown from a satellite airfield into a fully fledged bomber airfield housing the 446th BG known as “The Bungay Buckaroos”.

The night of April 22nd 1944 saw the USAAF’s Mission 311, when over 800 bombers, a mix of B-17s and B-24s, were ordered to attack the marshalling yards at Hamm in three waves, each with its own designated target. The bombers were to take off from their respective bases between 17:50 and 18:21, but even before the stream arrived over the target, Bungay would bear witness to what was about to happen that night.

For the crew of #42-50306 “Dragon Lady“, it would begin at home. On take off the B24 skidded and crashed killing not only the ten airmen on-board, but two ground staff as well. Then, shortly before arriving over the Dutch coast, a B-17 #42-19818 of the 401st BG at Deenethorpe, suffered a fire inside the fuselage. As the fire took a grip of the aircraft, the pilot Lt. Roland Schellenberg put the B-17 into a steep dive during which three crew members either fell or jumped from the aircraft. Eventually, the fires were extinguished and the aircraft returned to the UK making an emergency landing here at Bungay, with nor further loss. The aircraft was salvaged at the Salvage depot at Watton, but the three crewmen who left the aircraft, were never found even after an intense RAF Air Sea Rescue Search of the area.

B-24H #42-50306 crashed on take off at Bungay on April 27th 1944 with killing twelve men. (IWM FRE 6607)

As the bomber stream made its way to Hamm, unpredicted winds played havoc with many aircraft, some passing beneath the higher groups as they approached the bomb release point, putting themselves in grave danger of being hit from falling bombs. Others following these leading groups also began arriving too early over the target, and were unable to distinguish landmarks due to the heavy smoke from the previous wave’s bombing.

Whilst conditions were very difficult, most aircraft did manage to bomb either their given target or alternative targets of opportunity, and considering this, results were generally good for the three Divisions. However, the troubles for the crews didn’t really start until they left the target and began their flight home.

Being a late operation, returning bombers were not locating their bases until well after dark, a situation the Luftwaffe exploited to their full advantage. A small force of Me-410 night fighters mingled with the returning bombers, and so ground radar were then unable to pick them up. Once the ground staff realised what was happening airfield lights were extinguished and crews ordered to other bases. Unseen, the German fighters gradually picked off the bombers as they tried in vain to land at darkened airstrips.  One such pilot, 2nd. Lt. Frank Baker,  luckily managed to avoid not only the fighters but another B-24 as he struggled to bring his aircraft (#42-95294) down at an alternative base. For his action that night, Baker received an Oak Leaf Cluster to add to his DFC. The entire night cost the USAAF nearly 60 men, some of these being to friendly fire in the confusion that reigned in the skies that night. Twenty Liberators had been damaged by the marauding Luftwaffe fighters, many crashing with fatal results.

The night of June 5th 1944, brought good news and a surprise for the men of the 446th. A crew briefing was called at 23.30 in which they were told they would lead the Eighth Air Force’s part in the invasion the next day. A massive operation, it would require pin-point accuracy and split-second timing to achieve its aim. Bombers were to take off in darkness and rendezvous at given heights with the 2nd Division forming up in an area between the Mersey and Humber estuaries. Take off was just before 02:00 with the 446th’s ‘Red Ass‘ piloted by Captain Charles Ryan, along with Sgt William Barlow, (G); Sgt Stuart Merwin, (R/O); Sgt Bruno Corridino, (G); Sgt Jesse Davis, (G); Sgt Joseph Parkin, (G); Sgt Howard Weaver, (Flt. Eng/G); 1st. Lt Robert McConnel, (C/P); 1st. Lt. Banks Jacobs, (B/A); and 1st. Lt. Michael Paczan, (N) taking the lead. Also on board that day was Col. Jacob Brogger the station Commander.

At 05:55 the formation was over Vierville  dropping one hundred 500lb bombs. A days long event that saw continued and repeated attacks behind the invasion line. With no Luftwaffe intervention, the event was more of a side-show for the gunners of the heavy bombers, and very few casualties were incurred by the crews. This did not mean however, that casualties were absent throughout the invasion period. On June 7th, #42-51116 crashed on takeoff on a mission to Alencon in France. In the accident eight members of the ten crew were killed.

It was also the 446th that would suffer from the little impact that the Luftwaffe had. On the next day 8th and then again on 12th near Jersey and Rennes respectively, they were attacked by a small group of Bf109s, on each day one 446th aircraft was lost.

On the 8th, the first of these two days, #42-109830 went down in the English Channel with the loss of five crewmen. The remaining five were rescued by French fishermen only to be picked up later the German forces.*2 On the second day, B-24 #42-94859 also went down with another five aircrew killed. Of those who survived, one was caught and taken prisoner, whilst the remaining four managed to evade capture.*3

As the allies pushed on thorough France, Holland and into Germany, the 446th supported them. They targeted bridges, gun batteries and enemy troop positions during the St. Lo breakout in July. They dropped supplies to the paratroops around Nijmegen in September and attacked marshalling yards, bridges and road junctions in the Ardennes, preventing German reinforcements from pushing through in December 1944 – January 1945. This support continued right up to the wars end, dropping supplies to advancing troops over the Rhine and on through Germany itself.

Through all these missions, the ‘Bungay Buckaroos‘ managed some remarkable achievements. Liberator #42-52612 of the 706th BS, “Home Breaker” flew 102 missions before returning to the US, and both the 706 BS and the 707 BS surpassed 60 consecutive mission each (62 and 68 respectively) without loss.

RAF Bungay (Flixton)

Admin and bomb site Site – now a decaying.

The end of the war however brought a final twist for the 446th. On April 11th, when on the return flight from Regensburg, two B-24s #42-50790 and #42-51909, both of the 706th BS, collided over the base killing all twenty-two airmen on-board. But as if that were not enough, there was another evil twist of the knife just two weeks later, on the 26th, when two days after their final mission, a transition flight crashed killing a further six crewmen. It was a tragic and sad end to the Group’s war.

In all, the 446th had carried out 273 missions in total, dropping just short of 17,000 tonnes of bombs for the loss of 68 aircraft in combat and 28 through accidents and other incidents. Yet with all these remarkable achievements, the Group were never awarded any recognition in the form of a Citation or Group award.

With the war at an end, the 446th would depart Bungay for home. The aircraft departing mid June via the southern routes and the ground parties departing on the Queen Mary from Greenock in early July.

Bungay airfield, then surplus to US requirements, was transferred over to the Fleet Air Arm and renamed HMS Europa II on September 25th 1945. Bungay formed one of a small cluster of former USAAF airfields handed over to the Fleet Air Arm in preparation for the war in the Pacific. Acting as a satellite for HMS Sparrowhawk (formally RAF Halesworth another US airbase), it fell under the command of  Lt. Csr. R.J. Hanson D.S.O., D.S.C. but due to the end of the war against Japan, it only operated until May 1946 when it was handed back to the RAF and placed under the control of 53 Maintenance Unit. A further change in management saw it pass to 94 Maintenance Unit in November 1947 who stored surplus munitions along its runways and inside its buildings. A range of ordinance, from 250lb bombs to 4,00lb bombs, cables, flares, mines and German munitions were all stored here before disposal.

In the early 1950s the site was gradually run down, no longer needed by the RAF and finally closed in 1955. It was eventually sold off in 1961 and was returned to agriculture. As it closed, the last main gate board to adorn the site was rescued and now rests in the Norfolk and Suffolk Aviation Museum a short distance away.

Bungay gate sign

The last main gate sign from Bungay.

After that some private flying did take place at the airfield, the Martlesham Heath Parachute Club using it with a variety of aircraft types, but this was short-lived. Gradually the site was taken over by agricultural uses, the runways and perimeters tracks being all but removed, the buildings allowed to deteriorate with many being removed over time. Time had gone full circle, and Bungay airfield is no more. In memory of those who were stationed here a memorial stone in the shape of a B24 tail fin marks the site of the former airfield. Just one of several memorials in the local area.

Tucked away down a country lane, Bungay is best found from the B1062. Stopping on the small country lane, Abbey Road, you can see along what is left of these parts. Now predominately agriculture, fields stretch where the Liberators once stood, trees adorn the admin areas and hard standings support tractors and other modern farm machinery. Much of what remains is rooted on private land, and many of these buildings contain murals created by those who were stationed here in the latter part of the war. Dilapidated huts, they are gradually falling into ruin, overgrown with bushes and trees.

A well presented memorial and garden marks the site, and the Airfield entrance is now a farm along with its associated dwellings. A small plaque signifies a crash site at Barsham some 3 miles east and a superb museum at nearby Bungay  houses a range of artefacts associated with the 446th and other Eights Air Force groups. The nearby church holds a roll of honour and its own memorial to the group. A former rest room for the crews is now the local Community Centre and it too holds a plaque in memory of the 446th.

RAF Bungay (Flixton)

A peaceful memorial garden to the 446th marks the site of Station 125.

Sources and further reading.

*1 MACR 1735
*2 MACR 5482
*3 MACR 5802

Freeman, R.A., “The Mighty Eighth“, 1986, Arms and Armour Press.

A website dedicated to the 446th has further details of the crews and aircraft.

A Long Way From Home.

A guest post from Mitch Peeke.

June 19th, 1944: Just thirteen days after the Allied D Day Invasion. The weather that day was dry, but the late afternoon sunshine over Kent in Southern England was hazy. A formation of around 30 American B17 “Flying Fortress” bombers from the 379th BG, part of “The Mighty Eighth”, were returning home across the Kent countryside, heading due North, toward their base at Kimbolton, in Huntingdonshire. They were returning from a raid on the V1 launching site at Zudausques in Northern France.

The raiders had taken some Flak, but thankfully, no German fighters had found them. They were doubtlessly busy elsewhere, trying to stem the Allied advances. But the Flak they had encountered had been accurate and had exacted a price from the 379th for their raid. Many of those B17’s were now badly damaged and flying home on three engines rather than four. More of them than not, now had “extra ventilation”, courtesy of the German Flak Gunners, and were trailing heavy smoke from those engines that remained running. However, the B17 was known to be “a good ship”. Inherently stable, it was a remarkable aircraft for its size, able to withstand a hell of a lot of battle damage and still be capable of flying. Many a pilot had been able to “nurse” one home, despite the odds. The crews all had faith in their aircraft. It was a faith that was born from hard experience in hostile skies.

The formation crossed the South coast of England at 21,000 feet. Leading the No. 2 Section was B17 Heavenly Body II, of the 525th Squadron, Captained by 1st Lieutenant Lloyd Burns. A veteran crew, this had been their 29th mission over enemy territory. Just one more mission and the crew would have completed their tour and then they’d be going home, Stateside. The D Day Invasion had of course been keeping them busy. This mission to the V1 site at Zudausques had been their second mission of the day.

Lloyd Burns was an exceptional pilot with an enviable reputation for pulling off the smoothest of landings under any circumstances. The original Heavenly Body had been written off quite recently when the brakes failed on landing. Not even Burns could prevent that aircraft from being a runaway and as the heavy B17 simply ran out of airfield space, she rolled off the end of the runway, down a small hill and straight into a pile of scrap concrete rubble. Miraculously, Burns and his entire crew walked away from that landing. They got a new aircraft and quickly named her Heavenly Body II. (In fact, there were at least 4 other US aircraft named Heavenly Body. Two B29’s, another B17 of the 401st Squadron and at least one B25, all of which had a pin-up girl as nose art). This was now their third mission in the replacement aircraft and although they’d not yet had the time to paint the name and art on the bomber’s nose, the crew had happily settled in to their new ship.

Just after the formation crossed the South coast, Lloyd Burns swapped seats with his co-pilot, 2nd Lieutenant Fred Kauffman. Fred was hoping to get a ship of his own after they completed their tour and had asked Lloyd if he could take over for the descent and landing, as he wanted more 1st pilot experience. Lloyd saw no reason not to. Now as the formation was beginning the let down toward Kimbolton, they gradually lost their height over Kent.

At nearly 18:15, the formation was almost over Allhallows and down to 17,000 feet. Ahead of them, left to right, was the Thames Estuary; even busier than usual, with all sorts of shipping, due in no small part to the D Day invasion traffic.

At 17,000 feet, the haze grew thicker. Fred Kauffman was beginning to work hard for his 1st pilot experience. He was having to fly more by instruments as the visibility forwards was down to about 1,000 yards and the horizon was beginning to disappear into the miasma, though to the airmen flying through it, it didn’t seem to be too bad at that moment.

Flying above and slightly behind Burns’ aircraft, was his Port Side Wingman. This B17  bore the serial number 44-6133, but  no name. The pilot was 2nd Lieutenant Armand Ramacitti and he was in trouble. This was his first combat mission and his B17 had been very badly damaged by the German Flak. He’d been nursing her along since leaving France behind. He’d already lost one engine, his Port elevator and a fair piece of the Starboard one had also been blown away and he had another engine on the Port side smoking heavily and running rough. Now, that engine was making an unbearably loud whining noise, looking and sounding as if it was about to seize up too. Jockeying the throttles on his remaining engines, Ramacitti was trying to compensate for the dropping power, but the flight controls were growing sloppy and with the Port elevator gone, maintaining the crippled bomber’s height was getting harder by the minute. She was beginning to give up the unequal struggle to stay in the air.

Ramacitti’s Bombardier, 2nd Lieutenant Theodore Chronopolis, saw that having surged slightly ahead of their leader, they were now dropping back, out of formation. He called Ramacitti on the intercom, warning him to pull up, as they were now dropping very close to Heavenly Body II. Ramacitti was desperately wrestling with the dying bomber’s controls, trying to claw back some height, but it was a losing battle. Without warning, 6133 side-slipped sickeningly to Starboard, literally dropping out of Ramacitti’s hands. Chronopolis frantically buckled on his parachute, as did the Navigator, for both men now knew with absolute certainty, what was coming next.

6133’s side-slip cut across the top of Burns’ aircraft at an angle of about 35 degrees. Engine bellowing, the Starboard outer prop cut into the top of Heavenly Body II‘s flight deck, right behind the Pilot’s window, killing Fred Kauffman instantly. The two aircraft momentarily locked together in a deadly embrace.

Theodore Chronopolis knew they’d hit Burns’ aircraft. All he’d heard was a very loud, sharp bang and a terrible rending sound, as the two aircraft collided. He and the Navigator went straight for the nearest escape hatch. The Flight Engineer and a couple of the Gunners were already there, but the hatch was totally jammed. Just then, 6133 rolled off Heavenly Body II‘s back and inverted. Thrown about inside the aircraft like a small toy, Theodore didn’t know what happened next. He recalled hearing another big bang, then he blacked out.

The momentum of 6133’s continuing side-slip had separated the two planes. As 6133 rolled off Heavenly Body II‘s back and then inverted, her Flak-battered Port wing now sheared off completely, which was probably the second bang that Theodore Chronopolis had heard. As the wing came off, 6133 started to spin, pointing her nose straight down and plunging headlong toward the muddy waters of the Thames Estuary below.

When Theodore came to, he was free-falling outside of the aircraft. Instinctively, he pulled the ripcord on his parachute, which thankfully deployed. As his descent rapidly slowed, he saw a B17 going down below him, its death-plunge marked by a thick trail of black smoke. Then shock set in and he blacked out again. Unbeknown to Theodore, he was the only one who’d got out of 6133 alive.

Literally moments before, on Heavenly Body II, Lloyd Burns suddenly realised that something was horribly wrong. He was about to reach over behind Fred to pull back the curtain. He wanted to see if their rookie wingman, Ramacitti, was keeping with them, when a terrible grinding noise to his left made him duck down instinctively. The daylight through the left side windows was blocked momentarily and he felt the aircraft shudder viciously. He realised in that instant that they’d been hit by another B17, which seemed to him, to be on top of them. Then as 6133 slid off the top, he looked over at Fred. Lloyd was in no doubt at all that Fred was now dead. The first thing Lloyd tried to do was to somehow stabilise the aircraft. Grabbing the controls, he found  the ailerons completely unresponsive and he got next to no feedback from the elevators. This was not surprising as the B17’s control cables ran centrally along the top of the fuselage. 6133’s prop had undoubtedly chopped through them. Heavenly Body II was still flying as she’d been trimmed, just; but for how much longer was the question.

Lloyd noticed that the Flight Engineer was at the escape hatch, trying to open it. Realising that he’d no hope of flying the plane, Lloyd quickly reached for where his parachute was stowed, but couldn’t find it. As he climbed off the flight deck, one of the crew thrust a chute into his hands and he hurriedly strapped it on; only partially as it turned out. He assisted the Engineer in forcing the escape hatch open then literally shoved him through it, as he immediately followed the Engineer himself. As his parachute opened, Lloyd realised he was only half in the harness. Hanging on for dear life, he saw a B17 going down in a steep turn with one engine smoking badly, but was unsure which of the two aircraft it was.

The Bombardier on Burns’ aircraft, Jack Gray, later recalled that the bomber’s Plexiglas nose had been all but severed and he suddenly found himself seemingly more outside of the aircraft than inside it. Jack pulled himself back in and went for his parachute.

Heavenly Body II continued flying, though steadily losing height, even though there was only the dead co-pilot at the now useless controls. Six of her crew managed to safely escape. The Ball Turret Gunner, S/Sgt William Farmer, was one of the last to leave, noting that the aircraft looked like it was coming apart. He needed no second telling to get out and fast.

The six crew members that managed to escape were: Pilot Lloyd Burns, Bombardier Jack Gray, Top Turret Gunner Leonard Gibbs, Ball Turret Gunner William Farmer, Tail Gunner Richard Andrews and Radio Operator/Gunner Leroy Monk. All but one of those six landed in the water and were rescued by fishing boats. Tail Gunner Richard Andrews came down on dry land at Canvey. The three men who didn’t make it were: Co-pilot Fred Kauffman, Navigator Edward  Sadler and Gunner Louis Schulte.

Crew of Heavenly Body II: Front Row, L to R: Edward Sadler; Fred Kauffman; Jack Gray; Lloyd Burns
Back Row, L to R; Louis Schulte; Leroy Monk; Richard Andrews; Richard Billings; William Farmer; Leonard Gibbs
Note that Richard Billings was part of the Burns crew on arrival at Kimbolton, but was the 10th man when crew size was reduced to 9, and so was not with the crew at the time of the collision. The survivors of the Burns crew are all deceased except for Richard Andrews. (Photo courtesy 379th BG Association archive,  by kind permission.)

6133 meanwhile, had gone straight down and crashed in twenty feet of water, in what was then a minefield, about half a mile or so off the west beach at Allhallows. The Estuary bottom was and still is, soft Thames mud and the main part of the wreck undoubtedly buried itself to some extent in the mud. (What remained of the wreckage was later salvaged, probably when the minefield was cleared). She had taken most of her crew with her, trapped inside.

Sole survivor Theodore Chronopolis, landed safely by parachute. He was fished out of the water by a passing  boat. The eight men of 6133’s crew who died that day were: Pilot 2nd Lt. Armand Ramacitti, Co-pilot 2nd Lt. William Hager, Navigator 2nd Lt. Donald Watson, Gunner S/Sgt. Richard Ritter, Gunner S/Sgt. Cecil Tognazzini, Gunner S/Sgt. John  Burke, Gunner Sgt. Warren Oaks and Gunner Cpl. Paul Haynes.

Meanwhile, having been abandoned by her crew, Heavenly Body II continued flying, somewhat erratically and losing height all the time. At first, she’d turned west and seemed to be heading directly toward the oil storage tanks at ShellHaven on Canvey Island. To those watching on the ground, a disaster seemed inevitable, then; still losing height, she miraculously turned east, away from the refinery, over the town, toward Canvey Point and the mudflats. It seemed as though the pilot was still trying to find somewhere safe to put her down. She then circled once over Canvey Point before she  finally nose-dived onto the mudflats, throwing an engine forward as she crashed.

To this day, those who can remember the event have always held the pilot of that aircraft in high esteem. Trouble was, the pilot was at that moment, just landing in the water off Canvey Island by parachute! Did Fred Kauffman not die in the collision after all? Had he somehow survived his injuries, regained consciousness and taken control of the shattered aircraft? Unlikely. Burns had tried to take control just after the collision and found the controls unresponsive. It is also extremely unlikely that Fred could have come round from such traumatic head injuries as he’d received when 6133’s Starboard outer prop cut through the roof and side of the Flight deck.

The answer probably has more to do with the B17’s inherent stability. With the nose section totally open and the escape hatches gone, the sheer force of the through-rushing air was probably responsible for the apparent “steering” of the aircraft. Also of course is the fact that, though a stable design, the aircraft was literally coming apart in flight. Who knows precisely how the aerodynamics were working, but one thing is certain, she was not being actively piloted.

The semi-submerged wreckage of Heavenly Body II remained on the mudflats for decades. Every so often, the tides would uncover more of it and bury other sections. The wreck was easily accessible and so subjected to many souveniring expeditions. A local historical society salvaged some of it and put it on display in a museum, until it closed. The thrown engine was salvaged fairly recently and together with some other artefacts, is now on display at another local museum. There is also a storyboard on the seafront close to the crash site at Canvey Point and a memorial plaque, dedicated to the memory of both crews. Sadly, there is nothing of the kind at Allhallows, where 6133 crashed.

Most of the bodies, including Ramacitti’s, were recovered; some at the time, some a little later, and are interred in the American Cemetery at Madingley, Cambridge; a long way from home. One body was later sent home. The body of Gunner Louis Schulte from 6133 now rests at home in a cemetery in St. Louis. Only two are still unaccounted for: Fred Kauffman, Co-pilot of Heavenly Body II and Gunner Cecil Tognazzini from 6133, both of whom are listed on the tablets of the missing at Madingley. Their last resting places are very probably in the soft Thames mud that their aircraft crashed in. They too, are a long way from home.

The US Military Authorities naturally held an inquiry into the crashes. It was chaired by  Lieutenant-Colonel Robert S Kittel of the United States Army Air Corps. The Pilots and Co-pilots of both aircraft were charged to account. At the end of the inquiry, the official findings were that 2nd Lieutenant Armand J Ramacitti had failed to keep proper position within the formation. In trying to correct this, he had over-controlled, slid into and collided with, aircraft 42-97942 (Heavenly Body II) which was leading the second section of the formation. It was further stated that “No pecuniary or disciplinary action is contemplated”.

Comment from Mitch.

Personally, I cannot help but feel that this was a “cop out” and an extremely harsh outcome for the enquiry to have reached, to say the least.  Given the actual circumstances involved, simply blaming the collision on Pilot error seems to me to be grossly unjust. Some of the deceased crew members were awarded posthumous decorations, as indeed was Ramacitti. In my opinion though, Armand Ramacitti deserved far better than the enquiry board’s sanctimonious posthumous censure, their apparent “favour”of no official punishment and the award of what certainly looks to me to have been a “token” Purple Heart. He’d given his young life, on his first combat mission, desperately trying to get his Flak-blasted aircraft back to base; as had seven others of his equally meritorious crew, all of whom will remain forever, a long way from home.

My thanks go to Mitch for allowing me to post his write-up, it was a tragic accident that may or may not have been avoidable. Whatever the cause, I personally feel that the pilot was struggling with an aircraft that was unstable, difficult to control and likely to fall out of the sky at any moment. The fact that the aircraft had gotten as far as it had was a miracle in itself and those who lost their lives should be remembered for what they did and the sacrifice they made. To even consider that the pilot(s) were to blame for what happened to me is a travesty, they were young men fighting a war that was taking the lives of thousands.

Mitch is currently trying to have a memorial or plaque raised as close to the crash site as possible, I sincerely hope he achieves that aim and that these men are remembered in perpetuity.

Post Script.

B-17  #44-6133 was a Douglas/Long Beach B-17G-45-DL Flying Fortress delivered to Tulsa airbase, Oklahoma, May 10th, 1944. It was transferred to Hunter airbase, Savannah, Georgia, on May 19th, 1944, and then onto Dow Field on May 29th, 1944. She was assigned to the 525th BS, 379th BG as ‘FR-Y’at Kimbolton Jun 8th, 1944. The crew of #44-6133 were:

Pilot: Second Lieutenant Armand Ramacitti
Co-pilot: Second Lieutenant William ‘Bill’ Hager
Navigator: First Lieutenant Donald ‘Don’ Watson
Flight engineer/top turret gunner: Staff Sergeant Cecil Tognazzini
Radio Operator: Sergeant Richard ‘Dick’ Ritter
Ball turret gunner: Staff Sergeant John Burke
Waist gunner: Corporal Paul Haynes
Tail gunner: Sergeant Warren Oaks (his second mission)
Bombardier: Second Lieutenant Theodore Chronopolis

Sgt Cecil A Tognazzini

Flight engineer/top turret gunner: Staff Sergeant Cecil Tognazzini (Photo Janet Penn, via www.findagrave.com)

#42-97942 was a Lockheed/Vega B-17G-40-VE Flying Fortress delivered to Denver on April 11th, 1944. She then went onto Kearney air base in Nebraska on May 4th, 1944, before transferring also to Dow Field May 23rd, 1944. She was then assigned to 525th BS,  379th BG at Kimbolton as ‘FR-K’. The crew of #42-97942 were:

Pilot: First Lieutenant Lloyd Burns (just 19 years of age)
Bombardier: Second Lieutenant Jack Gray
Flight engineer/top turret gunner: Technical Sergeant Leonard Gibbs
Radio Operator: Technical Sergeant Leroy Monk
Ball turret gunner: Staff Sergeant William ‘Bill’ Farmer
Waist gunner: Staff Sergeant Richard ‘Dick’ Andrews
Co-pilot: Second Lieutenant Fred Kauffman
Navigator: Flight Officer Edward Sadler
Tail gunner: Staff Sergeant Louis Schulte

Mitch is the author of a number of books including “1940 – The Battle to Stop Hitler“the proceeds of which go to help the preservation of the Medway Queen a ‘little ship’ used in the Dunkirk evacuations.

A ‘gofundme’ fundraising account has been set up with a target of £1000, for which it is hoped the public will get behind, and secure a memorial for those young men who lost their lives that tragic day. Find the account at: https://www.gofundme.com/ww2-aircrew-memorial 

Further reading and sources:

www.canveyisland.org

www.379thbga.org

www.americanairmuseum.com

www.8thafhs.com

MACR 6984

MACR 6983

29th December 1944 – Disaster at RAF Waterbeach

Christmas and New Year doesn’t stop for war, and the inevitable battle of the Second World War continued on with air and ground crews across Britain carrying out their duties as normal, perhaps looking forward to a rest in the following days. December 29th 1944 was one such day.

RAF Waterbeach Museum

514 Squadron RAF 1944. Photo taken at Waterbeach Military Heritage Museum, August 2017

It was a hazy morning with a severe winter frost laying across the ground, fourteen aircraft were allocated for operations whilst for those non-operational crews it would be H2S and G.H. training. Out on the dispersal, the operational aircraft were being loaded with their bombs and prepared for the forthcoming flight, when suddenly one of the bombs being loaded on to Lancaster PD325 ‘JI-L2’ fell and exploded. The resultant explosion completely destroyed the aircraft and severely damaged seven others including NG141 which was parked alongside. The blast, heard as far away as Mildenhall some 23 miles away,  had repercussions right across the airfield, damaging windows and sending aircraft parts far and wide. Nine members of the ground crew attending to the aircraft also died, five of them simply ‘disappeared’ as did a tractor along with its portable generator. Following the incident, which was thought to have been caused by an ‘old stock’ bomb, the Station Commander cancelled operations for the day in case time delayed bombs on other aircraft exploded. The bomb disposal teams were brought in to remove those that were left remaining in the aircraft bomb bays. New Year at RAF Waterbeach would be very solemn in 1944.

Those that lost their lives that day were all members of 514 Sqn:

Leading Aircraftman Derrick Gordon Bichard (RAFVR) Radar Mechanic (s/n: 1870102)

Leading Aircraftman Samuel Bolton (RAFVR) Flight Mechanic (s/n: 1639785) – Commemorated at Runnymede

Aircraftman 2nd Class Donald Victor Brewer (RAFVR) Armament Assistant (s/n: 1893614)

Leading Aircraftman Ronald Davies (RAFVR) Flight Mechanic (s/n: 1128796)

Leading Aircraftman Geoffrey Graham Haydn (RAFVR) Radar Mechanic (s/n: 1863381)

Aircraftman 1st Class Harry George Leach (RAFVR) Electrician (s/n: 1429200) – Commemorated at Runnymede

Leading Aircraftman Laurence Smales (RAFVR) Flight Mechanic (s/n: 1621436) – Commemorated at Runnymede

Leading Aircraftman Frederick Charles Watson (RAFVR) Flight Mechanic (s/n: 1169390) – Commemorated at Runnymede

Corporal John Westgarth (RAF) Armourer (s/n: 552023) – Commemorated at Runnymede


“1940: The Battles to Stop Hitler” – Mitch Peeke

A book review.

This is a superbly written book that looks at the Battle of Britain through the life of the airmen who were primarily based at a now disused RAF station (RAF Gravesend) in Kent. Whilst being historically accurate throughout, it is not one of those books that is full of data, figures and graphs, more a book based on personal and general historical events. It deals well with the political climate in Europe post World War I, setting the scene for Hitler’s rise to power, and the lethargic way in which the Allies allowed him to achieve his ultimate goal. It looks at the political unrest at home, and how that shaped both a public and government totally unprepared for war.

Each of the first four chapters look at specific events that led to the declaration of war on September 3rd, 1939. It looks at how the Allied response to Poland’s invasion was belittled by the massive and hugely technologically advanced German forces, who cut through Belgium circumnavigating the Maginot line, forcing the BEF and French forces to a small pocket at Dunkirk. It then looks at the evacuation through the eyes of two small boats (one of which Mitch supports through his book sales) and those who sailed on her. By examining the infrastructure surrounding the evacuation, it adds a very personal touch to what was a massive undertaking, and one that the many other books, films and documentaries have failed to highlight.

After Dunkirk, Mitch examines the Battle of Britain as it occurred in the skies over Kent and London. Individual skirmishes, with details of those involved, add a very personal touch to the blow-by-blow account of the battle as it weaves its way to its ultimate ending.

It is clear from the references to the skirmishes that Mitch has carried out extensive and prolonged investigations into each one, even pinpointing in many cases the actual crash site of the aircraft. Added to this are the personal and eye-witness accounts which continue to keep the personal aspect very much at the front. As the battle draws to its conclusion, life in London’s city streets are revealed through events that are again backed up with eyewitness accounts and personal details. Some of these stories will make you laugh, the absurdity of ill-fitting fire hoses and the tenacity of the firemen to solve the problem whilst all around were in chaos, is just one incredible example. It also shows that how through it all, the people of Britain managed to keep smiling, still seeing the good in what was a terrible time.

Whilst the Battle of Britain officially ended on 31st of October, Mitch continues to tell the story as autumn turns to winter and as the Battle of Britain turned to the Blitz. The nightly bombing of British cities gave rise to some dark secrets and activities, but balanced with these are other more informal and light-hearted highlights, all of which add to pulling the reader into the atmosphere of 1940s Britain.

In summing up, Mitch analyses the flaws in the German strategic plan for attacking Britain. He looks at how poor decisions enabled Britain to refocus and rearm thus building her forces up to a strength that was far better than those that remained in the period immediately following Dunkirk.

He then reintroduces the characters that had appeared throughout the book informing the reader of their postwar lives, some of whom were his own family members and who witnessed first hand, the true horrors of war.

Throughout Mitch’s final chapters there is a glowing slant toward the people,  showing the true grit and resolve of the British people who ‘pulled together’, that has become synonymous with those dark days of 1940/41. But this is not a patriotic, ‘let’s wave the flag and tell the world how good we were’ book, it’s more a heartfelt look at a very decisive time in world history, one that could have been so very different if it were not for ‘the few’, their leaders and the British people who supported them.

As appendices, Mitch looks at one RAF Station in particular, RAF Gravesend, its history and what has happened to the site since its closure post war. Now long gone, it is one of the many airfields that were so important to Britain’s survival, yet nothing remains of it today. He also looks at the 15 brave airmen who lost their lives in 501 and 66(F) Sqns, their names now on a plaque on the wall of a leisure centre on what was the former entrance to the airfield. Reading their short biographies really brings home the tender age of those who paid the ultimate sacrifice for our freedom.

I read this book in about two days, it’s easy, and compelling reading, very detailed and very personal. “1940: The Battles to Stop Hitler” is not about the Battle of Britain per se, but more a personal examination of the people who were involved in the two battles; Dunkirk and the Battle of Britain, and how their lives were interwoven in the summer of 1940. Light hearted in places, extremely moving in others, it adds another dimension to those famous battles, and I for one would most certainly recommend it.

1940: The Battles to Stop Hitler” by Mitch Peeke is available from Pen and Sword Books Limited. It is sadly only available in digital format and all the author’s royalties go to The Medway Queen Preservation Society, The Medway Queen being a survivor of the Dunkirk evacuation and featured in Mitch’s book.

1940: The Battles to Stop Hitler”  is available from Pen and Sword Books,  ISBN: 9781473858091, Published: 24th June 2015. https://www.pen-and-sword.co.uk/1940-The-Battles-to-Stop-Hitler-Kindle/p/11118

I would like to pass on my immense gratitude to Mitch for providing me with a copy of the book via publishers Pen and Sword Books.

November 11th 2018 – At the going down of the sun…

At the eleventh hour on the eleventh day of the eleventh month 1918, the guns on the western front fell silent. Four years of war in which millions were either killed or wounded, towns and villages wiped from the map and the environment changed forever, had finally come to an end. All along the front line, men were soon to put down their arms and leave their trenches for home.

The war to end all wars had finally come to an end. During the last four years some 40 million people had been killed or wounded, many simply disappeared in the mud that bore no preference to consuming man or machine.

Back home, virtually no city, town, village or hamlet was left unscathed by the loss of those four years. Many who returned home were changed, psychologically many were wounded beyond repair.

Sadly, twenty years later, the world slipped into the abyss of war once more. A war that saw some of the most incredible horrors, one that saw the extreme capabilities of what man can do to his fellow-man. Across the world millions of innocent people were slaughtered under the guise of an ideology. An ideology that was determined to rid the world of anyone who was willing to speak out against that very same ideology.

Young men were transported thousands of miles to fight in environments completely alien to them. Many had never been beyond their own home town and yet here they were in foreign lands fighting a foe they had never even met.

The bravery and self-sacrifice of those young men  on the seas, on the land and in the air, go beyond anything we can offer as repayment today.

For nearly 80 years, the world has been at an uneasy rest, Korea, Vietnam, the Falklands, the Middle East, and the Far East, in almost every corner of the globe there has been a war in which our service men and women have been involved. The war to end all wars failed in its aim to bring peace to the world.

In this year, 104 years after the end of the First World War, we remember those who laid down their lives in the fight for freedom. We remember those who fought for the right to free speech, for the right to be who you are and the right to live our lives in peace.

We will remember them…

War Graves Cemetery - St Mary's Great Bircham St Mary’s Great Bircham
St. Clement Danes - Church of the RAF The rosette of the Commonwealth Air Forces – St. Clement Danes
Ypres 007 Tyne Cot, Ypres
DSC_0587 The American Cemetery Madingley

Anthem for Doomed Youth

What passing-bells for these who die as cattle?
Only the monstrous anger of the guns.
Only the stuttering rifles’ rapid rattle
Can patter out their hasty orisons.
No mockeries now for them; no prayers nor bells,
Nor any voice of mourning save the choirs,
The shrill, demented choirs of wailing shells;
And bugles calling for them from sad shires.

What candles may be held to speed them all?
Not in the hands of boys, but in their eyes
Shall shine the holy glimmers of goodbyes.
The pallor of girls’ brows shall be their pall;
Their flowers the tenderness of patient minds,
And each slow dusk a drawing down of blinds.

Wilfred Owen (18/3/1893 – 4/11/1914)

RAF Old Buckenham – the home of film stars!

In the second part of Trail 13 we leave Tibenham behind and head to another still active airfield. Like Tibenham, the heavy bombers have all gone, replaced by small single engined aircraft, and also like Tibenham, much of the site has likewise disappeared. However, the history of this airfield remains very much alive, through fly-ins, displays and events that all remind us about those difficult days of the late 1940s.

Synonymous with film starts such as James Stewart and Walter Matthau, this airfield lives on and is thriving. Showcasing a range of facilities it is a delightful little airfield and one that keeps the spirit of flying very much alive. From Tibenham we head only a few miles north-west, where we find the former US airfield Old Buckenham.

RAF Old Buckenham (Station 144)

Old Buckenham is an airfield with a rather grand name. It was a short-lived airfield, purposely built for the USAAF late on in the Second World War. It only ever housed one group, a group that was itself a late joiner. It was initially a rather unpleasant place to be, mud and rain being the airmen’s worst enemy. But as the war progressed it became more hospitable, more lively and more inspiring. Whilst the group was never considered a major player in the war, it did achieve some remarkable results, the group going on to set some extraordinary bomber records.

Opened as a bomber airfield in 1943, it was built under the class ‘A’ specification, with three intersecting concrete and woodchip runways (1 x 2,000 and 2 x 1,400 yds) each 50 yards wide. It had fifty hardstands of the spectacle style, two T2 hangars (four were allocated initially) and a standard 1941 design watch tower (12779/41).

‘Old Buck’ as it became known, was exclusively the home to the American 453rd Bomb Group, operating a range of versions of the enormous B-24 Liberator, initially under the command of Col. Joseph A Miller.

Consisting of the standard four Bomb Squadrons: 732nd (squadron code E3), 733rd (F8), 734th (E8) and 735th (H6), the group was constituted on the 14th May 1943 and activated on 1st June that same year. It then came into physical being on June 29th, taking its officers and enlisted men from the 29th BG (H), who, under Special Order No. 180, transferred fifty-five Officers and 231 enlisted men to the 453rd. Of these, twelve officers were sent to the 732nd, twelve to the 733rd, eleven to the 734th and another twelve to the 735th. Each of the squadrons also received fifty-five enlisted men, the remainder of the workforce going to the Group’s headquarters.

Even before leaving the United States, the 453rd would suffer casualties. Its first loss was B-24E #41-29032 piloted by 2nd Lt. David MacGowan (735thBS), which crashed into a hillside near to Du Bois, Wyoming whilst on a photographic and training exercise. The accident, on August 14th 1943, resulted in the loss of all eleven crewmen on board. It was perhaps, a sign of things to come.

After passing through a number of training sites in the United States: Wendover Field, Pocatello, Idaho and March Field, the ground echelons sailed across the Atlantic Ocean on the Queen Elizabeth to England. They  arrived at Old Buckenham at the end of December into what would prove to be a cold and very unpleasant winter. Considerable rain and snow had turned Old Buckenham into a mud bath. Colds and flu spread like wildfire through the ranks, and overshoes had to be issued to help against the unending sludge.

The air echelons would fly the southern route with the first leaving in early January. On the very day of departure another aircraft was lost  – two crews were now gone before the group had even reached the U.K.

The air echelons arrived throughout January and into February, organising themselves and preparing their ‘H’ model Liberators for the forthcoming battle. When possible, they undertook training flights over the English countryside, received ground instruction and took further role specific training. They began carrying out mock missions including on the 4th, a simulated mission which turned very sour for one particular crew.

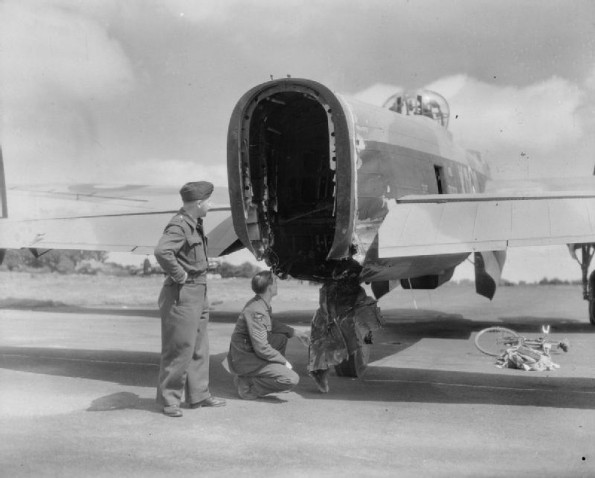
Liberator #41-28641, ‘Cee Gee‘ (referred to in some references as ‘Chee Chee‘) piloted by 2nd Lt. John R. Turner, became lost and it would seem, damaged by flak. Forced down onto an enemy airfield, it was repaired by the Germans and put back into service as A3 + KB by KG 200. The aircraft was intended to be used to ferry supplies to the island of Rhodes, and was recaptured by advancing American forces in May 1945. This was the first Luftwaffe captured Liberator and only the second to be put into service with German markings.

S/Sgt J. T. Sipkovsky, inspects B-24H #41-28641 [A5+KB] of KG200  ex 453BG /732BS, left at Salsburg by retreating German forces. (WM UPL 23019)

The next day, February 5th 1944, the Union Jack was officially lowered at Old Buckenham when, with much pomp and ceremony, Sqn. Ldr. L. Archer handed over the keys of the airfield to Col. Miller. Station 144 was now officially open for business.

There would be no break nor celebratory parties for the new Group though. On that same day, the 453rd were to take part in their first mission, a bombing raid to Tours in France.

Tours had been the focus of the invading Germans in the early part of the war. Heavily bombed with incendiaries, it was quickly turned into a fortress housing military camps  with strong fortifications. The allies then made it a focus for their air bombardments, but on this occasion, the weather would be the winner with heavy cloud causing many problems over the Continent. With the 1st, 2nd and 3rd Bomb Divisions in action that day, many would drop bombs on alternative targets, reform on other divisions or return home without bombing at all.

On the 6th February, the 453rd were back in action again, and again the horrors of war would be seen at Old Buckenham, when B-24 #42-52178 ‘Little Agnes‘ crashed after take off.  After lifting off the runway, the aircraft lost power, stalled and hit the runway hard sliding along on its belly into a ditch at the end of the threshold. The aircraft then broke up, at which point one of the ten 500lb bombs exploded setting off a chain reaction that led to a fireball. Mechanical failure of the #1 and #4 engines was blamed that day when eight of the ten crew on-board were killed when the aircraft came down.

For the remainder of February, including ‘Big Week’,  the 453rd would carry out further missions to both France, Holland and also Germany. These included: Siracourt (13th & 15th); Brunswick (20th), the airfield at Achmer (21st) and the Me-110 aircraft assembly plant at Gotha (22nd & 24th). Known for its high casualties, the 453rd managed to lose only one aircraft on the two missions it carried out to Gotha, a remarkable escape considering the ferocity of the battle, and the loss of thirty-three from other groups. It was also during this mission that sixteen aircraft would come down in Switzerland, the highest number of any mission of the war.

RAF Old Buckenham

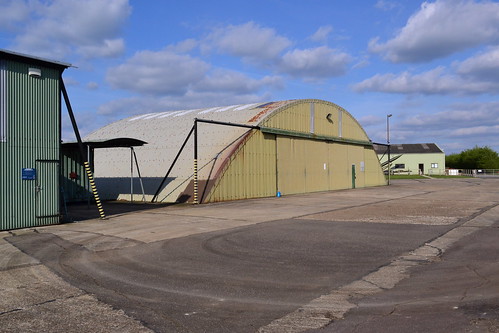
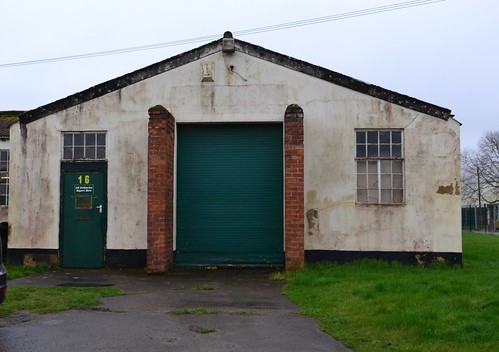
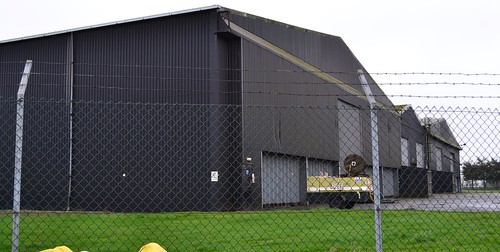
The Blister Hangar at Old Buckenham.

During March 1944, several major events would occur at Old Buckenham. Firstly, on the 6th, B-24H #42-64469 “El Flako” of the 732nd BS, whilst only on her third mission, would accidentally drop her bomb load just 3 miles from the airfield. Thankfully there were no injuries apart from a very large dent in the pride of the crew on board. Red faces aside, this mission, the USAAF’s first daylight attack on Berlin, would not be an easy ride for the 453rd.

Of the twenty-four aircraft sent out, four would fail to return, two over the target and two ditching in the channel. A fifth, piloted by Lt. Richard Holman, was badly damaged with two engines put out of action whilst over the target area. Determined to get back home, Lt. Holman dropped down to the cloud base where he was pursued by a number of FW-190s. With only two turrets operating, the crew managed to fight off the attackers, shooting down almost half of them in the process. After passing through a flak zone in Amsterdam they continued on, Lt. Holman putting the Liberator through some of the most incredible and violent turns possible, until they reached the Channel. With fuel and ammunition now critically short, the crew threw out anything and everything, in a desperate attempt to lighten the load of the failing bomber. Eventually, and only by the skill and determination of the crew, the aircraft arrived back safely at Old Buckingham. Many prayers and thanks were said on that particular day.

Then on the 18th, B-24H #41-28649, ‘Little Bryan‘, was hit by flak over Friedrichshafen, a target located close to the border with Switzerland on the banks of Lake Constance. Whilst the weather was near perfect, the target was covered with a thick smoke screen, preventing accurate visual bombing taking place. Heavy flak and fighter activity made things even worse for the bombers of the mighty Eighth.

Badly damaged, ‘Little Bryan‘ managed to continue flying but was losing fuel fast. As a result it would not make it home. On board ‘Little Bryan‘ that day was the Group’s Commanding Officer, Colonel Joseph A. Miller, along with the Group’s Navigator, Capt. Joseph O’Reilly. The aircraft crashed west of Vernon after the crew had baled out. Of the crew, ten were captured and taken prisoner, the last crewman escaping to fight another day. With the loss of a second aircraft along with three of its crew, March 18th would be a heartbreaking day for the 453rd.

The following day, Col. Ramsey Potts Jnr assumed command at Old Buckenham, a veteran of thirty-two missions he was one of the most decorated officers in the European Theatre, having been on both the Polesti and Rome bombing raids. He remained with the 453rd until mid 1944.

It was also at this time, (March 30th) that Major James “Jimmy” Stewart became the Group’s Operations Officer, Stewart who led the 733rd BS for 11 missions, went on to become a famous actor. He was promoted after the loss of Major Colfield earlier on, on February 16th.

RAF Old Buckenham

The mobile ‘control tower’ at Old Buckenham

April would see further losses for the group, but May would prove to be the worst so far. On the 8th, seven out of thirty-two aircraft would fail to return to Old Buckenham: #41-28650, #41-29571, #42-52180, #42-52185, #42-64453, #42-64464 and #42-110076, all being lost at Brunswick, a target gaining in its notoriety.

Following a move of the ground echelons on April 11th to form a new squadron at North Pickenham, the remaining staff were reshuffled to fill the gaps left behind. A small interruption to the continuing missions over Germany.

The 13th of April saw the first mission undertaken by Major Stewart, an operation that took 274 B-24s to various targets including the Dornier parts factory near Munich. The results that day were considered ‘good’.

For much of April the routine was the same, missions to France and Germany. After three months of being at Old Buckenham, the 453rd were now settling in well, improvements had been made to the living areas, more concrete had been laid to reduce the mud, and the cinema was now showing regular films. Other recreational areas were developed and morale was rising.

Throughout the conflict the 453rd would attack prestige targets: the fuel dump at Dulmen, marshalling yards, Hamm rail centres, Gelsenkirchen oil refineries, along with numerous airfields, canals and viaducts.

May would see yet another return to the dreaded Brunswick, and for the 453rd it would be another high loss mission. Using a mix of general purpose bombs and incendiaries, 307 B-24s of the 2nd Bomb Division joined aircraft from the 1st and 3rd Bomb Divisions in attacking it, and other major cities across Germany. On this day, ten aircraft would fail to return to base with eight being lost as the 453rd led the large formations into the target area. In the lead plane was Capt. Andy Low, who for his exemplary leadership, later received the Distinguished Flying Cross.

Bombing through 10/10 cloud using Pathfinder equipment, the group was attacked by around 200 enemy fighters, an attack that led to the area being known to the crews as ‘fighter-alley’.

RAF Old Buckenham

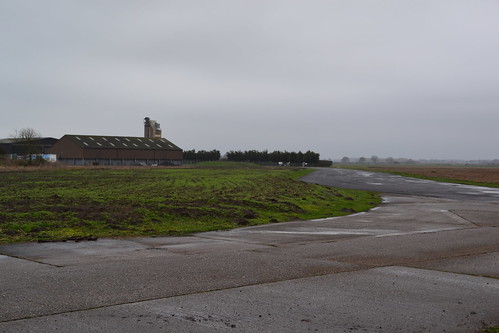
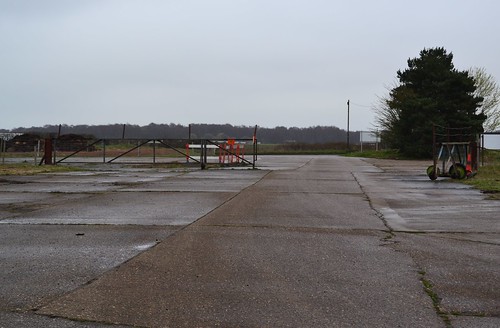
Part of the runway is now used as the taxiway.

By now, with mission counts mounting, crews were beginning to finish their tours of duty, the first full crew to do so, being the crew of Lt. Ward on May 31st, 1944.

Keeping morale up whilst the young men were away from home was always a challenge. Whilst undertaking training back in the States, a band was formed, a band that managed to reform itself finding space for rehearsals at Old Buckenham. The ‘GI’vers’ became one of the most successful forces bands in England, performing at dances both at Old Buckenham and at other US bases in the East Anglia area.

The morning of D-Day 6th June, brought early dawn action from the 453rd. Military sites between Le Harve and Cherbourg were targets for the day. The shore line batteries and any targets of opportunity, railways, troop concentrations and road junctions, were now well and truly in the sights of the bombers. So determined to play their part were the 453rd, that they flew four complete missions on that one day, unheard of in many Air Force heavy bomber Squadrons. For the next ten days Old Buckenham would be extremely busy, with missions being flown on all but one day, until the weather eventually brought an enforced break on the 16th.

As the war progressed the Old Buckenham group would go on to support many ground battles, including the Battle of the Bulge in the winter of 1944 – 45. A winter that would begin with the first crew loss through anoxia, when S/Sgt. Frank Mayar failed to respond to medical aid after his oxygen mask froze.

The 26th November 1944, would see tragedy strike home again for the 453rd. Mission 182 for the Old Buckenham Group, saw 350 B-24s of the 2nd Bomb Division and 381 B-17s of the 3rd Bomb Division attack targets in Germany. One of these targets included the railway viaduct at Bielefeld, a viaduct that became almost illusive until later destroyed by 617 (Dambusters) Sqn of the RAF.

The Bielefeld Viaduct after the dropping of the RAF’s ‘Grand Slam’. The ground bears the scars of continuous and heavy attacks (National Archives)

During take off for the mission, Capt. Ray Conard, the mission leader, failed to gain height. In a desperate attempt to avoid nearby housing, Capt. Conard jettisoned his bombs and, it is believed, deliberately crashed his aircraft away from them, thus saving the lives of those people living inside. For his actions, Capt. Conard, aged just 25, was recommended for the DSC Posthumously.

Christmas brought a much happier cheer to the Old Buckenham crews. Permission was granted to fly a plane load of toys to Paris to deliver them to French children. Locals brought as many as they could muster to the airfield and handed them over to the Americans. After slipping off the runway, ‘Liberty Run‘ eventually made it off the ground delivering the toys just in time for Christmas day.

The notorious winter weather of 1944 would claim yet another victim before the year was out. On December 27th 1944, #42-50898 failed to rise more than a few feet after taking off from a salted and slippery runway at Old Buckenham. Lt. Roscoe Brown was heard to say, “I cannot keep her up, we have had it”, just before the aircraft slammed into the ground. In the ensuing crash, the aircraft broke up and burst into flames, the fire setting off bullets and causing the bombs to explode. There was considerable ice that day, the runway and aircraft’s pitot tube later being found to have been iced up, adding to the already difficult flying conditions. As a pathfinder, it came as a terrible blow to the 453rd whose mission that day was subsequently scrubbed. Only four of Lt. Brown’s crew managed to escape the inferno that followed – it was a sad end to 1944.

The new year started as the old had finished, with more aircraft slipping on ice and crashing into parked aircraft. After further lives were lost and sliding incidents increased, the Group’s Commanding Officer Col. Thomas, called a halt to the proceedings and another mission was also scrubbed. Those that had got off the ground continued on, joining other groups in bombing their target – the Ramagen Bridge.

Crumpled tail of B-24 #42-51865 1st January 45 Old Buckenham. Eventually after numerous crashes and aircraft sliding on ice, the mission was scrubbed. (IWM FRE 1863)

With more attacks on Germany, January would become the month when the 453rd would set a record for the most missions flown (200) by any Liberator Group in a short space of time. A record they would be proud of and celebrate at reunions for years after.

As the war drew to a close, more missions would take the group into the very heart of Germany.  Even though the war was nearly over, accidents continued to occur and aircraft continued to be lost. The last mission for the 453rd took place on March 31st 1945, bombing the rail junction at Amberg. Thankfully all aircraft sent out that day came home. With the decrease in bombing sorties the Group’s focus began to change, recreational activities taking over where flying had been lost.

The final orders to stand-down finally came through on the 12th April 1945, and with it the end of 259 missions, in which 15,800 tons of bombs had been dropped. Of the original sixty-one aircraft sent over with the 453rd, only one was left, ‘Male Call‘, a B-24 veteran of ninety-five missions.

Elsewhere, the 453rd had ten aircraft that had completed 100 or more missions, the highest being that of 120  – “My Babs” of the 733rd Bomb Squadron. Even though they had lost almost all the original aircraft, they had set another record of 82 consecutive  missions without loss; a remarkable achievement considering the losses sustained by other heavy bomber groups in the European Theatre.

In mid April the group received orders to depart European shores for home. The group had been earmarked for a role in the Pacific, but ‘R & R’ was the order of the day and even though ground crews prepared the aircraft for combat, the US was firmly on the minds of all. On the 13th May the USS Hermitage set sail for the States, and Old Buckenham fell silent as the last few men departed closing the gates behind them.

Post-war, the airfield returned to RAF ownership seeing a few aircraft from other units being placed here, but no other major service or operators. Eventually in 1960, the RAF disposed of the site and it returned primarily to agriculture. Flying does continue today though, as Old Buckenham hosts fly-ins, displays and has a thriving aero club on part of the remains of the east-west runway.

As the site is an active airfield, access to any parts other than the public areas is very limited and so there is little to see from those dark days of the 1940s. The runways do remain as small roads for local tractor access, and one small part of the east-west runways is used for light flying. A further section of the north-west/south-east runway also exists as a taxiway to access the main runway. An original blister hangar is also on site along with a Nissen hut that now houses a museum.

RAF Old Buckenham

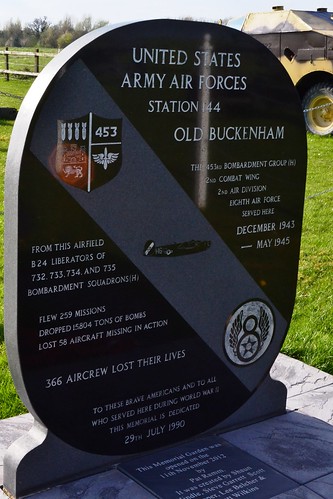
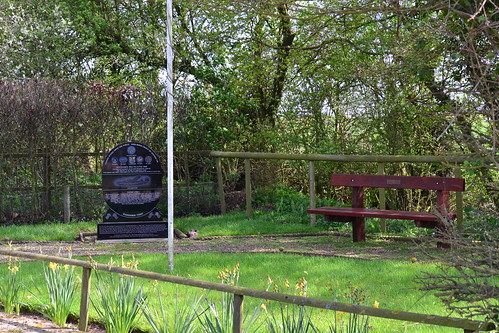
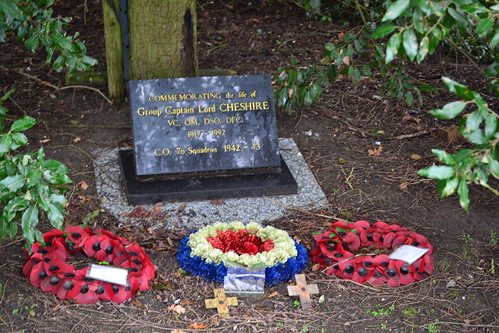
RAF Old Buckenham, memorial to those who served.

There is a varied collection of military hardware, mainly field guns, located on the site. A further ‘famous’ attraction is the T-55 Tank used in the James Bond film ‘Golden Eye’ which greets you as you arrive. A small, well cared for memorial in the shape of a Liberator tail-fin is dedicated to those 366 crew members and staff of the 453rd BG who lost their lives, and a cafe, aptly entitled “Jimmy’s“, provides refreshments for the visitor.

A delightful place to spend a warm Sunday afternoon watching light aircraft and contemplating what life was like at Old Buckenham as the roar of B-24s filled the air over 70 years ago.

RAF Old Buckenham

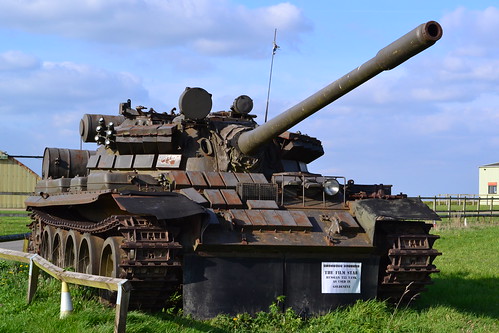
The T-55 tank used in the film ‘Golden Eye’

Post script

Some rare photographs taken at Old Buckenham were found following an auction in Montana, in a box of old photographic supplies. The story was reported in the ‘Eastern Daily Press‘ on December 18th 2013.

A museum to honour the men of the 453rd BG has since opened at Old Buckenham. Their website gives details of the collection and opening times.

RAF East Wretham – Home to the Czechs of Bomber Command (P1)

Hidden in the depths of Thetford Forest not far from the two major US Air bases at Mildenhall and Lakenheath, is a former airfield that has received a new lease of life as an Army training facility. Once home to Bomber Command’s only Czechoslovakian Squadron, it was also home to Canadians and other Commonwealth nationals. After their final departure, it became the home of an American Fighter unit meaning its history is both diverse and multinational.

In Trail 13, we stop off at the former Station 133, more widely known as RAF East Wretham.

RAF East Wretham (Station 133)

Originally built in the early part of the Second World War and opened in March 1940, East Wretham was primarily designed as a satellite airfield for nearby RAF Honington.  Being a satellite the airfield’s facilities would be basic, accommodation rudimentary and technical facilities limited. It would however, be developed as the war progressed and as its use increased. The main runway for example, (running north-east to south-west) was initially grass but with the arrival of the USAAF it would be covered with Pierced Steel Planking (PSP), designed to strengthen the surfaces and thus prevent aircraft digging into the soil.

East Wretham would also have a range of hangars. In addition to the standard two ‘T2’ hangars, it would have a canvas Bessoneau hangar, (more generally linked to the First World and inter-war years),  and an additional four Blister hangars (9392/42) all believed to be double ‘extra over’ blister hangars each 69 ft wide in the singular design.

The watch office at East Wretham was another unusual design. Built to drawing 15498/40, it was originally a single storey room built on concrete pillars with a flat roof. It was then modified later on in the war to include an overhanging observation room, with the extension being mounted on metal pillars. This new extension had considerably more glazing than the original structure, and was more in keeping with the building style of other wartime airfields. These extra windows gave a much better view across the entire airfield, especially useful as the office was unusually located along the perimeter fence well behind the technical area of the airfield!

The Control Tower of the 359th Fighter Group at East Wretham. Caption on reverse: 'Caption on reverse: '359th FG Photos Source: T.P. Smith via Char Baldridge, Historian Description: #13 Control Tower at Station F-133, East Wretham, England.'

The unusual design of the Watch Office can clearly be seen in this photograph*1. (IWM)

Originally there were only 27 ‘frying pan’ style concrete hardstands, each one being located at various points around the perimeter track, all in groups of three or four. These were then added to later on, again using steel planking, to extend the number of dispersal points located on hard surfaces; a further indication to the problems with the boggy soil found in this part of East Anglia.

Accommodation for the initial 1,700 personnel, was dispersed over twelve sites around the north of the airfield, and across the road from the main airfield site. One of these sites (Site 2) was the nearby Wretham Hall, a grand building built in 1912, it was utilised by Officers of the USAAF for their own personal accommodation. Sadly, the grand three storey building was demolished in the early 1950s, possibly as a result of its wartime use.

A bomb storage site was also built on the airfield. Located on the south side of the site, it was well away from any accommodation or technical buildings. It was also well away from the three large fuel stores,  which boasted storage capacities of: 24,000, 40,000 and 90,000 gallons.

The initial use of East Wretham was as a dispersal for aircraft based at Honington, the first of which was a newly formed Czechoslovakian Squadron, No. 311 (Czech) Sqn, on 29th July 1940. So new were they that they didn’t receive their Wellington ICs until the August. This was to be a unique squadron in that it was the only Czech squadron to fly with Bomber Command, and whilst the main body of the squadron was located at Honington, the operational flight (A Flight) moved to East Wretham shortly after its  formation. In mid September a decision was made to move the entire squadron across to East Wretham posting a detachment to RAF Stradishall, where they stayed until April 1942.

On September 10th 1940, 311 Sqn, now with a small number of operational crews, took part in their first mission, a true baptism of fire flying directly into the German heartland and Berlin. For one of the crews and their Wellington, this would not go well, the aircraft believed forced down in the vicinity of a railway line near Leidschendam in Zuid-Holland, with all but one of the six airmen on-board being captured.

The only crew member not to be caught was Sgt. Karl Kunka, who managed to evade capture for a short period, only to shoot himself with the aircraft’s Very Pistol. It was thought that he carried out this action to not only avoid capture but any possible retaliation against his family back home in Czechoslovakia. Whilst Sgt. Kunka’s wounds were not initially fatal, they were so severe that he later died, failing to respond to treatment whilst in hospital.

The aircraft, Wellington MK.Ia, #L7788, ‘KX-E’, was also captured, repainted in Luftwaffe colours and flown for testing and evaluation to Rechlin, the Luftwaffe’s main aircraft test facility north of Berlin.

RAF East Wretham 3

East Wretham still uses the Nissen huts and smaller buildings today.

During December 1941, a further Czech unit, No.1429 Czech Operational Training Flight (COTF) was formed along side 311 Sqn, under the command of Sqn/Ldr. Josef Šejbl. This unit was designed specifically to train Czechoslovakian aircrews for Bomber Command, with instructors for the flight, being taken from 311 Sqn following completion of their tour of operations.

As aircrew completed their training, they were transferred to the operational flight, a steady but slow build up meant that numbers were quite low, the squadron being  considerably reduced by heavy casualties in the early stages of the war. As with other Bomber Command squadrons, 311 Sqn carried out night bombing missions, many penetrating Germany itself.

1941 would see more missions to Germany, starting with the first three nights January 1st – 3rd, when Bomber Command aircraft hit Bremen, with 311 Sqn taking part on the night of the 2nd. On this night, three aircraft from 311 Sqn would join the Hampdens and Whitleys of Bomber Command in attacking a major railway junction in the centre of the city, where fires and explosions were seen as far away as 20 miles. A relatively successful operation, it would not be long before the first casualties of 311 Sqn would occur.

On the night of January 16th – 17th Wellington IC #T2519 ‘EX-Y’ was lost on a mission to Wilhelmshaven, the aircraft going down after suffering ‘technical’ problems. Last heard from  at 22:21, the aircraft disappeared without trace along with the entire crew, none of whom were ever heard from again.

1941 would end as it started, with a return trip to Wilhelmshaven, in which good results were recorded. One aircraft was lost on this mission, Wellington #T2553 ‘EX-B’, the pilot, Sgt. Alois Siska ditching the aircraft after it had sustained serious flak damage over the target area. As the aircraft sunk, it took the life of the rear gunner Sgt. Rudolf Skalicky, the other’s climbing into the aircraft’s dingy, a small craft in which they remained for several days.

As the dingy drifted towered the Dutch coast, the icy conditions would take two more lives, that of Sgt. Josef Tomanek (Co/P) and F/O. Josef Mohr (Nav.), whilst the pilot, Sgt. Siska, suffered badly from frost bite and gangrene. The remaining crewmen, F/O. Josef Scerba (W/O), Sgt. Pavel Svoboda (air gunner) along with Sgt. Siska, were picked up by German forces and  interned as POWs, mainly staying in hospitals for treatment for cold related injuries. Sgt. Svoboda went on to escape captivity no less than three times, evading capture until after the war whereupon he returned to England.

By mid 1942, 311 Sqn were assigned a new posting and a new airfield, but before departing in their final month, April 1942, they  would be visited by two particularly significant dignitaries. On April 3rd, Air Vice Marshal J. Baldwin, Air Officer Commanding No. 3 Group, RAF Bomber Command, visited to award the DFC  to P/O. Karel Becvar for his services as a navigator with 311 Sqn. Then on the 18th April, the President of the Czechoslovak Republic, Dr. Edward Benes, arrived along with several other dignitaries to inspect the Squadron, and give a speech regarding the work carried out by the crews here at East Wretham.

Tarck to Bomb Store

A number of tracks remain on the site.

During their last month, 311 Sqn would fly twelve more operations before finally departing Norfolk for Northern Ireland and Aldergrove. Whilst here at East Wretham, they would fly 1,011 sorties which included both attacks on industrial targets and propaganda leaflet drops. On the 30th, the main air body along with the rear party departed the site, the bulk of the squadron moving two days earlier. After their departure, 311 Sqn would not return to East Wretham.

In November 1942, after a long quiet break, East Wretham would spring into life once more with the arrival of another bomber squadron, No. 115 Sqn (RAF) from Mildenhall now flying  Wellington MK.IIIs.

Over the winter of 1942-43, 115 Sqn would lose ten aircraft, most to missions over Germany but two whilst ‘Gardening’, the last occurring on the night of New Years Eve 1942.

During the early months of 1943 six more Wellingtons would be lost from 115 Sqn, KO-D, KO-X, KO-C, KO-N, KO-T and KO-Q, the new year had not brought new fortunes.

By now the limits of the Wellington had been realised and its days as a front line bomber were numbered. A poor performer in the bombing theatre, it would be gradually moved to other duties, being replaced by the superior four-engined heavies; 115 Sqn was no exception. The MK.II Lancaster, powered by four Bristol Hercules engines, was less common than the Merlin powered MK.I and MK.III, but none the less was far superior to the Wellington in both performance and bomb carrying capacity.

The first Lancaster arrived in the March of 1943, and as it did the Wellingtons began to depart. To help train crews on the new aircraft, a detachment from 1657 Heavy Conversion Unit (HCU) would be re-designated 1678 (Heavy Conversion) Flight (HCF) and was based here at East Wretham.

Flying the radial engined Lancaster MK.IIs under the code ‘SW’, they were one of only two HCFs to be established in Bomber Command, both in May of that year. Specifically set up to convert crews from the Wellington to the Lancaster, they were a short-lived unit, becoming a Heavy Conversion Unit once more on September 16th 1943, after moving to RAF Foulsham. During this time the flight would operate only eight aircraft in total, losing none whilst at East Wretham.

Even with the new aircraft though, flying over Germany was not without its problems for 115 Sqn. The first aircraft to be lost, and the first of its type in Bomber Command, Lancaster MK.II #DS625 ‘KO-W’ was lost without trace in a raid to Berlin on the night of March 29th/30th. The Pilot Sgt. H. Ross, (RCAF) and his crew all being commemorated on the Runnymede memorial. The aircraft being new, it had only flown 26 hours since its arrival at East Wretham earlier that year on March 9th.

rear-turret-of-Lanc-lost-595x478

Avro Lancaster B Mk II, DS669 ‘KO-L’, of No. 115 Squadron, was hit by bombs from an aircraft flying above. during a raid on Cologne on the night of 28th/29th June 1943. The tail gun and gunner were both lost. (Author unknown)

With more missions into Germany, 115 Squadron’s Lancasters  would continue to serve well, perhaps one of the worst nights occurring just days before their eventual departure to RAF Little Snoring in early August 1943.

On the night of 2nd/3rd a mission was planned for Hamburg in which 740 aircraft were allocated. Of these, 329 were Lancasters, by far the largest contingency of the raid. Whilst over Germany, the formation entered a severe thunderstorm, and with many aircraft suffering from icing, they were forced to either turn back, or find other targets. The poor weather, including lightning, accounted for several of the losses that night including one of three lost from 115 Sqn.

Lancaster #DS673 was shot down by a night fighter, #DS685 was lost without trace and #DS715 was struck by lightning causing it to crash not far from the target. From the three that went down that night, there were no survivors from the twenty-one crewmen on board. 115’s time at East Wretham would close on a very sour note indeed.

With the departure of 115 Sqn in August, East Wretham would then pass from RAF ownership into the hands of the US Eighth Air Force, to become Station 133, the home of the three squadrons of the 359th Fighter Group – ‘The Unicorns’

RAF Holme – From Bomber base to Fighter Development (P2)

After part 1, we continue at Holme-on-Spalding Moor. Holme has recently changed hands owing to the reorganisation of Bomber Command boundaries. 101 Squadron had departed and now 78 Sqn were moving in.

76 Sqn had been through a number of disbandments and reforms since its original inception in 1916.  Being reformed in 1941, it arrived here at Holme-on-Spalding Moor from Linton-on-Ouse, another Yorkshire base. It was truly a multi-national squadron, made up of Polish, Norwegian, New Zealand and Canadian crews.

76 Sqn would see the war out at Holme, progressing through a series of Halifax upgrades, from the Mk.V, to the better performing MK.III and onto the MK.VI, a model they used in the final operations on 25th April 1945.

Shortly after arriving at Holme, 76 Sqn would suffer their first loss, with the downing of Halifax MP-Q #DK224, on the night of 22nd/23rd June 1943. On board this aircraft was Group Captain D. Wilson (RAAF) their station commander.  Of the eight men on board all but one (Sgt. R. Huke’s, parachute failed to open after he had baled out of the aircraft) survived, seeing the war out as POWs. Whilst the crew survived, albeit in captivity, it was none the less a blow to the station losing such a prestigious officer. The mission to Mulhelm saw 557 aircraft of mixed types attack and destroy 64% of the town including road and rail links out of the city, virtually cutting it off from the outside world. Whilst a heavy loss for those on the ground, it also suffered the loss of thirty-five aircraft, 6.3% of the force, a figure well above the ‘acceptable’ limit of Bomber Command losses.

File:Royal Air Force Bomber Command, 1942-1945. CE91.jpg

Halifax B Mk.II, DK148 ‘MP-G’ “Johnnie the Wolf”, of No. 76 Squadron RAF rests at Holme-on-Spalding Moor, after crash-landing on return from an operation to Essen on the night of 25th/26th July 1943. The propeller from the damaged port-inner engine flew off shortly after the bombing run, tearing a large hole in the fuselage. The mid-upper gunner immediately baled out, but the pilot, F/L. C. M. Shannon, regained control of the aircraft and managed to bring the rest of the crew back to Holme. © IWM (CE 91).

Perhaps one of the more bizarre accidents to happen at Holme was the death of a car driver who ended up on the runway as aircraft were taking off. On December 7th 1944, Halifax MK.III #NA171 ‘MP-E’ piloted by F/O. W. MacFarlane had begun its take off run when the pilot noticed a car parked on the runway. Unable to stop or divert, he lifted the huge aircraft up over the car, but clipping it as he passed. The occupant of the vehicle was killed but the aircraft carried on relatively unscathed. This same aircraft was brought down later that month over Kola with the loss of all but one of the crew.

For the duration of the war, 76 Sqn would take part in some of the heaviest air battles over Germany: Essen, Koln, Hamburg, Nurnberg and Berlin, in which losses were sustained in all. By the war’s end, 76 Sqn had been credited with 5,123 operational sorties, in which they had lost 139 aircraft, the highest number of missions by any Halifax squadron.

By the end of the war, it was decided that Bomber Command was to be reduced, No. 4 Group would become a transport group, No. 4 (Transport) Group, a change of ownership meant not only a change of role but a change of aircraft too. The Halifaxes were swapped for C-47 Dakotas in May 1945, and three months later the unit transferred from Holme to Broadwell and eventually the Far East.

Other resident units at Holme including No. 1689 (Bomber) Defence Training Flight (15th February 1944 – 7th May 1945) were also disbanded as their services were no longer needed. Many of these training flights had already disbanded by the end of 1944, as the force was being cut back and reduced. The Spitfires, Hurricanes and other assorted aircraft being disposed of in various manners.

RAF Holme on Spalding Moor

One of two turret trainers still on site.

As 76 Sqn left, another Dakota unit moved in to the void left behind, but 512 Sqn, a short-lived squadron, left in the October and eventual disbandment in 1946.

For the next six years Holme-on-Spalding Moor was left in a state of care and maintenance, slowly degrading over that time. At this point Holme’s future took a turn for the better when No. 14 (Advanced) Flying Training School  was reformed in response to an increase in pilot training needs. Reformed along with a small number of other training flights such as 15 Flying Training School, at Wethersfield, they were short-lived units, operating aircraft such as Airspeed Oxfords. No. 14 AFTS disbanded at the end of January 1953 at Holme.

However, the demise of 14 AFTS was to allow the airfield to transfer to the USAF, for deployment of its bombers of the Strategic Air Command (SAC). A move that would require extensive upgrading of the airfield including lengthening of the main runway to 2,000 yards. The USAF moved large amounts of equipment through Holme, while the main airfield at Elvington was also upgraded. The extensive work carried out here though would not to come to anything, and after three years the USAF pulled out leaving Holme empty once more.

RAF Holme on Spalding Moor

The perimeter track bends round the former technical site.

However, it was not the end of Holme, the upgrading work meant that Holme airfield had a good long runway capable of taking the modern fast jets coming on-line. Blackburn Aviation Ltd, who were based not far away at Brough, saw the potential and began to carry out trials of the new Blackburn NA.39 ‘Buccaneer’. A rugged carrier-borne, high-speed, low-level strike aircraft, it went on to serve in both the Royal Navy and the RAF – the prototype (XK486) being first flown at RAE Bedford on 30th April 1958, piloted by Derek Whitehead.

As Brough could not accommodate the Buccaneer, the aircraft were towed on their own wheels, backwards, along the roads around the area. Protected by a Police escort, they were commonly seen in the back streets of Holme being prepared and test flown from the new runway at Holme airfield.

An aviation firm established by Robert Blackburn in 1911, Blackburn Aviation became an established aircraft manufacturer during the interwar and war years, producing models such as the T-4 Cubaroo of which only two were built, the B-2 trainer and the B-24 Skua, the first British aircraft to shoot down an enemy aircraft on 25th September 1939.

Blackburn concentrated on ship-borne aircraft, many, including the early variants, having folding wings. In the Second World War they produced the B46 Firebrand, a successful aircraft, of which they produced just over 200 models of different variants. The Buccaneer was their modern version and proved to be just as successful. In the 1950s they also produced the Beverley, which at the time was the largest transport aeroplane in the world.

Over the next 40 years, the British aircraft industry would go through major changes, big names like Blackburn were amalgamated into Hawker Siddeley Aviation, then British Aerospace and finally the modern BAE Systems.

Bruntingthorpe May 2016 106

AT the former RAF Bruntingthorpe, Buccaneers regularly perform fast taxis along the runway. A sight and sound that once graced Holme-on-Spalding Moor.

The change brought new opportunities for Holme. The development of the American McDonnell Douglas F-4 Phantom allowed for testing at Holme, along with Harriers and Hunters of Hawker Siddeley fame. Trails of the Phantom included taking it to the extremes of its performance envelope, pushing the aircraft through maximum turns at supersonic speeds. Don Headley, Hawker Siddeley’s Chief Test Pilot at Holme, described the tests as “arduous” but “exhilarating nevertheless”.*3

Being a test pilot was a dangerous job, pushing aircraft to unknown limits. Deputy Chief Test Pilot with Blackburn Aircraft, Gartrell R.I. “Sailor” Parker DFC, AFC, DSM had to eject from the first prototype Buccaneer XK486 on 5th October 1960 when it got into difficulty following the artificial horizon breaking whilst in cloud. Both he and his passenger, Dave Nightingale, managed to escape the aircraft without injury. However, he didn’t have such a lucky escape when on 19th February 1963, the aircraft he was testing, Buccaneer XN952, went into an upright spin following a Low Altitude Bombing System (LABS) demonstration over Holme airfield.

In this manoeuvre, the aircraft flys in low enters a climbing loop and then releases the bomb near to the top of the loop, the aircraft completes the loop pulling away before the bomb strikes the target (also called ‘Toss’ or ‘Loft’ Bombing).  During the demonstration there was a loss of control due to a ‘roll-inertia coupling’ resulting in violent pitching and yawing, and loss of control as the aircraft rotated on all three axes. In the accident both Parker and his back seat observer, Mr Gordon R. C. Copeman (Senior Flight Test Observer), ejected from the aircraft, but Parker was too low, and Copeman fell into the burning wreckage after it had hit the ground. *4

Eventually on December 7th 1983, Buccaneer XV350 and Phantom XV429, took off  from Holme for the final time signifying the final closure of Holme airfield, a closure that ended a long history of aviation. With that, the name ‘Blackburn’ was gone forever, but the legacy of Robert Blackburn and his remarkable work in the aviation field would live on for many years yet.

No longer required or aviation purposes, Holme was sold off, the runways and Perimeter tracks were dug up, and the grounds returned to agriculture.

Sadly, the technical area which is now an industrial estate, is run down and tatty. Many of the original buildings are used by small businesses, furniture manufacturers, tool makers and car part suppliers. Buildings that are not used are run down and in dangerous conditions, fenced off they have a limited life span left. That said however, it remains quite intact and there are a good number of buildings left to see.

RAF Holme on Spalding Moor

Sadly many of the buildings are in a poor state of repair and have only a short life left.

If approaching from the village of Holme-on-Spalding Moor along Skiff Lane, you arrive at the first of three entrances. The first is the former perimeter track located at the north end of one of the secondary runways. The runway has long gone, but there is a hardstand still present, its large circular footprint giving a good indication of the nature of the site. This road leads round to the technical area and where the watch office was. A Post-war Fire Tender Shed does still stand here, but the office was believed  demolished in 1984. This road is gated and access is not permitted beyond here.

Continue along the road and a second entrance allows access to a small number of buildings of the former technical site. There is evidence across the road of further buildings but these have been removed leaving only their foundations visible. Continue passed here and you arrive at the main entrance, the two memorials are located just inside on the left hand side.  Continue along this road and you are entering the technical area, with a number of buildings on either side. Distinctly clear are the turret trainers and parachute stores, all in use with small businesses. At the end is one of the T2 hangars, re-clad and in use but inaccessible. Driving / walking round here you can see many of the former stores and admin blocks that formed the heart of the operations.

Some of these buildings are fenced off and in a dangerous condition, others have been better looked after, most are used by small businesses.

Commemorative memorials can be found at the former entrance to the site, including one to Group Captain (Lord) Cheshire VC, OM, DSO, DFC, who commanded 76 Sqn before being posted to Marston Moor. A highly respected man, he fought for changes to the Halifax to improve its handling and performance, and also post war, for funding for the memorials that stand at the entrance. His record of achievement and dedication is well versed across the history books and internet.

RAF Holme on Spalding Moor

Memorial to Group Captain Leonard Cheshire.

Holme-on-Spalding Moor is a remarkable airfield that is steeped in history. From the early days of the 1941 to the end of 1983 it saw some of the most heroic acts and the greatest advances in aviation. It took the fight to the heart of Nazi Germany, it led the way in state of the art fighter testing, rising like a phoenix out of the ashes until its final dying day.

Its present condition does not sadly reflect the enormous contribution it, and its personnel played in those turbulent years of history. Whilst having a largely intact technical area, its condition is a sad reflection on the importance we place on these once busy and historical places. Even with considerable development between inception and closure, and an ever-changing facade, the main heart of Holme always remained, but today sadly, it is a heart whose beat is slowing and one that will no doubt eventually stop and die. A remarkable place indeed.

Not far from here are both the airfields at Breighton and Melbourne, both of which have flying activities still going on, ‘intact’ runways and a number of buildings are still present. Also in Holme village is the All Saints Church, sadly kept locked out of hours, it has a window of remembrance dedicated to the crews of 76 Sqn and their heroic battle against Nazi Germany. It also has a number of graves from those who never saw peacetime again. It is certainly worth a visit.

Sources and further reading.

*1 The base system was brought in following the need for more airfields at the end of 1942 when the United States was drawn into the war. To ease administrative and support problems associated with multiple airfields, they were combined into a groups of 3 (or 4) with a parent station and 2 (or 3) satellites. Overall command was given to the HQ airfield (or base) headed by an Air Commodore. Approved in February 1943, it was rolled out over the following year.

*2 Australian War Memorial, Article number P04303.010

*3 Caygill, P., “Phantom from the Cockpit“, Leo Cooper Ltd; First Edition edition (26 July 2005) Pg 134

*4 ejection-history Website accessed 27/8/18.

ORB AIR 27/1902/1 National Archives

The 458 Squadron website aims to preserve the Squadron’s history paying tribute to those who served.

Chorley, W.R., Bomber Command Losses of the Second World War, Midland Counties Publications (1994)

BAE Systems website, accessed 27/8/18.

RAF Holme – From Bomber base to Fighter Development (P1)

In this next part of Trail 40, we head to the south-east of York, to an airfield that started off as a bomber airfield in the early stages of the war. As Bomber Command operations grew, so did the airfield, and so too did the casualties rise.

Post war, it went on to play a minor part in the cold war as an American air base, then like a phoenix out of  the ashes it rose to feature in the development of modern British fighter jets. Sadly, it all ended with the demise of the British aviation industry, now a handful of dilapidated buildings form the core of a rundown industrial estate that was once RAF Holme-on-Spalding Moor.

RAF Holme-on-Spalding Moor (RAF Holme/Spaldington)

The parish of Holme-on-Spalding Moor is  the largest historic parish in the county of  East Riding, covering 11,514 acres, with  a history that goes back as far as the iron age. The majority of the parish was, before the mid 1700s, a moorland, a bog in many places, that only the brave or knowledgeable could safely cross. The village and surrounding area is dominated by the medieval All Saints Church, that sits on land called Beacon Hill, 45m above sea level, about half a mile to the north-east of the village. The village  sits approximately halfway between York and Hull, whilst the airfield itself lies a few miles south-east of the village in the small hamlet of Tollingham.

Construction began in late 1940 as a bomber airfield for the expansion of the RAF’s No 4 Group, one of forty-three built in Yorkshire. It would initially cover around 400 acres, taking land from four separate local farms, an area that extended to over 1,500 acres as the war progressed.

RAF Holme on Spalding Moor

Many of the buildings still stand used as an industrial site.

Designed in the early stages of the war, as a parent station for Breighton and Melbourne (implemented after the introduction of the Base system in February 1943*1), Holme-on-Spalding Moor (or Holme) was built as a dispersed airfield with accommodation constructed to the north-east away from the main airfield site, the start of a new design aimed at reducing casualties in the event of an attack.  As a Scheme ‘M’ airfield, it would have one austerity measure ‘J’ type hangar and two type T2 hangars, designed to replace the former Type ‘C’ hangar. By the end of the war, these numbers would have been increased giving a total of five Type T2s and one ‘J’.

Whilst not a Class A airfield (implemented in 1942), Holme was built with three intersecting concrete runways, thirty-six dispersed hardstands and a watch office (designed to drawings 518/40 & 8936/40) built of brick, concrete and timber. As a parent airfield, the office would have a meteorological section attached.

The technical site was located to the north side of the airfield (within the legs of an upturned ‘A’ with the bomb store to the north-west and the dispersed accommodation area to the north-east. At its peak it housed upward of 3,000 personnel of mixed rank including nearly 500 WAAFs. For many, Holme-on-Spalding Moor was not a particularly pleasant stay, the locals objecting to the influx of airmen into their quiet community, forcing ‘nights out’ to go much further afield. Those who stayed here considered it bleak, cold and damp with few comforts, but like many personnel on Britain’s wartime airfields, they made the best of what they had.

Once the airfield was declared open, it was handed to No. 1 Group to train (Australian) bomber crews on the Wellington bomber. The first major squadron to arrive was 458 Sqn (RAAF), formed at Williamtown, New South Wales, under Article XV of the Empire Air Training Scheme. Many airmen were posted to Canada to finish their training, before finally being sent to the UK and their first operational squadron. The first thirty-seven of these qualified airmen spent the majority of August 1941 en route to the UK, arriving at Holme later that month, where they joined with other commonwealth airmen to form the squadron. The first aircraft they would use was the Vickers Wellington MK.IV, a model they retained until January/February 1942, when they replaced them with the MK.IC. At the end of March that year, 458 Sqn transferred to the Middle East, retaining various models of Wellingtons for the remainder of the war.

RAF Holme on Spalding Moor

Very easily visible is one of the few hardstands that survive at Holme today.

Whilst here at Holme-on-Spalding Moor, 458 Sqn would focus on the strategic bombing campaign against Germany, taking part in operations that took them to numerous cities in both Holland and Germany.

On the night of 20th/21st October, ten aircraft from 458 Sqn  joined twenty-five other aircraft in a raid on the port of Antwerp. With other raids targeting Bremen, Wilhelmshaven, and Emden, it would be a busy night for Bomber Command. On board one the of the 458 Sqn aircraft (Wellington IV #Z1218, ‘FU-D’) was: Sgt. P. Hamilton (Pilot); Sgt. P. Crittenden; P/O. D. Fawkes; Sgt. T. Jackson; Sgt. A  Condie and Sgt. P. Brown. The aircraft would depart Holme-on-Spalding Moor at 18:39, on the squadron’s first operational sortie. The weather that night was fair but cloud covered much of the target, and so many aircraft returned with their bomb loads intact. On route, just after midnight, Wellington ‘FU-D’ was shot down by a German night-fighter, with all but Sgt. Brown being killed.

The average age of these men was just 23, Sgt. Philip George Crittenden (aged 20) was the first Australian airman to be killed whilst serving in an RAAF Bomber Command squadron. He, along with the remainder of the crew, were buried in the Charleroi Communal Cemetery, Belgium, and is commemorated on Panel 106 at the Australian War Memorial.

Pilots of No. 5 Flight at No. 4 SFTS, Saskatoon, Canada. The majority of the students are recently arrived members of the RAAF, who travelled to Canada under the Empire Training Scheme. Third row back, left side:  Sgt Phillip George Crittenden 400410 (KIA 20th/21st October 1941)*2

A second 458 Sqn bomber (#R1765) was lost on the night of 22nd/23rd October, on operations to Le Harve. Hit by flak, the aircraft made it back to England where the crew baled out. Only one crewman, Sgt. Hobbs, failed to do so, his body was subsequently found in the bomber’s wreckage. A third Wellington was lost before the year was out, that of  #R1775 which lost contact at 20:35 on the night of 15th/16th November 1941, with the loss of all crewmen.

The October also saw the arrival of No. 20 Blind Approach Training (BAT) Flight, formed at the sub-station RAF Breighton, they moved here in the same month only to be disbanded and reformed as 1520 Beam Approach Training (BAT) Flight. This addition brought Airspeed Oxfords and Tiger Moths to the airfield, and was designed as part of the pilot’s training programme teaching night landing procedures.

January 1942 saw little change, with the loss of three further aircraft, one (#Z1182) ‘FU-G’ due to icing causing the aircraft to crash just after take off, a further two were lost 3 days later,  #R1785 was hit by flak and crashed over the target, with #Z1312 hitting high tension wires after returning home suffering flak damage from an aborted mission. In total there were twelve airmen killed and six injured in just three days, a terrible startto 458 Sqn’s entry into the European war.

During the February 1942, 458 Sqn began changing their Mk.IVs for MK.ICs, and then on March 23rd they moved out of Holme-on-Spalding Moor and set off to the Middle East, where they remained until the war’s end.

RAF Holme on Spalding Moor

Original hangars once housed Lancasters, Halifaxes and Buccaneers!

This left 1520 (BAT) Flight the sole users of Holme-on-Spalding Moor, until the August when, for a short period of six weeks, 460 Sqn Conversion Flight stationed a flight of Halifaxes here from the sub-station at Breighton. The four engined heavies then went through a period of changes eventually taking on the Lancaster.

After their departure, the end of September saw another Wellington squadron arrive, that of 101 Sqn RAF. The squadron, who transferred in from No. 3 Group, remained off operations for a short while whilst they converted to the new Lancaster, a major change from the poorer performing twin-engined ‘Wimpy’.

It was during one of these training flights that 101 Sqn would suffer their first accident at Holme, when it was thought, a photo flash flare exploded causing structural failure of the  Lancaster’s fuselage whilst flying over Wales – all seven crewmen were lost in the tragic November accident. During the autumn and winter months training would continue as Wellingtons were gradually withdrawn from front line operations, and units converted to the four engined bombers, primarily the Lancasters. Holme-on-Spalding Moor was no different, and once over, 101 Sqn would continue where 485 Sqn left off, taking the fight to the German heartland. During 1942-43 they would lose six aircraft in non-operational flights and fifty-nine during operations.

During January 1943, the first three aircraft of the year would be lost; Lancaster Mk.Is #W4796 ‘SR-R’, #ED443 ‘SR-B’ and # ED447 ‘SR-Q’ were all lost on operations to Essen and Hamburg with no survivors. Twenty-one fully trained aircrew were gone along with their aircraft.

Whilst the Lancasters of 101 Sqn fared reasonably well compared to other units, casualties being generally light, there was one night that stood out above all others, a night that would devastate the crews of 101 Sqn.

RAF Holme on Spalding Moor

The parachute store is now a tool shop.

On the night of 4th/5th May 1943, during the Battle of the Rhur, 141 Halifaxes, 255 Lancasters, 10 Mosquitoes, 80 Stirlings and 110 Wellingtons headed for Dortmund. A massive force, it was the largest single force below the 1,000 bomber raids so far, it was also the first major attack on Dortmund. Reports say that marking was accurate, but decoy fires lit on the ground drew many bombers away from the actual target. Even so, damage was extensive, with large areas of the city being flattened, over 3,000 buildings were either destroyed or damaged and 1,700 people either killed or injured. Sadly, 200 POWs were amongst those killed, alas a new record had been set for ground casualties. As for the Lancaster force, only six were lost, a small percentage compared to the other aircraft, but all six were from 101 Squadron.

All aircraft took off between 21:40 and 22:05 and headed out toward Germany. Of the six lost, one was lost without trace #W4784 ‘SR-E’ piloted by Sgt. W. Nicholson, and another ‘SR-F’ #W4888, piloted by F/O. N. Stanford, was shot down by a night fighter crashing in Friesland with the loss of six. The remaining four crashed either on their way out from, or on their return to, the airfield. ‘SR-G’, #W4863 piloted by Sgt. J. Browning (RNZAF) crashed at Scorton near to Richmond, Yorks; ‘SR-U’ #ED776, piloted by F/S. F. Kelly crashed short of the runway without injury; ‘SR-X’ #ED830, piloted by Sgt.F Smith hit trees near to Little Ouseburn, Yorkshire, and ‘SR-T’ #ED835 piloted by W/O. G Hough, was hit by flak but managed to return to Holme-on-Spalding Moor crashing a few miles away between Hotham and North Cave. On this night twenty airmen were lost, one was taken as a POW and seven sustained injuries of varying degrees. It would be the worst night for 101 Squadron for many months.

All Saint's Church

W/O. Gerald Hough killed on the morning of May 5th 1943 on 101 Sqn’s worse night of the war so far.

With the final loss taking place on the night of 12th June 1943, 101 Sqn would three days later, depart Holme-on-Spalding Moor for good, moving to Ludford Magna in Lincolnshire. A move that was triggered by the reorganisation of Bomber Command boundaries, Holme being taken over by No. 4 Group RAF.

The move would mean there would be no peace at Holme though, as 101 Sqn departed 76 Sqn arrived not with Lancasters though, but the other four engined heavy – the Halifax.

In Part 2 we see how 78 Sqn coped with the Halifax, an aircraft that was overshadowed by the Lancaster. Initially a poor performer, with improved engines it began to make its mark. It was slow process and in the meantime casualties for Halifax crews remained high. We also see what happened to RAF Holme post war, and how it played its part in the development of Britain’s jet fighters.