In Trail 7 we visited north-west Norfolk, staring at the market town of Downham Market heading on toward Norwich. Here we pass seven airfields and a bomb store. In the second visit of this trail, we leave Downham, travel East to find a few miles along, a field, unmarked and to all intents and purposes, insignificant. It did however, play a vital role and serve several squadrons.
RAF Barton Bendish
At the outbreak of war, orders were issued to all airfields across the UK to implement the ‘Scatter’ directive, a plan to relocate aircraft at various satellite airfields to disperse them away from the main airfield and possible German attack. This meant that many squadrons were spread over several airfields for short periods of time until the immediate threat, or perceived threat, had subsided.
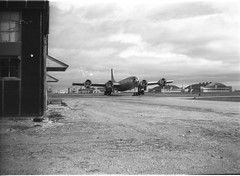
This was first seen at Barton Bendish (a satellite of Marham) when Wellingtons of 115 Sqn located at nearby RAF Marham were placed here. With no cover, the protection Barton Bendish offered seemed small in comparison to the main airfield at Marham.
The openness and cold of Barton Bendish has been noted in several scripts, and this caused problems in the winter months when starting cold engines. ‘Johnnie’ Johnson recalls in Martin Bowman’s book “The Wellington Bomber“*1 how they had to start the Wellington’s engine by getting it to backfire into the carburettor thus igniting unspent fuel in the air intake. This was then allowed to burn for a few seconds warming the carburettor allowing the engine to start. Careful timing was paramount, the danger being that the aircraft could catch fire if you were not cautious!
In the early part of the war Barton Bendish was also used as a decoy site, a flare path being lit at night to attract enemy bombers away from Marham a few miles down the road. How effective this was, is not known, but it may well have saved one or two lives at the main airfield.
Also during 1941, 26 Squadron (RAF) flying Tomahawk IIs were stationed here for three days from the 27th – 30th September, as was 268 Squadron on several other occasions. Also flying Tomahawk IIs, they passed through here during May 1941, then again between the 21st and 25th June 1941, 28th and 30th September 1941 and then again on the 25th/26th October 1941, 268 Sqn who were then based at RAF Snailwell, used the airfield as ‘the enemy’ in a station defence exercise, whereby they would perform mock attacks on Snailwell using gas, parachute and low flying strafing attacks methods. Being little more than a field, Barton Bendish provided no accommodation for the visitors, and so the aircrews slept in tents overnight, these being removed the next day after the attacks had been made.
By 1942, the Stirling was becoming a predominant feature at Marham, and with Barton Bendish being too small for its required take off distance, Downham Market became the preferred satellite, Barton Bendish being sidelined for other minor uses.
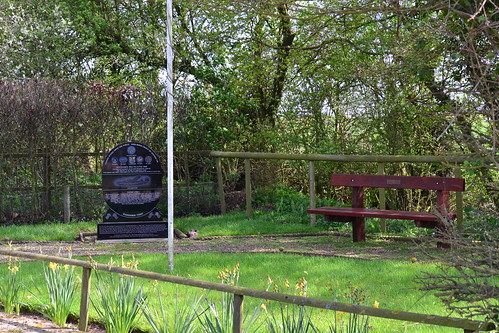
Little exists about its existence or purpose other than a few mentions in the operational record books of these squadrons, or recordings in the writings of RAF Marham personnel. Rumours state a ‘huge military (HQ) bunker’ and hard standings, but these are more likely farmer’s concrete pans, abundant across the area. No physical buildings (other than pill boxes) were ever thought to have been built and the airfield is listed as a satellite or landing ground of the parent airfield RAF Marham. No other signs seem to exist of the airfield. Another case of an airfield completely disappearing!
Continuing on from Barton Bendish, toward Norwich we shortly arrive at RAF Marham, one of the RAF’s few remaining front line fighter stations.
Whilst visiting the Swaffham (Norfolk) area, this was perhaps more prominent than in many of the other places I’d been. Like other sections, this area was predominately American in nature, forming the back bone of the USAAF, bomber squadrons of the 8th Air Force. An area rich in aviation history there are numerous tales of heroism and valour to be found. Our first stop along Trail 8 is RAF Methwold.
RAF Methwold
Methwold village sign
Located between Downham Market and Thetford, Methwold is a small rural setting on the edge of Thetford Forest. Its village sign and combined memorial, remind the passer-by of its strong air force links – a Lockheed Ventura taking off over the village church.
Methwold was actually built as a satellite for nearby RAF Feltwell and as such, had few squadrons of its own. Being a satellite its runways were of grass construction with little in the way of luxuries for accommodation.
On the day war broke out in Europe, 214 Squadron, equipped with Wellington MKIs, moved from RAF Feltwell to here at Methwold. Feltwell being larger, offered a prime target for the Luftwaffe and so their loss would be Methwold’s gain. The first production Wellington, the MKI was powered by two 1,000 hp Bristol Pegasus XVIII radial engines, and would soon be updated and replaced by the MKIA; the main difference being a change in gun turret from the Vickers to the Nash & Thomson. As part of Bomber Command, 214 Sqn did not carry out its first operational bombing flight until June 1940 some four months after it had left Methwold; but that is not to say casualties were not suffered.
On Monday November 6th 1939, Wellington L4345, crashed whilst circling on approach to Methwold. The accident resulted in the deaths of both crewmen, Pilot Officer J. Lingwood and Aircraftman 1, – A. Matthews.
Tragic accidents were not uncommon in these early stages of the war, another similar incident occurring at Methwold only a month later. In mid December, Pilot Officers W. Colmer and R. Russell-Forbes, along with Leading Aircraftman J. Warriner, were all killed whilst on approach to the airfield flying in another Wellington, R2699. Both these Officers were only recently commissioned and were still considered relative flying ‘novices’.
In February 1940, 214 Sqn departed Methwold and transferred to RAF Stradishall leaving only a small number of Wellington IIIs of 57 Sqn detached from their parent station at Feltwell. These would, in September 1942, be replaced by the mighty Lancaster, the four engined bomber that formed the backbone of the RAF’s Bomber Command.
Little happened at Methwold for the next two years, then in October 1942, 21 Sqn arrived. After having flown many missions against coastal targets in the Mediterranean, they were disbanded at Luqa only to be reformed and re-equipped at Bodney the same day. After changing their Blenheims for Venturas in May 1942, they transferred to RAF Methwold where they stayed for six months.
Operating both the Ventura MKI and II, they were the first Bomber Command squadron to re-equip with the type, and were one of the small number of squadrons who took part in the famous Eindhoven raid, attacking the Philips radio factory in December 1942. The daring Operation Oyster, would see the loss of sixteen aircraft – three of which belonged to 21 Sqn. Two of these aircraft crashed in enemy territory, whilst the third ditched in the North Sea after having been hit by enemy gunfire. Using a mix of Venturas, Bostons and Mosquitoes, this mission perhaps revealed the true vulnerability of such aircraft over enemy territory, a warning that would violently repeat itself in the months to come.
The spring of 1943 would again see changes at Methwold; as 21 Sqn departed, the ‘Flying Dutchmen’ of 320 (Dutch) Sqn would move in. 320 Sqn, were formed after the German forces invaded the Netherlands and consisted of mainly Dutch nationals. They carried out both anti-shipping and rescue duties before transferring, from Leuchars, to Methwold via Bircham Newton. Upon arriving here, 320 Sqn was absorbed into No. 2 Group and would shortly swap their Hudson VIs for Mitchell IIs. After a very short transfer period, they then departed Methwold, moving to the much larger base at Attlebridge.
Two further squadrons of Venturas arrived at Methwold in the early spring of 1943. Both 464 (RAAF) and 487 (RNZAF) Sqns were formed, transferred and disbanded in unison, and both consisted of commonwealth crews. Having entered the war in a baptism of fire, they also flew alongside 21 Sqn on the Eindhoven raid; 464 Sqn contributing fourteen aircraft whilst 487 contributed sixteen – each squadron losing three aircraft and all but four of the twenty-four crewmen.
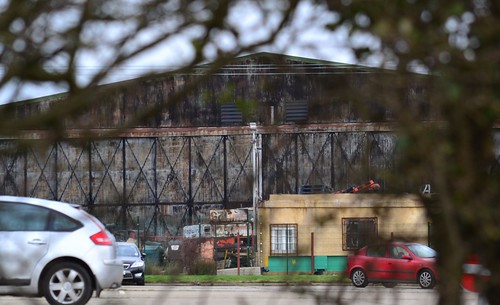
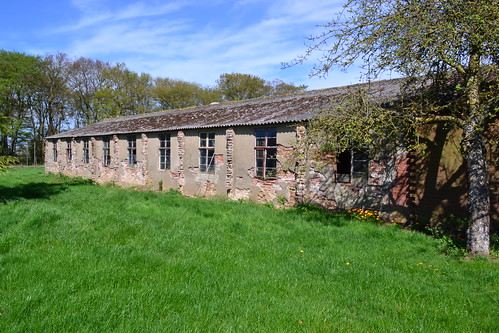
One of the original hangars at Methwold.
The Venturas earned themselves the unsavoury title the ‘flying pig‘ partly due to their appearance and partly due to poor performance. Based on the Lockheed Model 18 Lodestar, it was primarily a passenger aircraft and even though it had powerful engines, it performance was low and so operational losses were often high.
On May 3rd 1943, whilst on a ‘Ramrod‘ mission, eleven out of twelve (one returning due to engine trouble) 487 Sqn aircraft were lost to enemy action, and all but twelve of the forty-four crewmen were killed. Of these twelve, Squadron Leader Leonard H. Trent, was captured and taken to Stalag Luft III where he participated in the ‘Great Escape‘. On his eventual return to England at the end of the war, he was awarded the Victoria Cross for his leadership in ensuring the bomb run was completed despite heavy enemy resistance and very high losses.
In the summer of 1943, both 464 and 487 Squadrons became part of the newly formed Second Tactical Air Force; a move that led to their departure from Methwold, along with a new role and new aircraft.
Following their departure, Methwold was passed over to 3 Group and was designated to receive the heavy four-engined bombers of Bomber Command. To accommodate them, the site was upgraded to Class ‘A’ standard. Three runways were built, five hangars (four ‘T2s’ and one ‘B1’) were erected, and a wide range of ancillary buildings added. Aircraft dispersal consisted of 36 hard standings mainly of the spectacle type.
The incoming ground and aircrews would be accommodated in areas to the east of the airfield, buildings were sufficient for a small bomber site of some 1,800 men and just over 300 women, by no means large.
In this interim period on March 13th, a lone American P-47 #42-74727, suffered engine failure whilst on a routine training flight in the area. In an attempt to land at Methwold, the P-47 Thunderbolt crashed, slightly injuring the pilot but writing off the aircraft.
The first of the heavy bombers to arrive at the newly constructed Methwold were the mighty Stirling IIIs of 218 Sqn. A small detachment from RAF Woolfox Lodge, they would operate from here along side 149 Squadron who moved here from RAF Lakenheath in May 1944. 149’s record so far had been highly distinguished. Participating in the RAF’s second bombing mission of the war on September 4th, they had gone on to take part in the first 1,000 bomber raid, attacked prestige targets such as the Rhur, and had taken part in the Battle of Hamburg. They had also been in action in the skies over the Rocket development site at Peenemunde. They had gone on to drop essential supplies to the French Resistance, and one of its pilots, Flight Sergeant Rawdon Middleton, had won the VC for his valour and determination in action. 149 Sqn would go on with the offensive right up until the war’s end, replacing the ill-fated Stirlings with Lancaster MKIs and later the MKIIIs in August 1944.
During the D-Day landings, 149 Squadron were tasked with dropping dummy parachutists away from the Normandy beaches. As part of Operation Titanic, they were to deceive the German ground forces, aiming to draw them away from the Normandy beaches, thus reducing the defensive force. A task that proved relatively successful in certain areas of the invasion zone, it caused confusion in the German ranks and pulled vital men away from drop zones. During this dramatic operation, two 149 Sqn Stirlings were lost; LJ621 ‘OJ-M’ and LX385 ‘OJ-C’ – with all but three of the eighteen crew being killed.
In August 1944, 218 Sqn moved the remaining crews over to Methwold completing the unit’s strength once more. This move also led to them taking on the Lancaster MKIs and IIIs. 218 Sqn was another squadron with a remarkable record of achievements, its most notable being the VC posthumously awarded to Flight Sergeant Arthur Aaron for his ‘most conspicuous bravery’ whilst at RAF Downham Market.
As the allied advance moved across Europe, 149 Sqn supported them. In December 1944, 218 Sqn departed Methwold taking their Lancasters to RAF Chedburgh and disbandment the following year. 218’s losses were not over though, just days before the war’s end on April 24th 1945, Lancaster NF955 ‘HA-H’ crashed on take off, the last fatality of the squadron’s operational record. For 149 Sqn food packages replaced bombs as the relief operation – Operation Manna – took hold. After the fall of Germany in 1945, 149 Sqn ferried POWs back to Methwold in Operation Exodus, and for many, it was their first taste of freedom for many years.
The final squadron to be stationed at Methwold was 207 Squadron, between October 1945 and the end of April 1946 also flying the Lancaster I and III. As with many other bomber command squadrons, its history was also long and distinguished; flying its final mission of the war on 25th April 1945, against the SS Barracks at Berchtesgaden. During its wartime service 207 Sqn had completed some 540 operations, lost 154 crews and earned themselves a total of 7 DSOs, 115 DFCs and 92 DFMs.
In 1946, the Lancasters of 149 Squadron departed Methwold and all fell quiet. The site was officially closed in 1958 and the land returned to the former owners. In the early 1960s, much of the concrete was removed for hardcore, buildings were demolished and the land returned to agriculture, a state it primarily survives in today.
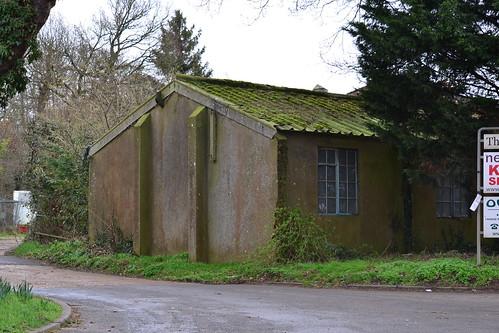
Stores huts used for light industry
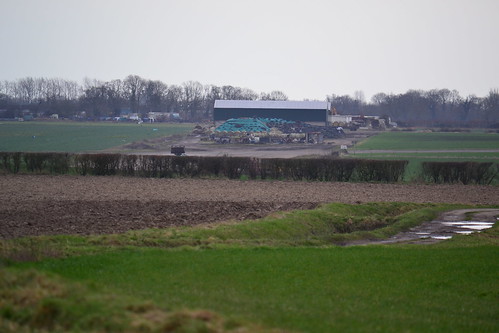
Methwold airfield is located south of the village of Methwold, accessible by the B1112. As you drive along this road, the technical area is to your left and the main airfield to your right. The entire site is primarily agricultural, with some of the remaining buildings being used for farming purposes or light industry. Many of these are accessible or at least can be seen from the main public highway.
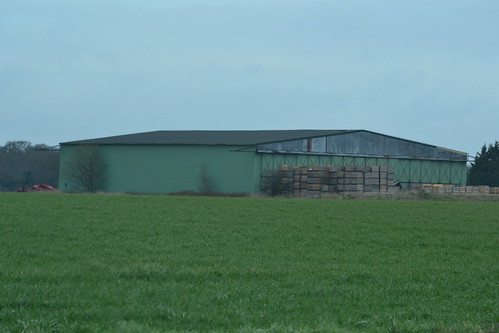
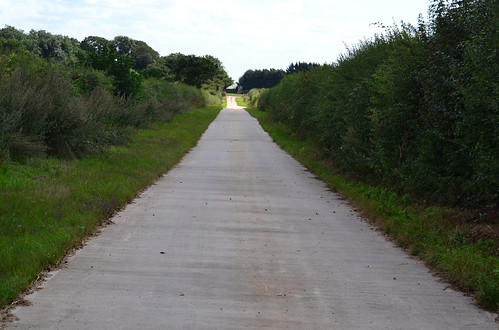
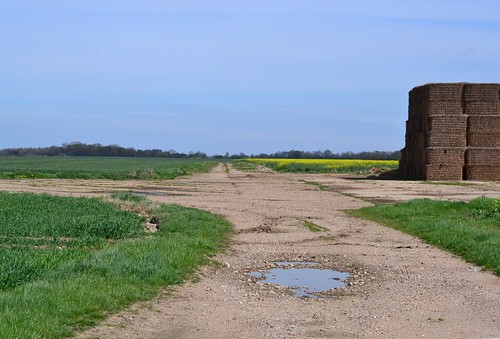
Large parts of the runways do still exist, although much of them are covered in newly developed industrial units, or are hidden away on private land. These most notable developments are at the northern end of the runway closest to Methwold village. However, best views of what’s left, are from the southern end, along a farm track that was once the perimeter track. Also here, is a single large and original ‘T2’ hangar, now used for storing agricultural equipment and other farm related products. This main north-westerly runway, built later in the war, is also used for farm related storage. Divided by a large fence, it is now part track and part storage. The remaining sections of perimeter track, a fraction of its original size, allows access to the runway past the hangar to an area of development further south to where the turret trainers once stood. Also visible here, is the Gymnasium built to drawing 16428/40 later adapted by the addition of a projection room (889/42) for recreational films.
Back alongside the B1112 hidden amongst the woods, is the technical area. Here in between the trees are the former technical huts and workshops now used by small industrial units, many of which survive in varying conditions, some of these are accessible to the general public.
One of the former runways looking north-west.
Methwold was never intended to be major player in the war. home to a small number of squadrons, it housed a variety of aircraft and a number of nationals who all combined, tell incredible stories of heroism, bravery and dedication. The squadrons who passed though here, carried out some of the RAF’s most daring raids, whether it be as part of a thousand bomber raid, a small force to attack the heart of Reich, or a diversionary raid to foil air and ground forces.
Methwold is now quiet, agriculture has taken over. The sound of heavy piston engines are now replaced by the sound of tractors, the buildings that once housed brave young men and their incredible machines now home to the machinery of food and farming. The small remnants of Methwold hold stories of their own, for it is here that history was made, war was won and lives were lost – and all in a very unassuming manner.
Notes and further reading
Local information and further detail is available from the local Methwold history group.
William G. Rueckert (service Number: 0 -420521) was born September 9th 1920, in Moline, Illinois. At school, he became a model student, achieving high grades throughout his school life. Upon leaving, he won a place at Illinois University where he wanted to study Law. Rueckert had a passion for reading, particularly the classics like Shakespeare and Proust and was known for his hard work and dedication.
It was at University that he met, on a blind date, he wife to be, ‘Dee’. The meeting almost never took place due to a faulty car, but as a lover of dancing, they turned out to be the perfect match and his lateness was forgiven.
Inseparable as a couple, Rueckert and Dee were married only a year later, in 1940, when Rueckert was just 19 years old.
War came even closer, and Rueckert decided he had to do his part and joined up with the Army, on July 15th 1941. Based at Pine Camp, New York, he was part of the 4th Armoured Division, and his hard work and dedication was very quickly realised; he soon won himself an award on the firing range. Constant passionate letters home cemented the love between Rueckert and Dee, in one letter he said; “My life, my love and all my hope all lie in my wife Dee!”
Rueckert’s life then changed and he joined the USAAC. As a trainee pilot, he moved from New York, to California and then onto New Mexico where he gained the qualification of Pilot instructor on October 28th 1943.
Whilst flying here at New Mexico, the plane Rueckert was in, a B-24, collided with a small training aircraft killing its pilot. Rueckert managed to land his own B-24 and following his actions, was credited with saving the lives of the crewmen on board.
Finally, the draw of the war led Rueckert to requesting a post overseas. He was sent to RAF Hardwick, Norfolk to join the 409th BS, 93rd BG, 20th Combat Wing, Eighth Airforce, in April 1944. Formed only two years earlier on 22nd April 1942, the 409th was to be Rueckert’s only operational squadron. Having won three DUCs already for operations over Europe including; the raid on the Romanian oil fields at Ploesti, and the enormous raid of February 1944 ‘Big Week’, the 93rd were a battle hardened group.
“Ted’s Flying Circus” as they were to be known, took part in the preparations for D-Day, completing much of their bombing missions over the Normandy area, cutting supply lines and communication routes across France.
Rueckert’s first and only mission, was on May 1st 1944. It was to be a night flight. He joined his best friend along with his assigned pilot Second Lieutenant Albert Schreiner (0-805532) on B-24 ‘Joy Ride‘ #42-7621, leaving his regular crew behind at Hardwick.
The aircraft, began its roll down the runway, as it neared the take off point, it is thought the undercarriage collapsed causing a catastrophic crash in which seven bombs exploded. The aircraft was completely destroyed and five of the crew killed including the pilot and Lt. Rueckert. The crash was so intense, it closed one of the three enormous runways for five days.
Dee, Rueckert’s wife, found out by telegraph that her husband had been killed. She was understandably devastated as were the two young children, Billy and Dianne.
Rueckert’s body was initially buried at Madingley Cemetery, Cambridge, but later he was repatriated and buried in the family plot in Illinois. His purple Heart, awarded earlier, has since been donated by his son Billy, to the church at Topcroft, where Rueckert prayed the night before that fatal flight. A plaque also sits in the wall in remembrance of the 668 men who never returned to Hardwick. Rueckert’s name appears in the St Paul’s Cathedral Roll of Honour, on page 365.
During March 1944, an event took place in the UK that considering its historical importance, is little known about. It was actually quite a momentous event, especially in terms of aviation history, and in particular the Second World War.
As a follow on to RAF Glatton and Trail 6, we look into the short-lived presence of Boeing’s mighty aircraft the B-29 ‘Superfortress’, in what would appear to be its first and only wartime presence on British soil.
At the time of the bombing of Pearl Harbour in 1941, the United States was less than ready for a global war. The retaliation and defeat of not only Japan, but Nazi Germany as well, was going to be both costly and massive, requiring a huge increase in manufacturing of both arms and machinery.
This increase meant not only aircraft for the Air Force, but the infrastructure to support and train the aircrews too. A network of airfields and supporting organisations totalling some $100 million in 1940, would, by the war’s end be valued in the region of $3,000 million. In terms of size, this infrastructure would cover an area of land equal to the combined areas of: New Hampshire, Vermont, Massachusetts, and Connecticut.*1
To complete the task, along with aiding her allies, the U.S. was going to need to design and manufacture many new models of aircraft, aircraft that would outshine anything previously made available to the U.S. forces. Long range bombers in particular, capable of travelling great distances were going to be required – and a lot of them. At the outbreak of the European war, the U.S. Army Air Corps was in comparison to the European forces, very small, commanding just 26,000 officers and enlisted men, and operating only 800 front-line aircraft. The Luftwaffe on the other hand, had expanded considerably over the previous years, now commanding some 3,600 aircraft. The British, who were still some way behind the Germans but growing rapidly, had available to them some 2,000 aircraft, whilst the French could muster slightly over 1,700. *1a
To meet this demand, U.S. aircraft manufacturers were going to have to start by modifying, and with some exceptions, redesigning the various aircraft types that were already available to the U.S. forces. However, and likewise the British and German manufacturers, new models were going to have to be designed and put into production very quickly if victory was to be achieved in any of the world’s theatres.
Preempting war, the US Government put out tenders for long range bombers, in answer to which during the 1930s, the Boeing Model 299, first flew. Eventually being purchased by the US Government to fulfil the role, it was put into production as the iconic B-17 ‘Flying Fortress’, and was followed not long after by the B-24 ‘Liberator’; a more modern aircraft which took its maiden flight in 1939. But sitting on the drawing board at this time, was another aircraft that performed even better, the formidable B-29, a bomber designed to fly at altitudes up to 40,000ft, beyond the range of anti-aircraft guns and faster than many fighters of the time. The aircraft was so advanced in design that depending upon its payload it was capable of flying distances of up to 5,000 miles, far beyond that of any other heavy bomber.
Whilst the U.S. aircraft manufacturers had already begun designing and testing these new models, it would be some time before the number and types of available aircraft would come anywhere close to being comparable to those of the Luftwaffe, R.A.F. or even later, the Imperial Japanese Air Force.
By August 1942 both the development and production of these two heavy bombers, the B-17 and B-24, were well underway, and so it was decided that they would go initially to the European theatre rather than the Far East. The competition for the attack on Japan now lay between the B-29 and Consolidated’s competitor the B-32 ‘Dominator’ – an enlarged and also pressurised version of their B-24. However, two years after the first design drawings were revealed, neither of these aircraft types had yet flown, and so the shorter ranged B-17 and B-24s were going to have to fill the gap until such times as their replacements could arrive.
The war in the Far East would provide its own set of problems. The distance that supplies would have to be taken would take time and before any invasion could take place, lost ground not only had to be recovered, but held. To achieve this, ground forces would need to be protected by an air umbrella, a defensive shield formed so tightly that air supremacy was guaranteed.
Getting supplies into China was difficult, by air it required long and dangerous flights over the ‘Hump’, the Himalayan mountain range, usually fulfilled by C-47s and DC-3s, their commercial equivalent. With the C-46 ‘Commando’ and C-87 coming on line later on, the frequency and quantity of these supplies could increase but it was still not enough for the Chinese, nor for the difficult task ahead.
By March 1943 the stage was set. The Fourteenth Air Force was created out of Maj. Gen. Claire Chennault’s China Air Task Force, which by the summer time, had begun attacks on coastal positions, ports and troop concentrations under Japanese control. This air umbrella was in part achieved over Burma, and the desired attacks on Japan now looked more possible, but the B-17s and B-24s that had worked tirelessly lacked the range to hit the Japanese homeland; the long range high performance B-29 was by now desperately needed.
During the Quebec Conference in August that year, U.S. officials put forward their proposal to stage American long range bombers on airfields in China, the area required for such bases being under Chinese control already and therefore not at the mercy of the Japanese forces. This offensive, designated the Matterhorn Project, would involve the still as yet untested in battle, B-29s, their longer range and larger bomb capacity enabling them to ‘bomb Japan into submission’ in a similar way that Sir Arthur Harris had hoped for in Europe with the RAF’s bombing campaign against Germany’s industrial targets and cities.
To meet these aims a new force would be created, the Twentieth Air Force, which would be made up of two commands: the XX Bomber Command from China and the XXI Bomber Command who would be based in the Mariana Islands after they were retaken from Japanese control.
The aircraft destined to carry out this role, the B-29, was still very much an unknown quantity. Rushed into production with scant attention to testing, it was a monster of an aircraft, with a crew of eleven in pressurised compartments, electronic gun turrets and a massive 141 ft wingspan. The project was to be the biggest in U.S. aviation history, spares alone in the initial contract costing $19.5m, and one which General Arnold
referred to as the “$3 billion gamble”.*1b
The following film “Birth of the B-29 Superfortress” shows a B-29 production line and a test YB-29 in flight. It also contains some short graphic images at the start.
A batch of four XB-29 prototypes were built, and after initial test flights, a further fourteen ‘test’ aircraft, designated the YB-29, were also constructed. But problems with design drawings, missing parts and rushed testing meant that production was slowed to a minimum, part finished aircraft being stored whilst awaiting vital components. After test flights it became apparent that the B-29’s engines were prone to overheating and in several cases catching fire. This delayed further testing reducing flying time considerably until the problems could be solved. During flight tests, this problem with the engines was graphically seen, first on February 18th 1943, and then again a year later.
In February, XB-29 #41-003 (the second prototype XB) crashed into a meat packing factory killing all eight crew on board along with twenty civilians on the ground. The pilot, Eddie Allen, had already received the Air Medal for successfully landing the same XB-29 following another engine fire in the preceding December. A year later, January 29th 1944, engine problems caused yet another accident when #41-36967, the last of the fourteen*2 Wichita YB-29s manufactured, crashed after losing all four engines whilst in the air. This problem with overheating engines becoming the proverbial ‘thorn in the side’ of the Boeing production team.
By the summer of 1943, B-29 training squadrons were being set up, the first, the 58th Bombardment Operational Training Wing (Heavy) later the 58th BW (Very Heavy), was formed with the 40th, 444th, 462nd, 468th and 472nd Bombardment Groups, each with four or five squadrons of their own.
After a period of training four of these groups (the 472nd was disbanded April 1944) would transfer to India flying via Africa to join the Twelfth Air Force initially flying supplies over ‘the Hump’, before taking part in operations against Japan from the Chinese airfields.
Departure for these groups occurred over the March – April 1944 period, during which time one of these aircraft would divert to the U.K. causing a huge stir whilst ‘touring’ several U.K. airbases.
Whilst precise sources seem scarce, it is thought that flying B-29s across the southern route raised fears of a Luftwaffe attack whilst en-route, and so a plan of ‘disinformation’ was set in motion to fool the Germans into thinking that the B-29s were to be based in England, ready to be used against German targets. The first part of this ruse was in early March 1944, when YB-29 #41-36963 ‘Hobo Queen‘ took off from Salina Airbase in Kansas and flew to England. It initially took the southern route toward Africa, but then deviated north heading to Newfoundland. The YB-29, piloted by Colonel Frank Cook, then flew across to the UK initially landing at RAF St. Mawgan, in Cornwall.
During its short stay in the U.K. it was known to have visited RAF Horsham St. Faith near Norwich, RAF Bassingbourn on the 8th March, RAF Knettishall and RAF Glatton on 11th March before its final departure from RAF St. Mawgan to India in April that year. The route took the YB-29 to Marrakech, Cairo (2nd April), Karachi (5th Apr) finally arriving at Kharagpur, India, on 6th Apr 1944 . Once here, it was assigned to the 769th Bomb Squadron, 462nd Bomb Group who were then based at Piardoba in India, where it was modified as a tanker to ferry fuel over ‘the Hump’. The YB-29, the only test model to fly overseas, gave a successful service, eventually being declared war weary and returned to the United States, its eventual fate being unknown, presumably, like many war weary models, the aircraft was scrapped.*3
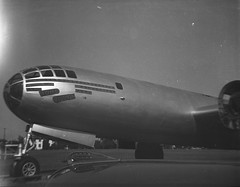
Whilst in the U.K. the YB-29 was certainly a major draw, over 1,000 key personnel viewing the aircraft at RAF Glatton alone, its enormous size dwarfing anything that had been seen in U.K. skies before.
The ruse was considered a success. The many B-29s that followed across the southern route did so without any interference from German aircraft, although how much of that was actually down to the ruse itself, is hard to distinguish. It is even thought in some circles that photos of the ‘Hobo Queen‘ appeared in the newspaper of the National Socialist German Workers’ Party, The Völkischer Beobachter, although an initial search of the paper through the Austrian National Library proved fruitless.
Crews and ground staff swarm around B-29 #41-36963 at Glatton airfield 11th March 1944*4.
Although B-29s were initially considered for the European theatre none operated from British soil until after the wars end, when a joint British and American operation, Project ‘Ruby‘*5, investigated deep penetration bombs against reinforced concrete structures. Three B-29s were prepared in the United States along with four B-17s and a select detachment of admin, maintenance, technical staff and air crew, who arrived at RAF Marham, Norfolk, on March 15th 1946. Initial plans were to test a series of bombs on the submarine assembly plant at Farge, but due to the close proximity of housing and an electricity plant, the U-boat shelter at Heligoland was used instead. The bombing trials began on March 25th by which time an original three B-17s from RAF Mildenhall had also joined the group.
A number of both American and British bombs were tested in the trials:
The US 22,000lb. ‘Amazon’ bomb
The US rocket assisted 4,500lb. ‘Disney’ bomb (used by B-17s in the latter stages of the war)
The 4,500lb. ‘Disney’ bomb without rocket assistance
The American 22,000lb. fabricated ‘Grand Slam’ (designated T14)
The American 12,000lb. fabricated ‘Tall Boy’ (designated T10)
The British 12,000lb, ‘Tall Boy’
The British 2,000lb. Armour Piercing bomb
The inert loaded 2,000lb. SAP (M103) bomb
The Picratol filled 2,000lb. SAP (M103) bomb
The 1,650lb. Model bomb
The results of the trials were quite conclusive, none of these bombs in their current form, were capable of penetrating the 23 ft thick concrete of the Farge roof, and therefore, all would need adapting, redeveloping or redesigning if such operations were to be carried out again.
Post war, B-29s were brought into the UK and operated as Boeing Washington B1s, operating with nine RAF Squadrons: No. 15, 35, 44, 57, 90, 115, 149, 192 and 207 at various airfields including RAF Marham, RAF Coningsby, RAF Watton and RAF Waddington, eventually being replaced by the high flying English Electric Canberra. The B-29 then disappeared from operational service in the UK.
Without doubt, the development of the B-29 had a major impact on the world as we know it today, and even though its first arrival in the UK in March 1944 caused a major stir in the aviation world, it incredibly remains a little known about clear fact. With little documentation available, there is clearly much more research to be done.
Since the original posting of this article, I have been contacted by Daniel Partridge whose grandfather (Leon Suthers) was at Randolph Field in the United States, after the war’s end. He has sent me some photos of ‘Hobo Queen’ after she returned to the US. According to information Daniel has supplied, she was used as a training airframe from January 1945 until 1954, after which she was scrapped. From the photos, you can see that much of the aircraft has been stripped away, presumably as part of this programme, yet the 45 camel ‘mission scores’ have been left. Further information from Daniel confirms that these Camels represent flights ‘over the hump’. My sincere thanks to Daniel for the information.
Hobo Queen Post War (Photo courtesy Daniel Partridge)
Hobo Queen Post War (Photo courtesy Daniel Partridge)
Sources and further reading.
*1 Nalty, B., et al. “With Courage The U.S. Army Air Forces in World War II” 1994. Air Force Historical Studies Office (p61)
*1a ibid (p38)
*1b ibid (p147)
*2 Only 14 YB-29BWs were built (#41-36954 – #41-36967) and all at Wichita. They were painted olive drab upper surfaces and light gull grey lower surfaces.
*3 MSN 3334.
*4 Image courtesy of 457th BG Association.
*5 Comparative Test of the Effectiveness of Large Bombs Against Large Reinforced Concrete Structures (PDF), Report of the Air Proving Ground Command, Elgin Field, Florida – Anglo-American Bomb Test Project “Ruby”. October 31st, 1946.
In this new addition to Trail 20, we visit a former airfield whose history not only stems back to the First World War, but is deeply rooted in it. Between the wars it lay dormant, and then sprang into life once more, as military activity in Norfolk increased during the 1940s. Known under four different names, and controlled by three different branches of the armed forces, we visit an airfield that has been the subject of one of Britain’s largest archaeological digs in recent years. Situated east of the coastal resort of Heacham in Norfolk, it now forms the first airfield on our tour in Trail 20. We start the Trail at the former RAF Sedgeford.
RAF Sedgeford (RFC Sedgeford, RNAS Sedgeford)
Also known as RFC Sedgeford, RNAS Sedgeford or Sedgeford Aerodrome, the airfield lies just outside of the village from which it takes its name, and on the south side of the B1454 Docking Road.
Sedgeford originally opened as a First World War airfield during the latter half of 1915 as Royal Naval Air Station (RNAS) Sedgeford. It was initially a Class 1 night landing ground (NLG) for the main base at Great Yarmouth (South Denes) much further to the east on East Anglia’s North Sea Coast.
The Royal Naval Air Service were themselves a fledgling service, being formed only a year earlier in July 1914, after the naval wing of the Royal Flying Corps (RFC) was removed from RFC control, being placed under the jurisdiction of the Admiralty. At their time of formation the RNAS had on its books some fifty-five seaplanes (inc. ship-borne aircraft); forty aeroplanes; seven airships; 111 officers and 544 men*1.
With aviation very much in its infancy, the RNAS had been using mainly airships, and were only just beginning to venture into aeroplanes as a means of fighting a war. With a range of airfields in the area including both RFC Holt and RFC Bacton (NLG), it also used Ludham (HMS Flycatcher), Pulham (an airship station), Hickling Road (a seaplane airfield), Lowestoft (a balloon site) and Great Yarmouth (South Denes which was a mixed use airfield for home defence and marine operations). From these humble beginnings, the RNAS were to become a strong force during the First World War.
With the might of the Zeppelin ruling the skies, it wasn’t long before the first attacks were made along the North Norfolk coast, ranging from Great Yarmouth to Kings Lynn. These attacks, and continuing intruder flights by Zeppelins, called for a much greater aerial protection of East Anglia. It was this call that led to the creation of not only Sedgeford but also Aldeburgh, Bacton, Holt, Narborough (which later became Norfolk’s first military airfield) and Burgh Castle as active airfields operating armed flying units*2.
During the early part of 1916, RNAS Sedgeford was transferred across to the RFC (themselves only formed on 13th April 1912) and used as a training station. The site was developed with further buildings added, eventually gaining eleven canvassed Bessonneaux hangars, two more permanent General Service Sheds, a range of buildings suitable for aircraft repair and maintenance, barrack huts, MT (motor transport) sheds and even a locomotive shed fed by a branch line to the main Hunstanton and West Norfolk Railway a mile or so to the north. Sedgeford would develop into a substantial sized airfield with some 100 buildings accommodating over 1,200 personnel including WRENs and WRAFs. Whilst the overall dimensions of the site cannot be confirmed, it is thought that the airfield covered around 170 acres.
The WRAFs, (known affectionately as ‘Penguins,’ because they didn’t fly) were often found working in aircraft doping sheds repairing aircraft fabrics using a potentially harmful ‘dope’ containing an acetate solvent. The fumes from this solvent were known to be lethal in large doses, with many of those using it on a regular basis, feeling ill or in extreme cases, dying from the effects of its toxic fumes. To combat the problem, some First World War doping sheds had extractor fans built into them to remove these hazardous fumes, and at Sedgeford, evidence has been found (by the Sedgeford Historical and Archaeological Research Project), that confirms their use here.
Over the next few years Sedgeford would house a number of flying units, both training and ‘operational’ whilst preparing to move to France. The first of these (No. 45 Squadron) arrived on 21st May 1916 operating the Bristol BE.2b, an aircraft that they had been using since April at Thetford. Over the next five months, 45 Sqn would take on three other aircraft types: the Henry Farman F.20, (June to August), Royal Aircraft Factory FE.2b (July to Sept) and lastly the Sopwith 1 1/2 Strutter (July to Sept 1917); the first British aeroplane to have synchronised guns firing through a two bladed propeller. The rather odd name was given to the aircraft because of the unusual ‘half-struts’ that attached the wings to the fuselage.
Sopwith 1 1/2 Strutter (unknown photographer via Wikipedia.)
In August 1916, 45 Sqn was broken up, with the nucleus being used to form a new squadron here at Sedgeford – No. 64 Sqn. The remainder of No. 45 Sqn then prepared for France, a move it made two months later.
No. 64 Sqn continued using the Henry Farman F.20s that had previously been allocated to them, but over time, they too would use a variety of aircraft types including: the Royal Aircraft Factory BE.2c and FE.2b, Sopwith’s famous Pup, the Avro 504 and the de Havilland DH5.
Then on February 1st 1917, 64 Sqn was itself then split, the demand for new pilots and new squadrons increasing as the conflict entered its third gruesome year. From this split, another new squadron was born, No. 53 Reserve Squadron, who were themselves re-designated as No. 53 Training Squadron on 31st May 1917, and operated models such as the RE.8, BE.2c, Avro 504J and the DH.6. They would eventually leave Sedgeford and end their days at Harlaxton where they were disbanded and merged into another unit.
Although many of these pilots were ‘experienced’, being in training meant there were of course accidents, many taking the lives of the young men who had been drawn to the thrill of flying. One such pilot, twenty year old Sec. Lt. Arthur Le Roy Dean, was killed when his Sopwith ‘Pup’ (official name Scout) B1788 spun into the ground whilst flying with 64 Sqn on August 8th 1917. He initially survived the crash only to die from his injuries the following day.
The grave of Second Lieutenant Arthur Dean RFC.
The 9th would prove to be a black day for 64 Sqn, after they lost a second pilot, Canadian Lt. Edward Gordon Hanlan, who was killed when his DH.5 (#A9393) crashed following a wing failure whilst performing a loop over the airfield at nearby Bircham Newton.
September 1917 would prove to be a busy month for both Sedgeford airfield and the many airmen stationed there. On the 15th, another new unit arrived to join 64 Sqn. They too were a new squadron, only being formed a few days earlier at Upavon. No. 87 Sqn, remained at Sedgeford for just three months prior to moving to Hounslow before themselves moving across to St. Omer in France, which was rapidly becoming the hub of the Royal Flying Corp in continental Europe.
This month was the penultimate month of 64’s stay at Sedgeford, and prior to them leaving for France another Sopwith Pup (#B1787) would take the life of its pilot, 2Lt. Francis Brian Hallam Anderson (aged 19) who, like Sec. Lt. Dean, survived the actual crash only to succumb to his injuries and die several days later on the 8th. Flying these lightweight aircraft was not proving to be easy.
By mid October (14th), orders to move had come through, and 64 Squadron packed its bags – they were on their way to France taking their DH5s to St. Omer. St. Omer being the very place the parent squadron (No. 45 Sqn) had moved to almost a year to the day previously. The many faces of 45 Sqn surely being different to those that departed a year before.
It was in France that 64 Sqn’s Acting Captain Flt, Lt. James A. Slater MC., DFC. would go on to be the Sqn’s top ace achieving 22 kills, which when added to the two he achieved with No. 1 Sqn, gave him a total of 24 kills. His determination and expertise in the air earning him both the DFC and Military Cross (with Bar) which was Gazetted in the London Gazette Supplement published on February 1st 1918*3*4.
The beginning of November 1917 would see another short lived unit arrive at this Norfolk site, and it would be the brief reuniting of two sister units.
Both No. 72 Sqn and No. 87 Sqn, had their roots firmly fixed in the same place – the Central Flying School at Upavon; 87 being formed from the resident ‘D’ Flight whilst 72 were formed from ‘A’ Flight. Whilst they perhaps enjoyed a momentary annexation, it would not last long before they would all depart and go their separate ways for good. Whilst 87 Sqn moved to the cold winter of France, No. 72 Sqn would take their Pups to the much warmer Persian Gulf and onto Basra and Baghdad, where they stayed until the war’s end.
Sedgeford was rapidly becoming a major player in the RFC’s continued development, with yet another new unit arriving here the same month they were formed – No. 110 Sqn. They too would be another relatively short stay unit, and again, operating a number of different aircraft types. Formed on November 1st, they were created out of the nucleus of 38 Training Squadron at Rendcomb, and stopped off at Dover on their way to Sedgeford. By June 1918, they were on their way again, moving to Kenley in Surrey, a station that would become famous in the Second World War as a fighter airfield.
Within days of 110 Sqn’s arrival, pilot James Alan Pearson was killed following a flying accident at Sedgeford. Pearson, who was from Chesterfield, had only joined the RFC in August that same year, transferring from South Farnborough, to Winchester, Oxford and then Hendon, where he joined No. 19 Training Squadron on September 19th, 1917. On November 19th, he completed his probationary period and was confirmed as a Temporary Second Lieutenant upon which, he was posted to No. 110 Sqn, at Sedgeford, just after the main squadron arrived at the busy Norfolk airfield.
His death came within a matter of days of his arrival, some references stating he ‘blacked out’, whilst other say his aircraft, a Martinsyde Elephant (#B866), broke apart. No doubt, both actions resulted from a steep dive from which Pearson never recovered. During the dive, and probable breakup of the aeroplane, Pearson was thrown out of the cockpit, unaided or not conscious, he failed to survive the fall. His official service record (AIR 76/396/34) simply states ‘Killed as result of aero accident‘, the short few entries showing how limited, at 18 years old, his experience was.
The grave of 18 yr old, Sec. Lt. James A. Pearson at St. Mary’s Church, Docking, who was killed within four months of joining the RFC.
As the war turned to another year and the winter of 1917/18 dragged on, New Year’s day 1918, would see No. 110 Sqn joined by another newly formed unit, No. 122 Sqn, who whilst initially operating a range of aircraft, were earmarked to receive the de Havilland DH.9. However, the transition would not go smoothly and it would ultimately result in the squadron’s demise.
Both 110 and 122 Sqns were assigned to go to France, 110 Sqn leaving on 15th June 1918 initially to Kenley before Bettoncourt to the south of Nancy in France, whilst No. 122 Sqn were to be sent to Hamble (which became the more prominent Upper Hayford post World War Two) where they were to take on the DH.9s before also moving to the continent.
However, the unit was disbanded whilst still as a training unit at Sedgeford on the day prior to its move on 17th August 1918. No. 122 was then reformed at Hamble, but further plans stalled as the DH.9 was replaced by the DH.10 and a delay in allocation prevented the reformed squadron from its final activation. With the war’s end and no further requirement seen for the squadron, the process then halted, and in November 1918, the squadron was disbanded for good .
With the war in Europe now over, the withdrawal of squadrons from France began and units started the long journey home. Sedgeford would continue to host some of these units, continuing to perform their role as a training airfield. Even at this point, expansion of the airfield was still occurring but the future for Sedgeford was not bright.
At the end of 1918, No 3 Fighting School (FS) (who had been formed at nearby Bircham Newton) arrived at Sedgeford. Being a former Aerial Fighting and Gunnery School, it operated a number of different aircraft types including: Pups, a range of de Havilland models, Dolphins, Camels and Handley Page 0/400s.
Perhaps now, as the war was over, a lapse in concentration or exuberant antics may have caused the death of young twenty-one year old 2Lt. Jack Garside of the Fighting School. He was killed on the 18th November just a week after the armistice when his Camel (E7253) was involved in a ‘flying accident’ over Hunstanton. Although born in Yorkshire, Jack was buried at his parents home town of Coventry, in the London Road Cemetery.
The accidents didn’t stop there either. In the new year, on January 24th 1919, two more Sopwith Camels collided over Sedgeford airfield. Camel C8318 flown by Capt. Cecil Frederick King MC., DFC., was in collision with H2724 flown by Lt Hector Daniel MC.
Capt. King, who had been wounded in France, had been awarded not only the Military Cross in April 1918, but also the Distinguished Flying Cross in August 1918 along with the Croix de Guerre. Incredibly he was just short of his 19th birthday. Lt Daniel (a South African), survived the accident, and also achieved the Military Cross along with the Air Force Cross in July 1918 and June 1919 respectively.*5
The grave of Capt. Cecil Frederick King MC., DFC, Croix de Guerre
The wind down was slow at Sedgeford, but March 1919 would see two major changes at the airfield. Firstly, on the 14th, No. 3 FS was disbanded, reforming as No. 7 Training Squadron (TS), who continued in the training role at Sedgeford. By October though, with cutbacks in the pipeline, it would no longer be required and so operations were curtailed, and it was finally disbanded.
Secondly, the end of March saw the arrival of a cadre of No. 13 Sqn with RE.8s. Their journey to Sedgeford had taken them around the many battlefields of France over the last three years, the skies of Norfolk must have been a more than welcome break for the young pilots.
As more and more units were disbanded, Sedgeford too would feel the bite. On New Year’s Eve 1919/20, orders were received and subsequently carried out, to disband the last remaining squadron at the airfield, and with this, the end of Sedgeford as a flying base was now signalled.
The interwar years saw many of the buildings removed, many being sold off or demolished, but fortunately some remained, falling into disrepair or put to agricultural use. What remained of the airfield was left in a dormant state, fading bit by bit. But, the 1930s increase in international tensions would be the saviour of Sedgeford, as war once again reared its ugly head. This time however, it would not be as an operational airfield with the usual buzz and activity it was once so used to, this time it would be a much quieter decoy site.
With so many strategic airfields located in East Anglia, and with the extended development of Bircham Newton as few miles away, the protection of these sites was paramount. The war of deception created the dummy airfield, with the sole purpose of diverting the Luftwaffe bombers away from the real airfield located nearby. Sedgeford was seen as a suitable location for such a site, the few remaining buildings being partly representative of a wartime airfield. With a little development and appropriate lighting added, Sedgeford became one such site, the remaining buildings being utilised to create an image of activity one would expect to see on an active airfield.
The airfield today is far different from the one used in World War One.
These decoy sites were the brainchild of Colonel John Fisher Turner, a retired Officer from the Air Ministry who had turned his hand to film work and special effects. Working with a team of tradesmen and engineers, they produced life-like aircraft, vehicles, boats and buildings using canvas, wood and other lightweight materials that when viewed from the air, look like the real thing. With lights added to give the impression of runway lighting, fires and vehicles, it proved to be a major coup in the war against the Luftwaffe. Designated as both a ‘Q’ (night time) and ‘K’ (day time) decoy station, Sedgeford was operational between June 1940 and August 1942, after which time the larger threat of bombing had sub-sided.
Sedgeford had a small number of operators on site to perform the deception, and because they were to attract enemy attention, they were provided with a shelter, the bulk of which still exists on the site today. After this, Sedgeford was finally closed down and returned to agricultural use once more. A state it has remained in ever since.
The airfield’s site is located just outside of the village, a gate and long path indicate the original entrance to the site. This path was once lined with First World War buildings, none of which remain today. The actual airfield itself is now an agricultural field, the railway spur that led from the main line has also gone, as has the main line itself. From the public road there are sadly no indications of the significance of this once historic site.
The main entrance and long road into former RAF Sedgeford. The field to the left would have had several buildings along it. The buildings remaining today are located beyond the forest on the horizon.
Along from the airfield toward the village of Docking, is another private dwelling that was also known to have been used as a billet for Sedgeford’s airmen. Formally the Union Workhouse it dates back to 1835 and was one of the largest workhouses in Norfolk at that time. Intended to hold up to 450 people, it rarely had more than 100 at any one time. The RFC took over the building in 1916 handing it back at the war’s end.
Since 2009 the Sedgeford Historical and Archaeological Research Project (SHARP) has carried out a huge excavation of the site at Sedgeford, uncovering a number of foundations and links to Sedgeford’s aviation history. Some of these buildings include the mortuary and Officers quarters, with its very ornate fireplace, and the World War 2 shelter mentioned previously. These are all firmly on private land hidden in a small wood around which the majority of the technical buildings were originally erected. Access to these sites is understandably only with permission, something I didn’t have on the day. The project, which has been carried out yearly, also uncovered numerous building foundations and a track for a hangar door. Substantial information being gleaned from the various digs being carried out over the years.
The types of buildings remaining at Sedgeford, especially the First World War examples, make this quite a unique site. So few buildings exist from this era, Stow Maries being the only other site with examples of any quality. This, along with the many deaths and sacrifices witnessed by Sedgeford, make it both historically and architecturally significant, and as such, perhaps the site should be protected.
The history of Sedgeford is extraordinary. Many of those who passed through its doors were teenagers, some lasted only weeks, whilst others went on to fly for years performing acts of great bravery and daring. But one thing that draws them all together was the thrill of flying in an era were flight was new and boundaries were unknown. Their bravery and courage should be remembered.
Sedgeford airfield had sadly all but passed into the history books, but recent excavations have given new life to this once significant site, and maybe one day, these will be given public status, and the memories of those who served and died here will live again.
This recognition took a step forward when on 21st July 1918 the Airfields of Britain Conservation Trust erected a memorial at Sedgeford. The report can be seen on both Your Local Paper website, and the ABCT website along with videos of the day and interviews with SHARP members.
From Sedgeford we continue with Trail 20, and travel east toward Docking, stopping off at St. Mary’s Church, before travelling a few miles further to the former airfield RAF Docking.
Sources and further reading.
*1 Fleet Air Arm Officers Association Website accessed 10/8/2019
*2 Gunn. P. “Aviation Landmarks – Norfolk and Suffolk“. The History Press (2017)
*3 London Gazette Publication date: Supplement: 30827, Page:9204.
In part 1 we left the “Eightballs” in the middle of a cold and icy winter, before which, a heavy toll had been paid. The January of 1944 would not prove to be any better for the men of the 44th BG, with both further losses and the high levels of stress playing their part in the coming months at RAF Shipdham.
On January 13th, a training mission was organised for a new crew, who had only joined the group on the Christmas Eve, and were barely three weeks into their war. On this day, B-24 #42-7551 of the 68th BS piloted by 2nd Lt. Glenn Hovey, would come in on approach to Shipdham, a landing in which one of the engines was feathered to simulate one engine out. With flaps and gear down, the pilot overshot, banking to the left striking a tree causing the aircraft to crash. The ensuing fireball killed nine men instantly, the tenth 2nd Lt. Richard Sowers being taken to hospital where he died shortly after. For a rookie crew this was perhaps the worst possible cause of death.
Liberators, including a B-24 (#41-29153), ‘Greenwich’ of the 506th BS, 44th BG (pilot 1st Lt. Robert Marx) conducts a raid on a German airfield near Diepholz. February 21st 1944. This aircraft was subsequently lost on April 8th 1944, all the crew were taken prisoner. (Official U.S. Air Force Photo)
The extreme pressures placed of aircrew were beyond that imaginable, and for some, it was just too much. After having joined the 44th and flown since July 1943, for one pilot it all became too great, and on January 20th he sadly took his own life. Not a unique event by any means, but his death shows the great pressure that airmen were subjected to and for some it was simply a step too far.
The end of March and into April saw the poor weather continuing, with many missions being aborted. On April 1st, a mission to Grafenhausen was yet again cancelled, but B-24s of the 44th and 392nd did continue on. Unbeknown to them, they were way of course, and when they released their bombs it was the Swiss town of Schaffhausen that was beneath them, and not the Germany city. Ten aircraft were lost that day whilst Swiss papers reported the loss of thirty residents. The Nazi propaganda machine-made good use of this most unfortunate accident.
Only eight days later the ‘Eightballs’ would suffer their greatest loss of the war, April being the month that cost more in men and machines than any other month of the conflict. This was a month that put even Ploesti and Foggia in the dark. A mission to Brunswick was scrubbed as the town was shrouded in smoke, and so a secondary target was selected Langenhagen Aerodrome near Hanover in Germany.
Now for the first time, fitted with PFF, the B-24s flew toward the target. It was a cloudless and sunny day, an escort of P-51s were with the Liberators when suddenly, out of the sun, came a whole horde of enemy fighters. They struck from above and in front making a concentrated attack that took out eleven of the 44th’s group; forty-one airmen were killed that day with almost as many being taken prisoner.
For the remainder of the war the group attacked many high prestige targets, including airfields, oil refineries, railways, V-weapon sites, aided the Normandy landings and the breakout at St. Lo. They supported the ground forces in the Battle of the Bulge and attacked railway bridges, junctions and tunnels preventing German reinforcements arriving at the front.
With their last operational bombing sortie taking place on April 25th 1945, never again would they lose as many aircraft as they did during those three major raids. Bombing turned to food supplies and transit flights bringing home POWs from camps across Europe.
Then over May / June 1945, the various echelons began to depart Shipdham returning to the U.S., they had completed 343 missions using six different marks of B24. They had flown against submarine pens, industrial complexes, airfields, harbours and shipyards. Whilst in Africa they had flown in the Ploesti raid in Romania, the raid on Foggia and had helped in the invasion of Italy.
The Unit achieved one of the highest mission records of any B24 group for the loss of 153 aircraft, the highest loss of any B-24 group. They had taken the taunting of the B-17 crews, been called ‘Jinxed’ and had lost a lot of young men in the process. The 44th had paid the price, but they had earned two DUCs, a Purple Heart and numerous other medals for gallantry and bravery in the face of adversity.
The 44th and their home at Shipdham had well and truly written itself into the history books.
Following cessation of conflict the mighty 8th left Shipdham. The airfield became a POW camp closing in 1947, it then remained in care and maintenance until finally being sold off in 1963. Over the years it has been turned into agricultural premises with an industrial complex covering the technical area of the airfield. Fortunately, flying activity has managed to keep a small part of Shipdham alive with the Shipdham Aero Club utilising one of the remaining runways.
If you drive round the site to the industrial area, you can clearly see the remaining two hangers through the fence. Behind these are a small selection of dilapidated buildings from what was the technical site, including the control tower and operations block.
Shipdam’s runway used for storage.
The tower is now a mere shell and in danger of demolition. For those not tempted to venture further, views of these can be seen from across the fields on the aero club side of the site. Further views reveal one runway covered in farm storage units, but the runway they sit on, remains intact.
This is a large site, much of which is now either agriculture or industrial, with what is left is in desperate need of TLC. Whilst there is a small part of this airfield alive and kicking, the more physical features cling on by their finger nails desperate for the care and attention they wholeheartedly deserve.
The club house at the aero club houses a small museum in memory of those who flew from here, with many pictures and personal stories it is one to add to the list of places to go.
I found this rare original footage of the 44BG taken at Station 115 on ‘You Tube’. This features a number of B-24s preparing for, and returning from, the November 18th Mission to Kjeller Airfield, Oslo (not the 19th as implied on the film). It also includes B24H #42-7535 ‘Peepsight‘ of the 506th crash landing after a mission.
The latter half of the film includes footage from 1944-45 noted by the change in the tail fin Bomb Group coding (Black stripe on white background as opposed to the black ‘A’ in a white circle). It would appear therefore to be a compilation of dates, but this aside, it is very much worth watching.
Shipdham was a relatively short-lived airfield, used by only one unit, the 44th Bomb Group, it saw many crews come and go and bore witness to some incredible actions. Whilst Shipdham lives on, the future of its buildings remain in doubt, the creeping industrial strong hold gaining in strength with each passing day. How long will it be before it sinks into obscurity and the brave actions of those who never returned are forgotten.
Lundy, W., “44th Bomb Group Roll of Honor and Casualties“, 2005, Greenharbor.com – a detailed account of the 44th’s missions, including personal accounts of each mission and details of the losses. (Twitter @44thbgROH)
Todd, C.T., “History of the 68th Bomb Squadron 44th Bomb Group – The Flying EIghtballs“. PDF document
As part of Trail 10, we revisit the first Norfolk airfield opened as a heavy bomber base for the USAAF. It is an airfield that lives on – just – and was the home to only one major bomb group. This group led the way for the B-24, they took heavy loses and bore the brunt of B-17 jokes. Their loses were so high that unofficially, they became the ‘Jinx Squadron’.
In this Trail, we go to RAF Shipdham otherwise known as Station 115.
RAF Shipdham (Station 115)
On leaving Watton, we travel north-east across the countryside to the small village of Shipdham, some 3.5 miles south of East Dereham. If you miss the turn, you will pass along the main road and a row of memorial trees dedicated to the parishioners of Shipdham who died in both World Wars. A list of those concerned is on a large board placed adjacent to the road. Turn back, return towards the village and take the left turn toward the airfield site. Opened in 1942, it was the first airfield to receive the Mighty 8th, who named it Station 115.
One of Shipdham’s remaining Hangars.
Shipdham was built during the period 1941-42 and opened as the first US heavy bomber airfield in Norfolk. It was built as a Class A airfield having three concrete runways, one of 2,000 yards, and two of 1,400 yards, each 50 yards wide. A standard perimeter track linked all three runways, the main one of which ran east-west.
The technical and administrative area was located in the south-eastern corner, the bombs store to the south-west, and the accommodation areas dispersed off to the south, unusually, between the two aforementioned sites. There were initially 50 concrete hardstands, but this increased later on to 55 as the airfield was updated. The majority of these hardstands (37) were the single pan style, whilst the remainder were the dual spectacle style.
Accommodation was built for around 3,000 personnel using a range of temporary buildings over nine different sites, with a further two sites, both sewage works, and a wireless transmitter site, also being located here . Shipdham unusually had three communal sites, two male and a WAAF, and many buildings were temporary in nature: Laing, Nissen, Thorn and some Hall huts. A further number of buildings were brick with both temporary and permanent designs in use.
The Watch Office (built to drawing 8936/40) was part timber and part concrete, a deviation from drawing 2423/40, and still stood, albeit in a very poor condition, at the time of visiting.
The first group to arrive here were the 319th BG, a group made up of twin-engined B-26 ‘Marauders’, who flew across the northern route of the Atlantic during September 1942. Their trip across was hazardous, many aircraft suffering as a result of the cold and closing winter months. Sent to Shipdham to begin training operations, they only remained here for around one month, being moved to RAF Horsham St. Faith in October, and with it vacating Shipdham for good. In their place came the main resident unit, the 44th BG known as the ‘Flying Eight Balls‘ bringing with them the mighty B-24 Liberators.
Shipdham’s Watch Office sites amongst the cranes and industrial buildings. (Just below the two cranes)
Activated on January 15th 1941, they were the USAAF’s first Liberator unit, becoming an operational training unit in February 1942, carrying out anti-submarine duties before making preparations for the European theatre. They moved from MacDill Field in Florida to Barkdale Field, Louisiana, and then onto Will Rogers Field in Oklahoma before setting off for England in October 1942. The three squadrons of the 44th, the 66th, 67th and 68th BS, were finally provided with aircraft and a full complement of aircrew at Will Rogers; however, this did not include the fourth and final squadron, the 404th BS, who were diverted to Alaska to protect the west coast against potential Japanese attacks. Being only three squadrons, the 44th BG would operate below full strength for almost six months until the replacement squadron, the 506th BS, would arrive. This weakened force would play its part in the 44th’s short and tragic history.
On September 4th, the ground echelons sailed on the Queen Mary, arriving in Scotland on the 11th. The first aircraft did not leave the US until later that same month, after which all personnel were gathered at their temporary base at Cheddington before moving off to Shipdham in October.
Once in England, the Liberators of the 44th were modified, flown to Langford Lodge, they were given scanning windows in the nose, the fitting of British IFF equipment, and improvement to the guns. The B-24s had been supplied with limiting ‘cans’ of ammunition rather than the much longer belt fed ammunition. Another adaptation at this point was the fitting of two .50 calibre machine guns in the nose, similar in style to those of the B-17.
On November 7th 1942, the ‘Flying Eight Balls‘ were put on limited combat status, with a small number of eight aircraft being sent on their first operational sortie. A diversionary flight, it was followed by four more sorties, of which only one involved any bombing at all. The 44th were not having a successful time though, the equipment they had been provided with was not protecting the crews from the extremely low temperatures found at high altitudes, several crewmen suffering from frostbite as a result.
By early December the last of the modified B-24s arrived back at Shipdham and the Group was back up to its three squadron strength. On the 6th December 1942, the group flew its first mission, a nineteen strong formation was sent to bomb the airfield at Abbeville-Drucat in France.
This mission would not go well. A diversionary attack, it would see the two squadrons the 66th and 67th called back, the abort signal did not however reach the 68th who unaware of the changes, carried on to the target. Being only six aircraft, they were woefully under protected, and after releasing their bombs over the target, were attacked by around thirty FW-190s. What resulted was devastating for the 68th, one aircraft was lost, Liberator #41-23786 piloted by 1st Lt. James Du Bard Jr. (s/n: 0-410225), along with its entire crew. Witness accounts from other crews say that as the aircraft went down, its guns continued to fire, the gunners of #786 staying at their respective stations even though their fate was sealed. As the pilot struggled to regain control and get the aircraft home, they managed to bring down two enemy aircraft before crashing into the sea themselves. For their actions and bravery, the entire crew were awarded the Silver Star.
In the attack on Abbeville-Drucat , every B-24 was hit by enemy cannon fire. Following a head on attack by fourteen FW-190s in waves of three or four, an exploding 20mm shell in the cockpit of ‘Victory Ship‘ #41-23813, badly injured both the pilot and co-pilot; but undeterred, 1st Lt. Walter Holmes Jr (s/n: 0-437615), managed to get home and land the aircraft even though he and his copilot, 2nd Lt. Robert Ager, were badly injured. For his brave action and determination to get home, he was awarded the first DFC for the group. Holmes would also go onto receive a DSC in the mission to Ploesti in August going on to complete his tour of duty later that same month.
A medical truck and ground personnel standby as B-24 Liberator #41-23813 “Victory Ship” returns from a mission. (IWM FRE 640)
A second attack to the same target was aborted, but during this mission one crewman suffered frostbite and had to have his arm amputated at the elbow. Then followed the third mission, and it proved just as disastrous for the 44th. A flight of 101 aircraft, a mix of B-17s and B-24s were sent to Romilly-sur-Seine, and of the 101 aircraft sent, only seventy-two made it to the target, the remainder being lost or aborting. From the 44th, only twelve of the twenty-one sent out made it through, and of these, one suffered a head on attack by a FW -190. The pilot Cap. Algene E. Key took evasive action but cannon shells ripped through the aircraft killing gunner S/Sgt. Hilmer Lund and seriously wounding two others. Key manged to fly the aircraft to the target and then home, even though it was badly damaged and difficult to fly. For his actions he was awarded the DSC.
The start of the war was not a good one for the 44th, many of those who came over were now in a state of shock, the extremely cold temperatures and determined fighters of the Luftwaffe both taking a toll on the crews. The early days of the 44th were difficult and the crews faced a very steep learning curve.
When the 44th’s sister group the 93rd BG departed for North Africa, the 44th’s three squadrons consisting of only nine aircraft each, accounted for the entire Liberator force in the European Theatre. Performance figures for the B-24s made it difficult to fly in tight formations, the faster speed of the B-24 also meant it ended up at the rear of the large formations and slightly higher. It was a difficult aircraft to fly and crews were finding it hard to maintain flight with the slower and lighter B-17s.
To counteract these problems they were given restricted fuel levels, a restriction that proved to be fatal on the January 3rd 1943 mission to St. Nazaire. With further aircraft aborting, only 8 aircraft reached the target and able to drop their bombs. On the way back, the leading B-17s took an incorrect heading, and the flight flew up the Irish Sea as opposed to crossing over southern England. Now desperately short of fuel they split up, searching for a safe haven. Some aircraft unable to locate an airfield, ran out of fuel, and had to land in fields with the expected results. Three crewmen were killed that day and seventeen were wounded, some dying later from injuries sustained in the crashes.
1943 had started as badly as 1942 had ended. Spirits were now low and over the next few weeks several aborted missions added to the misery of the 44th. With further losses in the few missions they flew, rumours spread of a ‘hard luck’ squadron, and questions were raised as to the suitability of the B-24 as a bomber. Things got so bad that the 67th was reduced to just three aircraft, with no sign of replacements of men or machine being delivered anytime soon.
Relaxation time at the 67th BS accommodation site (IWM FRE 670)
Then came some good news, the fourth squadron the 506th, arrived in March 1943 raising the 44th to its full complement of four squadrons for the first time since leaving the United States. Manning these aircraft was going to be another challenge though, many of the gunners were ground crews retrained as aircrew, some were drafted in from other squadrons, often being crewmen who had ‘failed’ in their previous roles. The future didn’t look any better even with the full complement of staff.
The Eighth now looked toward night flying as a possibility, the 93rd, having returned from Africa, stopped flying in order to train in their new role, leaving the 44th to ‘carry the can’ once more. Reduced to diversionary raids, the 44th were sent to Kiel on May 14th 1943, carrying a large number of incendiaries. Flying behind the higher B-17s, they were easy pickings for the FW-190s who picked off five of the twenty-one sent out before they reached the target. However, the determination of the crews saw some aircraft both get through and bomb successfully, a determination that won the group their first Distinguished Unit Citation (DUC).
With another aircraft lost on the return leg, the 44th had taken yet another beating, apart from odd crewmen who had been on leave or indisposed, the entire 67th had now been wiped out, one-quarter of the 44th was gone. Those that were left became bitter, some refused to fly, some had breakdowns but many others became stronger and more determined to see this through. The strength of those left was fuelled by both the bitter feeling toward the B-17 crews who continually mocked them, referring to them as ‘the jinx unit’, and those in command who it was felt used them for Luftwaffe bait.
There then followed a short period of good luck. A raid on the Submarine repair depot at Bordeaux on May 17th 1943 saw the loss of only one aircraft. ‘Avenger II‘ #42-40130 suffered engine problems, and being too far from England to make it back, the pilot 1st Lt. Ray Hilliard and the crew, decided to try their luck in neutral Spain. Turning south, they landed at the airfield at Alhama de Aragon where they were interned spending the next three months at the pleasure of the Spanish, before being returned to England.
There next followed an operational intermission, the B-24s swapping ‘ops’ for low flying practice over the English countryside until, on June 26th, when they departed Shipdham for the warmer climates of North Africa. Here they would carry out bombing missions over Italy and southern Europe including the famous Ploesti Oil refinery raid in August, for which they took another hammering and earned a second DUC in August 1943.
In late August, the 44th began returning to Shipdham, with some detachments remaining in North Africa, this meant that the 44th was split between both England and North Africa, performing missions from both locations. A disastrous few months however, had taken further tolls on the crews, but camaraderie remained high and resilience strong.
The winter of 1943/44 was one of the worst for the cold, ice and snow. England like most of Europe was snowed in and temperatures dropped dramatically. For the 44th, the new year would not bring any let up, and it started on yet another terrible note!
In part 1 of this Trail (Trail 14) we saw how Bungay had grown from a satellite airfield into a fully fledged bomber airfield housing the 446th BG known as “The Bungay Buckaroos”.
The night of April 22nd 1944 saw the USAAF’s Mission 311, when over 800 bombers, a mix of B-17s and B-24s, were ordered to attack the marshalling yards at Hamm in three waves, each with its own designated target. The bombers were to take off from their respective bases between 17:50 and 18:21, but even before the stream arrived over the target, Bungay would bear witness to what was about to happen that night.
For the crew of #42-50306 “Dragon Lady“, it would begin at home. On take off the B24 skidded and crashed killing not only the ten airmen on-board, but two ground staff as well. Then, shortly before arriving over the Dutch coast, a B-17 #42-19818 of the 401st BG at Deenethorpe, suffered a fire inside the fuselage. As the fire took a grip of the aircraft, the pilot Lt. Roland Schellenberg put the B-17 into a steep dive during which three crew members either fell or jumped from the aircraft. Eventually, the fires were extinguished and the aircraft returned to the UK making an emergency landing here at Bungay, with nor further loss. The aircraft was salvaged at the Salvage depot at Watton, but the three crewmen who left the aircraft, were never found even after an intense RAF Air Sea Rescue Search of the area.
B-24H #42-50306 crashed on take off at Bungay on April 27th 1944 with killing twelve men. (IWM FRE 6607)
As the bomber stream made its way to Hamm, unpredicted winds played havoc with many aircraft, some passing beneath the higher groups as they approached the bomb release point, putting themselves in grave danger of being hit from falling bombs. Others following these leading groups also began arriving too early over the target, and were unable to distinguish landmarks due to the heavy smoke from the previous wave’s bombing.
Whilst conditions were very difficult, most aircraft did manage to bomb either their given target or alternative targets of opportunity, and considering this, results were generally good for the three Divisions. However, the troubles for the crews didn’t really start until they left the target and began their flight home.
Being a late operation, returning bombers were not locating their bases until well after dark, a situation the Luftwaffe exploited to their full advantage. A small force of Me-410 night fighters mingled with the returning bombers, and so ground radar were then unable to pick them up. Once the ground staff realised what was happening airfield lights were extinguished and crews ordered to other bases. Unseen, the German fighters gradually picked off the bombers as they tried in vain to land at darkened airstrips. One such pilot, 2nd. Lt. Frank Baker, luckily managed to avoid not only the fighters but another B-24 as he struggled to bring his aircraft (#42-95294) down at an alternative base. For his action that night, Baker received an Oak Leaf Cluster to add to his DFC. The entire night cost the USAAF nearly 60 men, some of these being to friendly fire in the confusion that reigned in the skies that night. Twenty Liberators had been damaged by the marauding Luftwaffe fighters, many crashing with fatal results.
The night of June 5th 1944, brought good news and a surprise for the men of the 446th. A crew briefing was called at 23.30 in which they were told they would lead the Eighth Air Force’s part in the invasion the next day. A massive operation, it would require pin-point accuracy and split-second timing to achieve its aim. Bombers were to take off in darkness and rendezvous at given heights with the 2nd Division forming up in an area between the Mersey and Humber estuaries. Take off was just before 02:00 with the 446th’s ‘Red Ass‘ piloted by Captain Charles Ryan, along with Sgt William Barlow, (G); Sgt Stuart Merwin, (R/O); Sgt Bruno Corridino, (G); Sgt Jesse Davis, (G); Sgt Joseph Parkin, (G); Sgt Howard Weaver, (Flt. Eng/G); 1st. Lt Robert McConnel, (C/P); 1st. Lt. Banks Jacobs, (B/A); and 1st. Lt. Michael Paczan, (N) taking the lead. Also on board that day was Col. Jacob Brogger the station Commander.
At 05:55 the formation was over Vierville dropping one hundred 500lb bombs. A days long event that saw continued and repeated attacks behind the invasion line. With no Luftwaffe intervention, the event was more of a side-show for the gunners of the heavy bombers, and very few casualties were incurred by the crews. This did not mean however, that casualties were absent throughout the invasion period. On June 7th, #42-51116 crashed on takeoff on a mission to Alencon in France. In the accident eight members of the ten crew were killed.
It was also the 446th that would suffer from the little impact that the Luftwaffe had. On the next day 8th and then again on 12th near Jersey and Rennes respectively, they were attacked by a small group of Bf109s, on each day one 446th aircraft was lost.
On the 8th, the first of these two days, #42-109830 went down in the English Channel with the loss of five crewmen. The remaining five were rescued by French fishermen only to be picked up later the German forces.*2 On the second day, B-24 #42-94859 also went down with another five aircrew killed. Of those who survived, one was caught and taken prisoner, whilst the remaining four managed to evade capture.*3
As the allies pushed on thorough France, Holland and into Germany, the 446th supported them. They targeted bridges, gun batteries and enemy troop positions during the St. Lo breakout in July. They dropped supplies to the paratroops around Nijmegen in September and attacked marshalling yards, bridges and road junctions in the Ardennes, preventing German reinforcements from pushing through in December 1944 – January 1945. This support continued right up to the wars end, dropping supplies to advancing troops over the Rhine and on through Germany itself.
Through all these missions, the ‘Bungay Buckaroos‘ managed some remarkable achievements. Liberator #42-52612 of the 706th BS, “Home Breaker” flew 102 missions before returning to the US, and both the 706 BS and the 707 BS surpassed 60 consecutive mission each (62 and 68 respectively) without loss.
Admin and bomb site Site – now a decaying.
The end of the war however brought a final twist for the 446th. On April 11th, when on the return flight from Regensburg, two B-24s #42-50790 and #42-51909, both of the 706th BS, collided over the base killing all twenty-two airmen on-board. But as if that were not enough, there was another evil twist of the knife just two weeks later, on the 26th, when two days after their final mission, a transition flight crashed killing a further six crewmen. It was a tragic and sad end to the Group’s war.
In all, the 446th had carried out 273 missions in total, dropping just short of 17,000 tonnes of bombs for the loss of 68 aircraft in combat and 28 through accidents and other incidents. Yet with all these remarkable achievements, the Group were never awarded any recognition in the form of a Citation or Group award.
With the war at an end, the 446th would depart Bungay for home. The aircraft departing mid June via the southern routes and the ground parties departing on the Queen Mary from Greenock in early July.
Bungay airfield, then surplus to US requirements, was transferred over to the Fleet Air Arm and renamed HMS Europa II on September 25th 1945. Bungay formed one of a small cluster of former USAAF airfields handed over to the Fleet Air Arm in preparation for the war in the Pacific. Acting as a satellite for HMS Sparrowhawk (formally RAF Halesworth another US airbase), it fell under the command of Lt. Csr. R.J. Hanson D.S.O., D.S.C. but due to the end of the war against Japan, it only operated until May 1946 when it was handed back to the RAF and placed under the control of 53 Maintenance Unit. A further change in management saw it pass to 94 Maintenance Unit in November 1947 who stored surplus munitions along its runways and inside its buildings. A range of ordinance, from 250lb bombs to 4,00lb bombs, cables, flares, mines and German munitions were all stored here before disposal.
In the early 1950s the site was gradually run down, no longer needed by the RAF and finally closed in 1955. It was eventually sold off in 1961 and was returned to agriculture. As it closed, the last main gate board to adorn the site was rescued and now rests in the Norfolk and Suffolk Aviation Museum a short distance away.
The last main gate sign from Bungay.
After that some private flying did take place at the airfield, the Martlesham Heath Parachute Club using it with a variety of aircraft types, but this was short-lived. Gradually the site was taken over by agricultural uses, the runways and perimeters tracks being all but removed, the buildings allowed to deteriorate with many being removed over time. Time had gone full circle, and Bungay airfield is no more. In memory of those who were stationed here a memorial stone in the shape of a B24 tail fin marks the site of the former airfield. Just one of several memorials in the local area.
Tucked away down a country lane, Bungay is best found from the B1062. Stopping on the small country lane, Abbey Road, you can see along what is left of these parts. Now predominately agriculture, fields stretch where the Liberators once stood, trees adorn the admin areas and hard standings support tractors and other modern farm machinery. Much of what remains is rooted on private land, and many of these buildings contain murals created by those who were stationed here in the latter part of the war. Dilapidated huts, they are gradually falling into ruin, overgrown with bushes and trees.
A well presented memorial and garden marks the site, and the Airfield entrance is now a farm along with its associated dwellings. A small plaque signifies a crash site at Barsham some 3 miles east and a superb museum at nearby Bungay houses a range of artefacts associated with the 446th and other Eights Air Force groups. The nearby church holds a roll of honour and its own memorial to the group. A former rest room for the crews is now the local Community Centre and it too holds a plaque in memory of the 446th.
A peaceful memorial garden to the 446th marks the site of Station 125.
Sources and further reading.
*1 MACR 1735
*2 MACR 5482
*3 MACR 5802
Freeman, R.A., “The Mighty Eighth“, 1986, Arms and Armour Press.
A website dedicated to the 446th has further details of the crews and aircraft.
In Trail 14 we visit an airfield that was built in the mid part of the war and one that took some time to establish itself as a front line bomber station. However, it is one that would have its own share of problems, heroic acts, records and sacrifice. In the second part of this trip, we visit the former airfield RAF Bungay.
RAF Bungay (Flixton) (USAAF Station 125)
Bungay airfield lies in Suffolk, above an area known as the Waveney Valley, about two miles from the village from which it takes its name and fifteen miles from Norfolk’s county town of Norwich. It served under a variety of names: HMS Europa II, RAF Flixton, RNAS Bungay and USAAF Station 125. However, throughout its short life, it remained primarily under the control of the United States Army Air Force as a heavy bomber station designated Station 125.
Construction began in 1942, by Kirk & Kirk Ltd, but the work would not be completed for at least another two years until the spring of 1944. Even though the site was unfinished, the first units to be stationed here, would be so in the autumn of that same year, 1942. Initially designated as a satellite for the heavy bombers of RAF Hardwick, it would be some time before Bungay would establish itself as a fully operational front line airfield.
With the invasion of North Africa dominating the European theatre, a build up of military might would see many of Britain’s airfields taken over and utilised for both men and machinery. A part of this build up was the arrival of the twin-engined units the: 47th, 310th, 319th and 320th BGs operating the North American B-25 Mitchell. The 310th BG initially arrived at RAF Hardwick, over September and into October, where they would continue their flying training before departing for North Africa. The 310th consisted of the usual four Bomb Squadrons: 379th, 380th, 381st and 428th BS, and it was whilst training at Hardwick that one of these squadrons, the 428th, would move across to Bungay. Their arrival here was no more than as a dispersed site, allowing for free movement of aircraft in the busy skies over this part of East Anglia. At the end of their short stay, they would rejoin the main Group and depart for the warmer climates of North Africa.
The next group to arrive was something considerably bigger but also posted from nearby RAF Hardwick, the 329th BS of the 93rd BG with their B24 Liberators. Known affectionately as ‘Ted’s Travelling Circus‘ (after the CO, Colonel Ted Timberlake), the 93rd BG earned their unique name as a result of their constant moving around, continuously being spread across, what must have seemed, the entire European and Mediterranean theatres of war. Often split between the two, rarely were the Group ever together for any length of time.
During this period UK-based units of the 93rd at Hardwick began transferring to the 2nd Bombardment Wing, where they began training for ‘special duties’. Gaps in the 329th BS were filled with crews from the other 3 squadrons of the Group (328th, 330th, 409th) and were moved here to Bungay. Once here, the aircraft were fitted with the British ‘Gee‘ system and crews trained in its use. A remarkably accurate system of radio navigation, it was devised initially by Robert Dippy as a short-range aid for blind landings, but its success encouraged its development for a much greater use by the Telecommunications Research Establishment (TRE) at Swanage.
The remains of Bungay’s NE-SW runway looking north-east.
Bungay was Initially planned to equip the 44th BG, but the 329th were chosen over them and within a very short time the crews were ready, and ‘Moling’ mission could now begin. Designed as a ‘blind bombing’ utility, and because of fears of the system falling into enemy hands, heavy cloud cover was needed for operations to go ahead. Such conditions occurred early in 1943, on January 2nd, when four B-24s of the 329th set off from Bungay for the Ruhr. Unfortunately, as they neared the target, the cloud cover broke and the flight was exposed. This exposure prevented Gee from being used as it was intended, and the aircraft returned both without bombing and without using their Gee successfully. The weather again proved to be the Achilles heel in the planning on both the 11th and 13th January, when similar conditions were experienced and again all aircraft returned without bombing. These erratic weather conditions carried on well into March, the last attempt being made on the 28th, after which it was decided to abandon the idea, and ‘Moling’ operations were cancelled.
It was not a complete disaster for the 329th though, the experience of flying over occupied territory and using blind bombing equipment, meant they were able to transfer to a new Pathfinder role, now skilled in equipment not known about in other units of the USAAF.
At the end of these trials, and in the absence of her sister squadrons, the 329th joined up with the 44th BG in a move that led to their imminent departure from Bungay.
Following their departure, the work on Bungay’s construction continued. Built to Class A specifications, it would have three concrete, tarmac and wood chip runways intersecting to form the ‘A’ frame. Thirty-six frying pan and fourteen spectacle hardstands provided dispersed aircraft accommodation and two T2 hangars provided covered space for maintenance and repairs. The main technical area lay to the west of the airfield, the bomb store to the east and the main administration site (site 2) across the road to the west. As a dispersed site, many of its accommodation areas would be hidden amongst the trees beyond here. Linked by a maze of footpaths and small roadways, there were two communal sites (sites 3 and 4), seven officer and other ranks sites, a WAAF site, a sewage works and a sick quarters. In all it could accommodate around 3,000 men and women of mixed rank. Updating of the watch office included the addition of a Uni Seco control room (5966/43) by anchoring it to the roof of the already built observation room. By late autumn 1943, it was completed and the site was handed over to the 446th BG (H), Bungay’s most prominent resident, who would become known as “The Bungay Buckaroos”.
Their arrival here commenced on 4th November 1943, with four squadrons of B-24s – the 704th, 705th, 706th and 707th – all of which formed the larger 20th Combat Wing of the Second Bombardment Division, Eighth Air Force. The remainder of this wing included those of Hardwick’s 93rd BG and Seething’s 448th BG.
The 446th’s journey took the ground echelons from Arizona, to Colorado and onto Bungay via the Queen Mary, and the air echelons the southern air route via Brazil and Marrakesh. Under the command of Colonel Jacob J. Brogger, they would begin operations on the 16th December 1943. Throughout their term here the 446th would attack prestige targets including: U-boat installations, Bremen’s port, the chemical plants at Ludwigshafen, Berlin’s ball-bearing plants, the aero-engine works in Munich and the marshalling yards at Coblenz. In addition to these, the 446th would support the Normandy invasion, the break out at St.Lo, and drop supplies to the ground forces at both Nijmegen and in the snowy conditions of the Ardennes.
This remarkable list of strategic targets would begin with Bremen. The mission would see twenty-three heavy bomber groups along with a Pathfinder group drop over four thousand 500lb general purpose bombs and over ten thousand 100lb incendiary bombs. During the raid four B-17s would collide in mid-air and as for the 446th, they would not escape without loss. Two of their aircraft would crash, one of which, a Ford built B-24H-1-FO Liberator #42-7539, “Ye Old Thunder Mug“, would run out of fuel and crash near to its home airfield at Bungay.
The 446th would unusually send just one aircraft to Bremen four days later. This aircraft, a 704th BS Liberator, #42-7494 “Bumps Away” was hit by flak over Texel, one of the Dutch Wadden Islands. The strike sheered the tail turret sending the aircraft momentarily out of control. After the pilot (Second Lieutenant Thomas B. Long) stabilised the aircraft, it went on to complete its mission only to collide with another B-24 of the 392nd BG on its return journey. The collision sent the Liberator crashing into the North Sea killing all those on board*1.
Then on the 22nd, the 446th were sent back to Germany, this time Osnabruk. On this mission, B-24 #42-7611, another 704th BS Liberator thought to be ‘Silver Dollar‘, was hit by falling bombs from above. The aircraft fell from the sky killing eight of the crew with another two surviving, both being taken prisoner by the Germans. On board this aircraft was right waist Gunner Sergeant Walter B. Scurlock who had survived the crash landing in “Ye Old Thunder Mug” earlier that month on the 16th. It had been a difficult start for both Sgt. Scurlock and the 446th.
A B-24 of the 446th BG lands at a cold and frosty Bungay 24/12/44 (IWM FRE 6571)
January 1944 then took the men of the 446th to Kiel, but the cold and icy winter would be as much of an enemy to the group as the occupying German forces were a short distance across the sea. With several missions being curtailed during the month, those that did take place were prone to their own problems. On the 7th, the Bomb Group was unable to rendezvous with the 392nd and returned without bombing; on the 11th, the mission to Brunswick was recalled, again due to the bad weather. Following a Noball mission to St. Pierre-des-Jonquies on the 14th, the group were grounded for a week after yet more bad weather closed in. The continuing poor conditions prevented further immediate attacks, but the 28th would see the weather ease and the start of four days of consecutive flights to Frankfurt, Brunswick and two further Noball targets.
February, March and April were much more conducive to flying activities but the weather still played its part in cancelled or aborted operations. As the lead up to D-Day began, breaks in the weather allowed for strategic targets to be hit, airfields and marshalling yards, along with yet more Noball targets.
April 22nd 1944 saw the USAAF’s Mission 311, a mission that would become notorious in the history of the Eighth Air Force. On this day, the Eighth would lose more aircraft to enemy infiltrators than at any other time in its wartime history. The mission was to attack the marshalling yards at Hamm, which was considered a highly important strategic communications target, especially in the lead up to the allied invasion of Normandy. Hamm was especially chosen as it was said to be capable of dealing with up to 10,000 railways wagons a day, making it the busiest marshalling yard in Germany, and a prime target for the heavy bombers of the Allied forces.
On that particular day, over 800 bombers, a mix of B-17s and B-24s, were ordered to attack in three waves, each with its own designated target. The bombers were to take off from their respective bases between 17:50 and 18:21, but even before the stream arrived over the target, Bungay would bear witness to what was about to happen that night.
In part two we shall see what happened on the night of April 22nd and how Bungay developed during the closing stages of the war and beyond.
In Part 1, we saw how, at the end of 1943, the 93rd BG stationed at Hardwick had been ridiculed by B-17 crews, they had been spread far and wide and had won a hard fought DUC for their action over the Polesti oil fields. As 1943 turned to 1944, was their luck about to change?
1944 brought more similar events. January saw ‘No Ball‘ missions, attacks on the V-weapon sites across northern France. A turn that pleased some of the tired crews of the USAAF but one that was considered unnecessary and unlikely to turn the tide of the war by many others. January also saw the build up to February’s ‘Big Week’ campaign, a series of RAF and USAAF operations to destroy Germany’s aircraft manufacturing plants.
A dramatic picture taken shortly after a B-24 of the 93rd BG crashes on take-off at Hardwick on March 3rd 1944. Surprisingly the crew were all able to escape before the bombs exploded. (IWM FRE 3779)
In the following month, April 1944, the US Air Force was to suffer its greatest loss ever to intruders, Luftwaffe night fighters who followed the heavy bombers home, picking them off one at a time until they reached their bases in England. The bombers, many badly damaged or low on fuel, were easy pickings as they tried to land in the early evening darkness. Illuminated by navigation lights, the bombers could do little to protect themselves as the Luftwaffe pilots waited until the most opportune moment to unleash their cannon and machine gun bullets into the bombers. The mission to Hamm in Germany would mean the bombers were arriving back later, and once it was realised that the Luftwaffe were there, runway lights were extinguished, navigation light were put out and aircraft almost left to their own devices – the risk of collision increasing ten fold as a result of these actions. Two aircraft at Hardwick were attacked that night, both sustaining minor damage but thankfully suffering little in the way of long-term harm. Whilst a number of airfields across East Anglia did suffer badly that night, Hardwick on the face of it, got off lightly, with minimal damage being inflicted by these intruders.
June saw the Allied invasion of occupied Europe. The 2nd BD sending almost 550 B24s to the Normandy area with the 93rd bombing strategic military targets such as gun emplacements and bridges around Cherbourg. They would then go on to support the breakthrough at St. Lo and drop supplies to troops as they advanced across occupied Europe.
High numbers of operations during the summer of 1944 led to many crews achieving their 200 mission mark, each one showing the strain of continuous operations over occupied France.
During the failed operations in Market Garden, the 93rd supported the airborne troops dropping supplies on the 18th September. Then over the winter of 1944-45, they would support the troops in the Ardennes, a role they continued as the allied forces pushed across the Rhine and on into Germany itself.
By April 1945, the end was in sight and the 93rd were officially withdrawn from operations, performing their last mission on 25th April 1945.
Their stay post war would not be prolonged. They departed Hardwick over May and into June 1945, at which point the airfield was handed back to the Royal Air Force. The RAF retained the site until the early 1960s when it was eventually sold off, quickly returning to agriculture, a state in which it remains in today.
By the time they left, the 93rd had conducted 330 missions (41 from North Africa) from Hardwick, which added to the 66 already carried out from Alconbury, meant this was to be the highest number of operations of any Eighth Air Force Group. They flew 8,169 sorties dropping over 19,000 tons of bombs across Europe. They were the oldest Bomb Group of the Eighth Air Force, having the first bombers to fly both 25 and 50 missions – ‘Boomerang‘ and ‘Hot Stuff‘ respectively. They had also performed in numerous theatres: the Atlantic (Anti submarine theatre), Egypt-Libya, Sicily, Normandy, the Rhine, and over wide areas of central Europe making them the most travelled Group of the Eighth Air Force. They were awarded two DUCs, and post war went on to serve well into the early 1950s. This achievement made them the only USAF Group that had not been inactivated since its original formation in 1942.
Their departure from Hardwick marked the end of an era, a move that left an enduring mark on the local area. The Liberators may have moved on, but the history of the 93rd lives on to this day though the displays and actions of those who preserve Hardwick’s small number of buildings for the benefit of future generations.
While the airfield was returned to agriculture, proposals were put forward to transform part of the site into a domestic waste site. These were later withdrawn though after investigations into the geology of the site revealed that such actions could lead to toxins entering the water course below ground. A potentially lethal release with serious consequences.
Original buildings now serve as poultry sheds.
Today there are few physical remains of the airfield, a few scattered buildings amongst the trees, a small section of runway and a smattering of Nissen huts that form the recently created 93rd BG Museum. With such a large site, all of which is on private land, it is difficult to investigate individual parts in any depth. However, this does not lead to an uninteresting visit.
The airfield is separated by the local road, to the west are the runways and the east the admin and accommodation areas. To the west, one section of the main runway still exists in good condition and for a very special reason; the local farmer (Hardwick Warbirds) uses this to fly his TWO restored P-51Ds and other ex-military aircraft! Seen over the airfield on special occasions, he performs small displays for ‘open days’ and other museum related activities. Looking across the westerly side, one can see a lone windsock catching the morning breeze. This windsock marks the location of the remaining runway sections part of which can be seen easily from the public road.
There are two entrances to the eastern side, both go across private land, but the landowners are happy (in my experience) to allow free passage on both. I approached from the Barondole Lane entrance and headed to the aptly named ‘Airfield Farm’. Once there, I knocked at the farm door and gave notice of my intentions to the farmer’s delightful wife. She was happy for me to wander, and even took time out to explain the layout of the remaining buildings. She took time to show me the memorial that now stands outside the farmhouse, and then pointed me toward the museum further along the farm track and suggested I take a drive down even though they were not fully open for business. A truly lovely and helpful lady!
The original Nissen huts serve as a superb Museum.
The family now own a large part of the airfield and its remaining buildings. They have utilised some of these as part of the farm many of which now house chickens. In one of them, is a small clear block with a Liberator suspended inside, marking it as an original. Behind here are further building’s remains, in particular the gas training room, condemned as unsafe it is too costly to have demolished.
Driving on, you arrive at a small collection of Nissen huts, this forms the museum. Each one is original and in very good condition. Here they hold a huge range of memorabilia, uniforms, photographs and aircraft parts. This museum is a real gem quietly hidden away in this corner of Norfolk.
One of the volunteers at the time, himself ex-USAF, (RAF Bentwaters), told me stories about the site, the history of all the parts they had gathered and then he gave an amazing personal guided tour even though they were closed. He explained how at the end of the war, as the Americans pulled out, large trenches were dug and filled with unwanted bicycles and other artefacts that they were not allowed to give away for fear of disrupting the local economy – what you wouldn’t give for a heavy-duty metal detector! He also showed me spent cartridges that were used to light the Nissen hut fires, all found in the topsoil of the adjacent field!
A lone windsock marks the runway.
After you leave the museum, going back by the same track, turn left out onto the road and then right, you come across another one of the entrances to the original airfield, considerably smaller in size it is now only a farm track. It looks so insignificant shrouded by tress and bushes that it is difficult to imagine what went on here all those years ago.
Hardwick once bustled with airmen and personnel, several thousand in all, but with so much gone there is little to show for it now. It is however, good to know that flying still does take place here, and that through the museum, the dedication, sacrifice and bravery of those young men in their B-24s shall live on for many years to come.
Hardwick was originally visited in 2014, it appears in Trail 12.
Sources and further reading.
93rd BG casualty reports.
More information about Hardwick and museum details can be found on the museum website. When visiting the museum, check opening times as they are limited, but do spend a good half-day or more here. It will be worth your while.