There were many airfields in the eastern region of England during the Second World War, and countless crews were lost flying in combat operations. Undeterred and undaunted by these losses, many continued the brave fight to release Europe from the evil grip that was slowly strangling it. Loses were high, but at one particular airfield, the loses of one Group were the highest, and of those that came here, few were to return home alive.
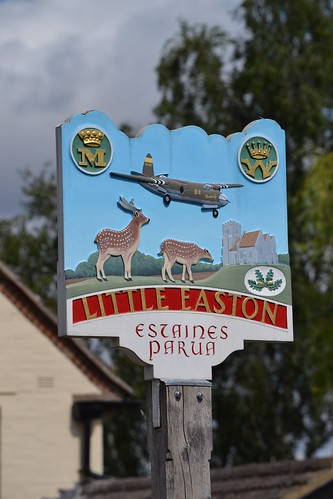
In Trail 9 we visit RAF North Pickenham, an airfield with a short life, but one with a terrible tale of loss and sacrifice.
RAF North Pickenham (Station 143)
RAF North Pickenham was built in the later part of the Second World War (1943/44) and was officially handed over to the USAAF, 492nd Bomb Group (BG), on May 22nd 1944, by an RAF Officer during a ceremonial hand-over parade. This handover would see the culmination of USAAF takeovers of British Airfields – some sixty-six in all. America’s ‘friendly invasion’, would result in eighty-two major operational units moving to the UK, all of which would occupy some seventy-seven military sites in total.
RAF North Pickenham (Station 143) was built with three concrete runways, 50 ‘spectacle’ style hardstands and a substantial bomb store to the north-west. Accommodation for the crews, was divided into a: communal site (site 3), mess site (site 4), six officers’ quarters (sites 6 to 11) and a sick quarters (site 5). Three further sites, 12-14, consisted of a small sentry post, sewage disposal site and H.F.D.F station. All the accommodation areas were to the eastern side of the airfield well away from the extended bomb store to the west.
The 492nd were a new unit, only being activated in the previous October. On arrival in the UK in April, they were assigned to the 2nd Bomb Division, 14th Combat Wing and sent to RAF North Pickenham where they entered combat on May 11th 1944. The main body of the ground echelon was formed with personnel taken from units already in the U.K. whilst the air echelons were trained states-side and then ferried across the southern Atlantic route.
This first mission, which took the 492nd to marshalling yards in north-eastern France, saw 364 B-24s of the 2nd and 3rd Bomb Divisions combine with 536 fighters over occupied Europe. Whilst relatively uneventful for the 492nd, two B-24s did run out of fuel on their return journey; the first, B-24J #44-4087 “Sweet Chariot” crashing at Bury St. Edmunds, whilst the second, came to grief at West Wittering in Sussex. Thankfully, only one crewman was lost (3 were injured), but he was to be the first of the many casualties of the 492nd’s operational war.
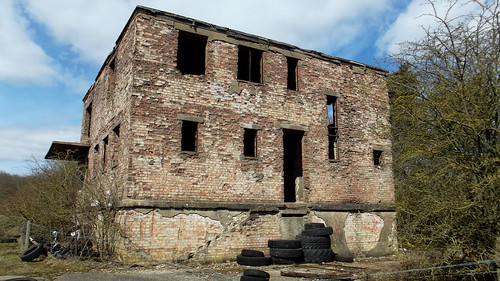
Operations Block, North Pickenham
Throughout the month of May, the 492nd operated against industrial targets in Germany, and being a new unit, their loses would be high. On May 19th 1944, a week into operations, they suffered their first major casualties, eight aircraft in total, all shot down in operations over Brunswick. Loses were not only happening in air either, only two days later, on May 21st, two B-24s collided on the ground whilst taxing -‘What’s Next Doc‘ struck ‘Irishman’s Shanty‘ – causing the former to be written off. It was not a good omen for the 492nd.
In the following month, on June 20th, a massed 2nd Bomb Division formation attacked Politz, an attack that saw the 492nd lose a further fourteen aircraft, six of which managed to limp to Sweden before finally coming down.
Things then went from bad to worse for the 492nd, but undaunted and undeterred, they would continue their quest, attacking V-weapons sites, coastal batteries, and other defences along the Normandy coast. Apart from supporting the St. Lo breakout on July 25th, they continued to attack targets in the German homeland for the remainder of what would be their brief existence.

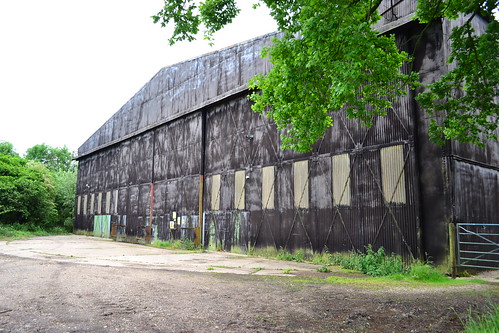
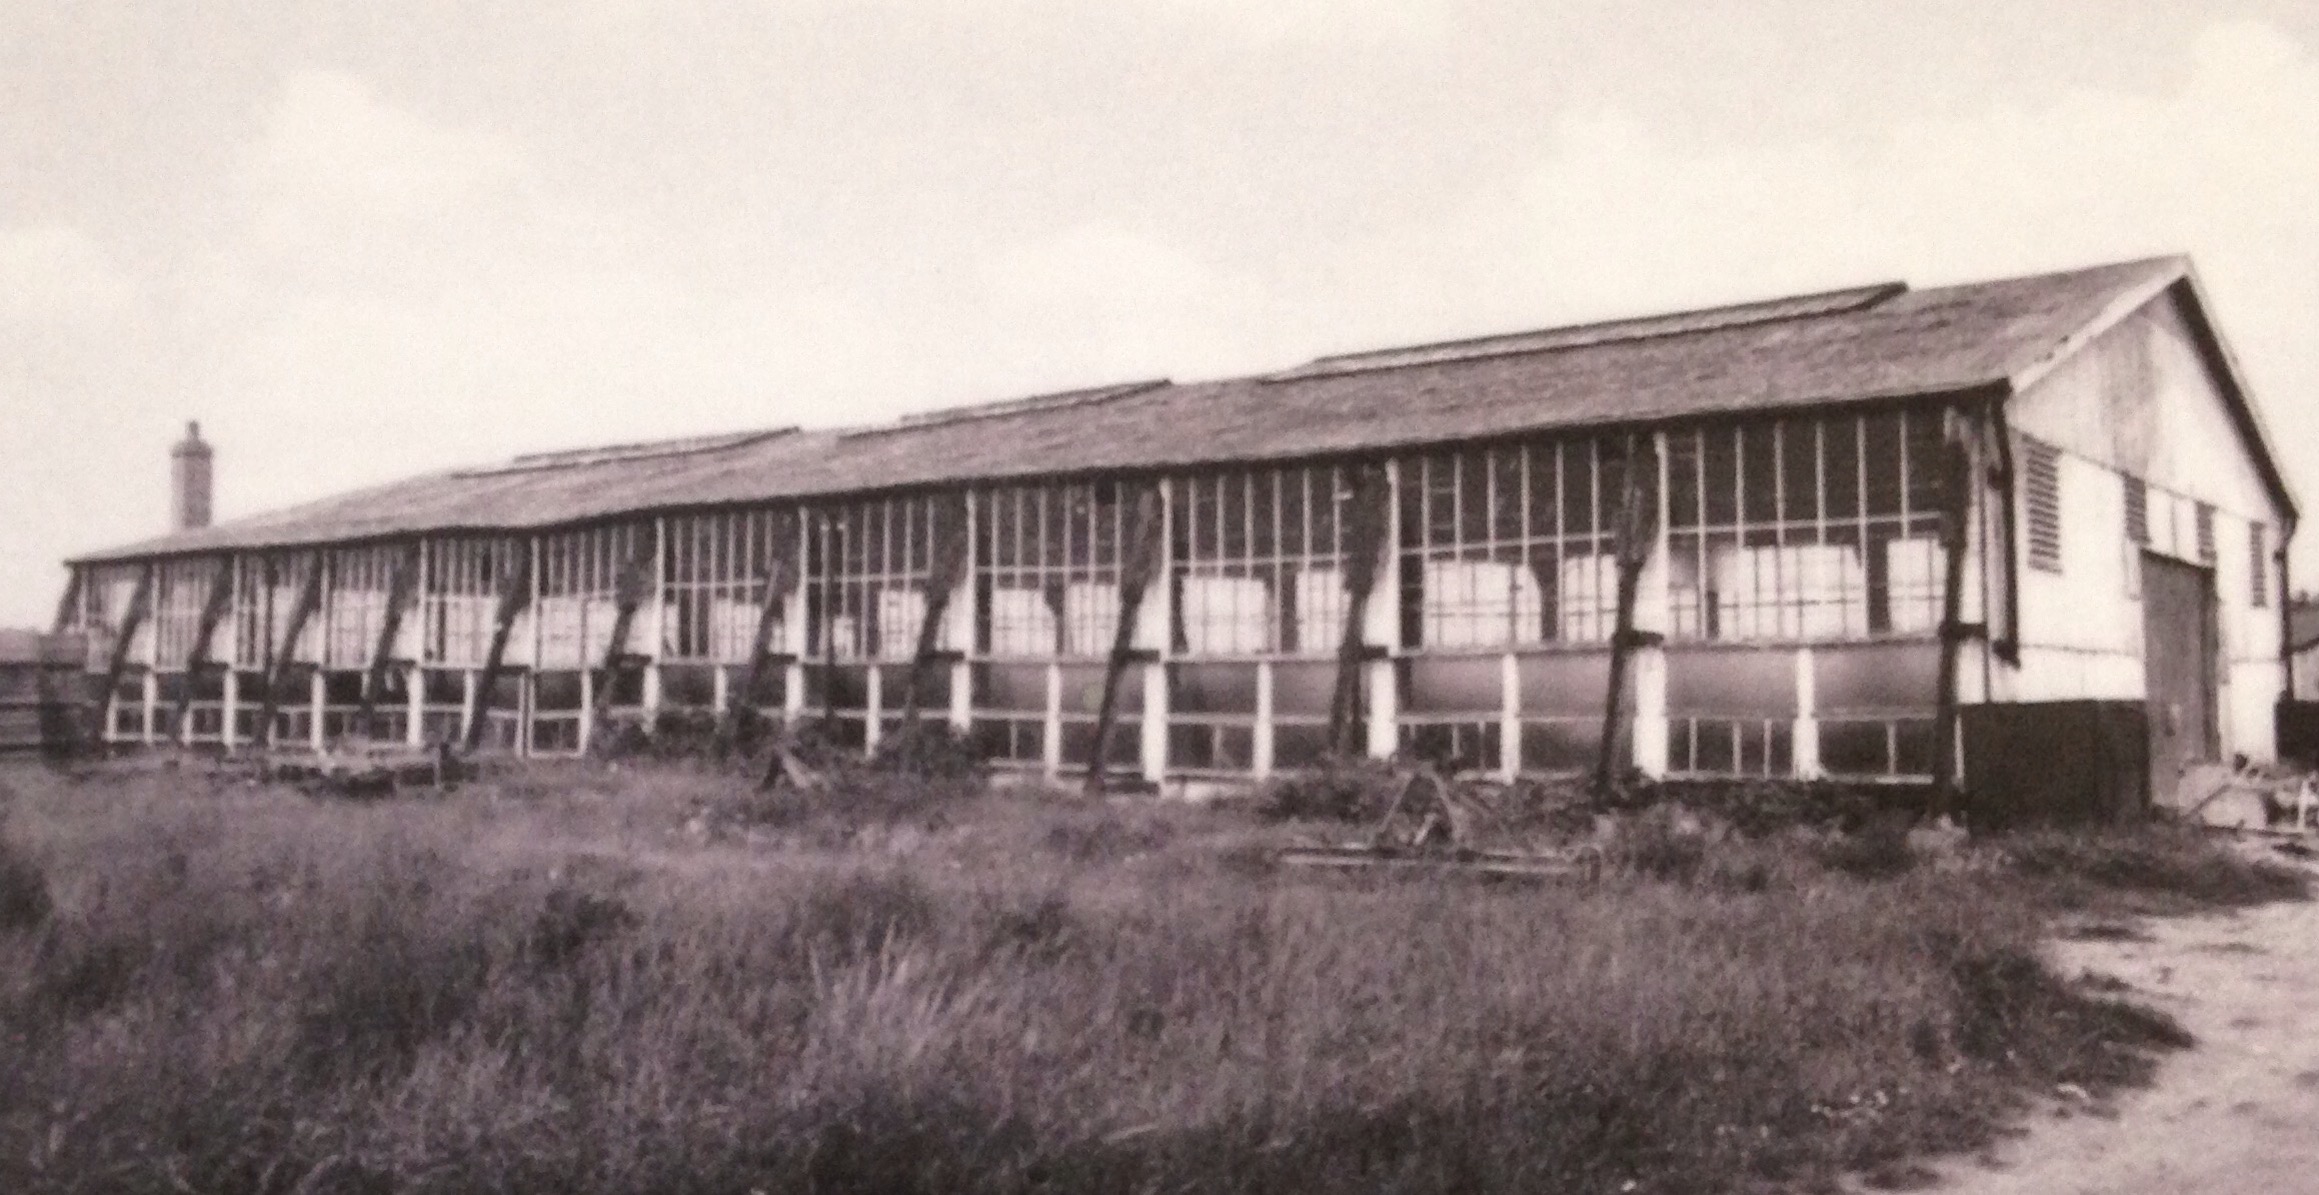
North Pickenham’s last remaining hangar before it was burnt down in 2014.*1
Consisting of the 856th, 857th, 858th and 859th Bomb Squadrons, they were not to fare well at all. In total, the 492nd would carry out sixty-six missions accumulating just over 1,600 sorties. During these operations, they would lose fifty-seven aircraft (including six non-operationally) which was the highest loss of any B-24 unit of the entire Eighth Air Force. Talk of ‘blame’ for these losses was rife; some blamed the aircraft’s all metal finish, saying it attracted fighter attention, others pinned loses on the Luftwaffe’s determination to bring down one single group, whilst another placed it solely at the inability of the crews to fly in neat well-structured formations. Whatever the reasons, it was certain that the 492nd were often ‘Tail-end Charlies‘ finding themselves in the weakest and most vulnerable positions of the formations – easy pickings for the now determined and desperate Luftwaffe pilots.
With loses continuing to climb and talk of a jinxed group spreading, an order came though on August 5th 1944 for the 492nd to withdraw from combat missions and take over ‘Carpetbagger‘ operations previously being performed by the 801st at RAF Harrington. This order would not end the 492nd’s increasing casualties though. On the following day, another two B-24s would both collide on approach to the airfield. #44-4016 ‘Sugar-n-Spice‘ and #42-50719 ‘Sans Souci‘ struck each other causing them both to crash. The accident resulted in the loss of eleven crewmen with another nine injured.
Finally, on 7th August the order was put in place and after the last mission that day, the move began. This reshuffle of numbers and crews was in reality the disbandment of the 492nd, the crews and ground staff being spread far and wide and the 492nd name being transferred to an already well established unit – the 801st.
The loss of these personnel gave North Pickenham a short respite from the rigours of war. But it would only be short. Within a few days, conflict would return as yet another B-24 unit, the 491st Bomb Group, would move in.
Originally designated to reside at North Pickenham, they were instead directed to RAF Metfield, primarily due to the immense progress that the 492nd had made in their training programme. Whilst there must have been concerns around the jinxed airfield, in terms of operational records, the 491st were to be quite the reverse of the 492nd. The 491st arrived at North Pickenham on the 15th August, and continued with their operations over occupied Europe. Like their previous counterparts, they focused on industrial targets in Germany, flying deep in to the heart of the Reich: Berlin, Hamburg, Cologne. Gelsenkirchen, Hannover and Magdeburg.
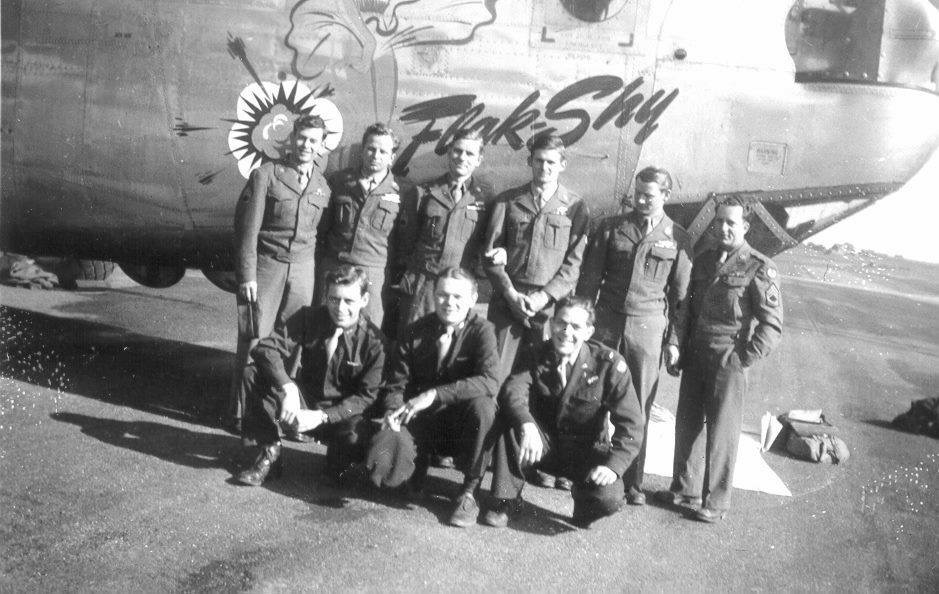
Ben Glidden front left pilot of ‘Flak Shy’ 491BG (Photo John Glidden)
It was on one of these missions, on November 26th 1944, that they were awarded a Distinguished Unit Citation (D.U.C.) for successfully bombing their target in Misburg despite very heavy loses from a prolonged and determined German counter attack. Out of the original 27 aircraft that set out from North Pickenham that day, 15 were lost to enemy action.
As 1944 turned into 1945 the appalling European weather set in. The cold snows of the 1944/45 winter were one of the worst on record, as troops in the Ardennes and ground crews of the Allied Air Forces were to find out to their discomfort.
Many bombing missions were scrubbed, often at the last-minute, but desperate attempts were regularly made to not only get supplies through, but to bomb strategic positions held by the Germans. On January 5th 1945, heavy snows fell across England and in an attempt to attack German positions, two B-24s of the 491st took off from North Pickenham with disastrous results.
The two aircraft, B-24 #44-40165 ‘Rage in Heaven‘ the unit’s assembly ship, and B-24J #42-50793, both crashed just after take off, with considerable loss of life. As a result, the decision was then made for the 491st to abandon any further attempts to get aircraft airborne, and their part in this operation was cancelled. Even though some 1,000 aircraft of the 1st, 2nd and 3rd Air Divisions would get aloft that day, January 5th would become a black day and notoriously famous for a number of such incidents across the English countryside.

The remains of B-24 #42-50793 lay in the heavy snows of North Pickenham following a crash on January 5th 1945. One of two 491st aircraft that crashed that day in snow storms. (IWM FRE 8588)
Eventually by April 1945, “The Ringmasters” as they had become known, had amassed over 5000 sorties, dropping over 12,000 tons of bombs, for the loss of only 47 aircraft on operational missions over occupied Europe. In June and July, after cessation of conflict, they began their withdrawal and a gradual return to the United States. A few days of ‘R and R’ then led to their inactivation on September 8th 1945.
After the group left North Pickenham, no other flying squadrons were based here, neither American or RAF, but a brief residency of Thor missiles operated by 220 Sqn between 22nd July 1959 and 10th July 1963, saw the site brought back to life momentarily. Finally, a last reprieve in 1965 saw testing of the Kestrel VTOL aircraft which of course became famous as the Harrier, one of the many British Jet Aircraft to see combat operations in the post war eras.
After the Kestrel trials were over, the site was closed and sold off, returning to a mix of poultry farming, and light industry. Many of the hardstands were removed, buildings left to deteriorate and the perimeter track reduced to a fraction of its former self. As time has gone on wind turbines have sprouted up across the open landscape making good use of the winds that blow across the Norfolk countryside.
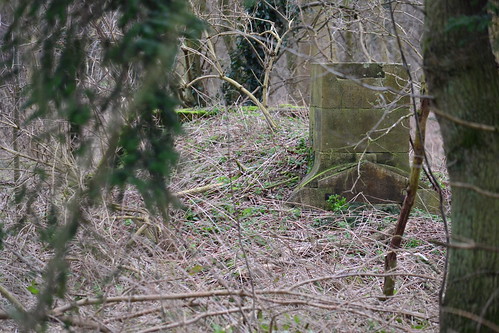
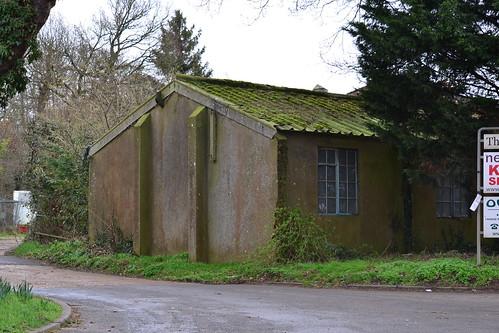
“Stanton” shelter located at South Pickenham.
Despite this decline, there are still signs of this once busy station to see. If approaching from the south, you will pass through South Pickenham first. Follow the leafy road toward the village, but keep a sharp eye open for amongst the trees are a series of “Stanton” air raid shelters of which there are five in total. Many of these are only visible by the escape hatches serving the top of the shelter. These were part of the domestic site that once served the airfield.
Some of these shelters are easily accessible being a few feet from the roadside, but as always, caution is the key word when visiting, and remember the laws of trespass! Moving further on, take a left and you pass a small collection of buildings on the right hand side.
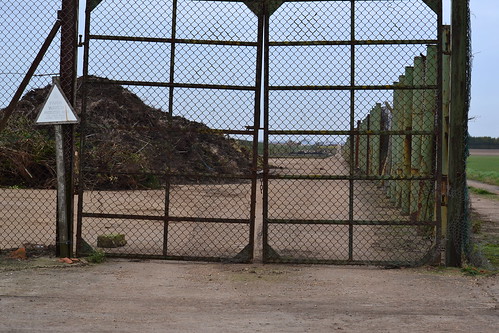
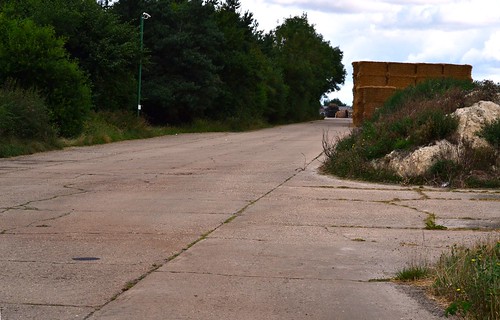
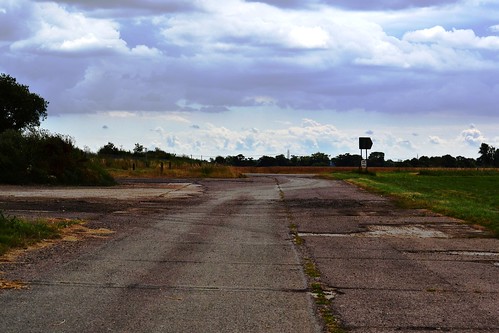
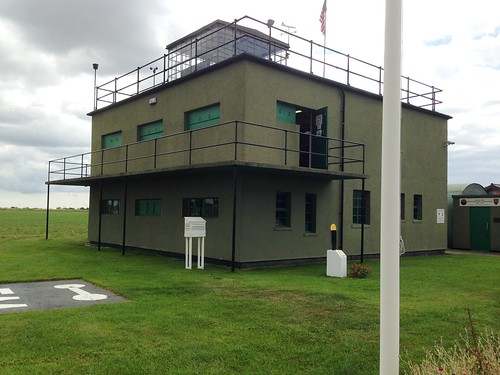
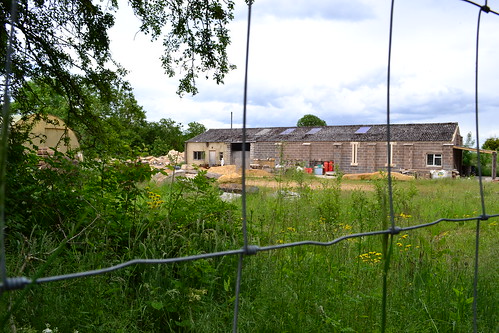
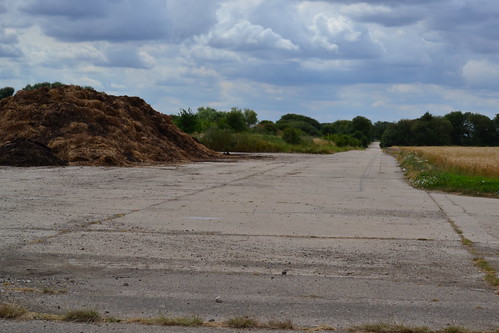
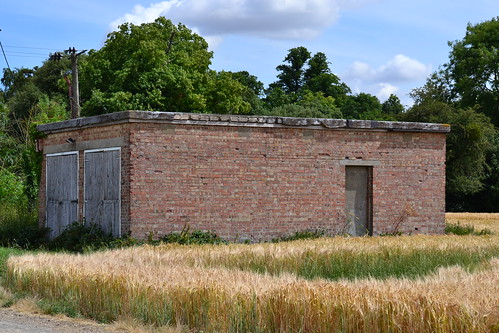
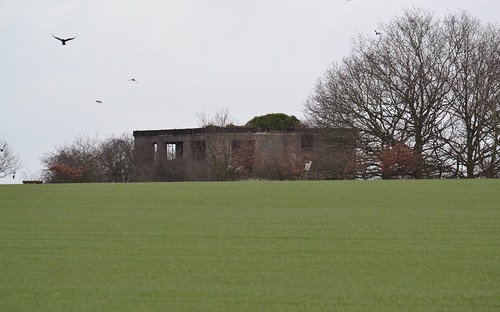
These are the operations block and the store for the American Norden M7 bomb sight. In a very poor state of repair, they once played a major role in the American offensive over Nazi Germany, – there must be many stories held within their crumbling and decaying walls. Continue past the buildings and you arrive at a ‘T’ junction. Turning right will take you to the airfield, now an industrial site and turkey farm. Access from here is both limited and private. Instead turn left, follow the road along, and then join the B1077. Turn right and drive for a mile or two, the airfield is on your right. A suitable parking space allows views across the field where its enormity can be truly understood. Now containing many turkey sheds along its runways, the outline is distinct and relatively clear considering its age. Up until November 2014 one of the original hangars still remained*1 fire destroying the structure, and what was left then subsequently removed. A number of ordnance huts mark the former location of the bomb dump, these can still be seen in the foreground from this high vantage point. The Watch Office, built to design 12779/41, was demolished many years ago but stood opposite you and to the right.
It is also possible to view the main runway. By driving around the site via Swaffham, or retracing your steps though the village, the best view is from the northern end of the airfield on the road from Swaffham to Bradenham, close to the village where the base gets its name. Substantial is size, these runways have fared remarkably well and the sheer size of them easily discernible from the views at this end.
North Pickenham may truly fit the description of ‘ghost’ airfield, its chequered history includes not only one of the worst fatality records of the whole eighth Air Force, but it also attracted a lot of Luftwaffe attention. In excess of 200 German bombs were dropped on it during its short and rather dramatic wartime life. Handed over to the Americans in May 1944, it was the 66th and final one to be so, thus ending a remarkable chapter in world history.
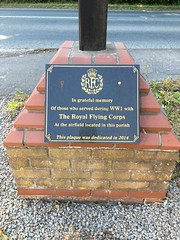
A memorial to the servicemen who flew from North Pickenham, lays silently in the village on the edge of a new housing development. Wreaths from nearby RAF Lakenheath enforce the link between the current American Air Force and Norfolk’s legendary flying history.
On leaving the remnants and stories of North Pickenham, we continue south-east, toward the former RAF Watton, another now extinguished British airfield.

Memorial dedicated to those who flew from, and never returned to, North Pickenham.
North Pickenham was originally visited in early 2014, this post has since been updated.
*1 This hangar was burnt down in November 2014. My thanks to the anonymous reader for the updates and corrections.