We have now seen how West Raynham developed from an expansion period airfield, through the Second World War and on into the Cold War. With tensions now easing and Government cuts biting hard, the future of West Raynham and the Service, hangs in the balance. But with new jets in the pipeline, changes to the Nuclear deterrent coming, a new direction may save the airfield from immediate closure. We also see how one man takes matters into his own hands and protests as these events which are to shape the future Air Force.
Later in August that same year, Nos. 1 and 54 Squadrons arrived at West Raynham boosting the numbers of personnel present here once more. Both units transferred over from Waterbeach in Cambridgeshire, in a move that saw the return of the Hawker Hunter F.G.A. 9.
No.1 Squadron, one of the RAF’s longest serving squadrons had provided almost continuous service since 1912, and had flown a wide variety of aircraft across Britain, France and the Far East. They brought with them a long and distinguished history.
It was perhaps a No. 1 Sqn pilot who defined West Raynham’s lasting legacy, that of the Flight Commander – Flight Lieutenant Alan Pollock, who around midday on 5th April 1968, flew a Hawker Hunter FGA.9 (XF442) between the two spans of Tower Bridge in London. The stunt, a protest by Pollock already annoyed at the Government’s defence cuts, was to raise the concerns of personnel at the lack of celebration of the RAF’s fiftieth anniversary. After leaving Tangmere (following a celebration dinner) he and his colleagues headed back toward their home base at RAF West Raynham. Pollock then turned away from the group and flew at tree top level along the Thames circling the Houses of Parliament no less than three times, before dipping his wings at the RAF Memorial and heading along the river and home. However, before long he was faced with Tower Bridge and a split second decision had to made. He decided to fly through the arches rather than over the bridge.
His fate was well and truly sealed, he was going to be disciplined and severely. On the way home, his single handed salute to the service he adored included ‘beating up’ Wattisham, Lakenheath and Marham airfields, before carrying out an inverted flypast at West Raynham. On landing, Pollock was arrested by the Military Police, after which a long, drawn out legal process was put into place. Rather than face a public outcry, the authorities gave him the ‘option’ to leave on medical grounds or through the more severe removal under Queens Regulations with the loss of all financial backing.
There was no option, and Flt. Lt. Pollock was sent packing. The political fallout from the event went on for months afterwards, leading to a stronger rebellion from the press who were already gunning for the Wilson Government. No one in authority wanted their ‘dirty washing’ aired in a public hearing.
54 Sqn meanwhile operated out of West Raynham as part of 38 Group Air Support Command. A role that required them to fly as a ground support unit, operating in conjunction with army ground forces. They flew from West Raynham for seven years, departing at the end of the decade. During this time, they would reinforce the Mediterranean and Germany even locating to Gibraltar after political ‘pressure’ from General Franco.
The 1960s also saw a change in direction for Britain’s defence network, which was brought about by the same 1957 Defence White Paper that saw the demise of 85 Sqn. The basis of this saw manned fighters be replaced by guided missiles along with investment in the V bombers, a retaliatory force that could deliver Britain’s nuclear weapons arsenal.
On September 1st, 1965, the first of West Raynham’s guided surface-to-air missiles arrived. The reformation of No. 41 Sqn with two units (sixteen missiles in each) saw the construction of a secure Bloodhound missile site on the eastern side of the airfield. These MK.II guided weapons would become the main airfield protection system of that time, although their presence only lasted five years before the unit was again disbanded and the missiles put onto storage.
With the birth of vertical take off and landings in the form of the Kestrel (later the Harrier) an evaluation unit was set up here at West Raynham. Designed to test the flying abilities of the Kestrel, up to and including near service conditions, it was made up of pilots from the UK, USA and West Germany. The unit, designated the Tri-Partite Evaluation Squadron Royal Air Force (TES), was designed to see how the aircraft would perform from both airfields and unprepared sites, using its VTOL and STOL capabilities. To this end the unit also used Buckenham Tofts located in the Stanford Training Area, the Army’s huge training area near to Thetford.
Testing any new aircraft is a risky business, the Kestrel being no different, and on April 1st 1965, Kestrel XS696, caught fire and crashed following a take off from West Raynham. Only a month old, the aircraft was struck off charge the same day as a Cat.5(c) and the remains scrapped after all recoverable components had been removed. The pilot was thankfully unhurt in the incident.
The accident didn’t completely deter the US Government though, and at the end of the year, six aircraft were sold to the US for further tests. Initially they were not convinced of its use, but the US Marine Corps were interested, and subsequently a long service began for the Harrier in both the US and here in the UK.
In 1967, Napalm saw a return to West Raynham when famously the Torrey Canyon struck rocks off the Cornish coast. The ship soon grounded and began to break up, spilling its cargo of oil onto rocks and into the waters around Cornwall. The Government decided to bomb the stricken vessel to reduce the impact of the oil spill, and so aircraft from the Fleet Air Arm and RAF were called in to bomb it. No. 1 Squadron were assigned the challenge and four Hunters were tasked with the role. Eventually after several attempts the wreck finally sank and much of the oil was burnt off.
Two years later in 1969, both No. 1 and No. 54 Sqns departed West Raynham. Their gap quickly being filled by No. 4 Sqn who arrived in September that year staying until the following March. Both 1 and 54 Sqns would become new Harrier units, forming squadrons in both Germany and here in the UK.
The dawning of 1972 saw the return of 85 Sqn, who after a spell of some nine years at Binbrook, returned with a new model Canberra the PR.3, a long range photo-reconnaissance aircraft, it was unarmed and relied on its high speed to escape any enemy aircraft.
A month later in February, it was decided to also reform 100 Sqn here at West Raynham, initially using staff from 85 Sqn. Starting off with the Canberra B.2, they quickly began changing these for the T.19, essentially a T.II with its Airborne Intercept radar (A.I.) removed – West Raynham was now awash with Canberras. One of the roles of 85 Sqn was to act as enemy intruders so QRA crews could perform practice intercepts. Although the QRA crews were aware of the nature of the intercepts, Canberras would fly in low and then climb over the UK coast imitating a Soviet bomber – often to great success.
On June 26th 1972 tragedy would strike at West Raynham once more, when a 100 Sqn Canberra T.19 ‘WJ610’ crashed shortly after take off. The Aircraft, crewed by Flight Lieutenant Nicholas Whitlock (pilot) with navigator Flight Lieutenant John Sheran, struck trees 2 miles south, south west of Rougham whereupon it burst into flames killing both airmen.
In the months before the accident, the aircraft had been on loan to 85 Sqn, although this had no bearing on the cause of the crash itself, but it has led to some confusion as to which squadron it was actually with at that time,
Investigations recorded that the aircraft was one of a pair that took off in bad weather flying on instruments. Then as it entered low cloud, Flt. Lt. Whitlock reported that the aircraft had suffered an undercarriage problem, at which point it peeled away from its leader, the assumption being that Flt. Lt. Whitlock was aiming to deal with the issue in hand. The investigation surmised that he may have been concentrating on the gear issue and became disorientated as a result. It is thought this then led to the accident and the aircraft’s inverted crash.
As a result of the tragic loss, formation take offs by Canberras were subsequently prohibited, any future take offs having a minimum of 30 seconds between each departing aircraft, it was a tragic loss that served to help others*2.
A brief interlude in the autumn of 1972 saw the reformation of 45 Sqn with Hunter F.G.A.9s, once established and organised the unit quickly transferred out, leaving West Raynham behind.
The 1970s saw further big changes within the RAF. The handing over of the nuclear deterrent to the Royal Navy for one along with Britain’s air defence missiles (Bloodhound) being withdrawn and transferred to Germany. However, later concerns over potential attacks forced a review, and as a result, in December 1975, 85 Sqn were disbanded, the aircraft were transferred out, and they were immediately reformed as a new Bloodhound unit. The missiles were brought out of storage and placed here in Norfolk. Some of the 85 Sqn personnel were absorbed into West Raynham’s 100 Sqn but they would only remain here at West Raynham for a further month before they too moved out.
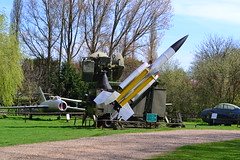
Bloodhound Missile at the Norfolk and Suffolk Air Museum (2014)
85 Sqn operated across a number of sites. Primarily based at West Raynham, they had Flights at both Bawdsey on the south Essex coast and North Coates in Lincolnshire. In October 1989 the squadron grew further, absorbing No. 25 Sqn, which gave the unit three more Flights at Wattisham, Barkston Heath and Wyton. By the start of the 1990s though, Bloodhound had become obsolete ‘Rapiers’ being the new low level airfield defence missile, and so Flights ‘B’, ‘C’ , ‘D’, and ‘F’ were all disbanded. This left the HQ (West Raynham), ‘A’ Flight (North Coates) and ‘E’ Flight (Wattisham), until these too were disbanded the following summer.
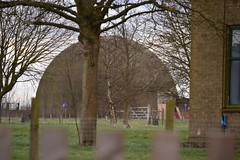
West Raynham’s Rapier training dome is now of ‘Historic Interest’. (2015)
By the time the 1980s had dawned, front line flying at West Raynham had been scaled back and no operational fighter units were based here. The airfield had entered the long and slow wind down to eventual closure.
By July 1991, with the last of the Bloodhound units being disbanded, the missiles they had been using scrapped or sold to the Swiss military, and the personnel pulled out, the site was left all but empty.
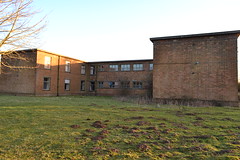
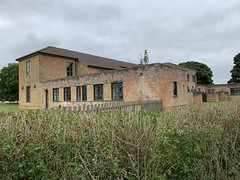
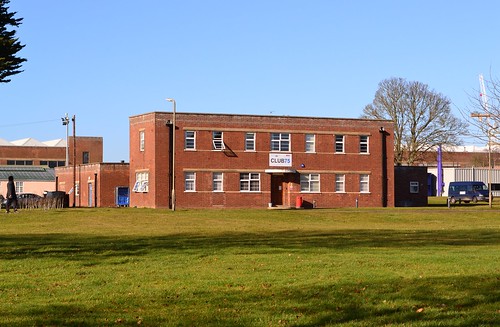
Any residue support units were also removed and in 1994 West Raynham finally closed its hangar doors. The airfield itself remained in MOD hands, but sadly the housing lay empty and it quickly became derelict, targeted by vandals. The accommodation blocks were damaged and windows were smashed. Long debates and scornful banter over the housing shortage boiled over in parliament and sites such as West Raynham were seen as prime land, with a huge infrastructure already in place, they were half way to meeting the needs of a growing community. The MOD eventually gave in, agreed to the sale and the site was handed over.
The two gate guardians, a Bloodhound missile ended up at Cosford Museum whilst the Javelin XH980 , was scrapped on site and disposed of. Since then the site remained closed and quiet.
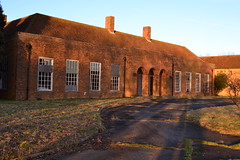
This closure left what is a rare example of a complete wartime and post-war airfield. As a result, many of its buildings are now of ‘historical interest’ and attempts at obtaining a Grade II listing to a large number of the airfield’s buildings was made by the English Heritage. Sadly, this was later withdrawn and no follow-up made although the post war Watch Office is now Grade II listed and more recently a private dwelling.
For many years the site stood empty gradually decaying. A number of planning applications were submitted and some of the accommodation blocks were transformed into private homes. This has thankfully meant that the original style and layout has been maintained. However, the runway and Bloodhound sites have now gone, having been replaced by what is reputed to be, one of Britain’s largest Solar Parks.
In 2016 a proposal was put forward to develop the site into a mix of housing, leisure facilities and industrial units, all utilising the existing buildings where possible. A design brief was put forward by FW Properties who estimated the 158 acre site to be worth £7.3m with a refurbishment value of some £5.2m. The proposal was for a four phase plan to include refurbishment of the original properties for housing, redevelopment of the landscape and infrastructure and new builds to create an integrated community on the site. A grand proposal that would keep the integrity of the site and utilise as many of the buildings as possible.
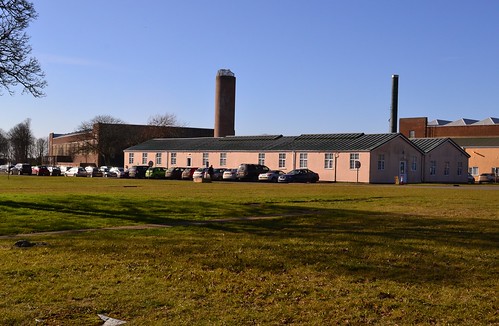
When I initially visited, the site had been sealed off, but the control tower along with a wide range of smaller ancillary buildings, were all shrouded in scaffolding. The Officers Mess had seen better days and the adjacent tennis courts had been reclaimed by trees.
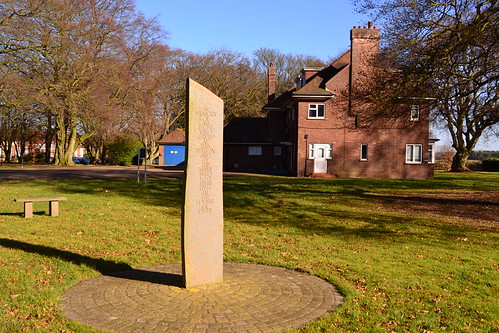
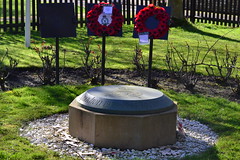
The Rapier training dome, original Battle headquarters and wartime pill boxes were also evident. A memorial to the crews of West Raynham had been erected in what is now the centre of a housing area that utilises the old accommodation blocks.
Today, much of it hasn’t changed, many of the smaller buildings continue to decay, but the post war watch office is a private dwelling, open for visitors and tours on heritage days, the guard house is a shop for fire places and the hangars are used by small, light industrial companies.
A Hunter F.1 ‘WT660’ has been acquired and sits near to the modern watch office, previously on display/stored in Scotland, it has been brought back to be refurbished and displayed in the colours it would have worn whilst in the Day Fighter Leader School between 1955 and 1957 here at West Raynham.
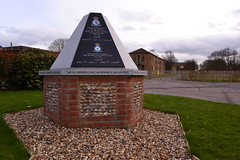
The West Raynham memorial sits next in the former accommodation area.
West Raynham is one of only a few complete sites that reflect the development and commitment of Britain’s air defences. Its origins and initial construction in the 1930s has seen continued improvements leading to its gaining a remarkable status that few other sites have gained.
Throughout its history it has seen a wide range of units, personnel and aircraft, it has been a training airfield, a front line fighter defence, a bomber airfield and even a missile base. Its future is now in the hands of a developer, who are implementing a gradual change from airfield to community utilising the main buildings on site to support light industry and housing. What the eventual model will look like only time will tell, lets hope the promises hold and West Raynham becomes a model for other disused airfields before they are bulldozed and all their history cleared for evermore.
I hope to make a further visit shortly and capture some more up to date photos.
The full story can be read in Trail 21 – North Norfolk Part 2.
Sources and further Reading (West Raynham).
*1 National Archives Operational Record Book 114 Sqn August 1941 – AIR 27/882/36
*2 Aviation Safety Network database
*3 National Archives AIR 27/882/36
*4 National Archives AIR 27/1456/75
*5 “Hansard 1803–2005” digitised editions of Commons and Lords Hansard, the Official Report of debates in Parliament. Hunter Aircraft (report of Enquiry)
National Archives AIR 27/731/1
AIR 27/801/1
AIR 27/882/33
AIR 27/2870/21
AIR 27/971/33
For personal stories and more photos see the West Raynham Association website.
The West Raynham Development Brief published by FW Properties.
My thanks to Jon Booty at the West Raynham Control Tower for corrections.