We carry on from Part 2 of Trail 41 for the final Part of RAF Charterhall. An airfield that had become known as ‘Slaughterhall’ it was about to see a new breed of aircraft, perhaps even a turn in luck.
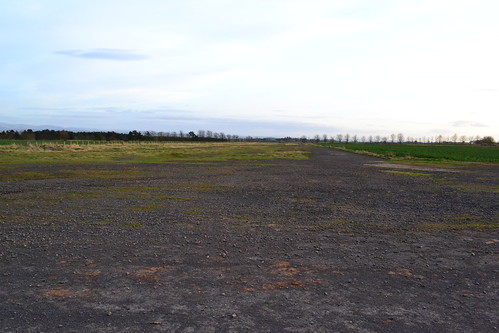
The main runway at Charterhall looking south.
The night of May 27th – 28th 1944 was a heavy night for Bomber Command, with large numbers of four engined heavies attacking targets in Germany. On their return, ten Lancaster bombers were diverted to Charterhall, the first time the four engined bombers would use the airfield, but not the last. On the 8th June, another seven were to arrive, also diverted on their return from the continent. Then in July, a Halifax was diverted here after sustaining heavy flak damage over Helioland. The pilot, P/O W. Stewart of the RCAF and navigator P/O K. Evans (RAF) were both awarded DFCs for their action whilst badly injured, such was the determination to get all the crew and aircraft back safely.
July to October saw an increase in flying and an increase in accidents. July ‘led the way’ with heavy landings, burst tyres, ground collisions and engine failures being common place. The majority of these incidents were Beaufighter MKIIfs, some were visiting or passing aircraft who suffered problems and had to divert. Charterhall saw a mix of Lysanders, Barracuders, Beauforts, Wellingtons and Hurricanes all use Charterhall as a safe haven.
As the threat of attack was now diminishing, a reorganisation of the O.T.Us would see 9 Group disband in September that year. The responsibility of 54 O.T.U (now flying mainly Mosquitoes) and Charterhall would now pass to 12 Group.
Eventually 1944 turned to 1945 and the year that saw for 17 fatal crashes also saw 54 O.T.U. take on more aircraft and more crews.
January 1945 was incredibly harsh in terms of weather and the cold. Training new crews on new radar meant that Wellingtons were brought into Charterhall. Small teams of pupils would take turns to operate the radar to detect Hurricane ‘targets’. These new models increased the air frame numbers at Charterhall to 123 by the end of January.
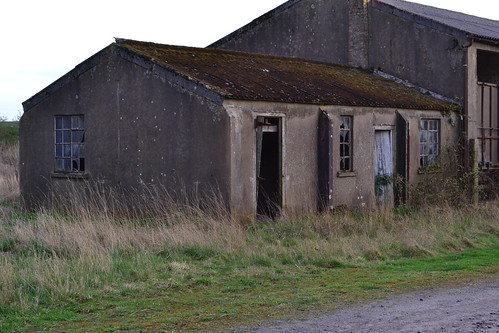
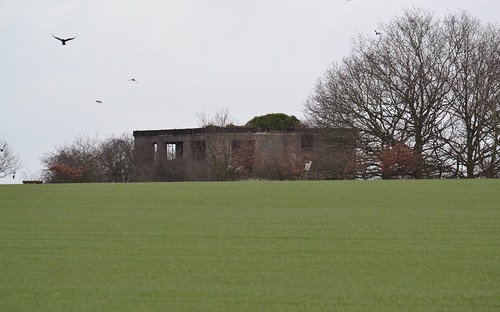
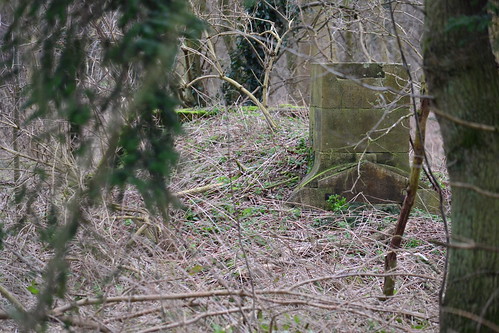
‘No. 1’ Building on the Technical site.
By now the allies were winding their way into Germany, pressure was increased by Bomber Command and so more heavies were to find Charterhall a refuge when the weather closed in. On the 15th February a large ‘Gardening’ operation led to 12 heavies landing at Charterhall along with four Mosquitoes who had been flying with them over Norway. All these aircraft were able to return to their various bases at Skipton-On-Swale, Leeming and Little Snoring the next day.
Two days later, more aircraft were to find Charterhall (and Winfield) needed. Some 266 aircrews – an incredible influx for one night – were going to need bedding – billiard tables, sofas and chairs suddenly became in very short supply.
The poor weather continued well into the year and snow caused some ‘minor’ accidents at Charterhall. The first confirmed death was not until early March and others were to follow. By May the war had come to an end and operations began to wind down. Winfield was closed and crews returned to Charterhall. Beaufighters were gradually sold, scrapped or moved elsewhere, and by August the last aircraft had left.
March would see the last fatalities at Charterhall, both in Mosquitoes on the 25th and 29th. In the former, the aircraft was in a high-speed vertical crash and the latter the pilot, Flight Lieutenant Cole (s/n125484), overshot the runway and crashed his Mosquito FBVI (HR297) a mile south of the airfield. He was 22.
Apart from a small detachment of crews from 770 Squadron Naval Air Branch carrying out trials, operations began slowing down. After VJ day, the Mosquito numbers were also wound down, only fifty-one aircraft remained by the end of August.
In September the order came through to vacate Charterhall and the packing began. By the end of the month 54 O.T.U. had all but vacated leaving Charterhall quiet once more. The last eighty aircraft consisting of: Mosquito VI, XVII and NF30s, Martinets, an Oxford, Miles Master II, Ansons, Hurricane IICs and Wellington XVIIIs were flown out for the final time, 54 O.T.U. had played its part and their end lay ahead.
In the three years that Charterhall had been in operation, they had passed over 800 crews for night fighter operations, they had suffered over 330 accidents, 56 of which had resulted in deaths. During this time crews had flown just short of 92, 000 hours flying time day and night, with almost a third being carried out at night. Had it not been for this unit, the heavy bombers of Bomber Command may well have suffered even greater losses, the determined and deadly night fighters of the Luftwaffe may have had a much wider and easier reign over our skies and the losses we quote today would be even higher.
But the withdrawal of 54 O.T.U. was not the demise of Charterhall. For a short period it was set up as No 3 Armament Practice Station, designed to support and train fighter pilots in the art of gunnery. During its period here November 1945 – March 1947 it would see a range of aircraft types grace the runways of Charterhall.
The first units were the Spitfire IXB of 130 squadron from December 1st 1945 – January 24th 1946, followed by 165 Squadron’s Spitfire IXE between 30th December and January 24th 1946. On the day these two squadrons moved out, Charterhall entered a new era as the jet engines of Meteor F3s arrived under the command of 263 Squadron. After staying for one month they left, allowing the Mustang IVs of 303 (Polish) Squadron to utilise the airfield. Each of these squadrons followed a course which included air-to-air target practice, ground attack, bombing and dive bombing techniques.
Following the completion of the course 303 pulled out and the order was given to close No. 3 Armament Practice Station and wind Charterhall down for good. The RAF sent no further flying units here and apart from a detachment of Mosquitoes from 772 Squadron of the Fleet Air Arm, by the following summer, it had closed. The final spin of the airscrew had taken place.
Post war, the airfield was left, the runways and buildings remained intact and the airfield was used by small light aircraft. Gradually though it fell into disrepair, used mainly for agriculture, it had a new lease of life when on Saturday May 31st, 1952, the airfield saw its first motor race using sections of the perimeter track and runways. A two-mile track became the proving ground for a number of the worlds most famous racing drivers including: Sir Stirling Moss, Jackie Stewart O.B.E., Roy Salvadori, Sir John Arthur ‘Jack’ Brabham, AO, OBE, Giuseppe “Nino” Farina and local boy Jim Clark O.B.E. Clark cut his racing teeth at Charterhall, eventually winning 25 Grand Prix races and the Indianapolis 500 in 1965. His grave lies in nearby Chirnside cemetery alongside his mother and father. Charterhall also saw the appearance of Scotland’s first organised sports car team, ‘Ecurie Ecosse’, using Jaguar cars*4. Racing occurred here until 1969, when the current owners took over the site.
The RAF then returned briefly in late 1976 undertaking trials of the Rapier ground-to-air missile system, in which a range of fast jets including Jaguars and Phantoms would participate. These lasted a month which would see the last and final RAF involvement end.
The owners reinvigorated the site providing a venue for rally sport events which started again in 1986. Eventually on March 30th, 2013, the last ever race was run and motor sport stopped for good and so another era finally came to a close.*5
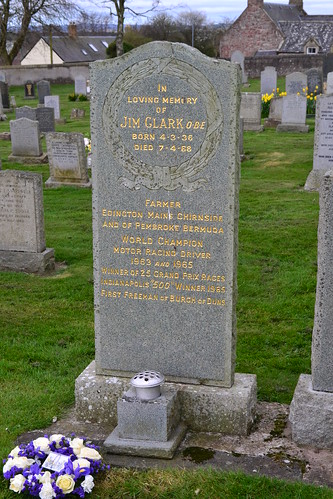
Jim Clark’s grave stone at Chirnside.
Today a section at the western end of the main runway is still available for use by light aircraft (with prior permission) and the main technical area is home to the Co-op Grain store, a facility which has a number of large stores for drying and storage of grain.
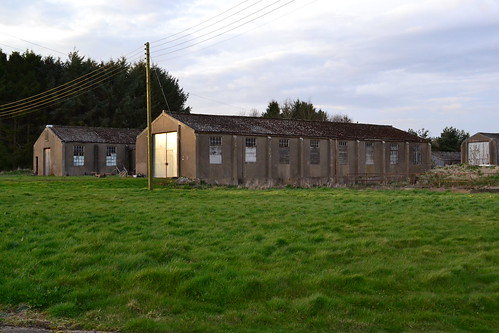
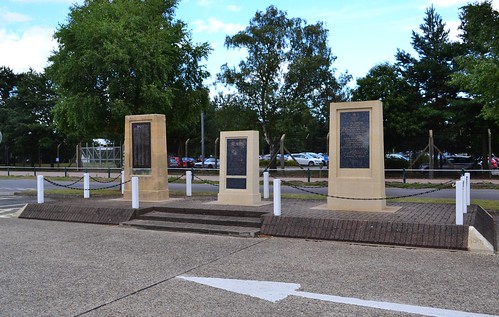
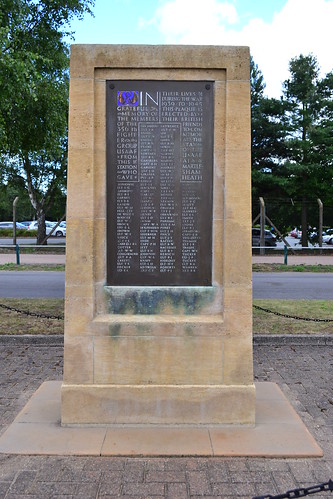
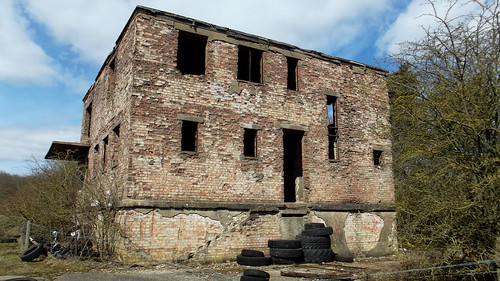
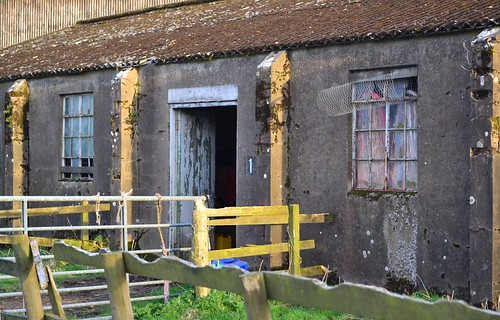
Accessing the site is from the B6460 where a memorial stands to the crews who passed through Charterhall and in particular Flight Lieutenant Hillary and Flight Sgt. Fison, who died in such tragic circumstances. A track leads all the way to the airfield site, which was the main entrance to the airfield. A good quantity of buildings still stand here on the technical site along with two of the original hangars. All of these are used for storage or stabling of animals including horses and are rather rundown. The perimeter track and runways are complete but their surfaces are breaking up and in a poor state of repair.
These buildings are a remarkable and poignant reminder of the tragic but significant years that Charterhall prepared and developed crews for the night fighter squadrons of the RAF. Hundreds passed through here, for many it was a difficult twelve weeks, for some it ended abruptly and decisively. Not known for its comforts, it was a pivotal station in the Second World War and indeed also for many years after for the those who went on to become some of the world’s most famous motor racing drivers.
Many airmen came and stayed, sixteen of them who were killed on active service whilst at Charterhall are buried in the nearby cemetery at Fogo, a short distance to the north of the airfield. Many are from around the commonwealth who came here to help and were never to return.
After leaving Charterhall, we head a little further east to Charterhall’s satellite and a site that had strong links with the forces of Poland. Remembered here is an usual mascot, a bear known as ‘Wojtek’. We stop off a few miles away at the satellite that was RAF Winfield.
Sources and further reading
*4 Obituary of Bill Dobson: ‘Ecurie Ecosse’ racing driver in ‘The Scotsman‘ newspaper 21st October 2008.
*5 A news report of the event can be read on ‘The Berwickshire News‘ Newspaper, 28th March 2013.