“1940: The Battles to Stop Hitler” – Mitch Peeke

A book review.

This is a superbly written book that looks at the Battle of Britain through the life of the airmen who were primarily based at a now disused RAF station (RAF Gravesend) in Kent. Whilst being historically accurate throughout, it is not one of those books that is full of data, figures and graphs, more a book based on personal and general historical events. It deals well with the political climate in Europe post World War I, setting the scene for Hitler’s rise to power, and the lethargic way in which the Allies allowed him to achieve his ultimate goal. It looks at the political unrest at home, and how that shaped both a public and government totally unprepared for war.

Each of the first four chapters look at specific events that led to the declaration of war on September 3rd, 1939. It looks at how the Allied response to Poland’s invasion was belittled by the massive and hugely technologically advanced German forces, who cut through Belgium circumnavigating the Maginot line, forcing the BEF and French forces to a small pocket at Dunkirk. It then looks at the evacuation through the eyes of two small boats (one of which Mitch supports through his book sales) and those who sailed on her. By examining the infrastructure surrounding the evacuation, it adds a very personal touch to what was a massive undertaking, and one that the many other books, films and documentaries have failed to highlight.

After Dunkirk, Mitch examines the Battle of Britain as it occurred in the skies over Kent and London. Individual skirmishes, with details of those involved, add a very personal touch to the blow-by-blow account of the battle as it weaves its way to its ultimate ending.

It is clear from the references to the skirmishes that Mitch has carried out extensive and prolonged investigations into each one, even pinpointing in many cases the actual crash site of the aircraft. Added to this are the personal and eye-witness accounts which continue to keep the personal aspect very much at the front. As the battle draws to its conclusion, life in London’s city streets are revealed through events that are again backed up with eyewitness accounts and personal details. Some of these stories will make you laugh, the absurdity of ill-fitting fire hoses and the tenacity of the firemen to solve the problem whilst all around were in chaos, is just one incredible example. It also shows that how through it all, the people of Britain managed to keep smiling, still seeing the good in what was a terrible time.

Whilst the Battle of Britain officially ended on 31st of October, Mitch continues to tell the story as autumn turns to winter and as the Battle of Britain turned to the Blitz. The nightly bombing of British cities gave rise to some dark secrets and activities, but balanced with these are other more informal and light-hearted highlights, all of which add to pulling the reader into the atmosphere of 1940s Britain.

In summing up, Mitch analyses the flaws in the German strategic plan for attacking Britain. He looks at how poor decisions enabled Britain to refocus and rearm thus building her forces up to a strength that was far better than those that remained in the period immediately following Dunkirk.

He then reintroduces the characters that had appeared throughout the book informing the reader of their postwar lives, some of whom were his own family members and who witnessed first hand, the true horrors of war.

Throughout Mitch’s final chapters there is a glowing slant toward the people,  showing the true grit and resolve of the British people who ‘pulled together’, that has become synonymous with those dark days of 1940/41. But this is not a patriotic, ‘let’s wave the flag and tell the world how good we were’ book, it’s more a heartfelt look at a very decisive time in world history, one that could have been so very different if it were not for ‘the few’, their leaders and the British people who supported them.

As appendices, Mitch looks at one RAF Station in particular, RAF Gravesend, its history and what has happened to the site since its closure post war. Now long gone, it is one of the many airfields that were so important to Britain’s survival, yet nothing remains of it today. He also looks at the 15 brave airmen who lost their lives in 501 and 66(F) Sqns, their names now on a plaque on the wall of a leisure centre on what was the former entrance to the airfield. Reading their short biographies really brings home the tender age of those who paid the ultimate sacrifice for our freedom.

I read this book in about two days, it’s easy, and compelling reading, very detailed and very personal. “1940: The Battles to Stop Hitler” is not about the Battle of Britain per se, but more a personal examination of the people who were involved in the two battles; Dunkirk and the Battle of Britain, and how their lives were interwoven in the summer of 1940. Light hearted in places, extremely moving in others, it adds another dimension to those famous battles, and I for one would most certainly recommend it.

1940: The Battles to Stop Hitler” by Mitch Peeke is available from Pen and Sword Books Limited. It is sadly only available in digital format and all the author’s royalties go to The Medway Queen Preservation Society, The Medway Queen being a survivor of the Dunkirk evacuation and featured in Mitch’s book.

1940: The Battles to Stop Hitler”  is available from Pen and Sword Books,  ISBN: 9781473858091, Published: 24th June 2015. https://www.pen-and-sword.co.uk/1940-The-Battles-to-Stop-Hitler-Kindle/p/11118

I would like to pass on my immense gratitude to Mitch for providing me with a copy of the book via publishers Pen and Sword Books.

RAF Hardwick – Ted’s Travelling Circus. (Part 1).

There are many good museums across the country that tell the stories of heroism and sacrifice witnessed during the Second World War. In Norfolk, most reflect the lives of the ‘friendly invasion’ the lives of the US armed forces and in particular the USAAF, who flocked here in their thousands to a life that was new and very dangerous.

One such group, the 93rd BG, achieved many records and fought in many theatres, but their road was not easy nor was it any ‘milk run’.

In this trail, we return to Norfolk, revisiting the lives of those who served at the former US station 104, otherwise known as RAF Hardwick.

RAF Hardwick (Station 104)

Hardwick is a difficult place to find, primarily due to the narrow lanes and the fact that the name given to it is not the closest village! In fact, Alburgh is closer, but once found this delightful place has a lot to offer to the visitor.

Opening in September 1942, the first units to arrive were B-25 Mitchells of the 310th BG of the Eighth Air Force. Its three runways of concrete and tarmac construction, one of 2,000 yards and two of 1,400 yards, were laid out in the classic Class A style. The entire site covered an enormous area, housing eleven ‘spectacle’ (double loop) and fifty ‘frying pan’ type hardstands, it had three T2 hangars, a watch office (to design 518/40 later modified to 5966/43) and a wide range of support and ancillary buildings common to  all Class A airfields. Being a bomber base, it would require two enormous fuel stores holding a combined total of 144,000 imp Gallons of fuel.

The airfield’s construction process commenced in late 1941 with the main infrastructure being built by John Laing & Son Ltd. Completion was achieved in the autumn of 1942, when the site was officially opened. The construction process would lead to a site capable of  holding around 3,000 personnel of mixed rank and gender. There would be six male sites, two female, two communal quarters and a sick quarters, and as was common with all airfields built after the start of the war, the main public road dissected the airfield separating it from the dispersed accommodation blocks. As a result, the accommodation was to the east beyond the technical area with the bomb dump far to the north-west. Accommodation for the personnel was primarily through ‘Laing’ or ‘Nissen’ hutting, with a small number of Boulton & Paul style huts, none of which offered a great deal of protection from the cold outside.

Handed over to the US forces in 1942, the ground echelons of the 310th BG arrived by sea during the September, with the air echelons bringing their B-25 ‘Mitchells’ via the northern route during early October. The 310th were lucky enough to avoid the seasonal weather change that caused so many problems for units flying across the northern route in the winter months that followed.

Brought to the UK to train crews before they were shipped out to North Africa, the new twin-engined bomber crews would very soon leave Hardwick behind, receiving their posting and transferring abroad in three stages during November and on into December.

RAF Hardwick Memorial

Memorial to the 93rd BG (328th 329th 330th and 409th BS) RAF Hardwick.

Hardwick would take on a very different sound after that, the B-25s being replaced by the heavy four-engined B-24s of the 93rd BG. The 93rd were already a battle experienced outfit, having flown a number of missions from Alconbury since the 9th October 1942 – the day the B-24 Liberator entered into the war.

Many of the early missions performed by the 93rd would be attacks on the submarine pens along the French coast, a move discussed at great length between the two US Generals, Spaatz and Arnold. The poor successes of these missions, which were designed to support the war in the Atlantic, were borne out in an Eighth Air Force study later on. In the report, published on 8th December, it was summarised that American bombs at that time were incapable of penetrating the thick ceilings of the U-boat pens, and that little damage was being achieved by the current US bombing strategy. As a result of this, attacks soon curtailed and operations moved to other targets.

Preceding the move of the 93rd to Hardwick was the posting of a large detachment to North Africa on December 5th. It was a detachment that would see the men and machines of the Eighth transfer across to the Twelfth Air Force. It was a move that was often complained about, seen as draining valuable resources and hindering the training and future operations of the Eighth Air Force in Europe.

Those who remained in the UK began transferring over to the 2nd Bombardment Wing and a new airfield here at Hardwick, where they were trained for ‘special duties’. Gaps in the 329th Bomb Squadron (BS) were filled with crews from the other 3 squadrons of the Group (328th, 330th, 409th) and were moved to a satellite airfield at Bungay. Here, the aircraft were fitted with the British ‘Gee’ system and crews trained on its use. By December they were ready, and ‘Moling‘ mission could now begin.

Unfortunately, the weather played a major part in the operational downfall of these missions, with insufficient amounts of bad weather being found to allow Gee to be used properly. Much to the surprise of the Americans, it didn’t always rain in England!

With the other three squadrons away in North Africa, the 329th joined forces with its sister group the 44th BG at Shipdham. Here they waited in earnest for the return of their associate squadrons.

Gas Training Room.

The gas training room, one of the few remaining buildings at Hardwick.

However, it was not a harmonious relationship. With the squadrons placed in North Africa getting considerable press coverage for their successes, and the B-17 groups being regular features in the UK, the 44th were understandably aggrieved, feeling that the press were ignoring the immense effort and losses they were incurring. The cold of high altitude bombing over occupied Europe was, it would seem, little match for the delights of North Africa.

In the following February / March 1943 the four squadrons were reunited for the first time, and they returned to Hardwick. Here they would fly bombing mission to targets in France and the low countries. In the April, Hardwick was visited by both Lord Trenchard and, ten days later, by Lieutenant General Frank Andrews,  two high-ranking officials who would bring prestige and pride to the men and women of Hardwick. It was Andrews who would be so tragically killed flying across the Northern Atlantic route later on. He along with the crew of B-24 #41-23728 ‘Hot Stuff‘, the first Hardwick crew to achieve their mission quota, would die in a crash that left just one survivor, the tail gunner. The name Andrews would live on though, his name being given to the airfield in Essex, RAF Andrews Field in memory of his work.

The summer of 1943 saw a further detachment being sent out again to North Africa. Here they would earn themselves a Distinguished Unit Citation (one of two), for the low-level action over the Ploesti oil fields in Romania. Further moves and detachments between Hardwick and mainly North Africa earned the unit the name ‘Ted’s Travelling Circus’, Ted being Colonel Ted Timberlake, the Group’s Commander.

During this early period of the war the Liberator groups had little in the way of operational ‘clout’ over France and Germany. With the larger operations being handled by the established B-17 Groups, the B-24s were often relegated to Air Sea Rescue missions where they would search for downed aircraft particularity over the North Sea.

By early September 1943 the bulk of the 93rd were back once more at Hardwick, small in numbers they were often overlooked for the more popular B-17s. Looked down upon by the crews of the B-17s who openly criticised the ungainly lines of the Liberator with names such as ‘banana boat’, only led in turn to jeers from B-24 crews who highlighted the short-range and lower bomb load carried by the sleeker B-17.

This short-range was a factor borne out on the 93rd’s first mission back in the UK when on the 6th September, sixty-nine B-24s of the 2nd Bomb Division (BD)  were sent along with 338 B-17s of the 1st and 3rd BDs to attack Stuttgart. A disaster from start to finish, heavy cloud prevented the target being bombed, formations were separated and targets of opportunity were then chosen. With the formations broken up, defensive power was lost and the Luftwaffe made easy pickings of those aircraft left out alone. Forty-five of the B-17s were lost compared to none of the B-24s, many B-17s having to ditch in the sea or crash-land in Kent after running out of fuel.  Of the sixty-nine B-24s flown out, none dropped their bombs but all four groups returned to their respective bases safely.

For the remainder of September, the Liberators of the 2nd BD were ordered to carry out ‘STARKEY‘ operations, beginning on the 9th to airfields in France and particularly  St. Omer. With few bombs being dropped it was a poor mission and one that was followed on the 15th September by similar results at Chatres. This would be the last mission for the B-24s of the 93rd before yet another posting to North Africa in a move that left the crews both astonished and in total disbelief. During this mission on the 15th, ten airmen would be lost with at least three having been known to have been killed. All ten were from the 330th BS, a sad end to a poor series of missions.

Returning again in early October, the 93rd of Hardwick would join the recently formed 392nd at Wendling for a mission  to Vegesack, a northern district of Bremen. With heavy cloud cover, alternative targets of opportunity were chosen, with little damage being done to Vegesack itself.

The poor weather continued for much of October, preventing the Liberators flying in anything but training flights. The 93rd were able to launch a diversionary raid for the B-17s ill-fated attack on Schweinfurt on October 14th, the majority of the sixty B-24s allocated for the raid failing to even get airborne. After abandoning the mission those that had managed to get aloft headed for Emden in an aim to draw fighters away from the main body of the Schweinfurt  raid. It was hoped that this move would reduce the mauling that would occur from this deep, unprotected penetration mission.

B-24D Liberator #41-23722 ‘Boomerang‘ (GO-C) of the 328th BS, 93rd BG at Hardwick. This was the first Eighth AF Liberator to complete 50 missions. After completing 53 missions, it was flown back to the US for a War Bond tour.

With further diversionary raids on the 29th, attacks on Wilhelmshaven on the 3rd November, Munster on the 5th and Bremen the 13th; the 93rd would then turn to Norway and targets at Rjukan. An ineffectual raid, it preceded further runs back into Germany. December and the approaching Christmas would see no let up for the men of the 93rd and Hardwick, mission numbers being so high that on the 16th, B-24D #41-23722 ‘Boomerang‘ became the first Liberator of the Eighth to pass the fifty missions mark. Three mission later she would depart the UK for American shores where she would perform a war bond tour raising much-needed money for the war effort.

Five days before Christmas, December 20th 1943, would see a return trip to Bremen. Two more aircraft would be lost on this mission. The first, B-24 #42-40133 of 328th BS piloted by Captain Cleveland Hickman (s/n: 0-727870) was shot down by Lt Kard-Heinz Kapp of JG 27/5 in Bf 109G-6 with the loss of all nine men on board. The second, #42-63963 ‘Unexpected II‘ of the 329th BS collided in midair with P-47D #42-8677 and crashed into North Sea north of Den Helder, Netherlands. All nine from ‘Unexpected II’ were captured and became prisoners of war.

Two days later, T/Sgt.John Tkachuk 329th BS died of anoxia after his foot was caught between a bomb and the bomb rack. The ‘walk around bottle’ he was carrying running out of oxygen before he could be given assistance. 1943 would draw to a close with a very sad overtone.

In Part 2, we see how 1944 arrives and how the closing stages of the war produced some remarkable records for the 93rd BG. We find out what happened to Hardwick and see the museum that has emerged to remember those who served from this airfield in the heart of Norfolk.

RAF East Wretham (P2)- From Bomber Command to USAAF

After part one of RAF East Wretham, we see how the poor fortunes of the Czech squadron of Bomber Command were left behind, a new breed of aircraft had now arrived in the form of the US fighter Group’s P-47s and P-51s. After the departure of Bomber Command, the site was turned over to the USAAF and renamed Station 133.

RAF East Wretham (Station 133)

With this change came a number of modifications to the airfield. Temporary Pierced Steel Planking (PSP) was laid, more concrete pathways added and the site accommodation improved generally. The work continued for several weeks whilst the personnel of the newly formed 359th Fighter Group (FG) were gathered together in the United States, finally shipping out across the Atlantic in the October 1943.

Only being recently manned, the 359th were truly a new group (although some pilots were drawn from other established combat units) being formed of the 368th, 369th and 370th Fighter Squadrons (FS). Arriving from Westover Field Massachusetts in the October 1943, they were one of the last units to join the Eighth Air Force with P-47 Thunderbolts; a move that bolstered fighter numbers to some 550, trebling the Eighth’s total number of fighters in only a matter of weeks.

By December they were combat ready, and their first mission took place on December 13th 1943 – an escort mission protecting  heavy bombers as they attacked airfields in France. During the mission, thirty-six aircraft of the 359th carried out fighter sweeps in the  Pas-de-Calais area without loss and without a single ‘kill’, a rather calm opening to their European war. On the 20th, they undertook their second mission, another escort of heavy bombers to Breman. Joining them were the 4th FG, 56th FG, 78th FG, 352nd FG, 353rd FG, 356th FG, and for their first time the 358th FG all flying P-47s. For the fighters it was another ‘uneventful’ mission with only minimal losses, but for the heavy bombers it was their first encounter with Me-410s, and their time-fused, aircraft launched missiles.

During March 1944 a special squadron was formed commanded by Capt. Charles E. Ettlesen of the 359th. Known as “Bill’s Buzz Boys”, the purpose of the unit was to develop ground-attack tactics as so few of these had been truly successful up until now.

The group tried many new ways of attacking enemy airfields, and in the month they were together, they succeeded in destroying or damaging numerous aircraft, blowing up several hangars, locomotives, barges and other small boats in their attacks. During one of these attacks on the airfield at Chateudun, Capt. Ettlesen hit a high tension wire which cut half way through his wing. He manged to fly the P-47 back to England landing at RAF Martlesham Heath in Suffolk, trailing a good 30 feet of wire behind him! On April 7th, the unit’s four flights returned to their respective groups, and the new tactics learned were taken to RAF Millfield, the brainchild of General Quesada to train pilots in the art of ground attack.

, 8AF USAAF.

Capt Charles C. Ettlesen 369FS, 359FG, headed the specialised ground attack unit. After returning to East Wretham he was last seen going down to strafe a Locomotive north of Gotha, 9th Feb. 1945. Classed as MIA he was never heard from again. *2

The 359th at East Wretham continued on with bomber escort operations throughout the early stages of 1944, and then in the April, they began to convert to P-51 Mustangs, a change that involved major retraining of both pilots and ground crews. Used to the air-cooled Douglas Wasp engines of the P-47s, they now had to convert to liquid cooled Merlins. To prepare mechanics for the forthcoming Mustangs, ‘sample’ P-51Bs were sent out prior to the shipment to allow for a smooth transition from one aircraft to the other.

By May, the 359th were ready with their P-51s and their first foray into enemy territory took place on the 5th. Not unlike their first mission with P-47s, it was an escort mission to attack targets in the Pas-de-Calais and Siracourt areas in ‘Noball‘ operations. Like the first, it also was uneventful, cloud cover preventing both allied bombing or Luftwaffe intervention.

Ground attacks were incredibly dangerous, and the summer of 1944 would reinforce that fact. In May pilot, Major George “Pop” Doersch, whose daring would eventually take his ‘kill’ rate into double figures, flew too low to the ground in a strafing attack on an airfield near Rheims. In the attack his propeller struck the ground causing the blades to bend at the tips. Fortunately and using all his skill and strength, he managed to nurse the aircraft (P-51B) back to Manston where it landed without further incident.

George

Major George Doersh who took his P-51B too close to the ground bending the propeller tips. (IWM)* 3

As D-Day approached, the 359th focused on strafing ground targets in and around the Normandy area; railway locomotives and communication lines were all now very high priority. During the invasion itself, the 359th escorted the heavy bombers across the channel, and whilst over France, they took the opportunity to continue with these opportunist attacks.

With the new P-51s they were now able to fly deeper into the heart of Germany and as far east as Poland. It was during these later stages of the war that the 359th really began to make their mark, participating in some of the biggest bombing missions of Germany, including those of: Ludwigshafen, Stuttgart, Frankfurt, Berlin, Mersberg, and Brux.

On 11th September 1944, the green nosed Mustangs of the 359th were finally rewarded for their efforts when they received the Distinguished Unit Citation (DUC) for their action over Mersberg. After attacking over 150 Luftwaffe fighters they also went on to destroy seven  locomotives on their way home. The detailed Citation highlights the bravery and dedication shown by the pilots of the 359th summing up with:

The conspicuous intrepidity, aggressive tactics and esprit de corps displayed by the pilots of this unit on this occasion accounted for the destruction of thirty-five enemy aircraft and contributed to the safe escort of the attacking bombardment formations. The actions of this unit reflect the highest credit upon the 359th Fighter Group and the Armed Forces of the United States.

The determination shown by the 359th resulted in many outstanding pilots. One, Maj. Raymond “X-Ray Eyes” Wetmore became the 359th’s (370th FS) top ace scoring 21 victories (plus 3 on the ground)- his last being an Me 163. Flying latterly  in P-51 #44-14733, Wetmore, like Doersch had a very lucky escape when his aircraft was hit by friendly fire during the Battle of the Bulge. By putting the Mustang into a steep dive he was able to extinguish the fire and return home safely. Flying in three aircraft all called “Daddies Girl” after his daughter, he received numerous awards and by the end of the conflict had completed 142 missions covering 563 combat hours.

RAF East Wretham 4

The old part remains cordoned off.

This attitude to the war, gave the 359th a worthy credit of 263 aircraft shot down with over 100 more being destroyed on the ground. In the 346 missions they flew, they lost a total of 106 of their own aircraft.

Along with further support operations in France and Holland, the 359th went on performing ground attack missions as the allied forces entered Germany. At the war’s end flying wound down, and the USAAF remained at East Wretham until the November of 1945 when the 359th departed, returning to the States and inactivation. With this, no further flying took place at East Wretham and the skies would fall quiet once more.

The airfield then reverted to 12 Group (RAF) ownership, then in May the following year, it was handed back once more to Bomber Command. Within a month the site was handed over to the Technical Training Command and finally East Wretham became a Polish resettlement camp for those personnel who were unable to return home. When they had all finally been moved on, the majority of the site became what it is today, used by the British Army as part of the massive Stanford Practical Training Area (STANTA) for manoeuvres and live firing training.

Bomb Store

The bombs stores blast walls are still intact – just.

Today most traces of the airfield as it was are gone. A number of buildings notably a T2 hangar and several Nissen huts survive on what is now farmland or in the military camp. The unique Watch Tower was demolished after the war as were many of the other ‘temporary’ buildings. Now used by STANTA, a mix of old and new are intertwined with the majority standing on inaccessible military ground. Parts of the perimeter track and hardstands do exist, many overgrown or broken up by the weather and weed growth.

Perhaps the best and by far most accessible examples of East Wretham’s past, is the bomb site which forms part of the East Wretham Heath Nature Heritage Trail. Access is to the south of the site just off the main A1075, Thetford Road. A two-mile walk through Heath land, it takes you right through the original bomb store. An area of natural beauty, famed for its wetland and ancient flints, you can easily find the many blast walls and small fusing buildings still there. Also traceable are the tracks that once took bomb loaded trailers to the airfield across the heath. Many now buried under the acidic soil, their existence evident in exposed patches of bare concrete.

Bomb Store

The decay is evident throughout the bomb store.

All these stores are being gradually reclaimed by nature, trees and rabbit holes have both taken their toll, the layout is still discernible and whilst much of the brickwork is ‘intact’, the warning signs are there and the wartime structures are crumbling fast.

A small airfield, East Wretham was never considered the most ‘homely’ of sites. Often wet and boggy, it was one of the less well-known and less famous places to be used. But the courage and determination of those who served here both RAF and USAAF, went a long way to helping defeat the tyranny that stood facing us across the small section of water not so far away.

Sources and further reading: (East Wretham)

For more detailed information on the Free Czechoslovak Air Force see their superb website.

No.311 ORB – AIR 27/1687/7

*1 IWM –  FRE 6117

*2 IWM – UPL 31469

*3 IWM – UPL 22685

Norfolk Wildlife Trust website.

RAF East Wretham – Home to the Czechs of Bomber Command (P1)

Hidden in the depths of Thetford Forest not far from the two major US Air bases at Mildenhall and Lakenheath, is a former airfield that has received a new lease of life as an Army training facility. Once home to Bomber Command’s only Czechoslovakian Squadron, it was also home to Canadians and other Commonwealth nationals. After their final departure, it became the home of an American Fighter unit meaning its history is both diverse and multinational.

In Trail 13, we stop off at the former Station 133, more widely known as RAF East Wretham.

RAF East Wretham (Station 133)

Originally built in the early part of the Second World War and opened in March 1940, East Wretham was primarily designed as a satellite airfield for nearby RAF Honington.  Being a satellite the airfield’s facilities would be basic, accommodation rudimentary and technical facilities limited. It would however, be developed as the war progressed and as its use increased. The main runway for example, (running north-east to south-west) was initially grass but with the arrival of the USAAF it would be covered with Pierced Steel Planking (PSP), designed to strengthen the surfaces and thus prevent aircraft digging into the soil.

East Wretham would also have a range of hangars. In addition to the standard two ‘T2’ hangars, it would have a canvas Bessoneau hangar, (more generally linked to the First World and inter-war years),  and an additional four Blister hangars (9392/42) all believed to be double ‘extra over’ blister hangars each 69 ft wide in the singular design.

The watch office at East Wretham was another unusual design. Built to drawing 15498/40, it was originally a single storey room built on concrete pillars with a flat roof. It was then modified later on in the war to include an overhanging observation room, with the extension being mounted on metal pillars. This new extension had considerably more glazing than the original structure, and was more in keeping with the building style of other wartime airfields. These extra windows gave a much better view across the entire airfield, especially useful as the office was unusually located along the perimeter fence well behind the technical area of the airfield!

The Control Tower of the 359th Fighter Group at East Wretham. Caption on reverse: 'Caption on reverse: '359th FG Photos Source: T.P. Smith via Char Baldridge, Historian Description: #13 Control Tower at Station F-133, East Wretham, England.'

The unusual design of the Watch Office can clearly be seen in this photograph*1. (IWM)

Originally there were only 27 ‘frying pan’ style concrete hardstands, each one being located at various points around the perimeter track, all in groups of three or four. These were then added to later on, again using steel planking, to extend the number of dispersal points located on hard surfaces; a further indication to the problems with the boggy soil found in this part of East Anglia.

Accommodation for the initial 1,700 personnel, was dispersed over twelve sites around the north of the airfield, and across the road from the main airfield site. One of these sites (Site 2) was the nearby Wretham Hall, a grand building built in 1912, it was utilised by Officers of the USAAF for their own personal accommodation. Sadly, the grand three storey building was demolished in the early 1950s, possibly as a result of its wartime use.

A bomb storage site was also built on the airfield. Located on the south side of the site, it was well away from any accommodation or technical buildings. It was also well away from the three large fuel stores,  which boasted storage capacities of: 24,000, 40,000 and 90,000 gallons.

The initial use of East Wretham was as a dispersal for aircraft based at Honington, the first of which was a newly formed Czechoslovakian Squadron, No. 311 (Czech) Sqn, on 29th July 1940. So new were they that they didn’t receive their Wellington ICs until the August. This was to be a unique squadron in that it was the only Czech squadron to fly with Bomber Command, and whilst the main body of the squadron was located at Honington, the operational flight (A Flight) moved to East Wretham shortly after its  formation. In mid September a decision was made to move the entire squadron across to East Wretham posting a detachment to RAF Stradishall, where they stayed until April 1942.

On September 10th 1940, 311 Sqn, now with a small number of operational crews, took part in their first mission, a true baptism of fire flying directly into the German heartland and Berlin. For one of the crews and their Wellington, this would not go well, the aircraft believed forced down in the vicinity of a railway line near Leidschendam in Zuid-Holland, with all but one of the six airmen on-board being captured.

The only crew member not to be caught was Sgt. Karl Kunka, who managed to evade capture for a short period, only to shoot himself with the aircraft’s Very Pistol. It was thought that he carried out this action to not only avoid capture but any possible retaliation against his family back home in Czechoslovakia. Whilst Sgt. Kunka’s wounds were not initially fatal, they were so severe that he later died, failing to respond to treatment whilst in hospital.

The aircraft, Wellington MK.Ia, #L7788, ‘KX-E’, was also captured, repainted in Luftwaffe colours and flown for testing and evaluation to Rechlin, the Luftwaffe’s main aircraft test facility north of Berlin.

RAF East Wretham 3

East Wretham still uses the Nissen huts and smaller buildings today.

During December 1941, a further Czech unit, No.1429 Czech Operational Training Flight (COTF) was formed along side 311 Sqn, under the command of Sqn/Ldr. Josef Šejbl. This unit was designed specifically to train Czechoslovakian aircrews for Bomber Command, with instructors for the flight, being taken from 311 Sqn following completion of their tour of operations.

As aircrew completed their training, they were transferred to the operational flight, a steady but slow build up meant that numbers were quite low, the squadron being  considerably reduced by heavy casualties in the early stages of the war. As with other Bomber Command squadrons, 311 Sqn carried out night bombing missions, many penetrating Germany itself.

1941 would see more missions to Germany, starting with the first three nights January 1st – 3rd, when Bomber Command aircraft hit Bremen, with 311 Sqn taking part on the night of the 2nd. On this night, three aircraft from 311 Sqn would join the Hampdens and Whitleys of Bomber Command in attacking a major railway junction in the centre of the city, where fires and explosions were seen as far away as 20 miles. A relatively successful operation, it would not be long before the first casualties of 311 Sqn would occur.

On the night of January 16th – 17th Wellington IC #T2519 ‘EX-Y’ was lost on a mission to Wilhelmshaven, the aircraft going down after suffering ‘technical’ problems. Last heard from  at 22:21, the aircraft disappeared without trace along with the entire crew, none of whom were ever heard from again.

1941 would end as it started, with a return trip to Wilhelmshaven, in which good results were recorded. One aircraft was lost on this mission, Wellington #T2553 ‘EX-B’, the pilot, Sgt. Alois Siska ditching the aircraft after it had sustained serious flak damage over the target area. As the aircraft sunk, it took the life of the rear gunner Sgt. Rudolf Skalicky, the other’s climbing into the aircraft’s dingy, a small craft in which they remained for several days.

As the dingy drifted towered the Dutch coast, the icy conditions would take two more lives, that of Sgt. Josef Tomanek (Co/P) and F/O. Josef Mohr (Nav.), whilst the pilot, Sgt. Siska, suffered badly from frost bite and gangrene. The remaining crewmen, F/O. Josef Scerba (W/O), Sgt. Pavel Svoboda (air gunner) along with Sgt. Siska, were picked up by German forces and  interned as POWs, mainly staying in hospitals for treatment for cold related injuries. Sgt. Svoboda went on to escape captivity no less than three times, evading capture until after the war whereupon he returned to England.

By mid 1942, 311 Sqn were assigned a new posting and a new airfield, but before departing in their final month, April 1942, they  would be visited by two particularly significant dignitaries. On April 3rd, Air Vice Marshal J. Baldwin, Air Officer Commanding No. 3 Group, RAF Bomber Command, visited to award the DFC  to P/O. Karel Becvar for his services as a navigator with 311 Sqn. Then on the 18th April, the President of the Czechoslovak Republic, Dr. Edward Benes, arrived along with several other dignitaries to inspect the Squadron, and give a speech regarding the work carried out by the crews here at East Wretham.

Tarck to Bomb Store

A number of tracks remain on the site.

During their last month, 311 Sqn would fly twelve more operations before finally departing Norfolk for Northern Ireland and Aldergrove. Whilst here at East Wretham, they would fly 1,011 sorties which included both attacks on industrial targets and propaganda leaflet drops. On the 30th, the main air body along with the rear party departed the site, the bulk of the squadron moving two days earlier. After their departure, 311 Sqn would not return to East Wretham.

In November 1942, after a long quiet break, East Wretham would spring into life once more with the arrival of another bomber squadron, No. 115 Sqn (RAF) from Mildenhall now flying  Wellington MK.IIIs.

Over the winter of 1942-43, 115 Sqn would lose ten aircraft, most to missions over Germany but two whilst ‘Gardening’, the last occurring on the night of New Years Eve 1942.

During the early months of 1943 six more Wellingtons would be lost from 115 Sqn, KO-D, KO-X, KO-C, KO-N, KO-T and KO-Q, the new year had not brought new fortunes.

By now the limits of the Wellington had been realised and its days as a front line bomber were numbered. A poor performer in the bombing theatre, it would be gradually moved to other duties, being replaced by the superior four-engined heavies; 115 Sqn was no exception. The MK.II Lancaster, powered by four Bristol Hercules engines, was less common than the Merlin powered MK.I and MK.III, but none the less was far superior to the Wellington in both performance and bomb carrying capacity.

The first Lancaster arrived in the March of 1943, and as it did the Wellingtons began to depart. To help train crews on the new aircraft, a detachment from 1657 Heavy Conversion Unit (HCU) would be re-designated 1678 (Heavy Conversion) Flight (HCF) and was based here at East Wretham.

Flying the radial engined Lancaster MK.IIs under the code ‘SW’, they were one of only two HCFs to be established in Bomber Command, both in May of that year. Specifically set up to convert crews from the Wellington to the Lancaster, they were a short-lived unit, becoming a Heavy Conversion Unit once more on September 16th 1943, after moving to RAF Foulsham. During this time the flight would operate only eight aircraft in total, losing none whilst at East Wretham.

Even with the new aircraft though, flying over Germany was not without its problems for 115 Sqn. The first aircraft to be lost, and the first of its type in Bomber Command, Lancaster MK.II #DS625 ‘KO-W’ was lost without trace in a raid to Berlin on the night of March 29th/30th. The Pilot Sgt. H. Ross, (RCAF) and his crew all being commemorated on the Runnymede memorial. The aircraft being new, it had only flown 26 hours since its arrival at East Wretham earlier that year on March 9th.

rear-turret-of-Lanc-lost-595x478

Avro Lancaster B Mk II, DS669 ‘KO-L’, of No. 115 Squadron, was hit by bombs from an aircraft flying above. during a raid on Cologne on the night of 28th/29th June 1943. The tail gun and gunner were both lost. (Author unknown)

With more missions into Germany, 115 Squadron’s Lancasters  would continue to serve well, perhaps one of the worst nights occurring just days before their eventual departure to RAF Little Snoring in early August 1943.

On the night of 2nd/3rd a mission was planned for Hamburg in which 740 aircraft were allocated. Of these, 329 were Lancasters, by far the largest contingency of the raid. Whilst over Germany, the formation entered a severe thunderstorm, and with many aircraft suffering from icing, they were forced to either turn back, or find other targets. The poor weather, including lightning, accounted for several of the losses that night including one of three lost from 115 Sqn.

Lancaster #DS673 was shot down by a night fighter, #DS685 was lost without trace and #DS715 was struck by lightning causing it to crash not far from the target. From the three that went down that night, there were no survivors from the twenty-one crewmen on board. 115’s time at East Wretham would close on a very sour note indeed.

With the departure of 115 Sqn in August, East Wretham would then pass from RAF ownership into the hands of the US Eighth Air Force, to become Station 133, the home of the three squadrons of the 359th Fighter Group – ‘The Unicorns’

September 26th 1942, a near tragedy for three RAF Squadrons.

The Eagle Squadrons were three RAF Squadrons made up of American volunteers, their achievements and records are well-known and well documented, however, it was not all plain sailing for these determined and courageous flyers. For one Squadron in particular, 133 Squadron, September 26th 1942 would be a disaster, a disaster that would almost wipe out the entire flight of twelve airmen.

133 Squadron had been on the front line serving at RAF Biggin Hill and RAF Martlesham Heath before arriving at RAF Great Sampford, a satellite for RAF Debden. The ground crews were predominately British, assisting and training the US ground crews in aircraft maintenance and support. All the pilots however, were US volunteers, formed into three separate squadrons but under RAF control.

1st Lt Dominic 'Don' Gentile and Spitfire BL255 'Buckeye-Don', 336th FS, 4th FG, 8th AF.

1st Lt Dominic ‘Don’ Gentile and Spitfire BL255 ‘Buckeye-Don’. The photo was taken after 133 Squadron RAF was disbanded and absorbed into the USAAF as the, 336th FS, 4th FG, 8th AF. (@IWM)

133 Squadron would arrive at RAF Great Sampford on September 23rd 1942, the same day as 616 Sqn RAF departed, they would be the last operational unit to fully use the airfield before its eventual closure.

Initially flying the Spitfire VBs, they soon replaced them with the MK.IX, a Spitfire that was essentially a MK.V with an updated engine. Having a higher ceiling than the FW-190 and being marginally faster, its improved performance took the Luftwaffe by complete surprise. It was so new and improved, that it remained on the secret list until after this particular operational flight.

On that fateful day, September 26th 1942, fourteen Spitfires of 133 Sqn took off from RAF Great Sampford in Essex, piloting those Spitfires were:

BS313 – F/Lt. Edward Gordon Brettell DFC (61053) The only British pilot and leader
BS275 – P/O. Leonard T. Ryerson (O-885137)
BS446 – P/O. William H. Baker Jr (O-885113)
BS137 – P/O. Dennis D. Smith (O-885128)
BR638 – P/O. G.B. Sperry (O-885112)
BS445 – P/O. Dominic “Buckeye-Don” S. Gentile (O-885109)
BS138 – P/O. Gilbert G. Wright (?)
BS279 – F/Lt. Marion E. Jackson (O-885117)
BS447 – P/O. R.E. Smith (O-885110)
BR640 – P/O. C.A. Cook (O-885112)
BS148 – P/O. Richard “Bob” N. Beaty (?)
BS301 – P/O. G.H. Middleton Jr (O-885127)
BS140 – P/O. Gene P. Neville (O-885129)
Unknown  – P/O. Ervin “Dusty” Miller (O-885138) (not listed but known to have been on the flight).

They were to fly to RAF Bolt Head in Devon, where they would meet with 401 Squadron (RCAF) and 64 Squadron RAF, refuel and be briefed for the mission. A mission that was supposed to be straight forward and relatively uneventful.

The aim of the mission was to escort US bombers to Morlaix on the Brest peninsula. The usual commander of 133 Sqn, Red McColpin, was not placed in charge that day, instead he had been posted, and a British Pilot, F/Lt. Edward Gordon Brettell DFC, was issued with the task.

McColpin was a strict disciplinarian and his leadership was admired by those who followed him. Without this leadership, 133’s preparation was slack and they ultimately paid the price for this.

After landing at 12:30 hours, they realised there were no facilities at Bolt Head for refuelling, and they would have to go with what they had. This would kick-start a catalogue of errors that would ultimately seal the fate of the flight. Following a briefing in which Wing Commander Kingcombe DFC and all but two of 133 Sqn pilots had failed to show up for, the flight (which included the sixteen 401 (RCAF) Squadron Spitfire IXs from RAF Kenley) took off at 13:50 hours. Of the fourteen 133 Sqn Spitfires sent to Bolt Head, only twelve would be needed, and two pilots were instructed to remain at Bolt Head, they were P/O. Ervin Miller, and P/O. Don “Buckeye-Don” S. Gentile, they would be the luckiest two men of the squadron that day.

The briefing, a very vague and rushed one, instructed the flight to carry out a ‘Circus‘ mission escorting seventy-five B-17 Flying Fortresses from the 92nd BG, 97th BG and the 301st BG, who were bombing Cherbourg and the airfields at Maupertus and Morlaix in Brittany. When the squadron took off the weather was clear, and winds were predicted to be 35 mph at 24,000 feet, but 5 miles off the English coast, they encountered 10/10th cumulus cloud cover at 7,000 feet, and so had to climb above it so that they could locate the bombers more easily.

The take of was a mess, disorganised and lacking both radio information and in many cases maps, the aircraft were lucky not to collide with each other.

Of the three RAF squadrons involved in the mission, 401 would take the high position, 133 the middle and 64 Squadron, the lower. They were to form up over Bolt Head at 2,000 feet and then head at 200o at 180 mph to overtake the bombers before they arrived at the target. If they could not locate the bombers, the flight was to circle the target for three minutes and then depart.

As the flight approached the rendezvous area, one 133 Squadron Spitfire had to drop out of formation and return home, as he had encountered engine problems; this problem was thought to be due to his low fuel. The remainder of the flight  scanned the skies for any sign of the bomber formation, and after searching for some 45 minutes, they spotted the bombers, some 50 miles south of Brest. The bombers had in fact already turned for home after having discarded their bombs near to the Pyrenees.

By now the 301st BG had been recalled, as their fighter escort failed to materialise, whilst the 97th BG had continued on. However, due to the heavy cloud cover over the target area, they had been ineffective as no bombing of the target had taken place. The American bombers, who were only three months into their European air war, had inadvertently miscalculated a tail wind putting them off track well away from the Bay of Biscay.

1st Lt George H Middleton Jr 336FS, 4FG, 8AF USAAF. Former Eagle Sqn Spitfire pilot.

P/O. G.H. Middleton Jr of 133 Squadron RAF was shot down and taken Prisoner of War (@IWM).

The three squadrons formed up on the bombers at just after 16:45 hours, with 64 Squadron on the port side, 401 Squadron on the starboard and 133 Squadron behind. The whole formation then flew north for 30 minutes, at which point it became evident that the wind speed was in fact over 100 mph, and not the 35 mph as stated by the Meteorological Office, or at the briefing! It has since been revealed that this information was known to those in authority, but it had not been passed down the chain of command and the pilots were never informed.

The formation then spotted land, the bombers thought they were over Falmouth and turned right. 64 and 401 Squadron broke away maintaining height, but 133 Squadron dropped down below the cloud base and prepared to land.

133 Squadron then began to search for the airfield, and after searching in vain, they found a large town, this they hoped would give them the vital fix they desperately needed. Flying low over the houses they realised they were not over England at all but in fact still over France. The flight, uninformed of the 100 mph north-easterly wind at their altitude, had also been blown wildly off course, and after 1.5 hours flying time, the situation had suddenly become very severe indeed.

The Squadron flight Leader, Flight Lieutenant E.G. Brettell, wanting to ascertain his exact position, called up a ground direction finding station who provided a  bearing and heading – 100 miles off the English coast with a homing vector of 020o. It was at this point they suddenly realised they were over the port of Brest, one of the most heavily defended ports under German occupation.

Immediately, the sky filled with flak and small arms anti-aircraft fire. The pilot in the number 2 position, Pilot Officer Gene Neville (O-885129) in Spitfire #BS140, took a direct and fatal hit, he was killed instantly. Three other aircraft were to be shot down in the melee that followed: Pilot Officer William H Baker Jr (O-885113) in Spitfire #BS446; Pilot Officer Leonard Ryerson (O-885137) in Spitfire #BS275 and Pilot Officer Dennis Smith (O-885128) in Spitfire #BS294 – all four were killed, and all four were awarded the Purple Heart.

2nd Lt. Gene P. Neville 133 (Eagle) Sqn RAF, stands before his MK. IX Spitfire at Great Sampford. He was Killed during the Morlaix disaster. (@IWM UPL 18912)

The remainder of 133 Squadron struggling to defend themselves, they scattered and were forced to land out of fuel, either on the island of Ouissant or on the French mainland.

Of the seven 133 squadron pilots who crash landed on French soil, five were known to have been captured immediately and taken prisoner: P/O. G.B. Sperry; F/Lt.  Edward Brettell; F/Lt. M.E. Jackson; P/O. C.A. Cook and P/O. G.H. Middleton Jr., with a sixth, P/O. G.G. Wright, evading the Germans for several days before being captured later on.

Of these initial five, F/Lt. Jackson was injured in his crash and hospitalised for eight weeks. He was then taken to Stalag Luft III from where he was able to escape for about ten days by jumping from the roof of his cell house into a lorry load of evergreen branches that were being taken away from the camp.

Another Pilot, F/Lt.  Edward Brettell  DFC. was executed for his part in the Great Escape from the same prison camp, Stalag Luft III, whilst P/O. Robert E. Smith, the last remaining pilot, managed to abandon his aircraft evading capture, eventually returning to England on 18th January 1943.

The pilot who turned back early due to his own engine problems,  P/O. Robert Beatty,  crash landed his Spitfire at Kingsbridge in Devon after he too ran out of fuel over the Channel. During the crash he sustained severe injuries but luckily survived his ordeal and was able to give an account of the mission through what he heard over the radio.

Several of the 401 Squadron pilots,  who had continued on, also reported being low on fuel and gave their intention to bail out before land was finally sighted. One of these, P/O. Junius L. Hokan (s/n: J/6833), did have to bail out over the sea, he was last seen in a gradual dive, his aircraft heading seaward. His body was never recovered. Others in the flight that day only just made land fall, one crashed and was taken to hospital where he recovered from his injuries, the others just managed to reach either RAF Bolt Head or RAF Harrowbeer. The Operational Record Books for 401 Squadron state that “many casualties were avoided by the clear thinking and cool behaviour of all members of our Squadron“.

A full report of the days tragic events was issued to Fighter Command Headquarters by Wing Commander Kingcombe DFC, Squadron Leader Gaze and Squadron leader K. Hodson DFC.

The effect on those left behind in 133 Squadron was devastating. The result of poor preparation, inadequate briefings and sub-standard communication between the Met. Office and Fighter Command had cost many lives, and very nearly many, many more. A number of postings to the Far East soon followed, and many lessons weren’t that day that led to improvements preventing such a tragedy ever happening again.

133 Squadron would continue to operate after this, transferring over to the USAAF being renumbered as 336th FS, 4th FG, three days later as planned, leaving both RAF Great Sampford and the sad memories of that very tragic day far behind.

S/L Gordon Brettell 133 Eagle Squadron

S/L Gordon Brettell, 133 Eagle Squadron, executed for his part in the Great Escape breakout at Stalag Luft III  (@IWM UPL 25574)

Sources and further reading.

Great Sampford appears in Trail 50.

National Archives: Operational Record Book 133 Sqn – AIR 27/945/2

National Archives: Operational Record Book 401 Sqn – AIR 27/1772/17

National Archives: Operational record Book 64 Sqn – AIR 27/590/41

*3 Price. A., “Spitfire – A Complete Fighting History“, Promotional Reprint Company,  (1974).

RAF Holme – From Bomber base to Fighter Development (P2)

After part 1, we continue at Holme-on-Spalding Moor. Holme has recently changed hands owing to the reorganisation of Bomber Command boundaries. 101 Squadron had departed and now 78 Sqn were moving in.

76 Sqn had been through a number of disbandments and reforms since its original inception in 1916.  Being reformed in 1941, it arrived here at Holme-on-Spalding Moor from Linton-on-Ouse, another Yorkshire base. It was truly a multi-national squadron, made up of Polish, Norwegian, New Zealand and Canadian crews.

76 Sqn would see the war out at Holme, progressing through a series of Halifax upgrades, from the Mk.V, to the better performing MK.III and onto the MK.VI, a model they used in the final operations on 25th April 1945.

Shortly after arriving at Holme, 76 Sqn would suffer their first loss, with the downing of Halifax MP-Q #DK224, on the night of 22nd/23rd June 1943. On board this aircraft was Group Captain D. Wilson (RAAF) their station commander.  Of the eight men on board all but one (Sgt. R. Huke’s, parachute failed to open after he had baled out of the aircraft) survived, seeing the war out as POWs. Whilst the crew survived, albeit in captivity, it was none the less a blow to the station losing such a prestigious officer. The mission to Mulhelm saw 557 aircraft of mixed types attack and destroy 64% of the town including road and rail links out of the city, virtually cutting it off from the outside world. Whilst a heavy loss for those on the ground, it also suffered the loss of thirty-five aircraft, 6.3% of the force, a figure well above the ‘acceptable’ limit of Bomber Command losses.

File:Royal Air Force Bomber Command, 1942-1945. CE91.jpg

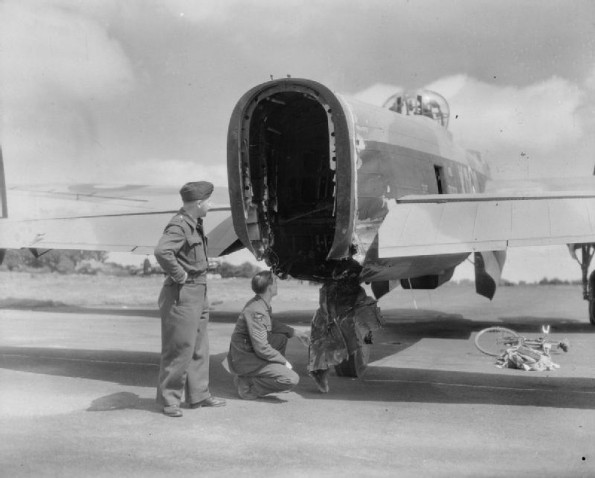
Halifax B Mk.II, DK148 ‘MP-G’ “Johnnie the Wolf”, of No. 76 Squadron RAF rests at Holme-on-Spalding Moor, after crash-landing on return from an operation to Essen on the night of 25th/26th July 1943. The propeller from the damaged port-inner engine flew off shortly after the bombing run, tearing a large hole in the fuselage. The mid-upper gunner immediately baled out, but the pilot, F/L. C. M. Shannon, regained control of the aircraft and managed to bring the rest of the crew back to Holme. © IWM (CE 91).

Perhaps one of the more bizarre accidents to happen at Holme was the death of a car driver who ended up on the runway as aircraft were taking off. On December 7th 1944, Halifax MK.III #NA171 ‘MP-E’ piloted by F/O. W. MacFarlane had begun its take off run when the pilot noticed a car parked on the runway. Unable to stop or divert, he lifted the huge aircraft up over the car, but clipping it as he passed. The occupant of the vehicle was killed but the aircraft carried on relatively unscathed. This same aircraft was brought down later that month over Kola with the loss of all but one of the crew.

For the duration of the war, 76 Sqn would take part in some of the heaviest air battles over Germany: Essen, Koln, Hamburg, Nurnberg and Berlin, in which losses were sustained in all. By the war’s end, 76 Sqn had been credited with 5,123 operational sorties, in which they had lost 139 aircraft, the highest number of missions by any Halifax squadron.

By the end of the war, it was decided that Bomber Command was to be reduced, No. 4 Group would become a transport group, No. 4 (Transport) Group, a change of ownership meant not only a change of role but a change of aircraft too. The Halifaxes were swapped for C-47 Dakotas in May 1945, and three months later the unit transferred from Holme to Broadwell and eventually the Far East.

Other resident units at Holme including No. 1689 (Bomber) Defence Training Flight (15th February 1944 – 7th May 1945) were also disbanded as their services were no longer needed. Many of these training flights had already disbanded by the end of 1944, as the force was being cut back and reduced. The Spitfires, Hurricanes and other assorted aircraft being disposed of in various manners.

RAF Holme on Spalding Moor

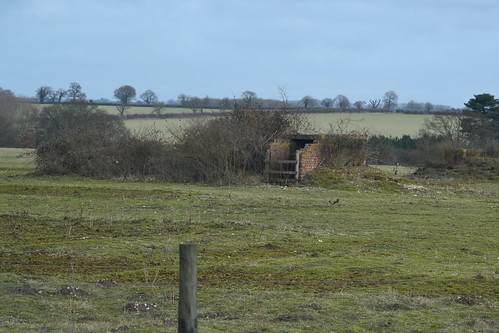
One of two turret trainers still on site.

As 76 Sqn left, another Dakota unit moved in to the void left behind, but 512 Sqn, a short-lived squadron, left in the October and eventual disbandment in 1946.

For the next six years Holme-on-Spalding Moor was left in a state of care and maintenance, slowly degrading over that time. At this point Holme’s future took a turn for the better when No. 14 (Advanced) Flying Training School  was reformed in response to an increase in pilot training needs. Reformed along with a small number of other training flights such as 15 Flying Training School, at Wethersfield, they were short-lived units, operating aircraft such as Airspeed Oxfords. No. 14 AFTS disbanded at the end of January 1953 at Holme.

However, the demise of 14 AFTS was to allow the airfield to transfer to the USAF, for deployment of its bombers of the Strategic Air Command (SAC). A move that would require extensive upgrading of the airfield including lengthening of the main runway to 2,000 yards. The USAF moved large amounts of equipment through Holme, while the main airfield at Elvington was also upgraded. The extensive work carried out here though would not to come to anything, and after three years the USAF pulled out leaving Holme empty once more.

RAF Holme on Spalding Moor

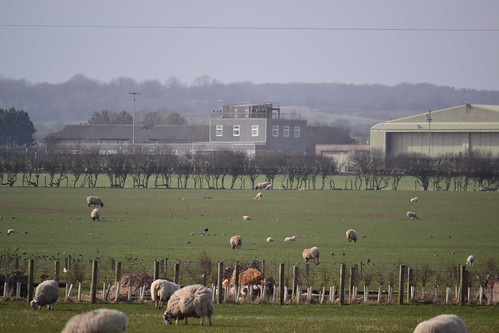
The perimeter track bends round the former technical site.

However, it was not the end of Holme, the upgrading work meant that Holme airfield had a good long runway capable of taking the modern fast jets coming on-line. Blackburn Aviation Ltd, who were based not far away at Brough, saw the potential and began to carry out trials of the new Blackburn NA.39 ‘Buccaneer’. A rugged carrier-borne, high-speed, low-level strike aircraft, it went on to serve in both the Royal Navy and the RAF – the prototype (XK486) being first flown at RAE Bedford on 30th April 1958, piloted by Derek Whitehead.

As Brough could not accommodate the Buccaneer, the aircraft were towed on their own wheels, backwards, along the roads around the area. Protected by a Police escort, they were commonly seen in the back streets of Holme being prepared and test flown from the new runway at Holme airfield.

An aviation firm established by Robert Blackburn in 1911, Blackburn Aviation became an established aircraft manufacturer during the interwar and war years, producing models such as the T-4 Cubaroo of which only two were built, the B-2 trainer and the B-24 Skua, the first British aircraft to shoot down an enemy aircraft on 25th September 1939.

Blackburn concentrated on ship-borne aircraft, many, including the early variants, having folding wings. In the Second World War they produced the B46 Firebrand, a successful aircraft, of which they produced just over 200 models of different variants. The Buccaneer was their modern version and proved to be just as successful. In the 1950s they also produced the Beverley, which at the time was the largest transport aeroplane in the world.

Over the next 40 years, the British aircraft industry would go through major changes, big names like Blackburn were amalgamated into Hawker Siddeley Aviation, then British Aerospace and finally the modern BAE Systems.

Bruntingthorpe May 2016 106

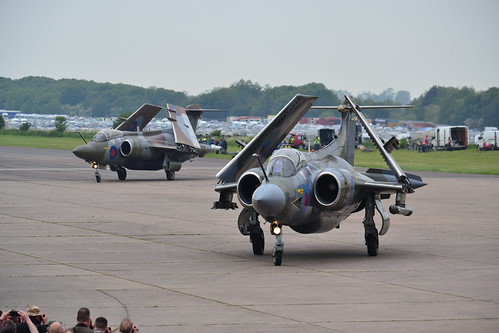
AT the former RAF Bruntingthorpe, Buccaneers regularly perform fast taxis along the runway. A sight and sound that once graced Holme-on-Spalding Moor.

The change brought new opportunities for Holme. The development of the American McDonnell Douglas F-4 Phantom allowed for testing at Holme, along with Harriers and Hunters of Hawker Siddeley fame. Trails of the Phantom included taking it to the extremes of its performance envelope, pushing the aircraft through maximum turns at supersonic speeds. Don Headley, Hawker Siddeley’s Chief Test Pilot at Holme, described the tests as “arduous” but “exhilarating nevertheless”.*3

Being a test pilot was a dangerous job, pushing aircraft to unknown limits. Deputy Chief Test Pilot with Blackburn Aircraft, Gartrell R.I. “Sailor” Parker DFC, AFC, DSM had to eject from the first prototype Buccaneer XK486 on 5th October 1960 when it got into difficulty following the artificial horizon breaking whilst in cloud. Both he and his passenger, Dave Nightingale, managed to escape the aircraft without injury. However, he didn’t have such a lucky escape when on 19th February 1963, the aircraft he was testing, Buccaneer XN952, went into an upright spin following a Low Altitude Bombing System (LABS) demonstration over Holme airfield.

In this manoeuvre, the aircraft flys in low enters a climbing loop and then releases the bomb near to the top of the loop, the aircraft completes the loop pulling away before the bomb strikes the target (also called ‘Toss’ or ‘Loft’ Bombing).  During the demonstration there was a loss of control due to a ‘roll-inertia coupling’ resulting in violent pitching and yawing, and loss of control as the aircraft rotated on all three axes. In the accident both Parker and his back seat observer, Mr Gordon R. C. Copeman (Senior Flight Test Observer), ejected from the aircraft, but Parker was too low, and Copeman fell into the burning wreckage after it had hit the ground. *4

Eventually on December 7th 1983, Buccaneer XV350 and Phantom XV429, took off  from Holme for the final time signifying the final closure of Holme airfield, a closure that ended a long history of aviation. With that, the name ‘Blackburn’ was gone forever, but the legacy of Robert Blackburn and his remarkable work in the aviation field would live on for many years yet.

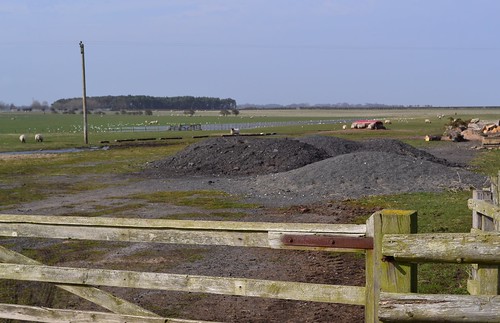
No longer required or aviation purposes, Holme was sold off, the runways and Perimeter tracks were dug up, and the grounds returned to agriculture.

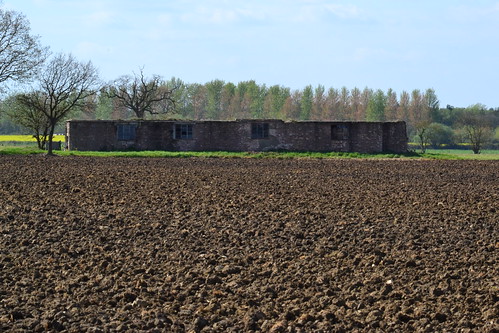
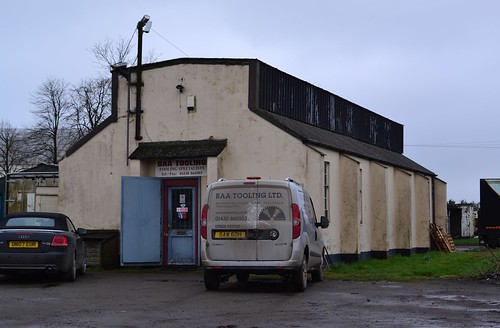
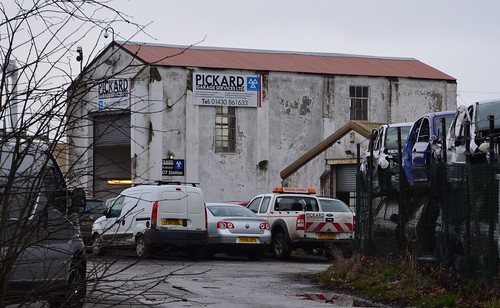
Sadly, the technical area which is now an industrial estate, is run down and tatty. Many of the original buildings are used by small businesses, furniture manufacturers, tool makers and car part suppliers. Buildings that are not used are run down and in dangerous conditions, fenced off they have a limited life span left. That said however, it remains quite intact and there are a good number of buildings left to see.

RAF Holme on Spalding Moor

Sadly many of the buildings are in a poor state of repair and have only a short life left.

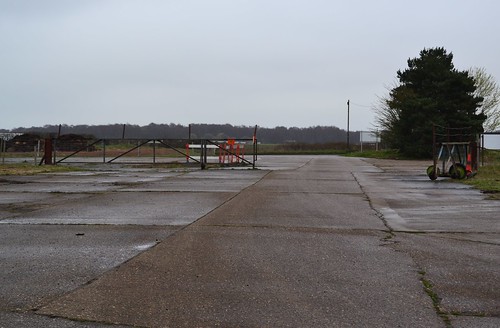
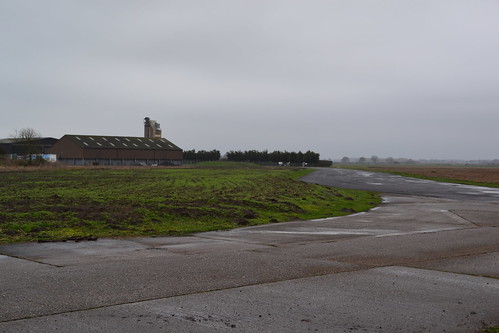
If approaching from the village of Holme-on-Spalding Moor along Skiff Lane, you arrive at the first of three entrances. The first is the former perimeter track located at the north end of one of the secondary runways. The runway has long gone, but there is a hardstand still present, its large circular footprint giving a good indication of the nature of the site. This road leads round to the technical area and where the watch office was. A Post-war Fire Tender Shed does still stand here, but the office was believed  demolished in 1984. This road is gated and access is not permitted beyond here.

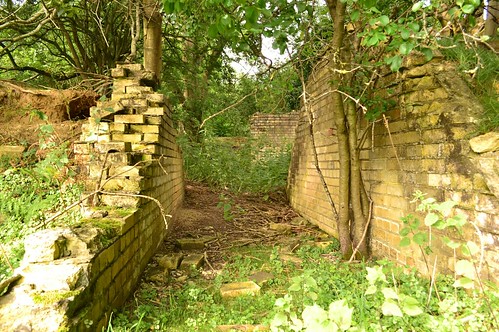
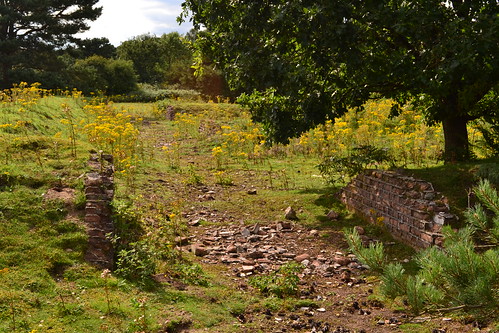
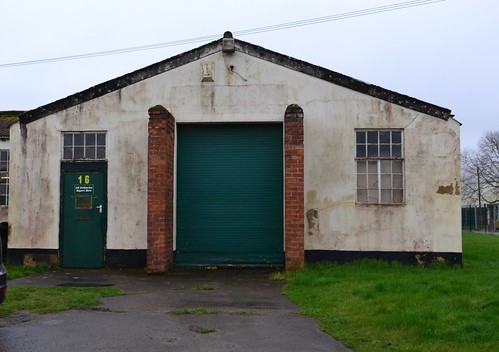
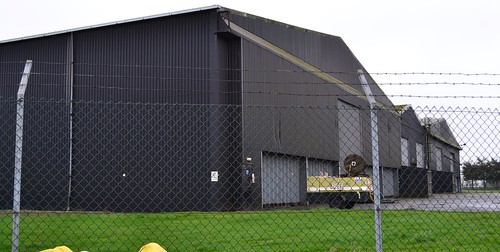
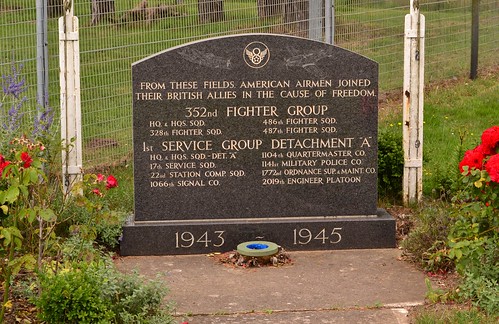
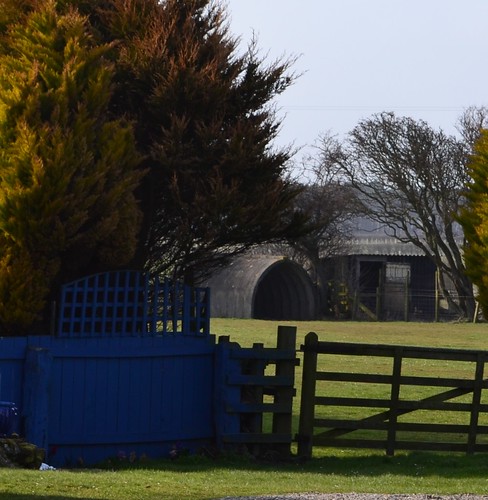
Continue along the road and a second entrance allows access to a small number of buildings of the former technical site. There is evidence across the road of further buildings but these have been removed leaving only their foundations visible. Continue passed here and you arrive at the main entrance, the two memorials are located just inside on the left hand side.  Continue along this road and you are entering the technical area, with a number of buildings on either side. Distinctly clear are the turret trainers and parachute stores, all in use with small businesses. At the end is one of the T2 hangars, re-clad and in use but inaccessible. Driving / walking round here you can see many of the former stores and admin blocks that formed the heart of the operations.

Some of these buildings are fenced off and in a dangerous condition, others have been better looked after, most are used by small businesses.

Commemorative memorials can be found at the former entrance to the site, including one to Group Captain (Lord) Cheshire VC, OM, DSO, DFC, who commanded 76 Sqn before being posted to Marston Moor. A highly respected man, he fought for changes to the Halifax to improve its handling and performance, and also post war, for funding for the memorials that stand at the entrance. His record of achievement and dedication is well versed across the history books and internet.

RAF Holme on Spalding Moor

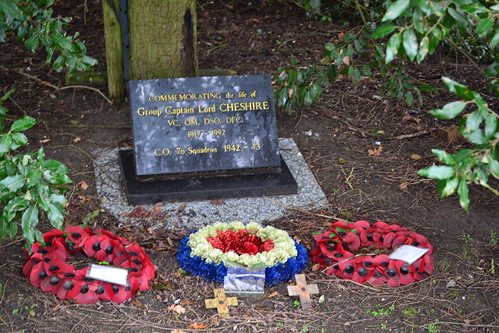
Memorial to Group Captain Leonard Cheshire.

Holme-on-Spalding Moor is a remarkable airfield that is steeped in history. From the early days of the 1941 to the end of 1983 it saw some of the most heroic acts and the greatest advances in aviation. It took the fight to the heart of Nazi Germany, it led the way in state of the art fighter testing, rising like a phoenix out of the ashes until its final dying day.

Its present condition does not sadly reflect the enormous contribution it, and its personnel played in those turbulent years of history. Whilst having a largely intact technical area, its condition is a sad reflection on the importance we place on these once busy and historical places. Even with considerable development between inception and closure, and an ever-changing facade, the main heart of Holme always remained, but today sadly, it is a heart whose beat is slowing and one that will no doubt eventually stop and die. A remarkable place indeed.

Not far from here are both the airfields at Breighton and Melbourne, both of which have flying activities still going on, ‘intact’ runways and a number of buildings are still present. Also in Holme village is the All Saints Church, sadly kept locked out of hours, it has a window of remembrance dedicated to the crews of 76 Sqn and their heroic battle against Nazi Germany. It also has a number of graves from those who never saw peacetime again. It is certainly worth a visit.

Sources and further reading.

*1 The base system was brought in following the need for more airfields at the end of 1942 when the United States was drawn into the war. To ease administrative and support problems associated with multiple airfields, they were combined into a groups of 3 (or 4) with a parent station and 2 (or 3) satellites. Overall command was given to the HQ airfield (or base) headed by an Air Commodore. Approved in February 1943, it was rolled out over the following year.

*2 Australian War Memorial, Article number P04303.010

*3 Caygill, P., “Phantom from the Cockpit“, Leo Cooper Ltd; First Edition edition (26 July 2005) Pg 134

*4 ejection-history Website accessed 27/8/18.

ORB AIR 27/1902/1 National Archives

The 458 Squadron website aims to preserve the Squadron’s history paying tribute to those who served.

Chorley, W.R., Bomber Command Losses of the Second World War, Midland Counties Publications (1994)

BAE Systems website, accessed 27/8/18.

RAF Holme – From Bomber base to Fighter Development (P1)

In this next part of Trail 40, we head to the south-east of York, to an airfield that started off as a bomber airfield in the early stages of the war. As Bomber Command operations grew, so did the airfield, and so too did the casualties rise.

Post war, it went on to play a minor part in the cold war as an American air base, then like a phoenix out of  the ashes it rose to feature in the development of modern British fighter jets. Sadly, it all ended with the demise of the British aviation industry, now a handful of dilapidated buildings form the core of a rundown industrial estate that was once RAF Holme-on-Spalding Moor.

RAF Holme-on-Spalding Moor (RAF Holme/Spaldington)

The parish of Holme-on-Spalding Moor is  the largest historic parish in the county of  East Riding, covering 11,514 acres, with  a history that goes back as far as the iron age. The majority of the parish was, before the mid 1700s, a moorland, a bog in many places, that only the brave or knowledgeable could safely cross. The village and surrounding area is dominated by the medieval All Saints Church, that sits on land called Beacon Hill, 45m above sea level, about half a mile to the north-east of the village. The village  sits approximately halfway between York and Hull, whilst the airfield itself lies a few miles south-east of the village in the small hamlet of Tollingham.

Construction began in late 1940 as a bomber airfield for the expansion of the RAF’s No 4 Group, one of forty-three built in Yorkshire. It would initially cover around 400 acres, taking land from four separate local farms, an area that extended to over 1,500 acres as the war progressed.

RAF Holme on Spalding Moor

Many of the buildings still stand used as an industrial site.

Designed in the early stages of the war, as a parent station for Breighton and Melbourne (implemented after the introduction of the Base system in February 1943*1), Holme-on-Spalding Moor (or Holme) was built as a dispersed airfield with accommodation constructed to the north-east away from the main airfield site, the start of a new design aimed at reducing casualties in the event of an attack.  As a Scheme ‘M’ airfield, it would have one austerity measure ‘J’ type hangar and two type T2 hangars, designed to replace the former Type ‘C’ hangar. By the end of the war, these numbers would have been increased giving a total of five Type T2s and one ‘J’.

Whilst not a Class A airfield (implemented in 1942), Holme was built with three intersecting concrete runways, thirty-six dispersed hardstands and a watch office (designed to drawings 518/40 & 8936/40) built of brick, concrete and timber. As a parent airfield, the office would have a meteorological section attached.

The technical site was located to the north side of the airfield (within the legs of an upturned ‘A’ with the bomb store to the north-west and the dispersed accommodation area to the north-east. At its peak it housed upward of 3,000 personnel of mixed rank including nearly 500 WAAFs. For many, Holme-on-Spalding Moor was not a particularly pleasant stay, the locals objecting to the influx of airmen into their quiet community, forcing ‘nights out’ to go much further afield. Those who stayed here considered it bleak, cold and damp with few comforts, but like many personnel on Britain’s wartime airfields, they made the best of what they had.

Once the airfield was declared open, it was handed to No. 1 Group to train (Australian) bomber crews on the Wellington bomber. The first major squadron to arrive was 458 Sqn (RAAF), formed at Williamtown, New South Wales, under Article XV of the Empire Air Training Scheme. Many airmen were posted to Canada to finish their training, before finally being sent to the UK and their first operational squadron. The first thirty-seven of these qualified airmen spent the majority of August 1941 en route to the UK, arriving at Holme later that month, where they joined with other commonwealth airmen to form the squadron. The first aircraft they would use was the Vickers Wellington MK.IV, a model they retained until January/February 1942, when they replaced them with the MK.IC. At the end of March that year, 458 Sqn transferred to the Middle East, retaining various models of Wellingtons for the remainder of the war.

RAF Holme on Spalding Moor

Very easily visible is one of the few hardstands that survive at Holme today.

Whilst here at Holme-on-Spalding Moor, 458 Sqn would focus on the strategic bombing campaign against Germany, taking part in operations that took them to numerous cities in both Holland and Germany.

On the night of 20th/21st October, ten aircraft from 458 Sqn  joined twenty-five other aircraft in a raid on the port of Antwerp. With other raids targeting Bremen, Wilhelmshaven, and Emden, it would be a busy night for Bomber Command. On board one the of the 458 Sqn aircraft (Wellington IV #Z1218, ‘FU-D’) was: Sgt. P. Hamilton (Pilot); Sgt. P. Crittenden; P/O. D. Fawkes; Sgt. T. Jackson; Sgt. A  Condie and Sgt. P. Brown. The aircraft would depart Holme-on-Spalding Moor at 18:39, on the squadron’s first operational sortie. The weather that night was fair but cloud covered much of the target, and so many aircraft returned with their bomb loads intact. On route, just after midnight, Wellington ‘FU-D’ was shot down by a German night-fighter, with all but Sgt. Brown being killed.

The average age of these men was just 23, Sgt. Philip George Crittenden (aged 20) was the first Australian airman to be killed whilst serving in an RAAF Bomber Command squadron. He, along with the remainder of the crew, were buried in the Charleroi Communal Cemetery, Belgium, and is commemorated on Panel 106 at the Australian War Memorial.

Pilots of No. 5 Flight at No. 4 SFTS, Saskatoon, Canada. The majority of the students are recently arrived members of the RAAF, who travelled to Canada under the Empire Training Scheme. Third row back, left side:  Sgt Phillip George Crittenden 400410 (KIA 20th/21st October 1941)*2

A second 458 Sqn bomber (#R1765) was lost on the night of 22nd/23rd October, on operations to Le Harve. Hit by flak, the aircraft made it back to England where the crew baled out. Only one crewman, Sgt. Hobbs, failed to do so, his body was subsequently found in the bomber’s wreckage. A third Wellington was lost before the year was out, that of  #R1775 which lost contact at 20:35 on the night of 15th/16th November 1941, with the loss of all crewmen.

The October also saw the arrival of No. 20 Blind Approach Training (BAT) Flight, formed at the sub-station RAF Breighton, they moved here in the same month only to be disbanded and reformed as 1520 Beam Approach Training (BAT) Flight. This addition brought Airspeed Oxfords and Tiger Moths to the airfield, and was designed as part of the pilot’s training programme teaching night landing procedures.

January 1942 saw little change, with the loss of three further aircraft, one (#Z1182) ‘FU-G’ due to icing causing the aircraft to crash just after take off, a further two were lost 3 days later,  #R1785 was hit by flak and crashed over the target, with #Z1312 hitting high tension wires after returning home suffering flak damage from an aborted mission. In total there were twelve airmen killed and six injured in just three days, a terrible startto 458 Sqn’s entry into the European war.

During the February 1942, 458 Sqn began changing their Mk.IVs for MK.ICs, and then on March 23rd they moved out of Holme-on-Spalding Moor and set off to the Middle East, where they remained until the war’s end.

RAF Holme on Spalding Moor

Original hangars once housed Lancasters, Halifaxes and Buccaneers!

This left 1520 (BAT) Flight the sole users of Holme-on-Spalding Moor, until the August when, for a short period of six weeks, 460 Sqn Conversion Flight stationed a flight of Halifaxes here from the sub-station at Breighton. The four engined heavies then went through a period of changes eventually taking on the Lancaster.

After their departure, the end of September saw another Wellington squadron arrive, that of 101 Sqn RAF. The squadron, who transferred in from No. 3 Group, remained off operations for a short while whilst they converted to the new Lancaster, a major change from the poorer performing twin-engined ‘Wimpy’.

It was during one of these training flights that 101 Sqn would suffer their first accident at Holme, when it was thought, a photo flash flare exploded causing structural failure of the  Lancaster’s fuselage whilst flying over Wales – all seven crewmen were lost in the tragic November accident. During the autumn and winter months training would continue as Wellingtons were gradually withdrawn from front line operations, and units converted to the four engined bombers, primarily the Lancasters. Holme-on-Spalding Moor was no different, and once over, 101 Sqn would continue where 485 Sqn left off, taking the fight to the German heartland. During 1942-43 they would lose six aircraft in non-operational flights and fifty-nine during operations.

During January 1943, the first three aircraft of the year would be lost; Lancaster Mk.Is #W4796 ‘SR-R’, #ED443 ‘SR-B’ and # ED447 ‘SR-Q’ were all lost on operations to Essen and Hamburg with no survivors. Twenty-one fully trained aircrew were gone along with their aircraft.

Whilst the Lancasters of 101 Sqn fared reasonably well compared to other units, casualties being generally light, there was one night that stood out above all others, a night that would devastate the crews of 101 Sqn.

RAF Holme on Spalding Moor

The parachute store is now a tool shop.

On the night of 4th/5th May 1943, during the Battle of the Rhur, 141 Halifaxes, 255 Lancasters, 10 Mosquitoes, 80 Stirlings and 110 Wellingtons headed for Dortmund. A massive force, it was the largest single force below the 1,000 bomber raids so far, it was also the first major attack on Dortmund. Reports say that marking was accurate, but decoy fires lit on the ground drew many bombers away from the actual target. Even so, damage was extensive, with large areas of the city being flattened, over 3,000 buildings were either destroyed or damaged and 1,700 people either killed or injured. Sadly, 200 POWs were amongst those killed, alas a new record had been set for ground casualties. As for the Lancaster force, only six were lost, a small percentage compared to the other aircraft, but all six were from 101 Squadron.

All aircraft took off between 21:40 and 22:05 and headed out toward Germany. Of the six lost, one was lost without trace #W4784 ‘SR-E’ piloted by Sgt. W. Nicholson, and another ‘SR-F’ #W4888, piloted by F/O. N. Stanford, was shot down by a night fighter crashing in Friesland with the loss of six. The remaining four crashed either on their way out from, or on their return to, the airfield. ‘SR-G’, #W4863 piloted by Sgt. J. Browning (RNZAF) crashed at Scorton near to Richmond, Yorks; ‘SR-U’ #ED776, piloted by F/S. F. Kelly crashed short of the runway without injury; ‘SR-X’ #ED830, piloted by Sgt.F Smith hit trees near to Little Ouseburn, Yorkshire, and ‘SR-T’ #ED835 piloted by W/O. G Hough, was hit by flak but managed to return to Holme-on-Spalding Moor crashing a few miles away between Hotham and North Cave. On this night twenty airmen were lost, one was taken as a POW and seven sustained injuries of varying degrees. It would be the worst night for 101 Squadron for many months.

All Saint's Church

W/O. Gerald Hough killed on the morning of May 5th 1943 on 101 Sqn’s worse night of the war so far.

With the final loss taking place on the night of 12th June 1943, 101 Sqn would three days later, depart Holme-on-Spalding Moor for good, moving to Ludford Magna in Lincolnshire. A move that was triggered by the reorganisation of Bomber Command boundaries, Holme being taken over by No. 4 Group RAF.

The move would mean there would be no peace at Holme though, as 101 Sqn departed 76 Sqn arrived not with Lancasters though, but the other four engined heavy – the Halifax.

In Part 2 we see how 78 Sqn coped with the Halifax, an aircraft that was overshadowed by the Lancaster. Initially a poor performer, with improved engines it began to make its mark. It was slow process and in the meantime casualties for Halifax crews remained high. We also see what happened to RAF Holme post war, and how it played its part in the development of Britain’s jet fighters.

RAF Bodney – High casualties and Heroic acts (Part 2).

After Part 1, we return to RAF Bodney to the point where the RAF had pulled out handing Bodney over to the US forces. From now on, it would be the home of the USAAF 352nd FG, its P-47s and P-51s.

Famed for the blue-noses on their P-51s, there would be high successes but there would also be many tragedies along the way.

Formed previously in September 1942, the 352nd Fighter Group (FG) composed of three Fighter Squadrons (FS): 328th FS, 486th FS (previously the 21st PS) and 487th FS (formally the 34th PS). Their journey had been both long and difficult, using elements of two squadrons who had previous battle experience in the Pacific theatre. The new 352nd would move through a series of training camps and bases across America, serving as part of the US Air Defence force before deploying overseas. From Mitchel Field, they transferred to Bradley Field (Connecticut), Westover Field (Massachusetts), Trumbull Field (Connecticut) and onto Republic Field, New York before  eventually leaving on the Queen Elizabeth arriving a week later at Bodney on July 7th 1943.

Arriving via Greenock and the Queen Elizabeth, the ground echelons of the 352nd were deposited at Watton station where they were taken by truck to RAF Watton. Pleasantly surprised by the far nicer accommodation blocks they had been used to, their joy was to be short-lived as Bodney was perhaps even worse than the original training camps they had endured back home.

Whilst the surrounding woods had been utilised for aircraft dispersal, the base was in need of an upgrade if it was to be used successfully. These improvements included the addition of steel mat and pierced-steel planking hardstands, additional taxiways and more roads constructed of both macadam and concrete. The men of the 352nd commuted daily from Watton carrying out repairs and improvements until such time as the airfield was more or less ready for occupation and they moved in.

During its time, Bodney would have two T2 hangars and five Blister hangars, accommodation would continue to be limited, allowing for around 1,700 men of mixed rank. Eleven accommodation sites were spread round the north and east of the main airfield, which included two communal sites (site 2 and 3) and two sewage works (sites 12 and 13). There were no WAAF accommodation blocks and due to initial shortages of Nissen huts, nearby Clermont Hall (originally a grand plastered brick Italian style building built by William Pilkington in 1812 as Lord Clermont’s hunting lodge*1)  was ‘requisitioned’ and flying crews moved in, it was a complete change and total luxury compared to other bases and camps used by either the RAF or USAAF. However, following a visit from an Air Inspector, the stay was short-lived and the airmen moved back to the basic hutting of Bodney, even after strong protests from Group Commander, Lt. Col. Joe Mason.

Master Mark II glider tug at Bodney, during airborne forces Exercise ‘SNAFFLE‘ © IWM (H 31737)

During this time manoeuvres regularly took place in the local area, and between August 9th and 11th 1943, one such exercise was conducted near to Newmarket, an exercise that involved both Polish and Canadian divisions opposing each other in mock attacks. During exercise ‘SNAFFLE‘, Master Mark II glider tugs used Bodney airfield whilst dropping a range of supplies such as petrol, ammunition and ordnance to illustrate both the usefulness, and importance of such activities. This made an interesting change to Bodney and something else for the crews to focus on.

It wasn’t long however, before the first P-47s were to arrive at Bodney, and at last flying could begin again with training flights started very soon afterwards. However, maintenance and flying operations were arrested by the lack of equipment, spares and aircraft – all very typical of the build up of US squadrons across the UK. As morale sunk, a special visitor arrived at Bodney, that of Capt. Clark Gable along with a film crew who were documenting the lives of American Fighter Squadrons involved in the European war.

A line up of P-47 Thunderbolts including (PZ-T,) “Little Evey” and (PZ-Z) “Pistol Packin’ Mama” at Bodney.  (IWM FRE 2795)

On September 9th 1943, some two months after their arrival, the 352nd flew their first mission. An uneventful patrol over England’s eastern coast between Southwold and Felixstowe. For the next few mission, even those into enemy territory, similar conditions were found, the enemy were not seen and flak remained low. However, this did not mean the 352nd were casualty free.

On 13th September 1943, Lt. Arthur Eaker was killed in a local flying accident, the groups first, then on the 14th, Lt. William Alm disappeared whilst in flight over the North Sea. His aircraft P-47D (#42-22531) was thought to have been lost due to mechanical failure, he was never found.

It wasn’t until the 10th October that the pilots of the 352nd got to fire their guns in anger, when they encountered a flight of Bf-109s near to Hertogenbosch, Holland. The first kills were recorded, but it was not to be all plain sailing. Four days later on the 14th (‘Black Thursday‘), the Luftwaffe changed tactics and hit the escorts as they crossed the coastline. Leaving the bombers unescorted to their targets in Germany. Once away from their ‘Little Friends’ the bomber formations were decimated by Me-110s – something need to be done.

With more mission to Germany and escort duties, the 352nd began to cut their teeth and become battle hardened. By the turn of the year they had completed 38 missions with the loss of ten aircraft. The pilots of the 352nd had now twenty-two enemy aircraft as confirmed ‘kills’, but five of their own were killed and two others had been made prisoners of war.

A new year and new directives for fighter squadrons. in order to achieve total air superiority pilots were instructed to hunt for the Luftwaffe and destroy them whenever the opportunity arose. Every aircraft destroyed on the ground now counting as a battle credit, the same as an aerial kill. In addition, fighter squadrons were now given designated ‘zones’ to protect, and once the bomber stream had passed through their zone, the fighters were free to roam at will. The gauntlet had been thrown and the US pilots were hungry for rewards.

Early 1944 saw these directives put into action. ‘kill’ rates began to rise, but along with it casualties also mounted. By February the war-weary P-47s were looking tired and the new P-51 began to appear. The Ninth Air Force taking first pickings with Don Blakeslee, (Trail 46 and Trail 50) formerly of the ‘Eagle Squadrons’ becoming the first US squadron to have the mighty Mustangs. It wasn’t until March 1st, 1944 that the 352nd would receive their first P-51s, with seven being delivered and duly handed over to the pilots of the 486th FS at Bodney.

A battled damaged P-51 Mustang (PZ-S) of the 486th FS, in a Blister hangar at Bodney. (IWM- FRE 2803)

It would take just eight days for the Bodney crews to mark their first Mustang ‘Kill’. Capt. Ed Gignac, in P-51B ‘PZ-W’ (#43-7022), shooting down a Bf-109 in battle that saw both P-51s and P-47s of the 352nd participate.

April saw more changes and new arrivals, by now there were two squadrons of P-51s at Bodney, a new sound reverberated around the grassed airfield and with it came more new directives, As many squadrons were equipped with a mix of aircraft, it was beginning difficult to tell them apart in the hectic skies. Coloured noses, wing tips and fins were rapidly becoming markings of individual squadrons and those in charge realised that a standard form of scheming was now necessary for this new and innovative way of distinguishing squadrons.

The blue nose was born, and Bodney’s Blue-nosed Mustangs were soon to be seen at low-level attacking airfields, locomotives, vehicles, troop columns and other similar ground targets.

In May, whilst acting on escort duties for a raid over Brunswick, the group shot down 27 enemy Bf-109s and FW-190s with the loss of only one aircraft. This action earned them a Distinguished Unit Citation, for taking on a “numerically superior force of German interceptors” continuing on until lack of ammunition and fuel forced their withdrawal.

The 352nd went on to support the Normandy invasion, an operation that proved to be a fatal tragedy for one pilot in particular, Lieutenant Bob Frascotti.

IMG_2210

Robert Frascotti next to his P-51B, 43-6685, named ‘Umbriago’ . At 21 years of age he was killed on his final mission before returning home. (Photo – Marc Hamel)

D-Day began early for the 352nd, the night sky was dark and to assist the take off temporary runway lights had been lit. Preceding Frascotti were his compatriots of the 486th FS. During the take off, one of the preceding aircraft struck a light causing the entire collection to extinguish. In the moments that followed, Frascotti and his wing-man, Lt. Carlton Fuhrman, were plunged into total darkness. Unable to see, the two were now committed and carried on, Fuhrman slightly behind Frascotti. Within seconds of them leaving the ground, there was a sudden and massive fireball in front of Fuhrman, a fireball that was the result of Frascotti striking the new, and as yet unfinished, watch office. His aircraft, fully armed and fully fuelled, became a fireball that lit-up the night sky, and one from which Frascotti would not survive.

Blinded temporarily by the flash, Fuhrman fought to prevent his aircraft stalling as he flew through the flames and on out into the night sky, struggling to orientate himself and  unable to register his instruments due to the blinding flash. Behind him, Frascotti’s burning wreck lit up the field, one of the 352nd’s finest had been killed in a total and needless tragedy. The only saving grace from this was that every other aircraft taking off after Frascotti was able to see, a guiding light some say, and so prevented other tragic accidents from happening that night. This was the young 21 year old’s final mission, his 89th, and on completion he would have been returning home.

During D-Day the 352nd flew 116 sorties, reigning death and destruction down on the German forces below, other casualties were to follow, but none until now, as destructive and heart rendering as that of Frascotti.

The Watch Office after being hit by Frascotti’s P-51 on the morning of D-Day. (© 352nd FG, USAAF)*2

After Normandy, the 352nd went on to support the breakout at St.Lo and the airborne assault in Holland. As autumn led into winter, the temperature dropped and the weather took a dramatic turn for the worse; with heavy snow and cold winds across the continent, as the ground forces held out on the Ardennes forest knew only too well. The 352nd, like many other squadrons, were to help support the paratroops, being moved on a short-term basis to Belgium (Asch (Y-29) and Chievres (Y-84)) to join the Ninth Air Force earning themselves the French Croix de Guerre on New Year’s Day 1945.

A week earlier, on Christmas Day 1944 a second tragedy was to befall the 352nd, one that would take the life of another one of the 352nd’s finest. The squadrons highest scoring pilot at that time, Major George Preddy, a hero to many of the airmen and ground crews at Bodney, flew into an American Flak barrage put up by the US Army’s 12th Anti-Aircraft Group. His plane was hit and whilst his canopy was seen to be ejected, no chute appeared, and his body was found still in the wreckage of his beloved P-51. The news of Preddy’s death stunned the celebrations at both Asch and Bodney, no-one could believe that such a daring and brave pilot could have been lost, let alone lost to friendly fire.

April would see the 352nd return to Bodney, where they continued operations until May 3rd 1945. Their final move on November 4th would take them home to the United States, a move that left Bodney empty and a legacy that would be hard to follow. The 352nd had flown 420 missions, losing 118 aircraft with 70 pilots killed. They had been awarded 13 DSC’s, 31 Silver Stars, 336 DFCs, 1304 Air Medals and 42 Bronze Star Medals. The Group had created 52 ‘Aces’, 28 of which had achieved the status in air-to-air combat, accounting for 505 aircraft in the air with Major George Preddy achieving 27 of these himself.

With that departure Bodney fell silent, it closed very soon after the war in Europe ended on November 26th 1945, reverting back to farmland soon after.

Today Bodney falls next to the British Army’s STANTA training ground and as such parts are a military site. Some structures can easily be seen from the main road, B1108,  with signs warning of MOD activity are everywhere.  The original water tower and pump still serve the camp, a few air raid shelters exist and some buildings on the camp. Hardstands can be seen in the woods but little from the road itself.

The watch office is accessible (on farmland) where there are also a few other buildings to be found, including  number of Type 22 pillboxes, many are derelict. The main army base is on part of the former accommodation site, with a memorial outside the gate dedicated to 352nd FG and associated units.

RAF Bodney

Bodney’s memorial to the 352nd FG.

Many of the buildings that were in existence were pulled down in 2012/13 due to increased vandalism and their heavy use for Rave parties. As a result even less now stands visible telling the incredible stories of this forgotten airfield.

Sources and further reading.

*1 Norfolk Heritage Explorer website, accessed 15/8/18

*2 Photo via www.controltowers.co.uk

Frascotti’s story is told in more detail in Heroic tales.

Preddy’s story is told in more detail in Heroic Tales.

Walton, D. “Northumberland Aviation Diary” (1999), Norav Publications

Freeman, R. “The Mighty Eighth“, (1986), Arms and Armour.

There is a website dedicated to the 352nd with a link to the superb ‘Bluenoser’ magazine.

RAF Bodney – High casualties and Heroic acts (Part 1).

Much has been written about the Famous ‘Blue Nosed Bastards of Bodney‘, the 352nd Fighter Group, Eighth Air Force. Famed for their determination and ferocious attacks on Luftwaffe aircraft, they produced some remarkable results – but they also suffered some terrible losses. Nicknamed the ‘Blue Nosers‘, because of their blue nosed P-51 Mustangs, they became one of the most successful fighter groups of the Eighth Air Force. In just a two-year period (September 1943 to May 1945), they were credited with 800 enemy aircraft destroyed, either on the ground or in the air, flying a total of 420 missions. Today the airfield they served from, RAF Bodney, is a small part of the STANTA training ground used by the Army for military exercises, and whilst the airfield has all but gone, the stories and tales of the 352nd continue to live on.

In this Trail, we look again at RAF Bodney, the units and the men who served, the heroic acts and the cost paid at this small grass airfield.

RAF Bodney (Station 141)

Bodney was initially an RAF airfield, opened in 1940 as a grassed site with a hardened perimeter track. During its construction, it had 27 asphalt hard stand of mixed sizes, fifteen large and twelve small, and was designed as a satellite for nearby RAF Watton (Trail 9). Whilst primarily associated with the USAAF, it was in fact an RAF Airfield for several years, housing detachments of aircraft from its parent station.

On 2nd March 1939, 21 (Norwich) Squadron (RAF), now part of 2 Group,  moved into Watton from Eastchurch bringing with them Blenheim MK.Is which they retained until the September when they changed them for the MK.IV. Being early on in the war, they were not yet fully operational, and so were limited to reconnaissance flights over northern France. They were also joined in the August by 82 Sqn, another Blenheim squadron, and it was at this time that they began to utilise Bodney as a satellite, dispersing aircraft here away from the parent airfield.

One of the earliest casualties to occur at Bodney was that of 82 Squadron, on the 22nd anniversary of the forming of the Royal Air Force – 1st April 1940. Take off occurred at 11:00 hrs when Blenheim MK.IV #L8867, piloted by F/O. Glyn Harries (s/n 39520), along with Sgt, Herbert Kelleway (s/n 561573) and LAC. Eric Wolverson (s/n 544700), was sent to attack enemy shipping off the Danish coast. During an attack, the aircraft was hit by Flak from enemy shipping and brought down with the loss of all three  crewmen on board. Their bodies were never recovered and they are commemorated at Runnymede.

RAF Bodney

Bodney today.

By the summer of 1940, Western Air Plan W.A.4(b) was put into operation, a plan that formed part of a 16 part operations plan in the event of a German attack, and one that would focus British Air power in the destruction of German power sources. Part 4(b) focused on the advancing troop and armour columns when they crossed into Southern Holland, Belgium and France. This required aerial attacks primarily from Blenheim and Fairy Battle Squadrons, and was intended to slow or even stop the advancement.

Blenheims of 21 Squadron were assigned to this plan focusing on troop columns and bridges, but being under-powered and weaker than their adversaries, Blenheim casualties were very high and operations over enemy territory were soon curtailed.

Western Air Plan W.A.4(b) was a plan that sent many pilots to their ultimate death or capture, as the aircraft they were flying were woefully inadequate for the job in hand. A fact borne out by the brave attempts of three crewmen on June 14th. On this day, Blenheim #R3742, of 21 Squadron at Bodney, was shot down over France, the three crewmen: P/O. W. Saunders, Sgt. H. Eden and Sgt. C. Webb,  fortunately surviving the resultant crash. After making their way to the coast, finding a boat and attempting to row to England, the three men began to hallucinate through exhaustion. After the second night, P/O. Saunders ‘disappeared’, leaving only his tunic behind in the boat. After being what they thought was only 10 miles from the English coast, they were eventually picked up in France and taken to a new POW camp on the Baltic coast.

On June 24th, 21 Sqn left Bodney moving north to RAF Lossiemouth where they performed anti-shipping operations off the Norwegian coast, before returning once more to Watton (and Bodney) where they continued these low-level operations. It was whilst back here at Bodney that another of 21 Sqn’s pilots, Sqn. Ldr. Malcolm McColm, flying in Blenheim MK.IV #T2223 ‘YH-T’ would also be shot down also ending his war as a POW.

On the night of 27th/28th December 1940, he took off with his crew, Sgt.  Cecil Hann (s/n 580541) and Sgt David Shepherd (s/n 625253), to attack coastal targets. After being shot down, both Sgts. Hann and Shepherd were killed but Sqn. Ldr. McColm survived and would go on to be one of the RAF’s greatest evaders, escaping no less than seven times from German incarceration. Eventually he was sent to Colditz where he shared a room with Douglas Bader and was an active member of the Colditz Escape Committee along with Airey Neave. These would prove to be residencies that would befall many Blenheim pilots at this point in the War.

Eventually in 1941, 21 Sqn moved away to the Middle East, only to be disbanded and reformed later on, all on the same day.

Being a satellite, the facilities at Bodney were rudimentary, and remained so even when 90 Squadron (RAF) began using it during testing of the mighty B-17 (Fortress MK.I). Initially reformed at Watton on May 3rd 1941, they quickly moved to larger bases at West Raynham and then Polebrook, where the Fortresses were tested for RAF bombing missions. Unfortunately operations proved too costly with too little success for them to continue, and the B-17s were gradually phased out of RAF operations.

RAF Bodney water tower

The water tower and pump house at Bodney are some of the structures remaining.

These coming and goings at Bodney had left 82 Sqn one of the few squadrons still in situ. Performing anti-shipping activities off the coast of the Friesian Islands, they would regularly fly over the sea at very low levels, attacking whatever ships they could find. On August 20th 1941, Blenheim MK.IV #V6445 ‘UX-E’ took off from Bodney on what was supposed to be a routine operation; at the controls was 20-year-old F/Lt. Dennis R. Gibbs (s/n 63471), with Sgt. Stanley V. Pascoe (s/n 548419) as wireless operator / gunner, and Sgt. Eric L. Cash (s/n 916895) as Observer / bomb aimer.

As the aircraft flew in low toward its target, Sgt. Cash (referred to as ‘Laurie’) released the bombs, at which point the pilot, realising how low he was, pulled up only to strike the mast of the ship they were attacking. The mast smashed the Blenheim’s perspex front severely wounding Sgt. Cash, and damaging numerous instruments, including the radio, in the process.

Unable to navigate properly, the pilot turned west and headed for what he hoped would be land. After some 6 1/4 hours flying time, a point very close to the flying limit of the Blenheim, F/Lt. Gibbs, not knowing where he was, decided to put the aircraft down in a suitable field. The nose of the aircraft still had part of the mast embedded in it, which made handling and landing the aircraft even more difficult than it would have been normally.

Luckily a passing Home Guard platoon were near by, and once the aircraft had come to a stand still, they helped pull the crew out of the wreckage; Sgt. Cash was taken to Acklington Hospital whilst F/Lt. Gibbs and Sgt. Pascoe were treated for minor injuries.

Later that night Sgt. Cash died from wounds he sustained in the collision, and was buried in Chevington Cemetery. F/Lt. Gibbs and Sgt. Pascoe returned to Bodney and after a short period of leave, returned to flying duties; F/Lt. Gibbs later receiving the DSO.

Until now Bodney had not had its own squadron, but on March 14th, 1942, a unique day in 21 Sqn’s history, the unit was disbanded in Malta only to be reformed the same day at Bodney. They continued to use the Blenheim MK.IVs, placing a small detachment at Abbotsinch (now Glasgow Airport) whilst the main part of the squadron stayed at Bodney. It was also during this month that 82 Sqn departed for the far east leaving Bodney to the new 21 Sqn.

During May 1942, 21 Sqn began to change their Blenheims, replacing them with the American built Lockheed Ventura (MK.I and MK. II), the first RAF squadron to do so. Throughout the summer months 21 Sqn carried out training flights converting crews from the Blenheim onto the Ventura, a slow process as new aircraft were only being sent as few as one or two at a time. The Ventura, a former passenger aircraft, could carry a 2,500lb bomb load with a larger crew of 4 or 5 including a top turret gunner. Take offs, landings and formation flying were the order of the day until in the October 1942, when 21 Sqn finally departed Bodney for RAF Methwold (Trail 8). This move signalled the permanent break that would mean 21 Sqn would now leave Bodney behind for good.

The winter months of 1942-43 were quiet at Bodney. The gradual build up of American forces in the UK meant that more and more airfields were needed to house fighters and bombers of the Eighth and Ninth Air Forces. Through both a renewed building programme and the taking over of older RAF sites, this heavy demand would soon be met. As part of this buildup, Bodney was identified as suitable site for a bomber station, but upgrading to Class A standard never happened, and instead it was allocated to a fighter group. After being designated Station 141, it was handed over to the US forces, who quickly began to make improvements to its design.

In part 2 of this RAF Bodney – High casualties and heroic acts, we shall see how Bodney  became home to the three squadrons of the 352nd FG, The tragedies that occurred at this small grassed airfield, and how the 352nd became one of the top scoring Fighter Groups of the US Air Force.

(See part two for references).

RAF Boulmer – Sophistication and intrigue (Part 2).

After Part 1 of ‘RAF Boulmer – Sophistication and intrigue’ we see how Boulmer developed during and after the Cold War. From a small decoy airfield, to a training facility for fighter pilots of 57 Operational Training Unit it then closed at the end of World War 2. Laying dormant for a while, flying would return, and Boulmer would become one of the most sophisticated RAF facilities anywhere in the United Kingdom.

RAF Boulmer

Boulmer’s modern watch office and hangar

After this, the RAF had no need to retain Boulmer, and so it was placed into care and maintenance. But then, in the early 1950s with the Cold War heating up, Boulmer was put back into action but not as an operational airfield flying front line aircraft, but as part of a sophisticated network of radar stations monitoring British airspace. To accommodate this new equipment, a new part to the of the airfield was opened up, located on both new land and former domestic sites to the north-west of the main airfield. This new construction took the name of the airfield but remains separate from its namesake, and well guarded from prying eyes.

During this time Boulmer would use  Linesman Passive Detection equipment, *1 to detect jamming targets in mass formations. An innovative design they were eventually removed as new and more modern equipment came into operation. In conjunction with this was the primary radar, the Marconi Type 84 and 85 search radars. These massive structures used  antenna reflectors measuring some 60 feet wide by 22 feet high, completing a full rotation four times every minute.

It was at this time, in the mid 1960s, that Boulmer the airfield, would once again see military flying take place. But by now the hard runways had been removed, and Boulmer’s gain had sadly been Acklington’s loss.

The closure of RAF Acklington meant that the Search and Rescue helicopters of 202 Sqn ‘A’ flight, would be moved into Boulmer to carry out Search and Rescue operations over the eastern regions of England and Scotland.  The Whirlwind HAR 10s of 202 Sqn were spread far and wide in a complex range of changes that saw them move as far a field as Coltishall, Leuchars, Lossiemouth, Manston and Port Stanley. These moves placed many stresses on the unit, and with the reduction in operational aircraft, Boulmer’s search area became much bigger.

A series of updates over the coming years meant several changes to the  various sites at Boulmer.  For a short period between 1968 and 1974, Boulmer Radar Station (Lesbury) was closed, as upgrading took place which saw ‘electronic’ warfare, and later a computerised interception control system, added. By the 1990s mobile radar was becoming more widely available and the giant Type 85 radar was dismantled and replaced by modern 3-D screening and automated tracking radar. Part of this network being housed on part of the former RAF Brunton.

In 1975 the robust Search and Rescue helicopters on the former airfield began being replaced by the successful Sea King HAR-3, an aircraft they operated for a further forty years in the Search & Rescue role. In 1978, the Sea King was withdrawn from some of these 202 Sqn operations and replaced themselves by the Wessex HAR 2, but three Sea King helicopters continued on at Boulmer, being the last aircraft to fly here under Military control. In conjunction with these changes, the main headquarters of 202 Sqn also moved into premises at RAF Boulmer, giving a new and extended lease of life to the former airfield.

In this new role Boulmer would regularly bear witness to accidents and fatalities. On Sunday 17th May 1987, an ex Boulmer airmen F/Sgt. Philip Scott crashed in an Steen Skybolt he had built himself at Boulmer. The aircraft ploughing into the ground killing  both F/Sgt. Scott and his passenger Cpl. Martin Leitner. It was suggested that a suitcase on board the aircraft had restricted control column movement leading to the crash.

In July 1989 an RAF Sea King from Boulmer was involved in a rescue mission to save two downed military airmen. A Tornado F3 of 23 Sqn RAF Leeming crashed into the sea 35 miles off Tynemouth, both airmen ejected, and whilst the navigator was saved, the pilot F/Lt. Stephen Moir was killed, trapped under his parachute in the cold waters of the North Sea.

Another RAF Leeming Tornado F3 (11 Sqn) got into difficulties later in 1994, the crew ejecting again but not before managing to transmit a distress call. This time both airmen were pulled from the water and taken to hospital with minor injuries, RAF Boulmer crews being on the spot within minutes.

A year later, 1995 saw another rescue mission by a Boulmer Sea King, when two Tornadoes collided 60 miles off the coast of Berwick-upon-Tweed. All four aircrew survived with two ejecting from one aircraft at the scene, whist the second (ZE773) was gingerly nursed back to RAF Leuchars. The aircraft landed without further incident even though it had no hydraulics or navigational aids.

In 2003 the Government put forward plans to close Boulmer, but protests from those opposed to the end of search and rescue operations led to a reprieve, and Boulmer would live a little longer.

Then during 2015, it was decided that the last six remaining UK RAF Search and Rescue bases – RAF Lossiemouth (202 Sn ‘D’ Flt.), DST Leconfield (202 Sqn ‘E’ Flt.), RAF Valley (22 Sqn ‘C’ Flt.), RAF Wattisham (22 Sqn ‘B’ Flt.), RAF Chivenor (22 Sqn ‘A’ Flt.) and RAF Boulmer’s ‘A’ Flight – would close, as Search and Rescue operations were finally privatised. Boulmer ceased operations on 30th September, with the last crews at RAF Chivenor being told to ‘Stand down’ a few days later on October 4th 2015, an event that ended seventy-four years of Search and Rescue history.

Since April 1st 1983 Search and Rescue units had answered 34,122 call-outs during which time 26,916 people have been rescued from both the sea and land*2.  Boulmer’s operations had now ended, raising a feeling of great sadness in the local community, a community who had regularly witnessed the S & R helicopters over their small village.

RAF Boulmer

Many of the private gardens around the airfield use shelters for storage.

During this time the Sea Kings had operated in some of the most treacherous of conditions and some of the most important events in recent history. This included rescue operations in the Lockerbie bombing, the collapsed North Sea oil rig ‘Alexander Kielland‘ and the Carlisle floods.

Boulmer’s name would not end there though, now forming the backbone of Britain’s Air Defence Network as the headquarters of the Air Surveillance and Control System Force (ASACS), it monitors the UK and NATO airspace 24 hours a day, 365 days year.  As part of a sophisticated network of mobile and fixed radar monitoring stations, it is linked to European based networks ready to intercept any threat or unidentified aircraft entering British Airspace. Boulmer remains the headquarters of this force with No.1 Air Control Centre currently at RAF Scampton in Lincolnshire, but due to return to Lossiemouth once Scampton has closed and refurbishment at Lossiemouth are complete. Together their information can lead to the dispatch of QRA Typhoons from RAF Coningsby or RAF Lossiemouth depending upon the direction and location of the threat.

Whilst the main airfield site is still owned and used by the RAF, there are currently no flying operations taking place. High tech training is the order of the day, Boulmer being home to the RAF School of Aerospace Battle Management (SABM). This is a worldwide centre of excellence leading battlespace management training and education for not only the UK’s Armed Forces, but NATO and other foreign military personnel as well. A range of associated technical units also serve and train here, giving Boulmer one of the most sophisticated organisational groups in RAF service. There are currently some 1,000 Service, civilian and contracted personnel working at the site at any time.

RAF Boulmer

RAF Phantom guarding RAF Boulmer.

Whilst flying ceased some years ago, Boulmer’s aviation history has not been forgotten. The main gate at Boulmer continues today to be guarded by Phantom XV415 an FGR.2 which operated with eight RAF squadrons before its final retirement. Prior to this, Spitfire MKVb EP120 was in pride of place until 1967 when it was removed for use in the film ‘The Battle of Britain‘. Its replacement was another Spitfire F, Mk XVI TB252 which left in December 1969 for RAF Leuchars.

These Spitfires headed a succession of aircraft to guard Boulmer’s gate. In 1972 Lightning XP745 became guardian as  tribute to the close work carried out between the radar station and 11 Group’s fighters. The twenty-sixth MK.3 Lightning built, XP745 was formerly based at RAF Wattisham with 56 Sqn, it moved to Akrotiri and then back to Wattisham and 29 Sqn. The Lightning made its last flight on February 4th 1975 to Leconfield, where it remained for a number of years donating parts and being gradually stripped of its components. Eventually it was given to Boulmer and returned to guardian standard. The current gate guardian, a McDonnell Douglas Phantom FGR.2 XV415 ‘E’, like its predecessor, also stands at Boulmer in the colours of No. 56 Sqn formerly of RAF Wattisham.

Even though Boulmer is no longer a flying RAF base, it is heavily guarded and its operations kept secret behind high fences. The main airfield site has itself gone, the runways all removed (a small patch remained at the time of visit in 2018) and little of the wartime airfield remains in public view.  The road approaching Boulmer gives you a choice, turning right takes you to the Radar centre an area patrolled by dog handlers and armed guards, this gives some indication of the seriousness taken inside the perimeter fence. Taking the left fork brings you to the main gate of the former airfield and Air Sea Rescue centre, and the location of the Phantom gate guard mentioned above. Behind here are the various training facilities, again guarded from prying eyes and unwanted visitors.

Carrying on past here, in a small coppice on the left, is a small collection of wartime buildings, very much left to the elements they are still mainly intact and possibly the best reminders of any wartime activity here at Boulmer.

Continue on from here along the coast road. This takes you to the eastern end of the former airfield, and in parts, along the original perimeter track used during Boulmer’s flying life. A caravan park sits on what was part of the airfield here, the only location where the remnants of the runway can still be found.

RAF Boulmer

What’s left of Boulmer’s runways are barely distinguishable beneath the stones.

Further along this road and you come to a bend, this is the threshold to the two main runways with their location still visible as scars on the earth disappearing into the distance. Distant views also allow sighting of the current hangar and watch office, but there is little to be gained here. The road then continues round and whilst the perimeter track carries on into the field, the road leaves here and passes away from the airfield site. The perimeter track at this point is now a mere single track hardly distinguishable as an airfield perimeter track.

RAF Boulmer

The scars of the two runways can still be seen in the fields of Boulmer.

Other than small buildings found in private gardens, little exists of this rather interesting site. Whilst its early wartime history is not earth shattering, it has however become one of the most important and key RAF sites in the UK today.

Sources and Further Reading.

*1 For a detailed explanation of these radar systems and personal accounts of using them, visit Dick Barrett’s excellent website.

*2 MOD Memo dated 10 May 2016 in response to a freedom of information request.

Chronical Live website accessed September 29, 2015 “Farewell to the Sea Kings at RAF Boulmer as new era in search and rescue dawns