Trail 44 – Kent (Part 3) – Sir Barnes Wallis – His Early Years

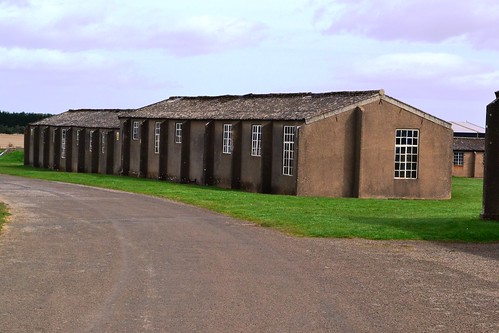
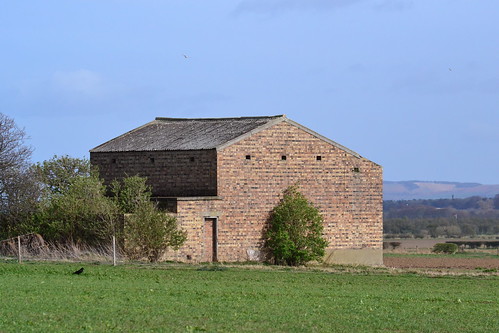
After visiting the many museums and former airfields in the southern and central parts of Kent (Trail 4 and Trail 18) we now turn north and head to the northern coastline. Here we overlook the entrance to the Thames estuary, the Maunsell Forts – designed to protect the approaches to London and the east coast – and then take a short trip along the coastline of northern Kent. Our first stop is not an airfield nor a museum, it is a statue of the designer of one of the world’s most incredible weapons – the bouncing bomb. Our first short stop is at Herne Bay, and the statue of Sir Barnes Wallis.

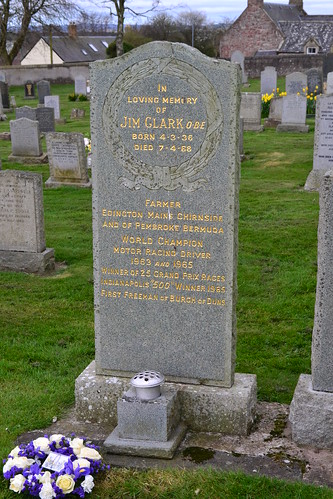
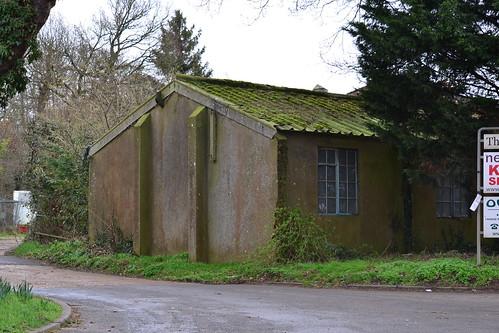
Sir Barnes Wallis – Herne Bay

Sir Barnes Wallis

The Barnes Wallis statue located at the eastern end of the town overlooking the sea at Reculver.

There cannot be a person alive who has not seen, or know about, the famous Dambusters raid made by 617 Sqn. It is a story deeply embedded in history, one of the most daring raids ever made using incredible ideas, skill and tenacity. There is so much written about both it, and the man behind the idea – Sir Barnes Neville Wallis CBE FRS RDI FRAeS – a man famous for his engineering prowess and in particular the famous ‘Bouncing Bomb’ that was used by Guy Gibson’s 617 Squadron in that daring raid of 16th May 1943. But there is so much more to Barnes Wallis than the Bouncing bombs; he made a huge contribution to British Aviation, weaponry of the Second World War, and later on in his life, supersonic and hypersonic air travel.

He is certainly one the Britain’s more notable designers, and has memorials, statues and plaques spread across the length and breadth of the country in his honour. But he was not just a designer of the Bouncing bomb, his talent for engineering and design led him through a series of moves that enabled him to excel and become a major part of British history.

Born on 26th September 1887 in Ripley, Derbyshire, he was educated at Christ’s Hospital in Horsham, he went on to study engineering in London, and shortly afterwards moving to the Isle of Wight. With the First World War looming, he was offered a chance to work on airship designs – an innovative design that would become widely used by the Naval forces of both the U.K. and Germany.

Wallis cut his teeth in marine engines as an engineer and draughtsman. He began his career in the London’s shipyards, moving to the Isle of Wight after which he broke into airship design. He followed a colleague he had met whilst working as a draughtsman with John Samuel White’s shipyard, together they would design His Majesty’s Airship No.9 (HMA 9).

The design process of HMA 9 was dynamic to say the least. Early non-rigid airships were proving to be very successful, and the new rigids that were coming in – whilst larger and more capable of travelling longer distances with greater payloads – were becoming the target for successive quarrels between the government and the Admiralty. World unrest and political turmoil was delaying their development even though plans for HMA 9 had already been drawn up.

Joining with his colleague, H.B. Pratt in April 1913, at the engineering company Vickers, the two designers began drawing up plans for a new rigid based along the lines of the German Zeppelin. HMA 9 would be a step forward from the ill-fated HMA No. 1 “Mayfly”, and would take several years to complete. Further ‘interference’ from the Admiralty (One Winston Churchill) led to the order being cancelled but then reinstated during 1915. The final construction of the 526 ft. long airship was on 28th June 1916, but its first flight didn’t take place until the following November, when it became the first British rigid airship to take to the Skies.

HMA 9 (author unknown*1)

With this Wallis had made his mark, and whilst HMA 9 remained classed as an ‘experimental’ airship with only 198 hours and 16 minutes of air time, she was a major step forward in British airship design and technology.

The Pratt and Wallis partnership were to go on and create another design, improving on the rigids that have previously been based on Zeppelin designs, in the form of the R80. Created through the pressure of war, the R80 would have to be designed and built inside readily available sheds as both steel and labour were in very short supply. Even before design or construction could begin there were barriers facing the duo.

Construction started in 1917, but with the end of the war in 1918, there was little future as a military airship for R80. Dithering by the Air Ministry led to the initial cancellation of the project, forcing the work to carry on along a commercial basis until the project was reinstated once more. With this reinstatement, military modifications, such as gun positions, were added to the airship once again. With construction completed in 1920, she made her first flight that summer. However, after sustaining structural damage she was returned to the sheds where repair work was carried out, and a year later R80 took to the air once again. After a brief spell of use by the U.S. Navy for training purposes, R80 was taken to Pulham airship base in Norfolk and eventually scrapped. Wallis’s design had lasted for four years and had only flown for 73 hours.

However, undaunted by these setbacks, the Vickers partnership of Pratt and Wallis went on to develop further designs. In the 1920s, a project known as the 1924 Imperial Airship Scheme, was set up where by a Government sponsored developer would compete against a commercial developer, and the ‘best of both’ would be used to create a new innovative design of airship that would traverse the globe. This new design, would offer both passenger and mail deliveries faster than any current methods at that time.

The Government backed design (built at the Royal Airship Works at Cardington) would compete against Vickers with Wallis as the now Chief Designer.

The brief was for a craft that could transport 100 passengers at a speed of 70 knots over a range of 3,000 miles. Whilst both designs were similar in size and overall shape, they could not have been more different. Wallis, designing the R.100, used a mathematical geodetic wire mesh which gave a greater gas volume than the Government’s R101, which was primarily of stainless steel and a more classic design. This geodesic design was revolutionary, strong and lightweight, it would prove a great success and emerge again in Wallis’s future.

Built at the Howden site a few miles west of Hull, the R100 was designed with as few parts as possible to cut down on both costs and weight; indeed R100 had only 13 longitudinal girders half that of previous designs. Wallis’s design was so far-reaching it only used around 50 different main parts.

The design plan of Wallis’ R-100 airship (author unknown*2

The 1920s in Britain were very difficult years, with the economy facing depression and deflation, strikes were common place, and the R100 was not immune to them. Continued strikes by the workers at the site repeatedly held back construction, but eventually, on 16th December 1929, Wallis’s R100 made its maiden flight. After further trials and slight modifications to its tail, the R100 was ready. Then came a test of endurance for the airship, a flight to Canada, a flight that saw the R100 cover a journey of 3,364 miles in just under 79 hours. Welcomed as heroes, the return journey would be even quicker. Boosted by the prevailing Gulf Stream, R100 made a crossing of 2,995 miles in four minutes under 58 hours. The gauntlet had been thrown, and Wallis’s airship would be hard to beat.

The R101 would face a similar flight of endurance, this time to India, and it would use many of the same crew such was the shortage of experienced men. On October 4th 1930, R101 left its mooring at Cardington for India. Whilst over France she encountered terrible weather, a violent storm caused her to crash, whereupon she burst into flames and was destroyed with all but six of the 54 passengers and crew being killed.

The airship competition became a ‘one horse race’, but an inspection of the outer covering of Wallis’s R100 revealed excessive wear, only cured by replacing the skin, an expense the project could barely swallow. With plans already in place for the R102, the project was in jeopardy, and eventually, even after offers from the U.S. Government, it was deemed too expensive, and by 1932 R100, the worlds largest airship and most advanced of its time, had been scrapped and the parts sold off.

Wallis’s airship career had now come to an end, but his prowess and innovation as a designer had been proven, he had set the bench mark that others would find hard to follow.

In the next part, we look at the work carried out by Wallis both during the Second World War and in the later years of his life.

Sources and further reading

*1 Photo from The Airship Heritage Trust website.

*2 ibid

R.A.F. East Fortune – Scotland’s Baby that Grew up.

After leaving R.A.F Drem, we travel a few miles to the east, away from Edinburgh to an airfield that was originally built in the First World War. In the mid war years it was closed and returned to agriculture; then, as the Second World War loomed, it was reopened, used by both the Navy and the Air Force. As such, its history goes back to the turn of the last century. Today it is Scotland’s home of the National Museum of Flight, it is also has one of the best preserved collections of original buildings left in the country. In the second part of Trail 42, we visit the former airfield of R.A.F East Fortune.

R.A.F East Fortune.

R.A.F East Fortune is another airfield that has its roots in the First World War. Located 4 miles north-east of the small town of Haddington, and a similar distance east of R.A.F Drem, it has since become Scotland’s premier aviation museum, housing one of the best collections of aircraft in the north.

East Fortune National Museum of Flight

One of the many buildings left at East Fortune.

With the outbreak of war in 1914, German intrusions over British towns and cities became both a tangible and frightening threat. Scotland and the north-east along with North Sea shipping lanes, all became targets. To counteract these threats, a string of defensive airfields (Stations) were built along the eastern coast of Britain operating as a combined force in the British Home Defence Network.

East Fortune become one such station, from which, during 1915, a small number of aircraft would operate. Designed to protect the waters around the city of Edinburgh and the North Sea coast, it fulfilled this role using a selection of aircraft including types such as the: Sopwith Scout, Maurice Fairman, Avro 504 and B.E.2c.

It wasn’t until 1916 though that the airfield really came into its own. Officially opened in August as a Royal Naval Air Station, it operated initially Coastal Class airships, followed shortly after by North Sea Class airships, both of the non-rigid design. Later on, as airships developed, the more famous ‘R’ series rigid airships appeared and took their place at East Fortune.

As a major airship station, there would often be five or six of the type at East Fortune at any one time, each carrying out submarine patrols over the North Sea. To ensure their safety whilst on land, a number of airship sheds were built; the design and development of these sheds proceeded almost as fast and dramatic as the airships themselves.

When war broke out, the threat posed to British ships  by German submarines, became all too apparent. The Admiralty recognising the potential of airships as spotters, were soon to put in an order for a ship that would be able to travel at speeds of between 40 – 50 mph, carry two crew, 160lb of bombs, wireless equipment and sufficient fuel for up to 8 hours flying time. These airships would ideally reach altitudes of around 5,000ft, and their design be so basic, that the crew could be trained and in the air within weeks rather than months. The first of these ships was the Submarine Scout (S.S.) class, a design that was so simple, the first were airborne within three weeks of the initial prototype being built. In essence, these used the wingless fuselage of a B.E.2c aeroplane suspended beneath a simple envelope. These ‘S.S.’ ships were so successful in their role, that the Admiralty ordered more, bigger and faster airships, and so the Coastal Class was then born.

The Coastal Class was larger at 195.6 feet long. They had two 150hp engines, a top speed of 52 mph, and could be airborne for up to 22 hours at a time. Designed around a French design, they were made of three sections, an unusual “Tri-lobe” design. The gondola itself, utilised two shortened Avro seaplane aircraft fuselages, the tails were removed and the two sections joined back-to-back. This produced a car that could seat four or five crew members with two engines at opposing ends. Canvas and planking was added for further strength and improved crew comfort. Operating successfully for two years, many soon became weary and in need of updating. Deciding to opt for an improved alternative, the Admiralty scrapped the Coastal Class and brought in the last of the non-rigid designs, the North Sea (N.S.) Class.

Initial trials and operations of the N.S. Class proved it to be very unpopular. Problems with the drive system left many crews unhappy about its performance, its top speed of 57mph rarely, if ever, being achieved. The original engines, 250 horse-power Rolls Royce engines, had very elaborate transmission systems, in fact so elaborate that they were prone to breaking. The only answer was to replace the entire system and attach the propellers directly to the engine itself. Once this problem was overcome, the airship was hailed as a success to the point that many of them broke flight endurance records on an almost regular basis. Whilst flights of 30 hours or more were not unusual, some extended as far as 61 hours, and even post war, one of these ships flew for an incredible 101 hours non stop.

The period 1916 – 17 saw a rapid advancement in airship design and development. The larger rigid airships (so-called because the envelope was now wrapped around a rigid frame) were now coming into being, and the remainder of the war would see these new airships coming on-line and into service, many appearing at East Fortune.

To counter the German’s Zeppelin threat, three new manufactures were contracted to build these rigid ships: Beardmore, Armstrong and Whitworth, and lastly Shorts Brothers.

At East Fortune, (H.M.A) R.24 was delivered on October 28th 1917, and not without its problems. Initial testing revealed that it was two-thirds of a ton heavier than its sister ship R.23, and after investigations as to why, it was discovered that it was the rivets used that were the problem. In order to move the craft from its Beardmore shed, a number of weight modifications had to urgently be made. These modifications included removing an engine and all the associated components from the rear car.

RAF EAST FORTUNE DURING THE INTERWAR YEARS

The camouflaged Airship shed built to house H.M.A. R.34 at East Fortune. Note the smaller shed to the right. (IWM – Q103040)

Although now much lighter, R.24 paid the price with speed, with no replacement of the propulsion unit, she remained slow, achieving a top speed of little more than 35 mph. But she did cover some 4,200 miles and flew for 164 hours in total; most of which were as training flights. As an operational airship however, she was little more than useless, and was eventually scrapped in 1919.

The next rigid airship to arrive and operate from East Fortune was R.29 in the following June. R.29 went on to be considered the most successful wartime rigid airship. Being the only one to be involved in direct enemy action, she was responsible for the sinking of the German submarine UB.115. Commissioned on 20th June 1918, she was based at East Fortune and would cover around 8,200 operational miles, in some 335 hours flying time. This would be a short-lived active life though, lasting only five months before the war finally came to an end.

Carrying on flying post war, she would eventually be scrapped in October 1919 having covered in total, 11,334 miles in service, more than any other British rigid airship up to that time.

Post war, rigids continued to operate from East Fortune; R.34 perhaps being the most famous. Another craft from the works of William Beardmore and Co. Ltd. of Inchinnan near Glasgow, R.34 would be constructed in the later stages of the war under War Specifications. At 634 feet in length with a top speed of 62 mph generated by five 270 hp Sunbeam ‘Maori’ engines, she would cost £350,000 to build. R.34 would be designed to carry twenty 100 lb and four 550 lb bombs, a range of Pom-Pom, Lewis and two-pounder quick-firing guns, but as she wasn’t finished until after the war, none of these were ever fitted, nor was she flown in anger.

R.34 probably at East Fortune. (author unknown)

Completed in early 1919, she just missed out the first Atlantic crossing, being laid up by damage caused by poor handling, and thus beaten to the record now held by Alcock and Brown. In May, she arrived at East Fortune, here she carried out a number of test flights including an endurance flight across the Scandinavian countries. Then in July 1919, she became the first aircraft to make the Atlantic crossing, both east to west, and back again.

On the evening of 1st July 1919 the ship was fueled to capacity, in the early hours of the morning she was moved out of her shed and prepared for the flight. Her captain, Major Scott, decided gave the order to release and at 1.42 am (GMT) R.34 lifted slowly in to the Scottish sky.

A record was made, R.34 had put East Fortune firmly on the map. After 108 hours and 12 minutes flying time, R.34, her crew and two stowaways: William Ballantyne and a small tabby kitten called “Whoopsie”, landed at Mineola, Long Island, New York.

After a major refit at East Fortune, R.34 left for Pulham airship base in Norfolk. Here she carried out a number of flights, but was eventually badly damaged in strong winds, and after being stripped, she was sold for scrap – a rather ungainly ending to an incredible machine.

Airships were not to be the only user of East Fortune though. With the formation of the Royal Air Force in 1918, it would initially house No. 208 Training Depot Station (T.D.S.), designed to train torpedo bomber pilots using a variety of aircraft types, such as the Sopwith Camel and Beardmore W.B.III. In August 1918, it became 201 Training Depot Station, merging both 1 Torpedo Training Squadron, and the Torpedo Aeroplane School already at East Fortune.

A Sopwith Cuckoo (N6954) of the Torpedo Aeroplane School dropping a torpedo during trials at East Fortune, 24 – 26 July 1918. (IWM Q 67496)

On 21st October 1918, No. 185 Squadron was formed here, made by merging elements of 31, 33, 39 and 49 Torpedo Depot Stations, they would fly the Sopwith Cuckoo until April 1919, when it was reduced to a cadre, and then disbanded five days later on April 14th, 1919.

It was also in this month on the 31st, October 1918, just days before the armistice that year, that Bristol F.2b B8942 of 201 T.D.S, left R.A.F. East Fortune for a bombing mission against the German Fleet. During the take off, the aircraft stalled and crashed into the ground. In what must have been the last casualties of 201’s operations, the two crew: Lieutenant Lynn N. Bissell (age 19), and  Lieutenant Eric W. Bragg (22), were both killed when a bomb they were carrying exploded on impact. They have remained together ever since in Athelstaneford Parish Churchyard in East Lothian*1.

201 Training Depot Station were soon re-designated as the Torpedo Training School, finally being disbanded on February 1st, 1920, here at East Fortune.

This move signalled the end of East Fortune as an airfield for now. The site was closed, many of the buildings were removed either scrapped or sold off, and no further flying activity would take place.

East Fortune National Museum of Flight

A small part of the collection of wartime buildings that still exist at East Fortune.

After laying dormant for around twenty years, the outbreak of war saw East Fortune brought back to life once more. Designated a satellite for R.A.F. Drem, it was virtually unchanged in its layout. After a period of expansion and development, new runways were laid, a technical site established, and accommodation and administration areas developed. A bomb dump was created to the south-west, well away from the other areas to the north. The runways, tarmac laid on hardcore, were all non-standard lengths, 1,710 yards, 1,560 yards and 1,100 yards but they were the standard 50 yards wide.

The first to arrive were 60 Operational Training Unit (O.T.U.)  in June 1941. A night fighter development unit they flew a range of aircraft including: Boulton Paul’s Defiant, Miles’ Master and Magister, and Westland’s Lysander. In June 1942, the  twin-engined Beaufighter also arrived here, a year which also saw a return of the Blenheim and Beaufort. Some of these Beaufighters were dual control and several had Aircraft Interception (A.I.) equipment installed.

It was in one of these Defiants, that pilot Sergeant Anthony. D.C. La Gruta, (s/n 400719) (R.A.A.F.) was killed when the aircraft he was in plunged into the ground with such force that it buried itself some 16 feet down. The Ministry of Defence, unable to recover the wreckage, declared it a war grave and his body remains there to this day. A monument and parts of the wreckage currently mark the spot where the aircraft lies. Whilst it can’t be confirmed, it would appear that whilst out conducting a series of ‘homing tests’, the pilot lost control of the aircraft resulting in the tragic accident.

East Fortune National Museum of Flight

One of several Air Raid shelters at East Fortune.

During October 1942, No. 2 Glider School were formed here, they were quickly moved on however, and disbanded later at Dumfries – playing virtually no part in the development of East Fortune. On 24th November 1942, 60 O.T.U. was officially disbanded, and then immediately reformed as 132 (Coastal) Operational Training Unit, remaining at East Fortune airfield. Operating under the leadership of No. 17 (Training) Group (R.A.F. Coastal Command) it was designed to train crews in the long-range fighter and strike role. To achieve this, there were some sixty aircraft split primarily between Beaufighters and Blenheims; with other models such as Beauforts, Lysanders, Magisters and Spitfire VBs also adding to the busy airspace in this region of Southern Scotland.

In May 1944, Belgian Flying Officer, Gilbert A. E. Malchair, (s/n 132969), and Flight Sergeant, Roger H. L. Closon, (s/n 1424811), both of the Royal Air Force Volunteer Reserve, took off in Beaufighter ‘EL457’ on what is believed to be a training sortie. Little is still known about the accident but it is believed that the pilot reduced height to prevent icing, in doing so, the aircraft collided with the ground at Hedgehope Hill (Threestoneburn Wood) in the Cheviots. As a result, both crewmen were killed.

In 1944 a few D.H. Mosquitoes arrived at the airfield, but by now East Fortune had begun the long wind down. By May 1946, 132 O.T.U. was disbanded, and the aircraft were either dispersed or scrapped.

The airfield remained in R.A.F. hands, but during the cold war years, the U.S. Air Force lengthened two of the runways in anticipation of the Cold War becoming ‘hot’. Thankfully however,  hostilities never broke out and occupation of the site never materialised. East Fortune was then used as storage facility in case of any subsequent Soviet attack, primarily for the ‘Green Goddess’ fire engines, and later to store food stuffs by the Ministry for Agriculture and Fisheries. The site remained ‘open’, and for a short period – April to August 1961 – it acted as a replacement for Edinburgh’s Turnhouse international airport recording just short of 100,000 passenger movements. After this, in 1961, East Fortune was finally closed and the site vacated.

Callender-Hamilton Hangar East Fortune National Museum of Flight

Two of the three Callender-Hamilton hangars.

Over the years East Fortune had gone from an Airship site to a night fighter training school. Operational Training Units had lost crews and the entire site developed and expanded. Two of the three runways were expanded up to 2,000 yards, 46 hardstands were laid, it had 3 Callender-Hamilton hangars, 8 blister hangars, and accommodated 1,501 R.A.F personnel and 794 W.A.A.Fs. Designed as a satellite it had achieved a remarkable status, incredibly much more than it was ever designed to do.

Since its closure however, it has taken on a new role, developing both its past and preserving its history, turning it into what is possibly Scotland’s finest aviation museum. Many of the Second World War buildings still remain: The night flying store (drawing number 17831/40); three Callender-Hamilton hangars; Nissen stores, latrines and a refurbished parachute store. The Watch Office sadly not refurbished, is also present on the airfield site, as are a number of air raid shelters. The main runway is also still in situ, now used for Sunday markets, with the original section and extended post war sections being dissected by the road through the site. The perimeter track and secondary runways are also intact, having been used in part for racing activities.

East Fortune

The Watch Office remains on the ‘active’ side of the airfield site.

One of the benefits of East Fortune is the location of all these buildings, primarily on one relatively small site. Access is easy although many of them are sadly locked and out-of-bounds to the public.

Considering its early history and the sacrifice many of its crews gave, East Fortune is an important site, it stands as a memorial to all those who came and died here, and to all those who not only wrote history, but have contributed to it over the last 100 years.

Sources and further reading:

Further details of R,34’s trip can be found here.

Additional pictures of East Fortune can be found on flckr.

More detailed information about R.34 and the development of Airships can be found on The Airship Heritage Trust website .

The Eastern Daily Press ran several articles on the commemoration of R34’s journey 100 years on. The articles are available on the EDP Website.

*1 The Commonwealth War Graves Commission website.

RAF Drem – The home of Airfield Lighting Systems.

In Trail 42 we continue our journey northward driving along the coastal route taken by the A1 road. The North Sea views here are simply breathtaking. Heading toward the seat of the Scottish Government and the beautiful and historic city of Edinburgh, we visit two more airfields with long and distinguished histories. One of these also has perhaps, one of the best collections of preserved buildings left on any wartime airfield outside of Duxford.

We start off just outside of Edinburgh heading eastward at an airfield that became synonymous with airfield lighting. The idea was simplistic, the effect wide-reaching. It was so successful, it became standard across many of Britain’s wartime airfields, it is of course RAF Drem.

RAF Drem

Drem is often used when talking about airfield lighting systems, the lights used to illuminate perimeter tracks, runways and landing patterns during the Second World War. But as an airfield, it played a much bigger part in the war, hosting some 47 RAF squadrons, a selection of Fleet Air Arm units and various Technical and Developmental Flights at some stage during its wartime life.

Many of these units were here on short detachments or rotations, whilst not conducive to long-term development of the site, it did bring a wide variety of aircraft to this small airfield in Scotland: Hurricanes, Spitfires, Whirlwinds, Mosquitoes, Defiants, Beaufighters, Typhoons and Tempests to name but a few. It also brought a multitude of nationalities with it: French Czechoslovakian, Polish, Canadian, Australian and New Zealand airmen all used the airfield at some point.

Located in East Lothian, Drem has a history that started in the early stages of World War I. Used by 77 Sqn, who were based at nearby Edinburgh, it was then called West Fenton, a name it retained until 1919 when it was renamed Gullane. 77 Sqn were responsible for the protection of the east coast of Scotland, and in particular the Firth of Forth in the Home Defence role. They used a number of landing grounds in this region including both Eccles Toft (Charterhall) and Horndean (Winfield); and had detachments spread widely around the Edinburgh region: Turnhouse, New Haggerston, Whiteburn and Penston.

77 Squadron flew a number of BE Types in this role, a role that continued up to 13th June 1919 when the squadron was disbanded. Also in 1919, (21st February) cadres from both 151 and 152 squadrons were also based here, staying until September and June respectively, when they too were disbanded following the end of the war.

RAF Drem

The Stand-by Set house, an auxiliary power station, still remains in good condition today.

A year before the end of the conflict, No. 2 Training Depot Station was formed here flying types such as the Bristol Scout, Sopwith’s Pup and Camel, the S.E.5a, Avro’s 504, and the Royal Aircraft Factory F.2B. A short role, they too were disbanded at the end of 1919, thus bringing the end of flying to Gullane.

In the interwar years Gullane, although only a temporary facility, was renamed Trenent, and it remained in this guise for a further six years becoming a full-time facility in 1939. In two years time, it would undergo fighter name changes finally taking on the name it has today, that of RAF Drem.

It was on 17th March 1939 that Drem returned to the flying training role with No. 13 Flying Training School (FTS) being formed here, operating a number of aircraft types including, Avro’s Anson, and Hawker’s Audax and Harts. After being renamed 13 Service Flying Training School (SFTS) in September that year, it would only last a month before being disbanded and absorbed into No. 8, 14 and 15 (SFTS). But it was at this point that Drem’s potential as a fighter airfield would be realised and its first operational unit would move in. Drem had finally reached maturity and its war would very soon begin.

Transferred to Fighter Command at the end of October 1939, a number of operational units would quickly arrive: 602 (13/10/39-14/4/40), 609 (17/10/39-3/6/42) and detachments from 607 Sqn (10/10/39) and 72 Sqn (17/10/39) would all precede 111 Sqn (7/12/39-27/2/40) in these early days.

It was during this time, in the early stages of the ‘phoney war,’ that Drem aircrews would have their first and perhaps their most significant aircraft intercept.

On 16th October 1939, Heinkel He 111 ‘1H+JA’, of Stabskette/KG26 piloted by Kurt Lehmkuhl was spotted en-route to the Firth of Forth. Immediately, aircraft from Drem’s 602 Sqn and Turnhouse’s 603 Sqn, were ordered to take off and intercept the aircraft. Whilst the Heinkel tried desperately to avoid the Spitfires, their deadly firepower proved too much, and the aircraft was eventually brought down at Kidlaw Hill. This Heinkel became known affectionately as the ‘Humbie Heinkel‘ due to its close proximity to the village of Humbie. The air-frame rapidly became a tourist attraction, locals would climb up into the hills to see the intact bomber as it lay helpless amongst the Scottish heather. The aircraft lay just a few miles short of where an Airspeed Oxford (N4592) had crashed just two days earlier killing both its young corporals: Basil F. Evans (23) and Charles M. Thorpe (22). The hills around Edinburgh were fast becoming a graveyard!

As a result of the Heinkel attack, the two gunners Cpl. Bruno Reimann and Sgt. Gottleb Kowalke were both killed (both are buried at the German Military Cemetery at Cannock Chase), the pilot was injured, but the navigator remained unharmed. Both the navigator and pilot surrendered to a local Policeman who was first at the scene of the crash*1.  This shooting down was particularly notable as it was the first German aircraft to be brought down on British soil and the victory was claimed by Drem’s 602 Squadron pilot, Flt. Lt. Archie McKellar. McKellar’s jubilation would be short-lived though, being shot down and killed himself one year later and within days of the official ending of the Battle of Britain – his name would never appear in the Battle’s roll of Honour.

Perhaps one of the most iconic photos of the war, The ‘Humbie Heinkel’ lies on a Scottish hillside surrounded by onlookers, the first German aircraft to be shot down on British Soil.*2

Drem had now entered the war and whilst it was a ‘front line station’ its buildings would never be more than temporary. Crew numbers would reach 1,807 RAF air and ground crew along with a further 374 WAAFs. The runways (1 x 1850 yds extended to 2,300 yds and 2 of 1,400 yds) would remain grass and a number of hangers (15 in all) would include 3 Bellmans. Seven hardstands were built all suitable for single engined aircraft with the technical and main accommodation sites located to the north-east.

However, these early stages of the war were not all smooth running. In December 1939 tragedy struck when a combination of errors led to a number of 602 Squadron Spitfires inadvertently attacking a flight of Hampdens of 44 Squadron. During the confusion, in which it is thought the Hampdens failed to identify themselves correctly as ‘friendly’, two were shot down: Hampden I L4089 and Hampden I L4090. In the second aircraft Leading Aircraftman T. Gibbin was killed by the Spitfire’s bullets, as the two aircraft crashed into the cold waters of the North Sea. The remaining seven were all picked up by trawlers and taken safely to shore. In a moment of dark humour the next day, the remaining Hampdens departed Drem, dropping hundreds of toilet rolls over the squadron huts!

The winter of 1940 saw a short stay by 43 Sqn, arriving mid December and then departing at the end of February, possible one of the less appreciated stays knowing the inclement Scottish weather.

ROYAL AIR FORCE FIGHTER COMMAND, 1939-1945

RAF crews of 43 Squadron sit around their dispersal hut stove at Drem. (IWM)

The early months of 1940 saw a royal visit to Drem, when on 28th February 1940, King George VI visited, escorted by none other than Air Marshall Dowding. Whilst here, the King awarded Sqn. Ldr. Douglas Farquhar with the DFC after he had brought down another HE 111 that was able to be repaired at Drem and subsequently flown to a base in England for evaluation.

The subsequent months would prove to be very hectic for Drem. Like other airfields in the north, Drem was to become a home and solace for battle weary crews moved from 11 Group in the southern regions of Britain. To keep up their skills, they would fly both coastal patrols and convoy escort missions, a far cry from the hectic and turbulent skies of Kent and the south coast.

This rotation of units through Drem would continue throughout the war, most squadrons remaining for short periods of only a month or two, and many ‘leap-frogging’ between here and other stations. One of these units included, in 1940, 29 Sqn (RAF) a night fighter unit that excelled and became perhaps one of the most successful night fighter Squadrons of the Second World War.

With these short stays, came a variety of nationalities, including two Polish units (307 and 309); a French (340); two Canadian (409 and 410); an Australian (453) and three New Zealand squadrons (485, 486 and 488), each bringing their own touch of life to Drem.

With them also came night fighter training, and it was with one of these units 410 Sqn (RCAF) – who had only been formed a month earlier on 30th June 1941 – that Pilot, Sergeant Denis W. Hall, (s/n 1168705) and Gunner, Flight Sergeant Denis G. Cresswell (s/n 751880) would lose their lives, when their Defiant N1731 crashed into a hillside near to the village of Gifford in East Lothian, whilst on  a night training flight. Their military service at Drem had lasted a mere twenty-four days.

It was just prior to this, during 1940, that the Drem Lighting system was developed. Born out a necessity to solve issues around the Spitfire’s poor visibility when landing, the station Commander, Wing Commander “Batchy” Atcherly, personally addressed the issue. The problem was that Spitfires needed to keep their noses up in a relatively high angle of attack in order to maintain slow landing speeds, a configuration that meant the pilot could not see directly in front of him. Atcherly devised a plan using lights, whereby the pilots would be able to maintain this high angle and still be able to see where they were supposed to be going. He also had to overcome the added problem that lighting illuminated an airfield and thus attracted enemy aircraft over the site.

So he developed his idea, a bright lighting system that was mounted in such a way that only aircraft in the landing pattern and flight path could see the lights, yet they were dim enough and shrouded well enough, to be hidden from those not directly in the landing circuit. Essentially, the idea involved mounting covered lights on poles 10 feet high at designated points around the airfield indicating the landing pattern. If enemy aircraft were to approach, they would not be able to see the field and home based aircraft could land in relative safety. In an emergency, the entire system could be dimmed or even shut down, something that didn’t, as a rule, need doing.

The system was so successful that it was adopted by the RAF and used widely across other RAF airfields. Remnants of this system are scare today, but some can be found with careful scouring of the ground where runways were once laid.

During the latter half of 1940, Drem would be the place where the remains of the beleaguered 263 squadron would reform and recuperate. Formed in 1939, 263 would go on to serve in Norway with Gloster Gladiators, and after many problems, would bring their aircraft home during the Allied evacuation of Narvik. Unable to fly the great distance from Norway, the aircraft were loaded onto the carrier HMS Glorious for the trip home. It was during this trip that the Glorious met two of the German’s deadliest warships, the Scharnhorst and Gneisenau, who simply outgunned the carrier and on June 8th 1940, sank the Glorious with all the aircraft, many of its pilots and its commanding officer, on board.

The surviving fourteen pilots returned to Drem, where they were given Hurricanes. Gradually new pilots arrived and the squadron was returned to full strength. In July, after a short spell at Grangemouth, 263 Sqn returned to Drem with Whirlwinds replacing the Hurricanes.

Dogged by problems, the Whirlwinds were not to be the master of the air they had designed to be. 263 Sqn also brought a new idea they had successfully used in Norway, that of log-lined dispersals. Sadly they were too far away from the crew huts and apart from a photo opportunity, they were never used.

Slowly the war progressed, units came and went. Being near to the coast, Drem was regularly used for detachments of Air Sea Rescue Squadrons including 278 Squadron whose parent base was at Coltishall  several hundred miles south in Norfolk!

In the mid 1940s Drem’s focus narrowed not only in to the night fighter role, but also airborne radar investigations. The Radar Development Flight were formed here in December 1942 operating Defiant IIs and Beaufighter VIs. For six months they would fly these aircraft evaluating new radar designs and new methods in aircraft interception. They carried on this role through several name changes including: 1692 (Radio Development) Flight and then 1692 (Bomber Support Training Flight) after it had left Drem for Norfolk.

As the war drew to a close, the Royal Navy strengthened its involvement with Drem, renaming it HMS Nighthawk on May 3rd, 1945. The Royal Navy had a keen interest in night fighter training and used the skills of the RAF to aid its own programmes of night flying training.

Whilst RAF involvement had all but wound down, one final important act was to occur at Drem. Just as Drem aircraft had taken part in the first downing of a Luftwaffe aircraft at the start of the war, it was another Drem unit, 603 squadron, who would take part in the ending of the war. 603 Sqn Spitfires were tasked on May 11th 1945, just four days after returning to Drem, with escorting three white Junkers JU 52s that were carrying a number of German High Command officers into Drem as part of the official surrender of the Norwegian delegation. As part of this agreement, the senior officers would provide not only detailed information on the locations of mines laid out in the Norwegian waters: but the locations of all military shipping; lists of all stocks of oil; petrol and coal; coastal batteries and their associated supplies and all matters concerning German naval activity – including the surrender of the entire U-boat fleet.

The German High Command in front of their white JU52. Left to right: (from doorway) Lieutenant Albens; Captain Loewisch; Captain Kruger; and on extreme left, Commander Mundy Cox, RN, C/O of the Royal Naval Air Station. (IWM)

Throughout the war, the Fleet Air Arm (FAA) had a number of units use Drem themselves: 732, 770, 784, 884, 892 and both 1791 and 1792 squadrons were all based here along with detachments from three other FAA units. This brought a new breed of aircraft including the Seafire, Hellcat and Firefly to Scotland’s skies.

After the war ended the Royal Navy’s Night Fighter Training School pulled out, the RAF returned but never really used it for more than glider training, and eventually Drem was closed in September 1947. Its closure had been swift and its decline even faster.

Much of Drem today is agriculture. The airfield is split into two parts, divided by the B1345 road. To the west is the former airfield, a grass site with a virtually intact perimeter track. Along this track (now a farm road) are the various dispersals used during Drem’s wartime life. To the south is a Type B Fighter Pen, distinguished from Type ‘E’s by their cranked walls, greater in size, they provided greater protection to aircraft than the ‘E’.

The technical site sits to the north-east of the airfield, now a small industrial site it still contains many of the original buildings used by Drem’s personnel. Some of these have been refurbished whilst others contain many original features. Back along the road, the Stand-by Set house still stands and what remains of the accommodation site sits across the other side of this dividing road.

RAF Drem

Part of the Accommodation site still stands in use by small industrial and retail units. A small display of information about Drem is also located on this site.

Inside one of these buildings, the Arts & Crafts Gallery, now Fenton Barns Retail Village which is the former WAAF dining hall, is a small display providing information about Drem and its wartime operations, with free entry it is an interesting stop off if you have time.

RAF Drem had a long and chequered history. For such a  small airfield, it played a major part in the war: bringing down the first Luftwaffe bomber on British soil, being involved in the sad situation of friendly fire, and having a Royal visit. It provided solace for many weary crews, helped develop night fighter interception tactics and methods, and was used by the Royal Navy. It saw many nationalities pass through its doors, along with a wide range of aircraft types. Drem gave its name to a remarkable system of lighting that revolutionised airfield lighting both during the war and for aviation today. It certainly should have a place in today’s history books, it truly deserves it!

After we leave Drem, we travel a few miles south-east to a former satellite airfield of Drem. To an airfield that became a player in its own right, and has since been developed into perhaps Scotland’s biggest Aviation Museum  it is certainly one of the best preserved airfields around. We go to the former airfield at RAF East Fortune.

Sources and further reading:

*1 A report of the crash appeared 75 years later in The Berwickshire News.

*2 © National Archives of Scotland. http://www.scotlandsimages.com


RAF Winfield and the Polish Connection (Part 2)

After Part 1, we return to RAF Winfield, where an ‘odd’ visitor arrives. We also see the post war demise of Winfield into the site it is today.

At the end of the war many Polish units and displaced persons were pulled back to the U.K. in preparation for their repatriation into civilian life and for some return to their native country. Winfield became the site of one such group; the 22 Artillery Support Company (Army Service Corps, 2nd Polish Corps) who whilst fighting in the Middle East and Italy adopted a rather odd mascot. He became known as Wojtek, a Syrian bear who was officially given the rank of Private in the Polish Army, and who ‘fought’ alongside them as one of their own.

THE POLISH ARMY IN BRITAIN, 1940-1947

Wojtek the Syrian bear adopted by the Polish relaxing at Winfield Airfield, the unit’s temporary home after the war.*1

After finding the bear as a young cub wrapped around the neck of a small Iranian boy, Lance Corporal Peter Prendys took him and adopted him. After the war, on October 28th 1946, the Polish Army along with the bear arrived at Winfield Displaced Persons Camp – little did they know what a stir Wojtek would cause.

As displaced persons the Polish men would venture into nearby Berwick, where the locals grew fond of them and drinks flowed in abundance. Wojtek would go with them, becoming a familiar, if not unorthodox, site amongst the streets and bars or Berwick. This cigarette smoking, beer loving character, often causing a stir wherever he went. He became renowned in the area, the local villagers would flock to see him. He joined in with the frolics and loved the life that he was being allowed to live.

As a bear he loved the rivers and the River Tweed flows only a short distance from Winfield, rich and fast flowing it is abundant in that other commodity – Salmon. However, Wojtek was under strict orders not to swim alone nor stray onto the airfield which although closed, could still provide a danger for him if seen.

Wojtek became part of local history, eventually, a year after their arrival, the Polish unit were demobbed and they moved away. Wojtek was given to Edinburgh Zoo to look after, who did so until his death at the age of 21 in 1963. A statue stands in Princess Street Gardens beneath Edinburgh Castle as a reminder of both him and the Polish troops who were stationed at Winfield camp. A second statue of Wojtek stands in the centre of Duns, the village not far from Charterhall. The Wojtek Memorial Trust, set up in his honour, aims to promote both educational and friendship links between the young people of Scotland and Poland, an aim it tirelessly works towards today.

RAF Winfield

Statue of Wojtek in the centre of nearby Duns.

After the Polish troops left, Winfield was allocated to the USAF, and earmarked for development, but this never materialised and the site was left dormant. Winfield then reverted back to RAF control some five years later in October 1955, whereupon it was disposed of and sold off.

A small group of private flyers reopened the site, renovating the watch office and utilising a small hangar on the north of the airfield. This operation has now ceased and the watch office has sadly fallen into disrepair, it windows missing and open to the elements. The demise of Winfield and its subsequent decay has begun.

Winfield airfield lies between two roads, a further public road passes through the site although this was seen to be gated at the southern end. The most prominent feature is by far the Watch Office, a two-story design built to design 15684/41, having walls some 13.5 inches thick as was standard for all night-fighter stations (but different to the one at Charterhall).

Other buildings also remain to the west on the main airfield site but these are only small and very few in number. The accommodation sites have all been removed, however, there are some buildings remaining in the former WAAF site to the north of the airfield. Located down a track just off the B4640, these buildings appear to be latrines and a possible WAAF decontamination block, with other partial remains nearby. Drawing numbers for these are unclear, (but appear to be 14420/41 and 14353/41) indicating WAAF (Officer and sergeant) quarters. Other buildings on this site look to have been a drying room, water storage tank and a picket post. Heading further south along this track leads to a small pond, here is a local design Fire Trailer shelter: a small brick-built building no more than about seven feet square. Presumably this pond was used to fill the fire trailer in cases of fire or attack and was located midway between the WAAF site and the main airfield. Also on this site, which is part of the Displaced Persons Camp, is a makeshift memorial to the Polish Armed Forces, dotted around the ground are a number of metal parts partially buried in the soil.

RAF Winfield

A plaque dedicated to the Polish Armed Forces placed next to the fire trailer hut.

The airfield runways and perimeter tracks are still in place, and years of both decay and locals using them to practice their driving skills on, have taken their toll. Like Charterhall, Winfield was also used as a motor racing circuit, although not to the same extent that Charterhall was. On one occasion though, as many as 50,000 spectators were known to have visited the site on one day alone!

Winfield like its parent site has now become history, the remnants of its past linger on as final reminders of the activities that went on here in the 1940s. The night fighter pilots who pushed the boundaries of aircraft location and interception are gradually fading away; the dilapidated buildings too are gradually crumbling and breaking apart. Inch by inch these sites are disappearing until one day soon, perhaps even they will have gone along with the brave young men who came here to train, to fight and in many cases to die.

As we leave the remnants of Winfield and Charterhall behind, we continue North to our next trail; nearing Edinburgh we take in more of Scotland’s natural beauty and even more tales of its wonderful but tragic aviation history.

My sincere thanks go to both Mr. and Mrs. Campbell for their hospitality and the help in touring these two sites. The history of both Charterhall and Winfield can be read in Trail 41.

Sources and Further Reading – RAF Winfield

*1 Photo IWM collections No.HU 16548.

The Polish Scottish Heritage website provides information about the scheme.

RAF Bardney to become a Shooting Range

After the closure of many of Britain’s wartime airfields, many were returned to agriculture or converted for use by light industry. Some were completely removed and some developed into housing. RAF Bardney, located a few miles to the east of Lincoln, has since been one of those used for a multitude of light industrial and agricultural uses and has been the recent subject of a planning application.

Bardney was home to three RAF squadrons during World War Two: Nos 9, (April 1943 – July 1945);  No. 227, who were reformed here at Bardney from ‘A’ flight of No. 9 Sqn and ‘B’ flight of 619 Sqn, staying for two weeks in October 1944; and finally No. 189 Sqn (April – October 1945) – all three squadrons operated the Lancaster MKI and MKIII.

During their stay here, No. 9 Sqn operated as part of 5 Group Bomber Command, using the Squadron code ‘WS’, and after moving in from nearby Waddington, they carried out a number of operations into the German heartland losing fifty-nine aircraft during 1943, half of which were whilst based here at Bardney.

The first fatality occurred on April 30th, when Lancaster III WS-R, ‘KD838’ was lost without trace in an operation to Essen. None of the seven crew members were ever found nor was there ever any trace of the aircraft.

9 Squadron was a mix of nationalities: British, Australian, Canadian, Rhodesian and Trinidadian. As with KD838, a large number of these crews were lost without trace, and as such, have no known grave – their memories being carved into the walls of the Runnymede Memorial.

ROYAL AIR FORCE BOMBER COMMAND, 1942-1945.

Lancaster Mk III, ED831 ‘WS-H’, of No 9 Squadron RAF, flown by Squadron Leader A M Hobbs RNZAF and his crew, at Bardney. © IWM (CH 10405)

In the dying stages of the war, Bardney was used by the RAF’s Bomber Command Film Unit, flying Lancasters and Mosquitoes, the unit was itself eventually disbanded at Upwood later in the same year.

Post war Bardney was used  as a Thor missiles base by No. 106 Squadron (July 1959 – May 1963), before its eventual closure and final disposal.

A planning application was originally submitted in September 2016 for a:

“Change of use and conversion of existing agricultural land and associated outbuildings to provide an outdoor activities centre providing archery, air rifle shooting, axe throwing, combat archery and zombie training, and the construction of earth bunds to a maximum height of 3.0metres (bunds already constructed), in accordance with the amended plans received by the Local Planning Authority on 15th November 2016”.

Objections were put forward by local people and comments made by other interested bodies such as Environmental Health, Health and Safety and the Economic Development Team. Permission was initially granted in December that year. There are certain conditions in the terms of the decision, but it seems more than likely that the development will progress as planned.

The proposal and supporting documents can be found on the East Lindsey District Council Planning site.

The story first appeared in ‘Lincolnshire Live‘ news report on May 27th 2017.

The Borders – RAF Charterhall (Part 3)

We carry on from Part 2 of Trail 41 for the final Part of RAF Charterhall. An airfield that had become known as ‘Slaughterhall’ it was about to see a new breed of aircraft, perhaps even a turn in luck.

RAF Charterhall

The main runway at Charterhall looking south.

The night of May 27th – 28th 1944 was a heavy night for Bomber Command, with large numbers of four engined heavies attacking targets in Germany.  On their return, ten Lancaster bombers were diverted to Charterhall, the first time the four engined bombers would use the airfield, but not the last. On the 8th June, another seven were to arrive, also diverted on their return from the continent. Then in July, a Halifax was diverted here after sustaining heavy flak damage over Helioland. The pilot, P/O W. Stewart of the RCAF and navigator P/O K. Evans (RAF) were both awarded DFCs for their action whilst badly injured, such was the determination to get all the crew and aircraft back safely.

July to October saw an increase in flying and an increase in accidents. July ‘led the way’ with heavy landings, burst tyres, ground collisions and engine failures being common place. The majority of these incidents were Beaufighter MKIIfs, some were visiting or passing aircraft who suffered problems and had to divert. Charterhall saw a mix of Lysanders, Barracuders, Beauforts, Wellingtons and Hurricanes all use Charterhall as a safe haven.

As the threat of attack was now diminishing, a reorganisation of the O.T.Us would see 9 Group disband in September that year. The responsibility of 54 O.T.U (now flying mainly Mosquitoes) and Charterhall would now pass to 12 Group.

Eventually 1944 turned to 1945 and the year that saw for 17 fatal crashes also saw 54 O.T.U. take on more aircraft and more crews.

January 1945 was incredibly harsh in terms of weather and the cold. Training new crews on new radar meant that Wellingtons were brought into Charterhall. Small teams of pupils would take turns to operate the radar to detect Hurricane ‘targets’. These new models increased the air frame numbers at Charterhall to 123 by the end of January.

RAF Charterhall

‘No. 1’ Building on the Technical site.

By now the allies were winding their way into Germany, pressure was increased by Bomber Command and so more heavies were to find Charterhall a refuge when the weather closed in. On the 15th February a large ‘Gardening’ operation led to 12 heavies landing at Charterhall along with four Mosquitoes who had been flying with them over Norway. All these aircraft were able to return to their various bases at Skipton-On-Swale, Leeming and Little Snoring the next day.

Two days later, more aircraft were to find Charterhall (and Winfield) needed. Some 266 aircrews – an incredible influx for one night – were going to need bedding – billiard tables, sofas and chairs suddenly became in very short supply.

The poor weather continued well into the year and snow caused some ‘minor’ accidents at Charterhall. The first confirmed death was not until early March and others were to follow. By May the war had come to an end and operations began to wind down. Winfield was closed and crews returned to Charterhall. Beaufighters were gradually sold, scrapped or moved elsewhere, and by August the last aircraft had left.

March would see the last fatalities at Charterhall, both in Mosquitoes on the 25th and 29th. In the former, the aircraft was in a high-speed vertical crash and the latter the pilot, Flight Lieutenant Cole (s/n125484), overshot the runway and crashed his Mosquito FBVI (HR297) a mile south of the airfield. He was 22.

Apart from a small detachment of crews from 770 Squadron Naval Air Branch carrying out trials, operations began slowing down. After VJ day, the Mosquito numbers were also wound down, only fifty-one aircraft remained by the end of August.

In September the order came through to vacate Charterhall and the packing began. By the end of the month 54 O.T.U. had all but vacated leaving Charterhall quiet once more. The last eighty aircraft consisting of: Mosquito VI,  XVII and NF30s, Martinets, an Oxford, Miles Master II, Ansons, Hurricane IICs and Wellington XVIIIs were flown out for the final time, 54 O.T.U. had played its part and their end lay ahead.

In the three years that Charterhall had been in operation, they had passed over 800 crews for night fighter operations, they had suffered over 330 accidents, 56 of which had resulted in deaths. During this time crews had flown just short of 92, 000 hours flying time day and night, with almost a third being carried out at night. Had it not been for this unit, the heavy bombers of Bomber Command may well have suffered even greater losses, the determined and deadly night fighters of the Luftwaffe may have had a much wider and easier reign over our skies and the losses we quote today would be even higher.

But the withdrawal of 54 O.T.U. was not the demise of Charterhall. For a short period it was set up as No 3 Armament Practice Station, designed to support and train fighter pilots in the art of gunnery. During its period here November 1945 – March 1947 it would see a range of aircraft types grace the runways of Charterhall.

The first units were the Spitfire IXB of 130 squadron from December 1st 1945 – January 24th 1946, followed by 165 Squadron’s Spitfire IXE between 30th December and January 24th 1946. On the day these two squadrons moved out, Charterhall entered a new era as the jet engines of Meteor F3s arrived under the command of 263 Squadron. After staying for one month they left, allowing the Mustang IVs of 303 (Polish) Squadron to utilise the airfield. Each of these squadrons followed a course which included air-to-air target practice, ground attack, bombing and dive bombing techniques.

Following the completion of the course 303 pulled out and the order was given to close No. 3 Armament Practice Station and wind Charterhall down for good. The RAF sent no further flying units here and apart from a detachment of Mosquitoes from 772 Squadron of the Fleet Air Arm, by the following summer, it had closed. The final spin of the airscrew had taken place.

Post war, the airfield was left, the runways and buildings remained intact and the airfield was used by small light aircraft. Gradually though it fell into disrepair, used mainly for agriculture, it had a new lease of life when on Saturday May 31st, 1952, the airfield saw its first motor race using sections of the perimeter track and runways. A two-mile track became the proving ground for a number of the worlds most famous racing drivers including: Sir Stirling Moss, Jackie Stewart O.B.E., Roy Salvadori, Sir John Arthur ‘Jack’ Brabham, AO, OBE, Giuseppe “Nino” Farina and local boy Jim Clark O.B.E. Clark cut his racing teeth at Charterhall, eventually winning 25 Grand Prix races and the Indianapolis 500 in 1965. His grave lies in nearby Chirnside cemetery alongside his mother and father. Charterhall also saw the appearance of Scotland’s first organised sports car team, ‘Ecurie Ecosse’, using Jaguar cars*4. Racing occurred here until 1969, when the current owners took over the site.

The RAF then returned briefly in late 1976 undertaking trials of the Rapier ground-to-air missile system, in which a range of fast jets including Jaguars and Phantoms would participate. These lasted a month which would see the last and final RAF involvement end.

The owners reinvigorated the site providing a venue for rally sport events which started again in 1986. Eventually on March 30th, 2013, the last ever race was run and motor sport stopped for good and so another era finally came to a close.*5

RAF Charterhall

Jim Clark’s grave stone at Chirnside.

Today a section at the western end of the main runway is still available for use by light aircraft (with prior permission) and the main technical area is home to the Co-op Grain store, a facility which has a number of large stores for drying and storage of grain.

Accessing the site is from the B6460 where a memorial stands to the crews who passed through Charterhall and in particular Flight Lieutenant Hillary and Flight Sgt. Fison, who died in such tragic circumstances. A track leads all the way to the airfield site, which was the main entrance to the airfield. A good quantity of buildings still stand here on the technical site along with two of the original hangars. All of these are used for storage or stabling of animals including horses and are rather rundown. The perimeter track and runways are complete but their surfaces are breaking up and in a poor state of repair.

These buildings are a remarkable and poignant reminder of the tragic but significant years that Charterhall prepared and developed crews for the night fighter squadrons of the RAF. Hundreds passed through here, for many it was a difficult twelve weeks, for some it ended abruptly and decisively. Not known for its comforts, it was a pivotal station in the Second World War and indeed also for many years after for the those who went on to become some of the world’s most famous motor racing drivers.

Many airmen came and stayed, sixteen of them who were killed on active service whilst at Charterhall are buried in the nearby cemetery at Fogo, a short distance to the north of the airfield. Many are from around the commonwealth who came here to help and were never to return.

After leaving Charterhall, we head a little further east to Charterhall’s satellite and a site that had strong links with the forces of Poland. Remembered here is an usual mascot, a bear known as ‘Wojtek’. We stop off a few miles away at the satellite that was RAF Winfield.

Sources and further reading

*4 Obituary of Bill Dobson: ‘Ecurie Ecosse’ racing driver in ‘The Scotsman‘ newspaper 21st October 2008.

*5 A news report of the event can be read on ‘The Berwickshire News‘ Newspaper, 28th March 2013.

The Borders – RAF Charterhall (Part 2)

Following on from Part 1 of Trail 41 – The Borders, we return to Charterhall in the beginning of 1943.

During the Battle of Britain many pilots suffered from burns in aircraft fires and crashes. The famous ‘Guinea Pig club’ became synonymous with those men who underwent experimental techniques in reconstructive skin work carried out by of Archibald McIndoe at the Queen Victoria Hospital, East Grinstead in Sussex. Some of these men wrote about their experiences, and one, Flight Lieutenant Richard Hillary, sadly lost his life at Charterhall.

Hillary arrived here in November 1942 – after two long years of surgery and hospitalisation. Writing about his experiences in ‘The Last Enemy‘ he opted for night fighter training and was posted to Charterhall. Still disfigured, he had virtually no experience in night flying and none on twin-engined aircraft.

RAF Charterhall

One of two remaining hangars.

The controls of the Blenheim were awkward and difficult to use at the best of times, Hillary, with his disfigured hands, found the Blenheim I more so and often needed help with the undercarriage. Cockpit lighting was another issue experienced by crews, even in later models instrument panels were difficult to read in the dark and this led to several pilots making errors when reading the various dials and gauges. Hillary found this a further challenge, with damaged eyelids his night sight was ‘impaired’ and on January 8th 1943, his aircraft, Blenheim V BA194, struck the ground killing both him and his Radio Operator Flight Sgt. K.W. Fison. The cause of the crash is unclear, whether Hillary’s condition added to the accident is not known, and it is generally thought to be as a result of icing due to the thick, cold Scottish fog. Whatever the cause, it ended the life of two very brave young men, one of whom had fought long and hard to survive in some of the harshest of times.*2

In April 1943 Beauforts began arriving to replace the ageing and very much outdated Blenheim Is. It was also in this month that responsibility of the O.T.Us passed over to 9 Group, and there were now fourteen operational units countrywide. Monthly ‘processing’ of new crews would be increased to an intake of 40 all undertaking a 12 week course before finally being posted to operational squadrons.

The summer of 1943 saw a rapid increase in accidents. Some of these occurred on the ground as well as whilst flying. On June 14th a tragic accident occurred when a Beaufighter piloted by Sgt. Wilkie, swung on take off colliding with another aircraft being refueled. The Bowser exploded in the accident destroying both aircraft and killing two ground staff: Leading Aircraftman (LAC) Francis P. Matthews and Leading Aircraftman George Lotherington.*3

A further incident, also caused by a Beaufighter swinging on take off, caused the first July fatality, when the aircraft hit both a blister hangar and a taxiing Beaufort. The two collisions wrote off the Beaufighter and severely damaged the Beaufort. The pilot of the Beaufighter,  Flight Sgt. W. Andrew (s/n 415280) aged just 21, was killed in the incident.

July was a milestone for 54 O.T.U in that it was the first time that 3,000 flying hours had been exceeded of which 894 had been carried out at night at a cost of 20 accidents – such was the demand for trained operational crews.

During September, new MK VI Beaufighters began to arrive. These were passed directly to Winfield and ‘C’ squadron after delivery and inspection at Charterhall. Even though they were ‘factory new’, they did not prevent further accidents nor deaths occurring. By the end of 1943, 54 O.T.U had amassed 28,940 hours flying time of which 7,012 were at night. A huge total that had enabled the RAF to pass the equivalent of 12 operational squadron crews but it had also taken a serious loss of life.

In January 1944 the unit strength was up to ninety-six aircraft, flying continued where the inclement weather allowed, and the year would start off with no serious accidents or deaths – a welcome break; but 1944 would eventually prove to be Charterhall’s worst year.

May brought a new focus for the trainees when it was decided to make  54 O.T.U operational in support of the impending invasion. Operating in the night fighter role, they were called out on to intercept German aircraft roaming over the north-east of England and southern Scotland. Unfortunately, whilst intruders were detected, no contacts were made during these operations, primarily due to the intruders flying too low for the GCI to pick them up; but it did give some purpose to the heavy losses that were being incurred.

At this time a new aircraft began appearing in ‘C’ Squadron, a model that gave new hope and determination to the crews – the incredible, D.H. Mosquito. By the war’s end, 54 O.T.U. would have used eight different variants of the Mosquito.

The initial batch of two were located at Winfield, rather disappointing perhaps for those at Charterhall, but they were not to be  devoid of their own special breed of aircraft.

The final part of our visit to RAF Charterhall will follow soon, the end of the war is in sight and so starts a new era for RAF Charterhall…

Sources and further reading

*News report on Hillary in ‘The Scotsman‘ Newspaper, 11th November 2001

*3 Commonwealth War Graves Commission website accessed 29/4/17

The Borders – RAF Charterhall (Part 1)

After leaving the Wolds of Yorkshire, Trail 41 takes us north across the border into Scotland. A land as diverse in its history as it is its beauty.  With fabulous views of the Cheviots to the south and the North Sea coast to the east, it is an area renowned for beautiful scenery and delightful walks. With Holy Island and Lindisfarne Castle standing proud, it also an area with a rich and diverse aviation history,

In this trail we stop off at two airfields where we find some remarkable relics and some terrible stories.

Our first stop is at a site that is little known about even though it played a major part in the night-fighter air war, and was also the proving ground for some of the world’s top motor racing drivers as well. Yet beneath all this glamour and bravado it holds a collection of terrible stories. We stop off at the former RAF Charterhall.

RAF Charterhall.

Located some 15 miles south-west of the coastal town of Berwick, Charterhall airfield had its aviation origins in the First World War. Its original name was RFC Eccles Tofts (although the two were not quite the same physical site), a landing ground for 77 Squadron who were based further north at Edinburgh, and flew the Royal Aircraft Factory BE.2c/d/e, BE.12, RE8, de Havilland DH6 and Avro’s 504k.  Whilst not official detached here, the airfield was available for these aircraft to land upon and be recovered should the need arise. It wasn’t kept open for long and soon disappeared returning to its former agricultural use.

Charterhall is one of those airfields that has a grand sounding name, suggesting regency and nobility, its reality though, was somewhat different. It gained the rather unsavoury, but apt, nick-name ‘Slaughterhall’, due to the high accident rate of the trainee aircrew who passed through here.

RAF Charterhall

Technical buildings at Charterhall.

Many of the aircraft that operated from here were outdated and ‘war weary’, held together by the dedicated mechanics that took great pride in their work. Used for short-term placements of trainees, it would not house any true front line squadrons until the war’s end in 1945.

As a training airfield it would have a large number of airfield buildings, two Tarmacadam (Tarmac) runways the main running east-west of 1,600 yards and the second north-east/south-west of 1,100 yards; both were the standard 50 yards wide. There were some 38 dispersal pans, similar in shape to the ‘frying pan’ style , eight blister hangars and four main hangars of which two still survive. Chaterhall’s accommodation was initially designed for 1,392 airmen and 464 WAAFs – consisting of 126 Officers (both male and female) and 1,730 other ranks (again both male and female).

The main technical area was to the north side of the airfield with accommodation spread amongst the woods around this area. The watch office, long since demolished, was a mix of concrete and timber (thought to be initially a 518/40 design), which originally had timber floors, roof and stairs. However, an acute shortage of wood led to all these designs having only a timber balcony and control room. These modified designs (Charterhall included) were therefore built to a mix of 518/40 and 8936/40 specifications.

Another interesting feature of Charterhall would have been the instructional fuselage building. Here crews would have been trained using an aircraft fuselage (Charterhall had two, one each of Beaufighter and Blenheim) jacked up and linked to a controller’s panel. A number of simulated problems could be created for the crews to experience, anything from radio exercises through small warning lights to engine failure and even ditching. All crewmen had to have a good understanding of their aircraft, working hydraulics, electrical and fuel systems were all taught using this same method. In addition to these training fuselages, Charterhall would operate six Link Trainers, along with several other ‘state of the art’ training facilities.

RAF Charterhall

Many of the remaining buildings are in a poor state of repair.

The entire airfield would occupy around 143 hectares, it was certainly not large, especially considering the numbers of crews and mix of aircraft it would have during its short life.

Construction of Charterhall took place over 1941/42 opening on April 30th as part of 81 Group Fighter Command (and later 9 Group), receiving 54 Operational Training Unit (O.T.U) in May 1942. Formed two years earlier, they flew primarily Blenheim Is and Beaufighter IIs under the Squadron code ‘BF’ (Four different unit codes were used: BF, LX, ST and YX). A number of these aircraft were fitted with Aircraft Interception radar (AI) and some Blenheims were dual control.

To support the operations at Charterhall, a satellite airfield was built at nearby Winfield, a few miles east, both sites being used by 54 O.T.U. simultaneously. Later in the war, in an effort to divert marauding Luftwaffe bombers away from the two airfields, a dummy ‘Q’ site (No. 179) was built at Swinton also to the east of Charterhall.

The increase in O.T.U.s in these early days of the war was as a direct result of the increase in demand for new pilots in Fighter Command. In December 1940, 81 Group had six such units (54-59 O.T.U.) and by June 1941 this had increased to nine (52 – 60). By 1942, a total of twelve were in existence boosted by the addition of 12, 61 and 62 O.T.U. 54 O.T.U. would be one of two specialising in twin-engined night fighter flying. New crews, of which there were about 30 per month, were initially given about ten days to establish themselves and ‘crew up’. As time passed however, this time reduced to the point where some intakes were literally herded in a hangar and told to find a crewman or they would be allocated one! *1

Many of the crews arriving at Charterhall were brought in from around the Commonwealth and after passing their basic flying training instruction, would proceed through a further three stages of training. Some crews were also ex-fighter pilots already battled hardened, who had transferred in from front line units to night-fighters.

Progression through the course would be through initially three, and latterly four, squadrons. ‘A’ Squadron would be the initial conversion unit initiating crews on the rudiments of twin-engined aircraft as many had come from single engined fighter units. ‘B’ Squadron was the intermediate squadron, where the crews moved onto the larger twin-engined aircraft and finally ‘C’, (based at Winfield) was the advanced squadron honing skills such as aircraft interception and attack.  After completing the full training period, crews would receive postings to front line squadrons across the U.K. and beyond.

RAF Charterhall

A latrine on the technical site.

Initially on opening, Charterhall was not completely ready, especially the airfield’s lighting (Drem), and so training flights would only occur during the day. But, with the help of ground crews, this was soon rectified and by the end of the month considerable work had been done, and very soon night flying could begin.

The first daylight flights took place on May 13th 1942, followed by night flying seven days later, and – as crews were to find out very quickly – flying these aircraft would be a risky business.

During 1942 some 5000 aircrew would enter 81 Group’s training units, and they would suffer in the region of 2,000 accidents, of which just under 200 would be fatal. On May 23rd, 54 O.T.U’s first accident would occur when a ‘technical failure’ on a Blenheim Mk I, would cause the controls to jam. The aircrew were thankfully unhurt but the aircraft was severely damaged in the resultant crash. The first fatality would not be long in coming though, occurring just two days later, on May 25th, less than a month after 54 O.T.U’s arrival. On this day, Blenheim IV (Z6090) crashed killing both Pilot Officer J. A. Hill (s/n 115324) and Observer Sgt. A.E. Harrison (s/n 1384501) in an accident which is thought to have been caused by icing. P/O Hill is buried at Haddington (St. Martin’s) burial ground in East Lothain, whilst Sgt Harrison is buried in Middlesbrough (Acklam) Cemetery, Yorkshire.

During June, the first Beaufighters would begin to arrive, followed quickly by their first accident. Whilst on delivery by 2 Aircraft Delivery Flight at Colerne, the aircraft – a Beaufighter MkIIf – had an engine cut out causing it to crash about 10 kilometres north-west of Charterhall. Luckily the crew were able to walk away but the aircraft was written off.

During July bad weather hampered flying activities, but it didn’t prevent the unit from increasing its strength to seventy-seven aircraft.  Primarily Blenheims and Beaufighters, there were also a small number of Lysanders for target towing and four Airspeed Oxfords.

Accidents continued to occur at Charterhall, and it wasn’t until September 1942 that it would be fatality free – a welcome boost to the morale of the instructors at the time. However, the reprieve was short-lived, and October would see further accidents and yet more fatalities. On the 5th, two Blenheim MK Is (L6788 and L8613) collided: Pilot Sgt. J. Masters (missing – presumed drowned) and Navigator Sgt. J. Gracey were both killed. There were seven other accidents that month, a tally that involved two Blenheims and five Beaufighters, with the loss of one life. Causes included: two burst tyres, two overshoots, a loss of control and an undercarriage failure, all of which added to the lengthening list of accidents occurring at Charterhall.

The need for new crews increased the pressure on training stations to increase flying hours. Courses were cut short, spares were lacking and with only rudimentary rescue equipment, further deaths were inevitable. As a result, it wouldn’t be until March 1943 before Charterhall would see a break in these increasing fatalities.

The start of 1943 saw a new Station Commander, but the new change in command would not see the new year start on a good note…


(Part 2 of Trail 41 will continue shortly).

Sources and further reading

*1 An interview with Edward Braine, in ‘reel 4’ he describes his posting to RAF Charterhall for operational training; crewing up; transfer onto Bristol Beaufighters; position of navigator in Bristol Beaufighter; accident during training; method of observing aircraft at night and interpreting radar signals. Sound file reel 4 Recorded and presented by the Imperial War Museum.


A New Memorial to Honour Those Who Never Came Home.

RAF Downham Market in Norfolk, was home to 6 squadrons during the Second World War: 214, 218, 571, 608, 623 and 635 along with a number of other non-flying units. It was also home to a number of aircraft types, Short’s enormous Stirling, the famous Lancaster and of course de Havilland’s ‘Wooden Wonder’ the Mosquito of the RAF’s Pathfinder force.

RAF Downham Market

One of the many huts still left on the airfield.

It was also the airfield that launched the last bombing mission by an RAF aircraft, a Mosquito, on May 2nd 1945, to attack retreating German forces at the Kiel canal.

Considering the strong links it has with the RAF and Bomber Command, it has never been given a fitting memorial, but maybe finally, this is about to change.

A proposal has been put forward to erect a grand memorial on a site next to where one of the former accommodation sites once stood. It will honour not only those who flew from Downham Market and never returned, but those who served and were stationed here as well.

It is hoped that the new memorial will consist of seven polished, black granite slabs with each name of the 700 crewmen who lost their lives, carved into it, in the order in which they were lost. It is hoped to raise £250,000 to cover the cost of the structure which will be grand in scale and stand next to the main A10, a road that was made using the runways for its hardcore.

Currently the only reminder of their sacrifice is a small memorial outside of Bexwell church. It is a small memorial telling the stories of the two heroic crew members, Flight Sergeant Arthur Louis Aaron and Squadron Leader Ian Bazalgette, two pilots who both received the Victoria Cross whilst at Downham Market, for extreme bravery in the face of the enemy.

Today whilst none of the runways or perimeter tracks exist, a number of the original buildings are still present, used by small businesses and light industry. Recently however, a  £170m regeneration plan was announced, one that may signify the end of these buildings and Downham Market airfield for good (see here).

RAF Downham Market and especially the many crew members, who came from all across the Commonwealth, deserve great recognition for the work they did. Perhaps this, is finally a sign that it may now happen.

The full story and pictures can be accessed on the Eastern Daily Press website. There are more details and a link to the donations page on the RAF Downham Market website. 

RAF Downham Market appears on Trail 7 – North West Norfolk. 


RAF Methwold – unassumingly famous.

The East Anglia countryside is littered with remnants of the Second World War. The massive build up that occurred here in the mid 1940s has led to changes in both landscape and culture, the ‘friendly invasion’ as it has become fondly known, had a huge impact on the towns and villages around here. An area rich in aviation history there are numerous tales of heroism and valour to be found.

Whilst on the eighth Trail of aviation sites, we stop at the former site that was RAF Methwold.

RAF Methwold

Methwold Village sign

Methwold village sign

Located between Downham Market and Thetford, Methwold is a small rural setting on the edge of Thetford Forest. Its village sign and combined memorial, remind the passer-by of its strong air force links – a Lockheed Ventura taking off over the village church.

Methwold was actually built as a satellite for nearby RAF Feltwell and as such, had few squadrons of its own. Being a satellite its runways were of grass construction with little in the way of luxuries for accommodation.

On the day war broke out in Europe, 214 Squadron, equipped with Wellington MKIs, moved from RAF Feltwell to here at Methwold. Feltwell being larger, offered a prime target for the Luftwaffe and so their loss would be Methwold’s gain. The first production Wellington, the MKI was powered by two 1,000 hp Bristol Pegasus XVIII radial engines, and would soon be updated and replaced by the MKIA; the main difference being a change in gun turret from the Vickers to the Nash & Thomson. As part of Bomber Command, 214 Sqn did not carry out its first operational bombing flight until June 1940 some four months after it had left Methwold; but that is not to say casualties were not suffered.

On Monday November 6th 1939, Wellington L4345, crashed whilst circling on approach to Methwold. The accident resulted in the deaths of both crewmen, Pilot Officer J. Lingwood and Aircraftman 1, – A. Matthews.

Tragic accidents were not uncommon in these early stages of the war, another similar incident occurring at Methwold only a month later. In mid December, Pilot Officers W. Colmer and R. Russell-Forbes, along with Leading Aircraftman J. Warriner, were all killed whilst on approach to the airfield flying in another Wellington, R2699. Both these Officers were only recently commissioned and were still considered relative flying ‘novices’.

In February 1940, 214 Sqn departed Methwold and transferred to RAF Stradishall leaving only a small number of Wellington IIIs of 57 Sqn detached from their parent station at Feltwell. These would, in September 1942, be replaced by the mighty Lancaster, the four engined bomber that formed the backbone of the RAF’s Bomber Command.

The Intelligence Room of No. 140 Wing, No. 2 Group, at Methwold, Norfolk. © IWM (HU 81315)

Little happened at Methwold for the next two years, then in October 1942, 21 Sqn arrived. After having flown many missions against coastal targets in the Mediterranean, they were disbanded at Luqa only to be reformed and re-equipped at Bodney the same day. After changing their Blenheims for Venturas in May 1942, they transferred to RAF Methwold where they stayed for six months.

Operating both the Ventura MKI and II, they were the first Bomber Command squadron to re-equip with the type, and were one of the small number of squadrons who took part in the famous Eindhoven raid, attacking the Philips radio factory in December 1942. The daring Operation Oyster, would see the loss of sixteen aircraft – three of which belonged to 21 Sqn. Two of these aircraft crashed in enemy territory, whilst the third ditched in the North Sea after having been hit by enemy gunfire. Using a mix of Venturas, Bostons and Mosquitos, this mission perhaps revealed the true vulnerability of such aircraft over enemy territory, a warning that would violently repeat itself in the months to come.

The spring of 1943 would again see changes at Methwold; as 21 Sqn departed, the ‘Flying Dutchmen’ of 320 (Dutch) Sqn would move in. 320 Sqn, were formed after the German forces invaded the Netherlands and consisted of mainly Dutch nationals. They carried out both anti-shipping and rescue duties before transferring, from Leuchars, to Methwold via Bircham Newton. Upon arriving here, 320 Sqn was absorbed into No. 2 Group and would shortly swap their Hudson VIs for Mitchell IIs. After a very short transfer period, they then departed Methwold, moving to the much larger base at Attlebridge.

Two further squadrons of Venturas arrived at Methwold in the early spring of 1943. Both 464 (RAAF) and 487 (RNZAF) Sqns were formed, transferred and disbanded in unison, and both consisted of commonwealth crews. Having entered the war in a baptism of fire, they also flew alongside 21 Sqn on the Eindhoven raid; 464 Sqn contributing fourteen aircraft whilst 487 contributed sixteen – each squadron losing three aircraft and all but four of the twenty-four crewmen.

DSC_0029

One of the original hangers

The Venturas earned themselves the unsavoury title the ‘flying pig‘ partly due to their appearance and partly due to poor performance. Based on the Lockheed Model 18 Lodestar, it was primarily a passenger aircraft and even though it had powerful engines, it performance was low and so operational losses were often high.

On May 3rd 1943, whilst on a ‘Ramrod‘ mission, eleven out of twelve (one returning due to engine trouble) 487 Sqn aircraft were lost to enemy action, and all but twelve of the forty-four crewmen were killed. Of these twelve, Squadron Leader Leonard H. Trent, was captured and taken to Stalag Luft III where he participated in the ‘Great Escape‘. On his eventual return to England at the end of the war, he was awarded the Victoria Cross for his leadership in ensuring the bomb run was completed despite heavy enemy resistance and very high losses.

In the summer of 1943, both 464 and 487 Squadrons became part of the newly formed Second Tactical Air Force; a move that led to their departure from Methwold, along with a new role and new aircraft.

Following their departure, Methwold was passed over to 3 Group and was designated to receive the heavy four-engined bombers of Bomber Command. To accommodate them, the site was upgraded to Class ‘A’ standard. Three runways were built, five hangars (four ‘T2s’ and one ‘B1’) were erected, and a wide range of ancillary buildings added. Aircraft dispersal consisted of 36 hard standings mainly of the spectacle type.

The incoming ground and aircrews would be accommodated in areas to the east of the airfield, buildings were sufficient for a small bomber site of some 1,800 men and just over 300 women, by no means large.

In this interim period on March 13th, a lone American P-47 #42-74727, suffered engine failure whilst on a routine training flight in the area. In an attempt to land at Methwold, the P-47 Thunderbolt crashed, slightly injuring the pilot but writing off the aircraft.

The first of the heavy bombers to arrive at the newly constructed Methwold were the mighty Stirling IIIs of 218 Sqn. A small detachment from RAF Woolfox Lodge, they would operate from here along side 149 Squadron who moved here from RAF Lakenheath in May 1944. 149’s record so far had been highly distinguished. Participating in the RAF’s second bombing mission of the war on September 4th, they had gone on to take part in the first 1,000 bomber raid, attacked prestige targets such as the Rhur, and had taken part in the Battle of Hamburg. They had also been in action in the skies over the Rocket development site at Peenemunde. They had gone on to drop essential supplies to the French Resistance, and one of its pilots, Flight Sergeant Rawdon Middleton, had won the VC for his valour and determination in action. 149 Sqn would go on with the offensive right up until the war’s end, replacing the ill-fated Stirlings with Lancaster MKIs and later the MKIIIs in August 1944.

During the D-Day landings, 149 Squadron were tasked with dropping dummy parachutists away from the Normandy beaches. As part of Operation Titanic, they were to deceive the German ground forces, aiming to draw them away from the Normandy beaches, thus reducing the defensive force. A task that proved relatively successful in certain areas of the invasion zone, it caused confusion in the German ranks and pulled vital men away from drop zones. During this dramatic operation, two 149 Sqn Stirlings were lost; LJ621 ‘OJ-M’ and LX385  ‘OJ-C’ – with all but three of the eighteen crew being killed.

In August 1944, 218 Sqn moved the remaining crews over to Methwold completing the unit’s strength once more. This move also led to them taking on the Lancaster MKIs and IIIs. 218 Sqn was another squadron with a remarkable record of achievements, its most notable being the VC posthumously awarded to Flight Sergeant Arthur Aaron for his ‘most conspicuous bravery’ whilst at RAF Downham Market.

As the allied advance moved across Europe, 149 Sqn supported them. In December 1944, 218 Sqn departed Methwold taking their Lancasters to RAF Chedburgh and disbandment the following year. 218’s losses were not over though, just days before the war’s end on April 24th 1945, Lancaster NF955 ‘HA-H’ crashed on take off, the last fatality of the squadron’s operational record. For 149 Sqn food packages replaced bombs as the relief operation – Operation Manna – took hold. After the fall of Germany in 1945, 149 Sqn ferried POWs back to Methwold in Operation Exodus, and for many, it was their first taste of freedom for many years.

The final squadron to be stationed at Methwold was 207 Squadron, between October 1945 and the end of April 1946 also flying the Lancaster I and III. As with many other bomber command squadrons, its history was also long and distinguished; flying its final mission of the war on 25th April 1945, against the SS Barracks at Berchtesgaden. During its wartime service 207 Sqn had completed some 540 operations, lost 154 crews and earned themselves a total of 7 DSOs, 115 DFCs and 92 DFMs.

In 1946, the Lancasters of 149 Squadron departed Methwold and all fell quiet. The site was officially closed in 1958 and the land returned to the former owners. In the early 1960s, much of the concrete was removed for hardcore, buildings were demolished and the land returned to agriculture, a state it primarily survives in today.

RAF Methwold

Stores huts used for light industry

Methwold airfield is located south of the village of Methwold, accessible by the B1112. As you drive along this road, the technical area is to your left and the main airfield to your right. The entire site is primarily agricultural, with some of the remaining buildings being used for farming purposes or light industry. Many of these are accessible or at least can be seen from the main public highway.

Large parts of the runways do still exist, although much of them are covered in newly developed industrial units, or are hidden away on private land. These most notable developments are at the northern end of the runway closest to Methwold village. However, best views of what’s left, are from the southern end, along a farm track that was once the perimeter track. Also here, is a single large and original ‘T2’ hangar, now used for storing agricultural equipment and other farm related products. This main north-westerly runway, built later in the war, is also used for farm related storage. Divided by a large fence, it is now part track and part storage. The remaining sections of perimeter track, a fraction of its original size, allows access to the runway past the hangar to an area of development further south to where the turret trainers once stood. Also visible here, is the Gymnasium built to drawing 16428/40 later adapted by the addition of a projection room (889/42) for recreational films.

Back alongside the B1112 hidden amongst the woods, is the technical area. Here in between the trees are the former technical huts and workshops now used by small industrial units, many of which survive in varying conditions, some of these are accessible to the general public.

RAF Methwold

One of the former runways looking north-west.

Methwold was never intended to be major player in the war. home to a small number of squadrons, it housed a variety of aircraft and a number of nationals who all combined, tell incredible stories of heroism, bravery and dedication. The squadrons who passed though here, carried out some of the RAF’s most daring raids, whether it be as part of a thousand bomber raid, a small force to attack the heart of Reich, or a diversionary raid to foil air and ground forces.

Methwold is now quiet, agriculture has taken over. The sound of heavy piston engines are now replaced by the sound of tractors, the buildings that once housed brave young men and their incredible machines now home to the machinery of food and farming. The small remnants of Methwold hold stories of their own, for it is here that history was made, war was won and lives were lost – and all in a very unassuming manner.

Notes and further reading:

Methwold appears in Trail 8 and was originally visited in April 2013.

Local information and further detail is available from the local Methwold history group.