RAF Bodney – High casualties and Heroic acts (Part 2).

After Part 1, we return to RAF Bodney to the point where the RAF had pulled out handing Bodney over to the US forces. From now on, it would be the home of the USAAF 352nd FG, its P-47s and P-51s.

Famed for the blue-noses on their P-51s, there would be high successes but there would also be many tragedies along the way.

Formed previously in September 1942, the 352nd Fighter Group (FG) composed of three Fighter Squadrons (FS): 328th FS, 486th FS (previously the 21st PS) and 487th FS (formally the 34th PS). Their journey had been both long and difficult, using elements of two squadrons who had previous battle experience in the Pacific theatre. The new 352nd would move through a series of training camps and bases across America, serving as part of the US Air Defence force before deploying overseas. From Mitchel Field, they transferred to Bradley Field (Connecticut), Westover Field (Massachusetts), Trumbull Field (Connecticut) and onto Republic Field, New York before  eventually leaving on the Queen Elizabeth arriving a week later at Bodney on July 7th 1943.

Arriving via Greenock and the Queen Elizabeth, the ground echelons of the 352nd were deposited at Watton station where they were taken by truck to RAF Watton. Pleasantly surprised by the far nicer accommodation blocks they had been used to, their joy was to be short-lived as Bodney was perhaps even worse than the original training camps they had endured back home.

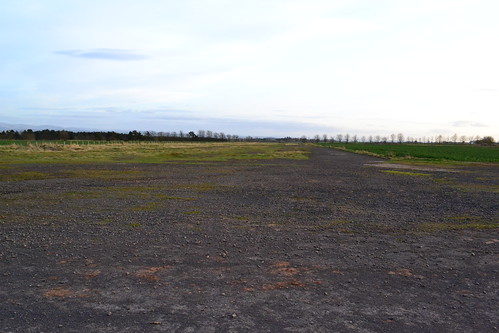
Whilst the surrounding woods had been utilised for aircraft dispersal, the base was in need of an upgrade if it was to be used successfully. These improvements included the addition of steel mat and pierced-steel planking hardstands, additional taxiways and more roads constructed of both macadam and concrete. The men of the 352nd commuted daily from Watton carrying out repairs and improvements until such time as the airfield was more or less ready for occupation and they moved in.

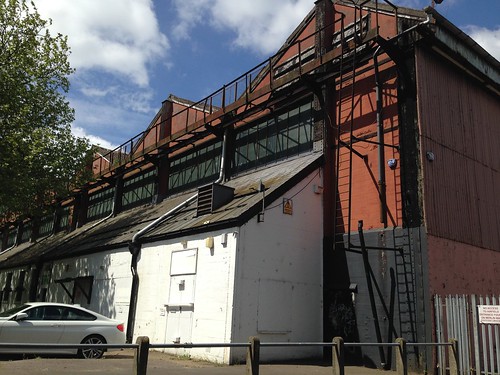
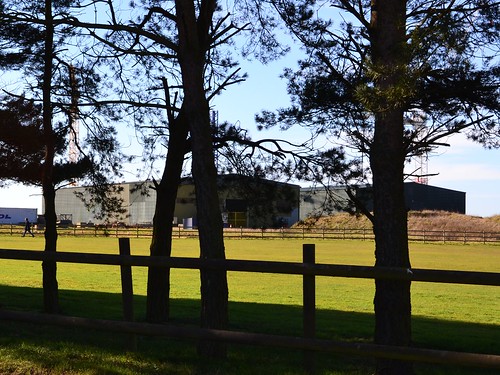
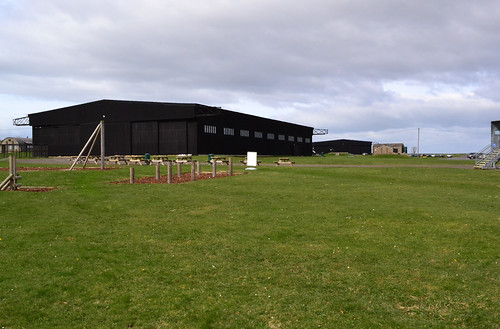
During its time, Bodney would have two T2 hangars and five Blister hangars, accommodation would continue to be limited, allowing for around 1,700 men of mixed rank. Eleven accommodation sites were spread round the north and east of the main airfield, which included two communal sites (site 2 and 3) and two sewage works (sites 12 and 13). There were no WAAF accommodation blocks and due to initial shortages of Nissen huts, nearby Clermont Hall (originally a grand plastered brick Italian style building built by William Pilkington in 1812 as Lord Clermont’s hunting lodge*1)  was ‘requisitioned’ and flying crews moved in, it was a complete change and total luxury compared to other bases and camps used by either the RAF or USAAF. However, following a visit from an Air Inspector, the stay was short-lived and the airmen moved back to the basic hutting of Bodney, even after strong protests from Group Commander, Lt. Col. Joe Mason.

Master Mark II glider tug at Bodney, during airborne forces Exercise ‘SNAFFLE‘ © IWM (H 31737)

During this time manoeuvres regularly took place in the local area, and between August 9th and 11th 1943, one such exercise was conducted near to Newmarket, an exercise that involved both Polish and Canadian divisions opposing each other in mock attacks. During exercise ‘SNAFFLE‘, Master Mark II glider tugs used Bodney airfield whilst dropping a range of supplies such as petrol, ammunition and ordnance to illustrate both the usefulness, and importance of such activities. This made an interesting change to Bodney and something else for the crews to focus on.

It wasn’t long however, before the first P-47s were to arrive at Bodney, and at last flying could begin again with training flights started very soon afterwards. However, maintenance and flying operations were arrested by the lack of equipment, spares and aircraft – all very typical of the build up of US squadrons across the UK. As morale sunk, a special visitor arrived at Bodney, that of Capt. Clark Gable along with a film crew who were documenting the lives of American Fighter Squadrons involved in the European war.

A line up of P-47 Thunderbolts including (PZ-T,) “Little Evey” and (PZ-Z) “Pistol Packin’ Mama” at Bodney.  (IWM FRE 2795)

On September 9th 1943, some two months after their arrival, the 352nd flew their first mission. An uneventful patrol over England’s eastern coast between Southwold and Felixstowe. For the next few mission, even those into enemy territory, similar conditions were found, the enemy were not seen and flak remained low. However, this did not mean the 352nd were casualty free.

On 13th September 1943, Lt. Arthur Eaker was killed in a local flying accident, the groups first, then on the 14th, Lt. William Alm disappeared whilst in flight over the North Sea. His aircraft P-47D (#42-22531) was thought to have been lost due to mechanical failure, he was never found.

It wasn’t until the 10th October that the pilots of the 352nd got to fire their guns in anger, when they encountered a flight of Bf-109s near to Hertogenbosch, Holland. The first kills were recorded, but it was not to be all plain sailing. Four days later on the 14th (‘Black Thursday‘), the Luftwaffe changed tactics and hit the escorts as they crossed the coastline. Leaving the bombers unescorted to their targets in Germany. Once away from their ‘Little Friends’ the bomber formations were decimated by Me-110s – something need to be done.

With more mission to Germany and escort duties, the 352nd began to cut their teeth and become battle hardened. By the turn of the year they had completed 38 missions with the loss of ten aircraft. The pilots of the 352nd had now twenty-two enemy aircraft as confirmed ‘kills’, but five of their own were killed and two others had been made prisoners of war.

A new year and new directives for fighter squadrons. in order to achieve total air superiority pilots were instructed to hunt for the Luftwaffe and destroy them whenever the opportunity arose. Every aircraft destroyed on the ground now counting as a battle credit, the same as an aerial kill. In addition, fighter squadrons were now given designated ‘zones’ to protect, and once the bomber stream had passed through their zone, the fighters were free to roam at will. The gauntlet had been thrown and the US pilots were hungry for rewards.

Early 1944 saw these directives put into action. ‘kill’ rates began to rise, but along with it casualties also mounted. By February the war-weary P-47s were looking tired and the new P-51 began to appear. The Ninth Air Force taking first pickings with Don Blakeslee, (Trail 46 and Trail 50) formerly of the ‘Eagle Squadrons’ becoming the first US squadron to have the mighty Mustangs. It wasn’t until March 1st, 1944 that the 352nd would receive their first P-51s, with seven being delivered and duly handed over to the pilots of the 486th FS at Bodney.

A battled damaged P-51 Mustang (PZ-S) of the 486th FS, in a Blister hangar at Bodney. (IWM- FRE 2803)

It would take just eight days for the Bodney crews to mark their first Mustang ‘Kill’. Capt. Ed Gignac, in P-51B ‘PZ-W’ (#43-7022), shooting down a Bf-109 in battle that saw both P-51s and P-47s of the 352nd participate.

April saw more changes and new arrivals, by now there were two squadrons of P-51s at Bodney, a new sound reverberated around the grassed airfield and with it came more new directives, As many squadrons were equipped with a mix of aircraft, it was beginning difficult to tell them apart in the hectic skies. Coloured noses, wing tips and fins were rapidly becoming markings of individual squadrons and those in charge realised that a standard form of scheming was now necessary for this new and innovative way of distinguishing squadrons.

The blue nose was born, and Bodney’s Blue-nosed Mustangs were soon to be seen at low-level attacking airfields, locomotives, vehicles, troop columns and other similar ground targets.

In May, whilst acting on escort duties for a raid over Brunswick, the group shot down 27 enemy Bf-109s and FW-190s with the loss of only one aircraft. This action earned them a Distinguished Unit Citation, for taking on a “numerically superior force of German interceptors” continuing on until lack of ammunition and fuel forced their withdrawal.

The 352nd went on to support the Normandy invasion, an operation that proved to be a fatal tragedy for one pilot in particular, Lieutenant Bob Frascotti.

IMG_2210

Robert Frascotti next to his P-51B, 43-6685, named ‘Umbriago’ . At 21 years of age he was killed on his final mission before returning home. (Photo – Marc Hamel)

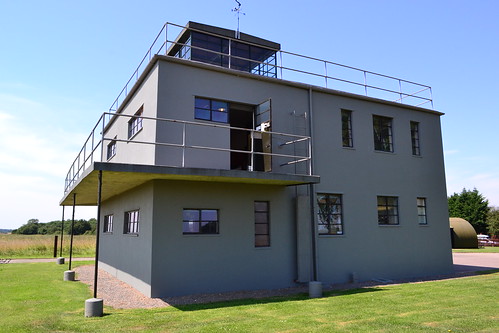
D-Day began early for the 352nd, the night sky was dark and to assist the take off temporary runway lights had been lit. Preceding Frascotti were his compatriots of the 486th FS. During the take off, one of the preceding aircraft struck a light causing the entire collection to extinguish. In the moments that followed, Frascotti and his wing-man, Lt. Carlton Fuhrman, were plunged into total darkness. Unable to see, the two were now committed and carried on, Fuhrman slightly behind Frascotti. Within seconds of them leaving the ground, there was a sudden and massive fireball in front of Fuhrman, a fireball that was the result of Frascotti striking the new, and as yet unfinished, watch office. His aircraft, fully armed and fully fuelled, became a fireball that lit-up the night sky, and one from which Frascotti would not survive.

Blinded temporarily by the flash, Fuhrman fought to prevent his aircraft stalling as he flew through the flames and on out into the night sky, struggling to orientate himself and  unable to register his instruments due to the blinding flash. Behind him, Frascotti’s burning wreck lit up the field, one of the 352nd’s finest had been killed in a total and needless tragedy. The only saving grace from this was that every other aircraft taking off after Frascotti was able to see, a guiding light some say, and so prevented other tragic accidents from happening that night. This was the young 21 year old’s final mission, his 89th, and on completion he would have been returning home.

During D-Day the 352nd flew 116 sorties, reigning death and destruction down on the German forces below, other casualties were to follow, but none until now, as destructive and heart rendering as that of Frascotti.

The Watch Office after being hit by Frascotti’s P-51 on the morning of D-Day. (© 352nd FG, USAAF)*2

After Normandy, the 352nd went on to support the breakout at St.Lo and the airborne assault in Holland. As autumn led into winter, the temperature dropped and the weather took a dramatic turn for the worse; with heavy snow and cold winds across the continent, as the ground forces held out on the Ardennes forest knew only too well. The 352nd, like many other squadrons, were to help support the paratroops, being moved on a short-term basis to Belgium (Asch (Y-29) and Chievres (Y-84)) to join the Ninth Air Force earning themselves the French Croix de Guerre on New Year’s Day 1945.

A week earlier, on Christmas Day 1944 a second tragedy was to befall the 352nd, one that would take the life of another one of the 352nd’s finest. The squadrons highest scoring pilot at that time, Major George Preddy, a hero to many of the airmen and ground crews at Bodney, flew into an American Flak barrage put up by the US Army’s 12th Anti-Aircraft Group. His plane was hit and whilst his canopy was seen to be ejected, no chute appeared, and his body was found still in the wreckage of his beloved P-51. The news of Preddy’s death stunned the celebrations at both Asch and Bodney, no-one could believe that such a daring and brave pilot could have been lost, let alone lost to friendly fire.

April would see the 352nd return to Bodney, where they continued operations until May 3rd 1945. Their final move on November 4th would take them home to the United States, a move that left Bodney empty and a legacy that would be hard to follow. The 352nd had flown 420 missions, losing 118 aircraft with 70 pilots killed. They had been awarded 13 DSC’s, 31 Silver Stars, 336 DFCs, 1304 Air Medals and 42 Bronze Star Medals. The Group had created 52 ‘Aces’, 28 of which had achieved the status in air-to-air combat, accounting for 505 aircraft in the air with Major George Preddy achieving 27 of these himself.

With that departure Bodney fell silent, it closed very soon after the war in Europe ended on November 26th 1945, reverting back to farmland soon after.

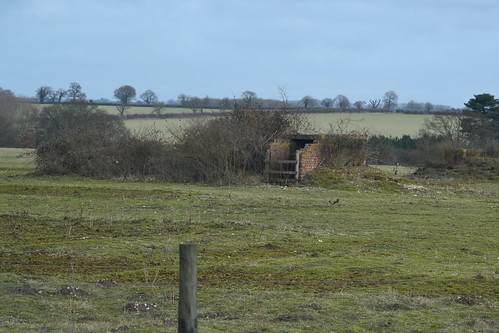
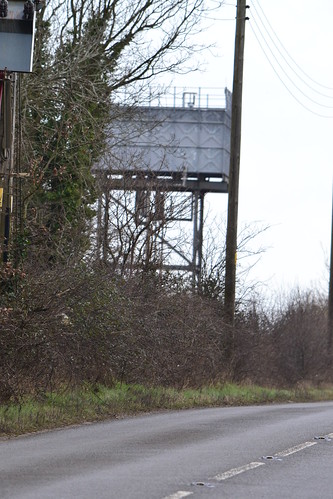
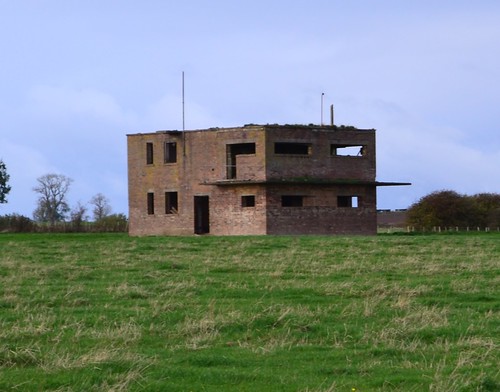
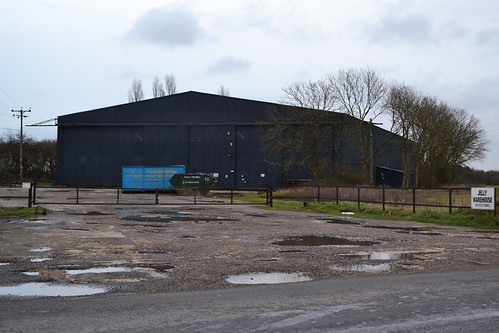
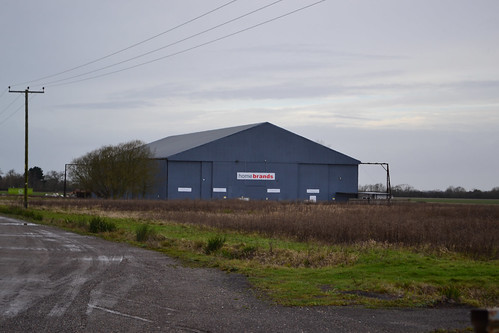
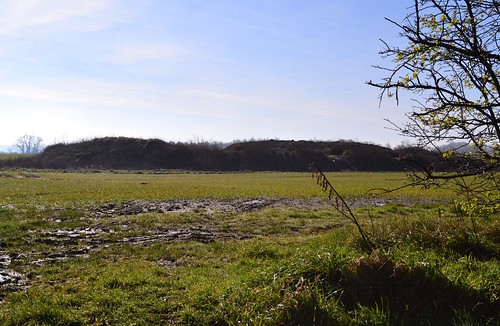
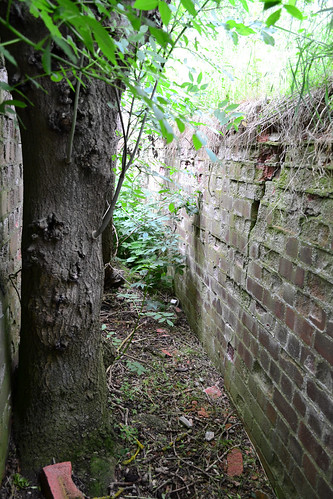
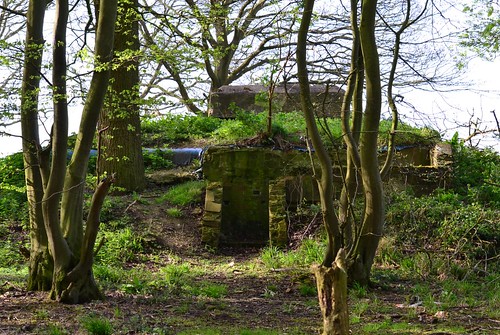
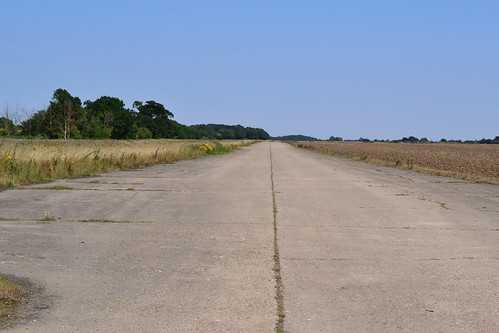
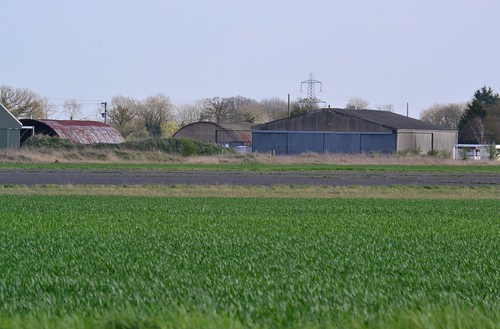
Today Bodney falls next to the British Army’s STANTA training ground and as such parts are a military site. Some structures can easily be seen from the main road, B1108,  with signs warning of MOD activity are everywhere.  The original water tower and pump still serve the camp, a few air raid shelters exist and some buildings on the camp. Hardstands can be seen in the woods but little from the road itself.

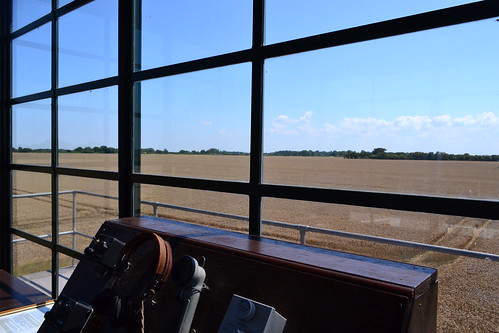
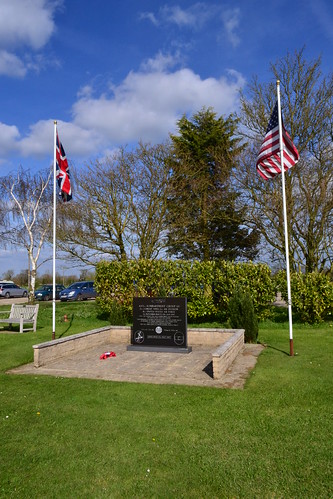
The watch office is accessible (on farmland) where there are also a few other buildings to be found, including  number of Type 22 pillboxes, many are derelict. The main army base is on part of the former accommodation site, with a memorial outside the gate dedicated to 352nd FG and associated units.

RAF Bodney

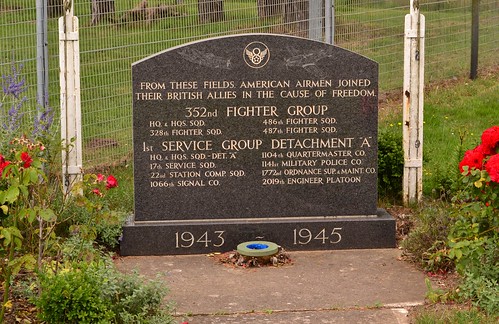
Bodney’s memorial to the 352nd FG.

Many of the buildings that were in existence were pulled down in 2012/13 due to increased vandalism and their heavy use for Rave parties. As a result even less now stands visible telling the incredible stories of this forgotten airfield.

Sources and further reading.

*1 Norfolk Heritage Explorer website, accessed 15/8/18

*2 Photo via www.controltowers.co.uk

Frascotti’s story is told in more detail in Heroic tales.

Preddy’s story is told in more detail in Heroic Tales.

Walton, D. “Northumberland Aviation Diary” (1999), Norav Publications

Freeman, R. “The Mighty Eighth“, (1986), Arms and Armour.

There is a website dedicated to the 352nd with a link to the superb ‘Bluenoser’ magazine.

RAF Bodney – High casualties and Heroic acts (Part 1).

Much has been written about the Famous ‘Blue Nosed Bastards of Bodney‘, the 352nd Fighter Group, Eighth Air Force. Famed for their determination and ferocious attacks on Luftwaffe aircraft, they produced some remarkable results – but they also suffered some terrible losses. Nicknamed the ‘Blue Nosers‘, because of their blue nosed P-51 Mustangs, they became one of the most successful fighter groups of the Eighth Air Force. In just a two-year period (September 1943 to May 1945), they were credited with 800 enemy aircraft destroyed, either on the ground or in the air, flying a total of 420 missions. Today the airfield they served from, RAF Bodney, is a small part of the STANTA training ground used by the Army for military exercises, and whilst the airfield has all but gone, the stories and tales of the 352nd continue to live on.

In this Trail, we look again at RAF Bodney, the units and the men who served, the heroic acts and the cost paid at this small grass airfield.

RAF Bodney (Station 141)

Bodney was initially an RAF airfield, opened in 1940 as a grassed site with a hardened perimeter track. During its construction, it had 27 asphalt hard stand of mixed sizes, fifteen large and twelve small, and was designed as a satellite for nearby RAF Watton (Trail 9). Whilst primarily associated with the USAAF, it was in fact an RAF Airfield for several years, housing detachments of aircraft from its parent station.

On 2nd March 1939, 21 (Norwich) Squadron (RAF), now part of 2 Group,  moved into Watton from Eastchurch bringing with them Blenheim MK.Is which they retained until the September when they changed them for the MK.IV. Being early on in the war, they were not yet fully operational, and so were limited to reconnaissance flights over northern France. They were also joined in the August by 82 Sqn, another Blenheim squadron, and it was at this time that they began to utilise Bodney as a satellite, dispersing aircraft here away from the parent airfield.

One of the earliest casualties to occur at Bodney was that of 82 Squadron, on the 22nd anniversary of the forming of the Royal Air Force – 1st April 1940. Take off occurred at 11:00 hrs when Blenheim MK.IV #L8867, piloted by F/O. Glyn Harries (s/n 39520), along with Sgt, Herbert Kelleway (s/n 561573) and LAC. Eric Wolverson (s/n 544700), was sent to attack enemy shipping off the Danish coast. During an attack, the aircraft was hit by Flak from enemy shipping and brought down with the loss of all three  crewmen on board. Their bodies were never recovered and they are commemorated at Runnymede.

RAF Bodney

Bodney today.

By the summer of 1940, Western Air Plan W.A.4(b) was put into operation, a plan that formed part of a 16 part operations plan in the event of a German attack, and one that would focus British Air power in the destruction of German power sources. Part 4(b) focused on the advancing troop and armour columns when they crossed into Southern Holland, Belgium and France. This required aerial attacks primarily from Blenheim and Fairy Battle Squadrons, and was intended to slow or even stop the advancement.

Blenheims of 21 Squadron were assigned to this plan focusing on troop columns and bridges, but being under-powered and weaker than their adversaries, Blenheim casualties were very high and operations over enemy territory were soon curtailed.

Western Air Plan W.A.4(b) was a plan that sent many pilots to their ultimate death or capture, as the aircraft they were flying were woefully inadequate for the job in hand. A fact borne out by the brave attempts of three crewmen on June 14th. On this day, Blenheim #R3742, of 21 Squadron at Bodney, was shot down over France, the three crewmen: P/O. W. Saunders, Sgt. H. Eden and Sgt. C. Webb,  fortunately surviving the resultant crash. After making their way to the coast, finding a boat and attempting to row to England, the three men began to hallucinate through exhaustion. After the second night, P/O. Saunders ‘disappeared’, leaving only his tunic behind in the boat. After being what they thought was only 10 miles from the English coast, they were eventually picked up in France and taken to a new POW camp on the Baltic coast.

On June 24th, 21 Sqn left Bodney moving north to RAF Lossiemouth where they performed anti-shipping operations off the Norwegian coast, before returning once more to Watton (and Bodney) where they continued these low-level operations. It was whilst back here at Bodney that another of 21 Sqn’s pilots, Sqn. Ldr. Malcolm McColm, flying in Blenheim MK.IV #T2223 ‘YH-T’ would also be shot down also ending his war as a POW.

On the night of 27th/28th December 1940, he took off with his crew, Sgt.  Cecil Hann (s/n 580541) and Sgt David Shepherd (s/n 625253), to attack coastal targets. After being shot down, both Sgts. Hann and Shepherd were killed but Sqn. Ldr. McColm survived and would go on to be one of the RAF’s greatest evaders, escaping no less than seven times from German incarceration. Eventually he was sent to Colditz where he shared a room with Douglas Bader and was an active member of the Colditz Escape Committee along with Airey Neave. These would prove to be residencies that would befall many Blenheim pilots at this point in the War.

Eventually in 1941, 21 Sqn moved away to the Middle East, only to be disbanded and reformed later on, all on the same day.

Being a satellite, the facilities at Bodney were rudimentary, and remained so even when 90 Squadron (RAF) began using it during testing of the mighty B-17 (Fortress MK.I). Initially reformed at Watton on May 3rd 1941, they quickly moved to larger bases at West Raynham and then Polebrook, where the Fortresses were tested for RAF bombing missions. Unfortunately operations proved too costly with too little success for them to continue, and the B-17s were gradually phased out of RAF operations.

RAF Bodney water tower

The water tower and pump house at Bodney are some of the structures remaining.

These coming and goings at Bodney had left 82 Sqn one of the few squadrons still in situ. Performing anti-shipping activities off the coast of the Friesian Islands, they would regularly fly over the sea at very low levels, attacking whatever ships they could find. On August 20th 1941, Blenheim MK.IV #V6445 ‘UX-E’ took off from Bodney on what was supposed to be a routine operation; at the controls was 20-year-old F/Lt. Dennis R. Gibbs (s/n 63471), with Sgt. Stanley V. Pascoe (s/n 548419) as wireless operator / gunner, and Sgt. Eric L. Cash (s/n 916895) as Observer / bomb aimer.

As the aircraft flew in low toward its target, Sgt. Cash (referred to as ‘Laurie’) released the bombs, at which point the pilot, realising how low he was, pulled up only to strike the mast of the ship they were attacking. The mast smashed the Blenheim’s perspex front severely wounding Sgt. Cash, and damaging numerous instruments, including the radio, in the process.

Unable to navigate properly, the pilot turned west and headed for what he hoped would be land. After some 6 1/4 hours flying time, a point very close to the flying limit of the Blenheim, F/Lt. Gibbs, not knowing where he was, decided to put the aircraft down in a suitable field. The nose of the aircraft still had part of the mast embedded in it, which made handling and landing the aircraft even more difficult than it would have been normally.

Luckily a passing Home Guard platoon were near by, and once the aircraft had come to a stand still, they helped pull the crew out of the wreckage; Sgt. Cash was taken to Acklington Hospital whilst F/Lt. Gibbs and Sgt. Pascoe were treated for minor injuries.

Later that night Sgt. Cash died from wounds he sustained in the collision, and was buried in Chevington Cemetery. F/Lt. Gibbs and Sgt. Pascoe returned to Bodney and after a short period of leave, returned to flying duties; F/Lt. Gibbs later receiving the DSO.

Until now Bodney had not had its own squadron, but on March 14th, 1942, a unique day in 21 Sqn’s history, the unit was disbanded in Malta only to be reformed the same day at Bodney. They continued to use the Blenheim MK.IVs, placing a small detachment at Abbotsinch (now Glasgow Airport) whilst the main part of the squadron stayed at Bodney. It was also during this month that 82 Sqn departed for the far east leaving Bodney to the new 21 Sqn.

During May 1942, 21 Sqn began to change their Blenheims, replacing them with the American built Lockheed Ventura (MK.I and MK. II), the first RAF squadron to do so. Throughout the summer months 21 Sqn carried out training flights converting crews from the Blenheim onto the Ventura, a slow process as new aircraft were only being sent as few as one or two at a time. The Ventura, a former passenger aircraft, could carry a 2,500lb bomb load with a larger crew of 4 or 5 including a top turret gunner. Take offs, landings and formation flying were the order of the day until in the October 1942, when 21 Sqn finally departed Bodney for RAF Methwold (Trail 8). This move signalled the permanent break that would mean 21 Sqn would now leave Bodney behind for good.

The winter months of 1942-43 were quiet at Bodney. The gradual build up of American forces in the UK meant that more and more airfields were needed to house fighters and bombers of the Eighth and Ninth Air Forces. Through both a renewed building programme and the taking over of older RAF sites, this heavy demand would soon be met. As part of this buildup, Bodney was identified as suitable site for a bomber station, but upgrading to Class A standard never happened, and instead it was allocated to a fighter group. After being designated Station 141, it was handed over to the US forces, who quickly began to make improvements to its design.

In part 2 of this RAF Bodney – High casualties and heroic acts, we shall see how Bodney  became home to the three squadrons of the 352nd FG, The tragedies that occurred at this small grassed airfield, and how the 352nd became one of the top scoring Fighter Groups of the US Air Force.

(See part two for references).

The Development of Britain’s Airfields (Part 8).

In this, the last of the series looking at the development of Britain’s airfields, we look at the Watch Office, perhaps the most atmospheric of buildings associated with Britain’ wartime airfields. The hub of an airfield control, it was where aircraft were counted out and back, where the battle was monitored and the cries of those who fought in the air war were heard.

Though only a recent addition to airfield architecture, it developed quickly and became one of the technologically advanced offices in the world.

Watch Offices.

The Watch office, Watch Tower or in American terms Control Tower, was the centre piece of any airfield, the place in which all operations were controlled. Even today, the control tower is the one feature that stands high above the rest of the airfield with commanding views across the entire site.

Many of these watch offices remain today, some as fabulous museums, some as private dwellings, but many are sadly derelict or even worse – gone altogether. This that do survive create a haunting and evocative feeling when seen from inside.

Thorpe Abbotts Museum

The beautifully restored Thorpe Abbots Watch Office (design 15683/41).

Unlike hangar development, the watch office appeared quite late in the development of the airfield, only really coming into being as war seemed inevitable. Before this, a rudimentary office was often all that was used, usually attached to the side of the main hangar, and was used to ‘book’ aircraft in and out. But by the mid war period the watch office had become a major structure on the airfield, a standard design (depending upon the airfield use) with two or more floors and often a ‘glass house’ for observation purposes.

For obvious reasons the watch office was built away from other buildings with clear sight over the entire airfield, an important aspect if controllers were to keep watch on the many aircraft that were moving about the airfield space. A vital asset to the airfield it was often targeted by marauding bombers, and in the case of attack, the controllers within would relocate to an emergency battle headquarters, hidden at ground level on a remote part of the airfield, but still with views across the site.

The basic watch office was often adapted rather than demolished and rebuilt, this can and does, cause great confusion as to its design origin. Further more, on some sites, the original was abandoned but not demolished, and a new office built elsewhere on a nearby site, thus giving rise to two offices on the one airfield eg. Matlask and Martlesham Heath

The Watch Office as we know it was first seen on military airfields in 1926 and resembled a small bungalow with bay windows. Those constructed on bomber bases would be slightly smaller than those on fighter bases, a fighter base office having a pilots office attached. The idea behind this was to keep pilots as close to the airfield  control centre so they could quickly be scrambled and report back to the airfield controller on their return. These early design were found on airfields such as Bircham Newton in Norfolk, Hendon and Tangmere and were all built to the same  basic 1926 drawing design only modified to take the extra pilots room.

The standard shape of the World War 2 Watch Office stems back to the mid 1930s, with the introduction of a two-storey building that was square in design. Like similar buildings of its time, it was brick, a building material that was replaced with concrete, in 1936.

RAF West Malling Control Tower under refurbishment

West Malling a 5845/39 design which is now a coffee shop.

By the end of the expansion period, and with the introduction of hard runways, it was realised that the non-dispersed sites gave poor visibility for early watch offices, views across the airfields were not clear and so a quick remedy was called for. The answer lay in two choices, (a) demolish the current buildings  and rebuild it in a better location, or (b) add an extension. In many cases the former was the better idea and this progressed quite quickly, however, where the latter was chosen, remedial work required alteration of the building whilst it remained in use.

A further complication to these designs was the introduction of meteorological sections, which all new buildings erected at the beginning of the war now had. This gave a mix of design styles, enough though there was only a small selection of design drawings from which to work.

These late expansion period and early war designs introduced the idea of ‘viewing platforms’ or parapets, surrounded by safety railings along the front of the building. These deign also had very large glass fronted walls, bright and airy they allowed a lot of light to enter the building but gave cause for concern later on, when it was realised that a bomb blast would cause severed injury to the occupants in an attack. It was also found that during night operations, large windows were more difficult to black out and so smaller windows offered both better protection and greater ease of black out.

As building materials became scare, particularly wood and brick, concrete became the norm. This change also led to drawing changes even though the basic design inside and out, was the same.

In order to appreciate the changes to watch office designs, one needs to consider the different roles that airfields played during the war. Bomber Command airfields would have a differ office to a fighter Command airfield, which in turn, had a different office to a satellite or night-fighter station.

Thorpe Abbotts Museum

Watch Offices give commanding views across the airfield. (Thorpe Abbots).

The regional control stations where these first offices were being built were certainly getting the better choice at this time, standard fighter and bomber airfields having to use inferior designs that very soon became outdated and inadequate for the needs of the airfield.

During the massive building programme of 1941/42, there was some effort made to standardise all airfield Watch Offices, this resulted in the 1941 design drawing no. 12779/41. This was to be the basic airfield watch office design, with its parapet, six large windows to the front and outside access steps. As older airfields were brought up to Class A Specification, many had these new Watch Offices built to replace the older original ones. Some simply had adaptation of the original. Here the use of the airfield had a bearing on the watch office modification / design, and whilst the basic 12779/41 model was employed, slight variations did exist where the airfield was not a bomber airfield.

Therefore various adaptations of this did follow, examples of which include the slightly smaller 13023/41 (RAF Cottam), those with modified smaller windows 15371/41 (Kimbolton) and 343/43 (Martlesham Heath),  and the smaller Night-Fighter design 15684/41 (Winfield). Being a Night-Fighter station Winfield, had the same basic design but construction methods were totally different. This new design 15684/41, would become standard at all night fighter bases.

All these alternative designs appear outwardly very similar to the original, but differ mainly in window design only, although the physical size of some is different.

RAF Winfield

The Night-Fighter station Watch Office at Winfield (15684/41) is a similar design but smaller, having only four windows in the front.

This design, 343/43, eventually became the most common design for watch offices and appeared on all operational stations and Operation Training Unit airfields after 1943, using a set of six half-size windows across the front.

Tower (2)

The smaller windows of Parham (Framlingham) were half the original design size (12779/41 modified to 343/43).

A further addition was the glass observation room located on the roof of the Watch Office. These were generally only applied to Group control offices, and gave an excellent all round unrestricted view of the entire airfield. Examples that exist today, such as Framlingham above, are replicas but have been built to very high standards.

Former RAF Martlesham Heath

Martlesham Heath is a similar design to Framlingham (modified to 343/43) – Note the runway heading board on the roof.

At the end of the war some airfields such as Sculthorpe and West Raynham had their Watch Offices modified as they changed roles to Very Heavy Bomber Stations. This new design 294/45, improved on former buildings as a complete new design based on a steel frame with precast concrete floors. It had an extra floor added and then the octagonal ‘glass house’ or Visual Control Room with slanted glass to reduce glare.

Control Tower

Sculthorpe’s modified tower gives 360 degree views over the airfield. A three-story block it utilises the former World War 2 Watch Office.

The Watch Office has been the hub of airfield command and control since the mid 1930s, it has developed from the humble shed to a multi-functional technologically advanced building dominating the skyline of the airfield today. Sadly though, many are now gone, and of those that are left only a few remain in good condition or open to the public.

Summary

The war-time airfield incorporated numerous building designs and shapes, certainly far too many to cover here, the wide variety of technical buildings, synthetic trainers, parachute stores, headquarters and general stores, all changing as the war progressed.  The design and materials used in these structures was as varied as the designs themselves. But as the RAF grew so too did the airfields they used. The runways, the hangars, the technical buildings and accommodation sites have all grown alongside. Sadly many of these buildings have now vanished, but the process and speed at which they developed has been unprecedented. From humble grass strips with wooden shacks to enormous conurbations with numerous buildings, they have become iconic symbols representing decades of both aviation history and human sacrifice.

The entire page can be viewed separately:

Part 1 – The Road to War.
Part 2 – The Expansion Period and airfield development.
Part 3 – Choosing a site.
Part 4 – Building the airfield.
Part 5 – Airfield Architecture.
Part 6 – Runways and Hardstands.
Part 7 – Hangars and aircraft sheds.

or as a whole document.


The Development of Britain’s Airfields (Part 7).

Whilst the runway’s remains one of the biggest features of an airfield, perhaps one of the most discussed and certainly visible is the hangar. Large sheds used to maintain aircraft, many still dominate the skyline today, used by farmers and industrial companies, they are massive buildings, but yet many remain classed as temporary or even transportable!

The development of these huge buildings is another that lasted many years, and whilst similar in layout and design, they are as complicated and as varied as any other building found on Britain’s airfields.

Hangars and Aircraft Sheds.

The topic of aircraft hangars is well versed in a large number of books and internet references. They, like the runways, can explain much about the history and use of an airfield, being the largest single building on any airfield site. Distinguishing features between hangar types is often difficult to see, many now re-clad or updated with modern features, doors or materials, even the differences between some designs is so small, without technical drawings or measurements, ascertaining the type can be all but impossible.

Hangars (or aircraft sheds as they were initially called) have been fairly constant in design, however, different services used different types, Admiralty seaplane sheds for example, were primarily side opening, whereas RAF hangars were generally front opening. Design and construction was undertaken by numerous companies (Herbertson & Co. Ltd., Nortons Ltd., Teeside Bridge and Engineering Co. Ltd., and Sir William Arrol & Co.) and even Handley Page Aircraft Co. and Boulton & Paul dabbled with the idea. With so many forms being used, it is a topic both detailed and extremely wide.

This is not therefore, intended to describe each and every hangar ever built (Second World War Air Ministry designs alone covered more than 56 types!), but more a general realisation of the huge development they undertook during this expansion and wartime period on RAF / USAAF airfields. Figures quoted here are generally rounded.

In order to understand the changes in aircraft hangars we need to briefly look at those of the First World War, where aircraft were stored in ‘sheds’, often made from canvas covering a wooden frame, or as a more permanent construction, completely wooden sheds with sliding doors. Later on these were built using metal (iron in particular) and were designed to be permanent, capable of housing several aircraft at a time.

The First World War hangars were varied and often crude, some little more than glorified tents, but through development famous names such as the Bessonneau and Hervieu were created toward the end of the war. Hangars became so large that specialist units had to be created solely to transport, erect and maintain them, and their use became more widespread.

The most common hangar of this period, the Bessonneau, was the first standard transportable hangar used on Royal Air Force airfields. Modern forms of it are still in use today, using different materials, they are quick to erect and offer reasonable protection from the weather outside.

The Bessonneau was a wooden frame structure covered in canvas. It was a simplistic design, able to be erected in as little as two days by a group of 20 skilled men. Heavy canvas doors open at one end allowing aircraft to be moved in and out with relative ease. The problem with these hangars was that the canvas was prone to freezing in winter and therefore becoming difficult to use.

There were two models of the Bessonneau built, differing only in their length – either 79 feet or 118 feet – but both were 65 feet wide.

The interwar and early war years were perhaps understandably,  the years in which the greatest hangar development occurred. The Air Ministry – the body overseeing the works – decided upon a system of ‘structure type’ using names and designations such as, Type ‘A’, ‘B’, ‘C’, Bellman, ‘T2’, etc., and just like the expansion period schemes, they progressed through this system as new developments came about.

The first type was the Type ‘A’, a permanent design, originating in 1924, it was used well into the 1930s when it was gradually replaced during the expansion period. Some examples did last well into the war and even beyond, for example, North Weald, one of the first airfields to be allocated a Type ‘A’, still uses one today.

Type A Hangar

Type A Hangar at North Weald. One of the first stations to have these types of Hangar, it has workshops attached to the Hangar side.

The Type ‘A’ is probably the first to represent the modern hangar, doors at both ends in leaves of four running on rails. Workshops are attached to the hangar side, something that was discontinued as Britain entered the war. Walls were reinforced with concrete to protect from bomb splinters, and they were built 249 feet long and 122 feet wide.

During the late 1920s, the Air Ministry published requirements for new heavy bombers, and these would require new hangars in which to maintain them. In response, the Ministry then updated the Type ‘A’ hangar to the Type ‘B’. In essence a larger version of the Type ‘A’, (160 ft span and 273 ft in length) the ‘B’ was named the ‘Goliath‘ with only three being built (each being a different length). One of these was at RAF Martlesham Heath and is still used today on what is now the industrial park. Like the Type ‘A’, the roof of the ‘B’ is possibly its most discernible feature, a series of trusses along its length crossing laterally over the roof.

With expansion period demands increasing, further developments were needed, and it was envisaged that an increasing bomber size would be needed if substantial bomb loads were to be delivered deep into the continent. The current size of hangar was now considered too restrictive and so a new buildings would be needed. The requirements of the Air Ministry was for a hangar with a span of 150 feet and length of 300 feet. With these in place, new aircraft specifications could be issued.

The Type ‘C’, (designed in 1934) as it was designated, would become the dominant building on any airfield and therefore visible from quite a distance. As airfield designs were subject to scrutiny by the Society for the Preservation of Rural England, local objections were taken into account during the design process. To appease any  objections, the steel frame was covered with local brick or stone, keeping it inline with other buildings not only on the airfield, but houses and buildings erected locally.

Most airfields during the expansion period were built with these hangars on site, and naturally went through a series of developments and improvements. This means, that there are many different forms of the Type ‘C’: gabled roof, hipped rafter and reinforced concrete. Another modified version of the ‘C’ appeared in 1938 and was designated the ‘C1’ (or ‘Protected’), this was an austerity measure development, reducing the amount of material used by lowering the roof height by 5 feet – internal metal work was also left partially exposed. Both the ‘C’ and ‘C1’, continued to be built with offices, workshops and aircrew accommodation attached to the hangar side, the idea being that it was more efficient to do so for the repair of the aircraft inside. As these were larger in width and length than their predecessors, they would have six leaf doors also sliding on top and bottom rails.

RAF Upwood

Type C at the former RAF Upwood.

1936 saw a dramatic change in hangar design, with two new requirements being issued by the Air Ministry. Firstly, storage space was now running out and so new facilities were required. These Aircraft Storage Unit Stations (ASU) would need their own hangar type, and so a requirement for these was put forward. Also at this time, the Ministry put out a demand for transportable hangars, these would replace the ageing Bessonneaus of the First World War. The response to these demands were three storage hangars and two temporary hangars.

Storage Hangars.

The Type ‘D’, ‘E’ and ‘L’ Hangars, were a development used specifically by the ASU stations, and they were not generally built on front line operational airfields. They were virtually identical in size to the Type ‘C’, but each type was marginally bigger in span 150 ft, 160 ft and 167 ft than the previous model, and all were the same length at 300 feet. The three types were different from previous hangars in that they had curved roofs, allowing the ‘E’ and ‘L’ to be covered with soil for protection and camouflage (the ‘D’ had straight side walls and therefore could not be covered). ASUs were built to assemble and disassemble aircraft for shipment to operational airfields in Britain or overseas. Aircraft were stored, in varying degrees of assembly within these units, and heavy hoists were often used to store aircraft ‘tail up’. However, with the outbreak of war, aircraft storage was thought better dispersed around the airfield and not concentrated in one space, so this method of storing aircraft was abandoned. Many of these hangars still remain today, used by small industrial units or for farm storage.

The next two types, the ‘J’ and ‘K’, were virtually identical in design, again with curved roofs, they were used for storage of aircraft. The ‘J’ can be found on many operational airfields, built in conjunction with other main hangars (Waterbeach is a very good example of this combination), whilst the ‘K’ was built on ASU stations. The design came in as a result of Expansion Scheme M, and was as a result of the call for 2,550 front line aircraft by March 1942.

The main difference between the two, (other than their location) was in the roof structure, the ‘K’ having lifting tackle rails along its width, while the ‘J’ were along its length. The ‘K’, being used for storage of aircraft, didn’t have any windows, where as the ‘J’ did as offices and workshops were in use constantly. Like previous hangars, the ‘J’ and ‘K’ both had a span of 150 ft and a length of 300 ft.

RAF Waterbeach 'J' Hangar

A ‘J’ hangar located at RAF Waterbeach.

Transportable hangars.

The 1936 transportable hangar requirement, asked for a hangar that could be easily erected and didn’t require a permanent base. It also asked for doors at both ends and needed to be simplistic in design, with parts being interchangeable. These hangers also saw the separating of the office/workshop facilities previously built onto the side of the hangars, these now being located in buildings in the technical and administrative areas. After considering numerous designs, two were chosen and ultimately built.

The first of these, and the primary choice, was the Bellman. Designed by an engineer within the Works Directorate, N.S. Bellman, they were smaller than previous hangars (88ft span and 175 ft on RAF bases) and could be built in under 500 hours by a dozen men. So successful, were they, that over 400 were built between 1938 and 1940 across a wide range of airfield types. Some of these examples even appeared in Russia.

Bellman Aircraft shed

Bellman Aircraft sheds at the former RAF Bircham Newton

The second design, was the Callender (later Callender-Hamilton with modifications) Hangar, designed by the bridge design company Callender Cable and Construction. These had a span of 90 clear feet, with a length of 185 ft, and were used on both RAF and RNAS airfields. There were only eight of these built before the outbreak of war, examples of which appear at East Fortune, further examples with lower roof clearances (17 ft) being purchased after 1940. The Callender-Hamilton are best recognised by their lattice-work on the top door rails.

Callender-Hamilton Hangar East Fortune National Museum of Flight

Callender-Hamilton Hangar East Fortune National Museum of Flight

As the war approached, 1939 – 1940 saw a transition period between ‘permanent’ and ‘temporary’ buildings, although many of these temporary buildings still stand today! Because of this change, many airfields had various hangars built, something that often gives a mix of hangar designs on one airfield which can cause confusion as to its age and origin. However, from this point on, all wartime hangars were designed as temporary hangars, designed with short lives and easily assembled / disassembled.

By 1940, the Bellman was considered too small for the RAF’s requirements and a new design was going to be needed. An agreement between the Air Ministry and Teeside Bridge & Engineering resulted in the ‘T’ series of hangars, perhaps the most well-known of the hangar designs.

The ‘T’ series covers a wide range of (temporary or transportable) hangars, each slightly different to the previous, but designed as three main types; T1 (90 ft span), T2 (113 ft) and T3 (66 ft). The length of each hangar varied depending upon local requirements and the number of additional bays added as needed. The design number e.g T2 (26) indicated the number of bays (26) and hence the length.

The ‘T’ range were a diverse and complicated range, the ‘T2’ being sub split into 5 variants (T2, T2 Heavy Duty, TFB (flying Boat), TFBHD (flying boat heavy-duty) and T2MCS (marine craft shed), so the identification of each being difficult without measuring equipment.

RAF Wratting Common

A T2 hangar at RAF Wratting Common.

On first inspection the ‘T2’ and Bellman look virtually identical, both lightweight, steel lattice frames with metal side panels. The main distinctions are that the Bellman doors are flush with the top of the side panelling whereas the ‘T2’ has an extra level of panelling and so are not flush. The other difference is the lattice frame inside the roof, the ‘T2’ has only diagonal braces whereas the Bellman has vertical braces in addition to the diagonals. Both hangars have six leaf doors on sliding rails supported both top and bottom, allowing full width access.

A final addition to the ‘T2’ were the Ministry of Aircraft Production Hangars the Type ‘A’ (A1 & A2) and Type ‘B’ (B1 & B2) built in the mid war years 1942-43 and funded by the Ministry of Aircraft Production. These hangars, not to be confused with the type ‘A’ and ‘B’ of the 1920s, were designed specifically for the repair of damaged aircraft especially operational aircraft on their own airfield. They were also erected at ASUs, and Satellite Landing Grounds (SLG).

RAF Wratting Common

A B1 at RAF Wratting Common an RAF bomber station.

The ‘B1’ and ‘B2’ were built specifically at Bomber Command airfields for the repair of damaged bombers thus eliminating the need to transport them long distances to specialist repair depots. Designed by T. Bedford Consulting Engineers they were eventually found on virtually all Bomber Command airfields by the end of the war and were manned by civilian repair organisations. Examples of both the ‘T2’ and ‘B1’ can be found in use at Wratting Common.

‘A1’ and ‘A2’ hangars on the other hand, whilst similar in design – metal cladding on metal frames – were slightly smaller and found only on aircraft factory airfields. Thus again there are virtually two identical hangars designated primarily by their location!

The last hangar to be commonly found on RAF / USAAF airfields were the blister hangar. A hangar of a temporary nature that usually used a curved metal frame covered in metal sheeting. The Blister hangar was the brainchild of architects and consulting engineers Norman & Dawbarn and William C. Inman of Miskins & Sons, and was designed to accommodate small span aircraft ideally fighters dispersed around the perimeter of airfields. Maintenance or storage could easily be carried in these hangars, and they could easily and quickly be erected, no base or foundations being required before hand.

These types of hangar came in three designs, the standard blister, (timber construction), over type (light welded steel) and Extra Over (also light welded steel), and ranged in span from 45 – 70 feet, A further type built was that of Double extra Over and Dorman Long, a separate design similar in shape but securely bolted to foundations. Many of these hangars have now gone, the majority being dismantled and sold off, only to be erected elsewhere on farmland well away from their original location. The father of a friend of mine, was employed in this very role, one day finding a Spitfire inside a blister hangar which nobody claimed to own!

By the end of the war, in excess of 900 ‘T2’ hangars were erected on British airfields including those built abroad. In 2004 it was thought there were about 100*7 left surviving on MOD property in Britain. A number have also survived on farmland used to store foodstuffs or machinery, or industrial sites. The ‘T2’ remained the main hangar in use by both the RAF and USAAF during the war, appearing on all Class ‘A’ airfields, occasionally with other models also being present. A number of other older models also continue to serve even to this day. Considering many of these were built as temporary buildings, they have survived remarkably well and are testament to the engineering design of the pre and early war years.

This is by no means an exhaustive list of those hangars that were built during the period 1918 – 1945 (other examples include the: Aeroplane Twin Shed; RFC Sheds; Seaplane Sheds; General Service Sheds; Plane Stores; Running Sheds; Lamella (a German idea built in Britain); Hinaldi; Main Hangars; Lamson Hangars; Fromson Hangars; Robins Hangars; Butler (a US design); Merton; ‘S’ type Hangars (RNAS); Pentad Hangar and Boulton & Paul Hangars and of course post war examples such as the Gaydon), but hopefully it has shone a glimmer of light on these remarkable structures that often dominated the skyline and that remain the centrepiece of many a disused airfield today.

In the next section we shall look at that other main iconic building in airfield design, the watch office.

Sources and further reading. 

*7Technical Bulletin 02/02 “World War II Hangars – Guide to Hangar Identification” Ministry of Defence (February 2002).

The Development of Britain’s Airfields (Part 6).

After considering the architecture of Britain’s airfields in Part 5, we turn to the hard surfaces, primarily the runways. Developed out of necessity, they created a steep learning curve for those involved in their construction. Many problems were found, many materials were tried, but ultimately they were built and even after their removal for hardcore, many have left scars in the tissue of the earth that remind us of their once massive presence.

Runways, Perimeter Tracks and Hardstands

In the pre-war years, the development of hard runways and large airfields was a new phenomena, hard surfaces being a new aspect still very much a topic of considerable controversy. In the First World War, water logging and mud was an issue even for the small biplanes that filled the skies over Britain and  France. To overcome this, ash was spread over landing surfaces and to some degree successfully, but even though many local remedies were tried, it wouldn’t be taken seriously until the Second World War loomed.

Glatton (Conington) second runway markings

Runways like this one at Glatton (Conington) remain in good condition and used by the local flying club.

At this point the typical airfield layout included up to four grass runways, one of 1,300 x 400 yards and three of 1,000 x 200 yards, many were even smaller. Bomber and Fighter Command, realising that not only would the new era of aircraft call for longer, hard runways on its airfields, but the need to maintain year round activity was essential if Britain was to defeat the Luftwaffe.

Both Fighter and Bomber Command pushed the Government to allow these to be developed, on the one hand Sir Hugh Dowding, fighting the corner for Fighter Command, pressed home the need for hard surfaces on his fighter airfields, whilst Sir Arthur Harris on the other, pushed for hard surfaces on his bomber airfields.

The entire process was lengthy and complex, and lacked in-depth, professional knowledge. The first hard ‘pavements’ later runways and taxi ways, being constructed based on road building techniques and knowledge. So before any firm decisions could be made, trials would need to be carried out to determine not only whether or not they were indeed needed, but if so, how they should be best constructed.

Initial steps in runway construction was started as early as 1937, where ‘flexible’ runways were constructed comprising layers of brick or stone covered with two further layers of tarmac and a coat of asphalt to seal the structure in. Concrete pavements, which proved to be much stronger were either 150 mm or 200 mm thick slabs laid directly onto the ground after the topsoil had been removed by heavy machinery. As would be expected, these early designs failed quite quickly under the heavy loads of the fighters and bombers that were coming into service. Rapid repairs were carried by adding a further layer of tarmac (6.5cm) and another layer (2cm) of sealant.

These early flexible constructions continued to fail whereas the concrete designs stood up to much more wear and tear and proved longer lasting. However, time was short and the learning curve would be steep.

The test to determine these needs was to take a Whitley bomber, laden to equal its full operational weight, and taxi it across a grassed surface.  A rather primitive assessment, it was intended to ascertain the effects of the aircraft on the ground beneath. Trials were first carried out at Farnborough and then Odiham, and these were generally successful, the Whitley only bogging down on recently disturbed soils. Further trials were then carried out at RAF Stradishall in March 1938, and the results were a little more mixed. Whilst no take offs or landings took place during these trials, the general agreement was that more powerful bombers would have no problems using grassed surfaces, as long as the ground was properly prepared and well maintained. All well and good when the soils were dry and well-drained.

By April 1939, the Air Ministry conceded, and agreed to lay runways at a small number of fighter and bomber airfields, of which Kenley, Biggin Hill, Debden and Stradishall were identified.  Whilst construction was slow, only two fighters airfields being completed by the outbreak of war, progress was finally being made.

These initial runways were only 800 yards long and 50 yards wide, but were extended later that year to 1,000 yards long, as aircraft were repeatedly running off the ends on to the grassed areas. Over the years Stradishall in particular, would be further developed, its longest runway eventually extending to 2,000 yards.

RAF Charterhall

The runway at Charterhall in the borders, breaking up after many years of use both by training units and as a motor racing circuit post war.

During the early war years, the demand for airfields grew. By early 1940 the requirement was for three runways as close as possible at 60o to each other, and of a minimum length of 1,000 yards with room for extension up to 1,400 yards. This then became the norm by late 1940 especially at bomber airfields, with the main runway being 1,400 yards and subsidiaries at 1,100 yards. A month later, this increased by another 200 yards with a requirement to be able to extend to 2,000 and 1,400 yards respectively.

However, these short piecemeal responses were not sufficient and it was both a continual problem and a thorn in the side for the Air Ministry. Sir Arthur Harris, in raising his concerns for airfields belonging to Bomber Command, also pushed the need to develop good, long and reliable surfaces. He voiced his frustration in a vehement letter*6 to Lord Beaverbrook in 1941, In which he states:

“For twenty years everybody on the stations and the squadrons has been screaming for runways without avail.”

and he continues stressing the need for hard surfaces particularly in winter as:

“Through not having runways our effort will be seriously detracted from in normal winter conditions and reduced very probably to zero in abnormal winter conditions.”

He then goes on to state that Britain’s views were ‘blinkered’ saying that:

“Every other nation throughout the world has long been convinced of the necessity for runways…”

By the summer of 1941, the length of runways had again increased, all stations would now have a main runway of 2,000 yards and two subsidiaries of 1,400 yards and where this was not possible, then a minimum of 1,600 and 1,100 yards (fighter and night fighter stations being shorter at 1,300 and 1,400 yards respectively).

The harsh winters were less than ideal for laying concrete (by far the best material for the job) but any delay could mean the difference between success and failure. Elaborate testing was therefore passed over, materials were laid and experience led the way. This method of trail and error, led to many instances of runways having to be dug up and relaid, this in itself led to problems as aircraft, men and machinery had to then be moved and housed elsewhere. The American Eighth Air Force suffered greatly with these problem, fully laden bombers repeatedly breaking through the surface or falling off the edges as it gave way.

Another consideration was that of training and satellite airfields. As the need for new pilots increased, the training of new recruits intensified. The harsh winters were causing major headaches for these airfields as mud, stones and other winter debris was causing continuous problems for flying. With both man power and materials being in short supply, suitable alternatives were sought.  A number of solutions were offered all very similar in their design and material.

The answer it seemed lay in steel matting – of which twelve different types were used – the more common being : Sommerfeld Track, Pierced Steel Planking (PSP – also called Marston Mat), or Square Mesh Track (SMT).

Sommerfeld track was a steel mat designed by Austrian Kurt Sommerfeld. The tracking was adapted from a First World War idea, and was a steel mat that when arrived, was rolled up in rolls 3.25 m (10 ft 8 in) wide by 23 m (75 ft 6 in) long. It was so well designed that a full track could be laid, by an unskilled force, in a matter of hours. Each section could be replaced easily if damaged, and the entire track could be lifted and transported by lorry, aeroplane or boat to another location and then reused.

Sommerfeld track (along with these other track types) were not only used commonly on training and satellite airfields, but also on Advanced and Forward Landing Grounds in Kent and later France after the Allied invasion of Normandy. In the build up to D-Day, 24 Advanced Landing Grounds in southern England were created using this form of Steel Matting,

Tracking had to be robust, it had to be able to withstand heavy landings and be non-conspicuous from the air. Sommerfeld track met both of these, and other stringent criteria very well, although it wasn’t without its problems. Crews often complained of a build up of mud after heavy rain, and concerns over both tyre and undercarriage damage were also extensively voiced; several records reporting tail wheels being ripped off after catching in the track lattice.

Because of the poor state and short length of runways, bombers were still regularly running off the ends, especially at night, or being unable to fly because the surfaces were poor or even unusable. A number of ideas were tested out to alleviate the problem, one such idea led to twenty sites testing arrester hook facilities. Several heavy bombers: Halifax, Manchester, Stirlings  and later the Lancaster,  were all modified to undertake these trials, with Woodhall Spa becoming the first airfield to have the full complement of six arrester sets.

Runway arrester gear

Runway arrester gear at Woodhall Spa.

The idea was met with scepticism, but trials went ahead and in January 1942, a list of priority airfields was sent out to the Headquarters of No. 1,3,4, and 5 Groups RAF detailing those twenty sites selected for the equipment. At the top of the list was RAF Woodhall Spa in Lincolnshire, followed by Bottesford, Swinderby, Ossington, Syerston, Middleton St. George, Linton, and ending with Waterbeach and Stradishall. By late 1942 Woodhall Spa was ready and in October, five landings were made by an Avro Manchester.  A month later the decision was made to install units at all major operational airfields, but this never came to fruition and the idea was soon mothballed. By 1943, it had been forgotten about and the 120 or so units built were scrapped (many being left buried where they were laid).

It was finally during early 1942 that a standard design airfield would be put in place. Known as the Class ‘A’, it would be the standard to which all new airfields and updated older sites would be made.

A Class A airfield would be designed around three hard concrete runways, shaped like an ‘A’ with each runway at 60o  to each other where possible. The main runway would be aligned with the prevailing wind again were possible to allow aircraft to take off/land into the wind as often as possible (north-east, south-west). In several cases, due to land features and local restrictions, this was not always possible, and so many permutations of design were seen as a result.

Rapidly becoming the largest part of the airfield layout, the runways and other paved areas – perimeters tracks, aprons and hardstands – were now given high priority. The standard now called for a main runway of 2,000 yards with two subsidiaries of 1,400 yards. Each of these would be 50 yards wide whilst the connecting perimeter tracks would be 50 feet wide. Along side these runways would be an emergency landing strip, a grassed area given a landing surface of 400 and  200 yards respectively.

Dues to the high numbers of bombers returning badly damaged and unable to make safe and proper landings, a small number of emergency strips were created by extending the main runways to 4,000 yards long and 400 yards wide. One such airfield was RAF Manston in Kent. Being on of the closest airfields to the continent, it was often the first place a stricken aircraft, especially a bomber, would seek out.

Whilst the general layout of airfields did not change for the remainder of the war, some further runways were extended to 3,000 yards, one such example being RAF Sculthorpe in Norfolk which was prepared to take the heavy B29 ‘Superfortress’ and post war, the B-36 ‘Peacemaker’.

A further point worth mentioning here is that of dispersals, not required pre-war, they were also an aspect of airfield architecture that were born out of the Second World War. In the inter-war years, aircraft were housed either on a central pan (apron or ramp) or within hangars. These collections of aircraft were easy targets and even a small amount of munitions could cause huge damage. In 1939 the need for dispersals was therefore recognised and so to address the issue, hedges were removed and tracks created that took aircraft away from the main runway but kept them within easy reach of the airfield site. The initial design was that of the ‘frying pan’ a 150 ft circle connected to the perimeter track by a small concrete track.

However, by 1942, it was found that aircraft were clogging up these tracks, some even ‘falling off’ the concrete onto soft soil and so blocking following aircraft in their tracks. The answer was the ‘spectacle’ or ‘loop’ hardstand, so-called by their oval shape, generally in pairs, that allow aircraft in and out without the need to turn or block access tracks. From 1942 onward, this model became the standard hardstand for all Class A airfields, and the aim was to have 50 such hardstands placed strategically around the perimeter, with 25 at satellite airfields. As the threat of attack diminished toward the end of the war, ‘finger’ or ‘star’ dispersals began to appear, much less effective than the predecessors, they were however cheaper and easier to construct.

RAF Milfield

Unusual as many training airfields didn’t have aircraft pans, RAF Millfield, in the borders, had several

In addition to hardstands, pens were built on fighter stations. The first, an experimental pit, was dug at Feltwell, whilst overly expensive and obtrusive, it did lead the way to aircraft pens later on, pens that were developed as either type ‘B’ or ‘E’  on these fighter airfields. The main difference here is that the early type ‘B’ had cranked side walls whereas the ‘E’ had walls that were straight. The former requiring more space, was later phased out in favour of the ‘E’, named so by its shape, using side and back walls to protect the fighter or small bomber located within.

Remains of Type 'B' fighter Pen

The remains of a Type ‘B’ Fighter Pen at Matlaske.

RAF Macmerry

A Type ‘B’ Pen at RAF Macmerry. The cranked wall can be seen to the right, with the central wall on the left. The entrance is to the bottom right.

Examples of these pens were located at Matlaske (type ‘B’ – built to design 7151/41) and Macmerry in Scotland, whilst the type ‘E’ were found on airfields especially those around London that included Biggin HiIl, Kenley and North Weald.

Kingscliffe airfield

One of the ‘E’ type pens found at Kings Cliffe. Adapted with rifle slits for additional defence.

These pens were designed to specific dimensions and were designed as either a ‘Hurricane’ or ‘Blenheim’ to accommodate either a single engined or twin-engined aircraft. Within the back wall of these pens was a shelter for up to 25 personnel, and in some cases, they had Stanton Shelters built-in to the structures. Some, for example, at Kings Cliffe in Northampton, remain with rifle slits for additional protection from ground forces.

King's Cliffe airfield

Inside the aircraft pen shelter at King’s Cliffe.

Whilst the majority of these shelters were manufactured using banks of soil, sandbags, brick or concrete, there was a least one example at RAF Drem, in Scotland which used logs cut to size and shape and built in the style of a Scandinavian house. It is these various designs of aircraft pen that paved the way to modern hardened aircraft shelters (HAS) seen on military airfields today.

From the early days of grass runways to the massive lengths of concrete that were created up to and after the mid 1940s, runways and hardstands have become a defining factor in airfield design. The sole purpose of an airfield – to get aircraft off the ground as quickly as possible, get them to their target and them get them home again – led to the development of both runway lengths and construction materials, much of which has paved the way for modern airfields today. These early leaps into runway designs have enabled larger and heavier aircraft to make those important journeys that we very much take for granted in this the modern world of air travel and general aviation.

In the next section we look at one of the buildings most associated with the airfield. An early form of aircraft storage, its role changed as it was soon realised that aircraft needed to be dispersed and not grouped together on large aprons as they were in the prewar era. Aesthetics and neatly lined up aircraft were no longer an important factor in front line flying, but safety and the ability to repair aircraft quickly and efficiently were. Here we introduce the hangar, a huge building often of a temporary or transportable nature, that became one of the more longer lasting structures of airfield architecture.

Sources and further reading. 

*6 Letter from Arthur Harris to Lord Beaverbrook, February 1941 – AIR 19/492 – National Archives

RAF Thorpe Abbotts – home to the ‘Bloody 100th’.

There are few Bomb Groups who got through the war unscathed. Some earned notable awards, many earned notable nicknames. There are none more though than that of the 100th Bomb Group of the United States Air Force, a groups of men who fought in many of Europe’s most fearsome air battles, suffering many great loses but also achieving great successes.

In this review of Trail 12 we look again at the airfield at Thorpe Abbots, and the history behind the derelict buildings and the concrete remains, we see how the 100th BG earned themselves that most unsavoury name ‘The Bloody 100th‘.

Thorpe Abbotts (Station 139).

Opened quite late in the war, (April 1943), Thorpe Abbots would only be active for a short period of time. But during these months, it would be home to one major air group, the 100th BG of the US Eighth Air Force, who would gain the unsavoury name ‘The Bloody 100th’. Their legacy would become well-known, it would be a legacy connected with death and destruction, and would be one that would live on for many years, even after the cessation of conflict in Europe.

The first units of the 100th BG would arrive in June 1943, and would operate continuously here until the cessation of conflict in 1945. The site would never see any further action after this, being returned to the RAF who retained ownership until its final closure in 1956. Now totally agricultural, it boasts a superb museum as a memorial to those who gave so tragically flying with ‘The Bloody 100th’.

Thorpe Abbotts Village sign

Thorpe Abbotts Village sign

The 100th’s name developed as a result of losses sustained by the group, which in actual fact were not significantly worse than any other Bomb Group of the US Air Force at that time. However, throughout their 306 operational missions over occupied Europe, 177 aircraft along with 700 lives were sadly lost in what were some of the most difficult and terrifying air battles of the Second World War.

Designated Station 139, Thorpe Abbots was built to Class A specification, with three concrete and woodchip runways in the form of an inverted ‘A’, with the cross of the A being the main runway running east to west. Being a bomber base it had 36 pan style hardstands and 16 spectacle hardstands around the perimeter. Maintenance was carried out in two T2 hangars (a type A to drawing 8254/40, and a standard T2). The technical area, accommodation areas and even the bomb store were very unusually all nestled close together in the south-western corner of the site, giving the whole airfield a  compact feel.

With two communal sites, six airmen sites, two WAAF sites, a sick quarters and sewage works, it was a large accommodation area capable of holding 3,000 men and women of mixed ranks. All the accommodation areas used a range of standard huts, Nissen, Romney, Seco, Thorn and Orlit, all of which appeared on site.

Being a large base, it was, like many of its counterparts, a little town in its own right, with a barber’s shop, a cobblers, grocery store, a gymnasium and squash courts. It also had an on site plumbers, a cement store and a carpenter’s shop.

Although the journey of the 100th started with the activation on June 1st 1942, little occurred until later that year, when the collection of 230 enlisted men and 26 Officers arrived at Walla Walla, Washington, under the guidance of the Group Adjutant Cpt. Karl Standish. He began to organise the cadre into something worthwhile, and as more men arrived the ranks began to swell and the 100th began to take shape. The four squadrons: 349th (led by Cpt. William Veal), 350th (Cpt. Gale Clevan), 351st (Cpt. John Kidd) and 418th (Cpt. Robert Flesher), formed bonds and very quickly, and very soon after, the air echelons would begin to arrive, bringing with them brand new ‘straight out of the factory’ B-17Fs.

Thorpe Abbotts Museum

Thorpe Abbotts Control Tower now a museum to the 100th BG.

Their next move came at the end of November with a move that took them to Wendover Field, Utah, followed by, Sioux City and then Kearney Air Base in Nebraska, their final major US base before leaving for the UK in May 1943.

After the ground and air echelons split for their transition, the air echelons flew to bases in Newfoundland, where they departed across the northern route to Prestwick at the end of May. The ground echelons then  carried out ground training before departing on the “Queen Elizabeth” on the 27th May, many men being confined below decks because of the overcrowding on the upper decks.

The Queen Elizabeth finally made Greenock, and the men began unloading, the transition from the US to the UK being a shock to many as they clambered aboard the small ‘box cars’ size trains. That night they arrived at Poddington, their first base, and following a poor night’s sleep they received their initial introduction into the British way of life.

The 100th’s arrival at Thorpe Abbotts was not a pleasant one, the base was unfinished, accommodation was lacking and overcrowded, and food supplies were poor to say the least; this was not going to be an easy ride by any means.

Finally, in June, the air echelons began to arrive, the ground and air crews began to work on their machines, rehearsing, tweaking instruments and flying around the local area, until just after midnight on June 25th 1943, the order came through; they were to fly their first mission early that next morning.

The 100th were the third B-17 group to join the Mighty Eighth, as part of the new and reorganised 4th Bombardment Wing, they would join with the 379th BG (Kimbolton) and the 384th BG (Grafton Underwood), both also B-17 groups.

On that morning the aircraft would depart Thorpe Abbotts at 06:00 hrs, and whilst flying out over the North Sea, the formation would be joined by another B-17, with no top turret and the letters ‘VGY’ painted on it. No-one knew what it was, or where it had come from, and suspicions quickly arose about its authenticity. The ‘alien’ ship remained with the formation up until the target at which point it departed and “all hell broke loose”. The formation consisting of these new recruits was ragged and the experienced Luftwaffe pilots took full advantage of this. Focusing on the low squadron first, they fired a barrage of explosive shells into the fuselage’s of the B-17s. That afternoon three aircraft and thirty airmen failed to return home to Thorpe Abbotts, the war had hit home, and hit home hard.

Robert H. Wolff’s crew. L to R Back Row: Ira Bardman, Alfred Clark, William ‘Casey’ Casebolt, James Brady, Arthur ‘Eagle’ Eggleston, Willis ‘Browny’ Brown . Front Row: Charles ‘Stu’ Stuart, Fredric ‘Buzz’ White, (aiming at the enemy) Bob Wolff, Lawrence ‘Mac’ McDonell. The photo was taken after Regensburg for publicity purposes. (@IWM FRE 905)

Over the next month, there were many aborted and scrubbed missions, this continued raising and dashing of hopes set the men on edge but what few missions they did fly, they manged to get through relatively unscathed.

The end of July 1943 saw the official hand over of Thorpe Abbotts from the RAF to the USAAF, with Sqn. Ldrs. Lawson and Bloomfield representing the RAF and Col. Harding the USAAF.

On August 17th 1943, on the anniversary of the Eighth’s operations from England, the men of the 100th sat in the briefing room awaiting the revealing of the target for the day. The anticipation however, was soon replaced with trepidation as the route map revealed a line that would take them deep into the heart of southern Germany, to the Messerschmitt plant at Regensburg. This would be no ordinary mission though, they were to not return to Thorpe Abbotts that day, but instead, they were to complete the first shuttle mission by the Eighth Air Force of the war, flying on to land in North Africa.

After an initial postponement because of mist, the green light was finally given and the aircrews started their engines. One by one they departed Thorpe Abbots toward the  skies above Germany. The 100th were in the unenviable position of ‘tail end Charlie’ being the low squadron at the rear of the formation. Added to this the 100th BG found themselves unprotected due to miscalculations in timing, and as unprotected ‘tail-end Charlies’, they were easy prey for the fearsome and hunting Luftwaffe. For two whole hours the defenders attacked from every possible angle, venting their determination on the lowly B-17s. The sky was littered with downed aircraft and falling wreckage. The B-17s were subjected to harrowing attempts to bring them down, air-to-air bombing from Ju-88s, and rockets fired from BF-109s just added to the mayhem of exploding cannon shells and bullets.

During this engagement B-17 #42-30311, piloted by Lt. Tom Hummel was attacked by Rudolf Germeroth in Bf 109G-6 of J 3/1. The aircraft was seen to explode and fall from the sky. The two waist gunners Ken O’Connor and Dick Bowler were killed whilst the remainder of the crew escaped the wreck and were taken prisoner.

Bombing over the target was accurate and reports sent back to England hailed the mission as a total success, The Messerschmitt factory being totally destroyed, and along with it unbeknown to intelligence, secret jigs for the manufacture of Me 262 jets. But the price had been high, of the twenty-one aircraft sent from the Thorpe Abbotts group,  nine had been lost and ninety men were either dead, captured or missing. Of all the groups who had taken part, the 100th had suffered the most, the lead group protected by P-47s coming off much more lightly.

The Regensburg mission would be a turning point for the 100th, their luck would run out and very soon they would earn themselves the unsavoury nickname ‘The Bloody 100th‘, a name that would stick with them for the duration of the war and beyond.

For their action in this mission, the 100th (and the entire division) would earn themselves a Distinguished Unit Citation (D.U.C.) an award now becoming a regular feature amongst the brave crews of the Eighth Air Force.

In the Citation, the Secretary of War, G.C. Marshall said:

“The 3d Bombardment Division (H) is cited for outstanding performance of duty on action against the enemy on 17th August 1943. This unprecedented attack against one of Germany’s most important aircraft factories was the first shuttle mission performed in the theatre of operations and entailed the longest flight over strongly defended enemy territory yet accomplished to this date. For 4.5 hours the formation was subjected to persistent, savage assaults by large forces of enemy fighters…

…The high degree of success achieved is directly attributable to the extraordinary heroism, skill and devotion to duty displayed by the members of this unit.”

During the September, the USAAF was reorganised again, the 4th Bombardment Wing now becoming the 3rd Bomb Division, 13th Combat Wing, a move that heralded little more than a change in aircraft markings. September would also be a notable month for other reasons. The mission on the 6th to Stuttgart would be a disaster for the USAAF, a deep penetration mission that saw over 400 aircraft combine in the skies over Germany. It was during this mission that B-17 #42-30088 ‘Squawkin’ Hawk II‘ would suffer from head on attacks by Luftwaffe aircraft who pounded the B-17 with 20 mm cannon shells. In the attacks the co-pilot (F/O. Harry Edeburn) was fatally wounded, the bombardier and navigator Lt. Peter Delso and Lt. Russ Engel were both severely wounded and the pilot, Lt. Summer Reeder was sprayed with metal as the nose of the B-17 shattered. With poor control and no oxygen, Reeder dropped the aircraft some 14,000 ft at an unbelievable rate of around 300 mph, before playing cat and mouse with the Luftwaffe fighters who were determined to finish off the damaged aircraft. By singing and telling jokes, the severely injured Reeder assisted by the badly wounded navigator, manged to reach England and without brakes or hydraulics, managed to put the aircraft down on a fighter airfield in England.

Squawkin Hawk II‘ would go on to become the first 100th BG aircraft to complete 50 missions covering a staggering 47,720 combat miles. She returned to the US in May 1944 where she was eventually sold for scrap.

After completing 50 missions, “Squawkin’ Hawk II” was covered with autographs before being sent back to the US for retirement and eventual scrapping.(@IWM FRE 4124)

During this disastrous mission many aircraft would run out of fuel, five made for Switzerland including ‘Raunchy‘ from the 100th BG in which Joe Moloney, the ball turret gunner, would be killed whilst trying to ditch. He would take the dubious honour of being the first US airman killed in neutral Switzerland.

It was also at this month, that the 100th would suffer another major blow and to rub salt into the wounds, they would not even get credit for it.

After a cancelled mission on September 24th 1943, the men of the 100th were raised from their beds for a practice mission over the North Sea, a ‘mission’ that would test their ability as Pathfinders. With bombs still in the aircraft from the morning’s preparations, skeleton crews and semi prepared aircraft took off from several bases across East Anglia.

They were to form up with P-47s over the Wash and then fly out over the sea and practice bombing. When a collection of aircraft appeared on the horizon it was assumed by the bomber crews that it was the friendlies arriving at last. The reality of it was sickening. Diving out of the sun Luftwaffe fighters from JG 3/II attacked the formation, rallying 20mm cannon shells in to the B-17’s wings and bodies. One aircraft, #42-30259 “Damifino II” piloted by Lt. J. Gossage crashed into the sea. Five crewmen were plucked from the water by Motor Torpedo Boats (MTB) hunting German ‘E’ boats, five men remained missing presumed dead.

Yet more difficult times lay ahead. The October raid to Munster saw only one of fourteen aircraft return home – 120 crewmen were missing in action that day. As aircraft were hit from head on, the formation split. Aircraft dodged falling debris and exploding B-17s as rockets were launched at near point-blank range in a forty-five minute frenzy of slaughter.

This disastrous mission would see the tally of lost airmen rise to 200 in just one week, the loss could not be hidden and Munster would simply add another black chapter to the already darkening book of the 100th’s war. Even the one year celebrations at the end of October failed to cover the feeling of loss shrouding the base, a feeling as thick as the autumn fogs preventing flying from taking place.

Thorpe Abbotts Emergency operations block

Ghostly reminders hidden amongst the trees. Thorpe Abbott’s Battle Headquarters.

The cold winter of 1943/44 saw more fog, rain and cold, the dismal weather allowing only a few missions to go ahead. But as spring warmed the ground, the softening of the German defences in preparation for Operation “Overlord” could begin. ‘Big Week’ of February 20th – 25th, saw the 100th in action again – Brunswick on the 21st. March saw another milestone etched in the annuals of history as the 100th took the war directly to the heart of Germany and Berlin. Over three days the 100th would target the German capital, the first on the 4th, followed by the 6th and then the 8th. The 4th would see the 100th achieve the first blood, shooting down their first German aircraft over Berlin.

Each attack brought new challenges. In the first mission the weather forced many aircraft to abandon the flight and return home, the 100th, persevering lost one aircraft that day. On the 6th, the loss was much higher, fifteen aircraft went down and then another single aircraft on the 8th; 170 men were missing from those missions.

For their action, the 100th would receive their second DUC, albeit a year later. In the General orders 3rd March 1945, No.14 it said:

“The 100th Bombardment Group (H) is cited for outstanding performance of duty in action against the enemy in connection with the initial series of successful attacks against Berlin, Germany, 4, 6, and 8 March 1944…”

For the remainder of the summer the 100th would attack oil fields. bridges, and gun positions. They would provide support at St. Lo and Brest in August. Marshalling yards would also come under the focus of the 100th, the Ardennes and the assault across the Rhine.

On 16th September 1944, a letter was sent by Major General Earl Partridge (U.S. Army) to the Commanding Officer of the 100thBG extending his gratitude to all the personnel at the station on their 200th mission. He concluded:

“Please extend to all Officers and Men on your station my appreciation for the outstanding work which they have done. Their achievements reflect the highest credit upon themselves and the Army Air Forces as a whole.”*1

As part of the celebrations a B-17 was sent to London to collect a “huge supply of Whisky and Vodka”, no doubt a considerable amount was consumed that night.

Eventually the war would come to a close and the 100th perform their last mission on April 20th 1945. They would lick their wounds and prepare for a well-earned return to the US.

By the end of its war-time operations the 100th BG had flown nearly 9,000 sorties, in over 300 missions, dropping over 19,000 tons of bombs. They would be credited with the destruction of 261 enemy aircraft, with another 240 damaged or probable. They earned two DUCs and the French Croix de Guerre with palm. Far from being the worst in the 8th Air Force, the 100th’s reputation for accuracy, and overall low operational loses made it one of the most outstanding Bomb Groups of the Air Force.

Finally leaving in December 1945, the 100th would eventually return to serve over the skies of the UK once more as the 100th Refuelling Wing based at nearby RAF Mildenhall.

After the 100th departed, Thorpe Abbots was returned to RAF ownership, no further military flying  took place and the site remained inactive. Eventually in 1956 the airfield was closed and the site then sold off to private ownership. Many of the runways and perimeter tracks were removed for hardcore, and the buildings fell into disrepair.

Today, the site houses a museum utilising the old original control tower and a small number of other buildings. Tucked neatly away amongst the beautiful countryside of Norfolk, this museum is more than worthy of a visit.

Thorpe Abbotts Museum

The Tower has Commanding Views.

Visible remains of the airfield are restricted to mainly perimeter track, but remnants can be found with a little effort. In the woods to the east of the tower, buried in amongst the undergrowth, are the remains of buildings including the Battle Headquarters  which would have commanded excellent views across the field in the case of attack.

The perimeter track has been partially utilised and turned into road, from which larger sections can be seen. A number of admin blocks, stores and a range of accommodation buildings are now engulfed by trees and vegetation but still survive and are all very much on private land.

Thorpe Abbotts Museum

Remnants of the perimeter track at Thorpe Abbotts.

Whilst many buildings remain hidden away, the dedication of a few volunteers keep the memories and lives of those who gave so much alive, and enable the history of Thorpe Abbots airfield to continue on for future generations.

Sources and further reading. 

*1 100th BG Quartermaster Log via their website August 2019.

Freeman, Roger A. “The Mighty Eighth” (1986) Arms and Armour

Arnold, Henry. H., “Contrails, My War Record: A history of World War Two as recorded at U.S. Army Air Force Station #139, Thorpe Abbots, near Diss, county of Norfolk, England” (1947) World War Regimental Histories Book 194.

Further details of the 100th BG and information about the museum can be found on the museum website.

Disaster at RAF Tibenham.

In this post, we revisit Tibenham in Norfolk, the home of the 445th Bomb Group, Eighth Air Force. Whilst here, the 445th would suffer the worst casualty rate of any Bomb Group in a single mission, a mission that virtually wiped out the entire Group. Yet they would no give up, determined they would go onto have one of the most successful bombs on target statistics of all the Eighth’s Bomb Groups, a record they can be proud of.

RAF Tibenham (Station 124)

Station 124 was one of those purpose-built airfields designed specifically for the USAAF in the mid-part of the war. Known to the locals as Tivetshall, it occupies a site previously used by the Royal Flying Corps in World War 1 (although there appears to be no record of units based here).

In preparation for the Air Force’s arrival, a Class A airfield was built, with three standard concrete and tarmac runways, the primary of 2,000 yds and two secondary each 1,400 yds long and all the standard 50 yds wide. In addition, there were thirty-five ‘frying pans’ hardstands and a further seventeen ‘spectacle’ hardstands, all dotted around the perimeter track. Aircraft maintenance was completed in two T2 hangars, one in the technical area and one other to the south side of the airfield. The bomb store was located to the north-west of the airfield, with the technical and administrative areas to the east. Beyond this, dispersed further to the north-east were the accommodation areas: two communal sites, a WAAF site, sick quarters and seven male accommodation sites. Accommodation was initially designed for 3,000 personnel, using mainly Nissen huts with some Orlit hutting on site. Most other buildings were ‘temporary’ and built of brick.

RAF Tibenham Perimeter track

Part of the perimeter track – RAF Tibenham

Built over 1941-1942 by W. and C. French Ltd, it was opened in 1942, and was the temporary residence for the ground echelons of two squadrons of the 320th BG in November that year. The plan was to send the air echelons via the northern route, but due to heavy losses of the 47th and 319th BGs, they were diverted to North Africa via the southern route. The Ground echelons would then join them departing both Tibenham and nearby Hethel on November 21st 1942.

Tibenham then remained unoccupied by operational forces until November 4th 1943, when the 700th, 701st, 702nd and 703rd Bomb Squadrons of the 445th Bomb Group, Eighth Air Force arrived.

The 445th’s journey brought them from Gowen Field in Idaho, through Wendover Air Force Base in Utah, to Sioux City where they completed their training. In October the ground echelons sailed on the Queen Mary arriving in Scotland in early November. The air echelons flew the southern route, covering Florida, Puerto Rico, Brazil and West Africa before arriving shortly afterwards.

Flying B-24 Liberators, they would perform their first mission on December 13th 1943 – a month after their arrival. Their first target was the U-boat pens at Kiel. Along with other units of the 2nd Bomb Division fifteen aircraft would take off and undertake what was to be a relatively uneventful sortie, all the 445th aircraft returning with only two aircraft damaged and no casualties.

Their third mission, also in December, was less successful. A massive force of 546 bombers left England to attack Breman, arriving over the target between 11:42 and 12:14, the force was badly hit by ME-410s of the Luftwaffe. The 445th had fifteen of their aircraft damaged, with two crewmen wounded and eleven classed as ‘missing’. The realities of war were beginning to bite home.

1944 would be a more decisive year for Tibenham and the 445th. During the February ‘Big Week’ campaign against the German aircraft industry, Tibenham would suffer from accidental bombing by a returning Liberator. After being recalled, a  B-24 accidentally released a bomb whilst flying over Tibenham airfield, the resultant explosion killing two servicemen and a civilian in a nearby house.

The 445th would also suffer this year, but for their determination and action over Gotha they would be awarded a Distinguished Unit Citation (DUC), an award that reflected their bravery.

RAF Tibenham

Today’s huts and hangars

The eight groups of the 2nd Bomb Division (BD) were targeting the Me-110 factories on February 24th 1944, dropping 372 tons of high explosive bombs. During the  mission 239 aircraft would leave England in three large wing formations, the 445th in the 2nd Combat Wing (CW) were to fly in the lead, along with the 389th BG and the 453rd BG. Behind them were the 14th Combat Wing with the 20th Combat Wing bringing up the rear.

The lead group were hit hard as much as 80 minutes before the target. Flying ahead of schedule, they had failed to rendezvous with their escort and so were at a huge disadvantage. Flying at altitude, the lead aircraft of the 389th suffered oxygen problems, which caused the bomb aimer to suffer from anoxia, the condition led to him release the bombs early, over Eisenach and not the primary target. As the bombs fell toward the ground, others in the wing began to follow suit, all releasing their bombs far too early, and well away from the target area. The 445th realising there was a problem, ignored the false signal and continued on to the target alone. Being out of formation and without escort, the B-24s were ‘sitting ducks’, and unsurprisingly were given special attention by the Luftwaffe.

From then on, and for an hour after the bomb run, Luftwaffe fighters attacked the B-24s, and one by one, the heavy bombers fell from the sky as fighters picked them off. After two and a half hours of relentless attacks, thirteen of the original twenty-five aircraft had been lost and nine others were badly damaged. The mission had cost 50% of the groups aircraft, but it was a tragedy that was not to be their last, nor their worst.

The main formation who had released early, had also suffered badly, being subjected to aerial bombing, cable bombing and rockets, an attack which led to a mission tally of thirty-three aircraft being lost and 314 airmen being classed as ‘missing in action’.

March 1944 would also be a noteworthy month. It was the end of a career as Commanding Officer for Capt. James Stewart, Commander of the 703rd BS. Posted here before he was declared unfit for flying duty, he arrived as ‘Operations Officer’, before being given the Command of the 703rd. He would go onto fly ten missions with the 703rd before departing Tibenham for Old Buckenham and the 453rd BG as Group Operations Manager.

Because the 445th had flown many missions over the winter months, March would become noteworthy for another reason. Four months after their first operation, Lt. Sam Miller and the crew of B-24 #42-110037 of the 700th BS had completed twenty-five missions whilst here at Tibenham, they were the first crew of the group to do so. At last some good news had brought relief to the horrors of the previous months and in particular the disaster of ‘Big Week’.

Ground personnel of the 445th Bomb Group gather around a B-24 Liberator (I5-B+, serial number 42-110037) after its return to base on D-Day. Printed caption on reverse: '51451- Ground crew swarming around a bomber returning from a D-Day mission for information on the invasion.' Handwritten caption on reverse: 'Lt Sam Miller's B-24 returning to Tibenham, Norfolk after he and crew completed a 25 mission tour of operations. First crew in the 445th bomb Group to do so.'

The return of B-24 #42-110037 after its crew had completed 25 Missions (USAF).

In the lead up to the Normandy invasion in June, the 445th attacked airfields in the Paris area along with V-weapons sites in Northern France, and on D-Day itself, they returned and attacked the shore installations, pounding them before the land forces arrived. The 445th then went on to help with the breakout at St. Lo striking enemy defensive positions. The Tibenham group were now so successful that they led the ratings for the most accurate bombing of all the Liberator groups in Europe, these successes though, were to be short-lived, for on September 27th 1944, the 445th would suffer its own ‘day of infamy’.

On that day the group was allocated the Henschel facility in Kassel, and they were to lead 315 B-24s to the target. Navigating by GEE the 445th took a wrong turn and left the protection of the formation. The turn went unnoticed by the remainder of the group and so, all of a sudden, the 445th were now out on a limb and lacking the protection of the formation once again.

The group then all dropped their bombs, but unbeknown to them they were not over Kassel but were in fact over Gottingen some 20 miles away. After implementing the withdrawal plan, the 445th put themselves even further away from the main force, they were now alone. All of a sudden the 445th met II/JG.4, and what followed would all but wipe out the group.

Fw-190s approached the group from behind, three abreast diving down as they fired. Then followed two Me-109 Gruppen of JG.4 who picked off the damaged aircraft. With individuals falling away, the formation was spread and broken up, some 150 enemy aircraft had attacked and devastated the group.

In around five minutes, the Luftwaffe fighters had picked off and dispatched twenty-five B-24s and damaged most of those that remained flying. Only the intervention of US fighters stopped the total and complete annihilation of the group. The scene was devastating, the sky was full of smoke and debris, parachutes from both sides floated through the carnage. Three more B-24s crashed on the way, luckily in allied territory, two others managed to reach Manston’s emergency runway and one more crashed at Old Buckenham. The four remaining aircraft managed to limp back to Tibenham, but only one was able to fly again the next day.

In a written account*1, Pilot Capt. William R Dewey Jr describes the scene in his B-24 (one of those that made Manston)

“The tail turret had caught fire, from direct hits by 20 mm cannon in the first wave of FW-190s, both waist gunners were wounded and bloody along with the tail gunner. There was a huge hole in the right waist ahead of the window, the left waist window was shattered. Control cables to the tail were partially damaged, and the twin vertical rudders appeared frayed and disintegrating. Looking out the copilot’s window we could see a 3′ diameter hole in the upper surface of the wing behind the #3 engine, where 100 octane gasoline was splashing out.”

Dewey goes on to explain how the co-pilot William L. Boykin Jr, carried oxygen bottles back to the wounded crew, gave them first aid and comforted them. Dewey then decided to drop below oxygen requirement level and risk ditching. Switching channels to the emergency channel, he manged to contact air-sea rescue using the code word “Colgate“. After obtaining a radar fix, they gave him a heading for Manston.

After an hour Dewey spotted Manston and began the task of landing not knowing what condition the flaps, undercarriage or tyres were in. Thankfully all were in good order and he described it as:

“the best I ever made in a B-24 – like we were on feathers. A day we will never forget!”*1

Statistics for the day were horrendous, the efficiency of the German controllers had been spectacular, no previous efforts had yielded such incredible results; 236 men were missing, 1 was dead and 13 were injured in the resultant crashes. This loss, left only ten aircraft in the entire group, and would go down as the worst operational day of the war for any single group of ‘The Mighty Eighth’.

The 445th would regroup and return though. In December and January they supported the troops in the Battle of the Bulge by bombing German communication lines, helping the Paratroops holding up in the forests of the Ardennes.

On February 24th 1945, Ford built Liberator B-24H-1-FO #42-7619 “Bunnie” a veteran of 103 missions, took off from Tibenham’s main east-west runway. Within seconds something went wrong and the bomber crashed a few hundred yards west of the airfield. In the crash four of the crew were killed, the remaining five managed to survive.

Photo of

“Chuck” Walker & his crew being congratulated by Lt. Col. Fleming, (deputy commander) on completion of their 35th mission and “Bunnie’s” 100th.(IWM)

and then on 24th March 1945, they dropped food, ammunition and medical supplies to the troops who had made the Rhine crossing at Wesel. They returned later that day to bomb the landing grounds at Stormede.

The 445th went on to carry out a total of 282 operations building a reputation for high accuracy bombing in the face of danger. Further awards were received from the French for their support of the Resistance, in dropping food supplies, gaining them the Croix de Guerre, a highly regarded award.

The 445th flew their last mission on 25th April 1945, the last mission by the Eighth Air Force in Europe, attacking airfields and rail targets in south-east Germany and Czechoslovakia without loss. The 445th finally returned to the US at the end of hostilities leaving behind huge numbers of crews for whom home would never be back on their own soil.

After their departure in May / June, Tibenham remained ‘operational’ although no operational flying took place. The RAF then began to sell off parts of the airfield to the local farmers. A short-lived expansion of the airfield’s runway in 1955 led nowhere, as no aircraft were assigned to the airbase, and in 1959, Tibenham was finally closed as a military base. During this time, the Norfolk Gliding Club took over part of the site, paying a rent to the Ministry of Defence, remaining here even after 1964/65 when the airfield site was finally sold.

Since then the Club has fought long and hard to keep flying at Tibenham. Battles over land and attempts to curb flying have so far failed. Gradually bit-by-bit the infrastructure has been removed, sold off for hardcore and agriculture use.

Flying at Tibenham

Small piston engined aircraft keep the spirit alive

A small collection of memorabilia and photographs of the four squadrons based at Tibenham are maintained by the club, and a memorial stands as a lasting legacy to those who never returned.

Currently, large parts of two of the runways remain; the perimeter track can also be seen, being split by the main road round the airfield. Also a small number of huts are still being used and the site is in remarkable condition as a result.

Other evidence is hard to find, the majority of the accommodation, stores and works all being located to the east amongst the trees and on private land. I am reliably informed that primitive airfield defences can be found amongst the trees at the end of the runway. These amount to a ladder that would enable any defence troops to climb up and remain hidden should any German paratroopers fall.

The heavily laden bombers have long since been replaced by the grace and beauty of gliders, the control tower and other major buildings are now history, but as the summer sun and cool breeze wafts across the open skies above Norfolk, it is easy to picture these lumbering bombers, fuelled and crewed waiting for their turn to depart. With the roar of labouring engines now long gone, peace has returned once more to this quiet corner of Norfolk.

RAF Tibenham memorial

Memorial dedicated to the 445th BG.

Tibenham was initially visited in April 2014 when these photos were taken. It appears as part of Trail 13 along with Old Buckenham and East Wretham. This page is an update with additional information on the 445th’s history.

Sources and further reading.

The Norfolk Gliding Club website gives details of their activities, opening times and flying operations.

*1 A typescript memoir written by Capt. William R. Dewey ‘Disaster at Kassel’: 27th Sep 1944. Second Air Division Digital Archive . Ref: MC 371/250, USF 5/1 accessed 25/3/18.

All Saints Church in Tibenham also has a small memorial and kneelers dedicated to those who flew from Tibenham.

50 Aviation Trails Reached!

I am pleased to announce that since starting Aviation Trails four years ago, I have now reached that magic number of 50 Trails around Britain’s wartime airfields, a feat I never thought would happen.

Each Trail covers two or more sites, in some cases six, many three, covering in total, over 100 former RAF and USAAF airfields and museums around Britain.

I can honestly say its been a terrific four years, in which I have learnt a lot about Britain’s wartime past, the men and machines that flew from these places and the tragedies that occurred at so many. The development of these airfields was staggering, the process of construction, and the subsequent decay just as eye-opening. These sites and the people who used them, have changed both the British and world landscape, leaving in many cases scars that may never heal. The buildings and stretches of concrete that remain are monuments to human endurance and sacrifice, a sacrifice that we hope may never have to be repeated.

RAF Tibenham Perimeter track

The perimeter track at the former RAF Tibbenham.

During these four years there have been several changes at many of these sites, hangars and other buildings have gone, runways are continuing to be dug up as they become prime land for development. As we speak there are numerous sites under planning proposals, whilst others are waiting in the wings to hear what their fate will be.

To compile these trails I have personally visited each and every one of these sites, even a field has a certain something when you know who stood there before you.

To all those who have visited, commented and followed me on this journey, I thank you, I hope you have enjoyed the journey back in time as much as I have writing it. I hope that through these trails, the memories of those who gave their all may live on so that future generations may know who they were and what they did, so that we may enjoy the peace we do today.

Here’s to the next 50!

Andy.

RAF Andrews Field – (Great Saling/Station 485) – Trail 33: Essex Part 1.

RAF Attlebridge  (Station 120) – Trail 7: Northwest Norfolk.

RAF Barton BendishTrail 7: Northwest Norfolk.

RAF Biggin Hill (Westersham) (Station 343) – Trail 4: Kent Part 1.

RAF Bircham NewtonTrail 20: North Norfolk (Part 1).

RAF Bodney (Station 141) – Trail 8: Swaffham and Her Neighbours (Part 1 of 3).

RAF BournTrail 31: Southern Cambridgeshire (Part 2).

RAF Brenzett (ALG) – Trail 18: Kent Part 2.

RAF BruntonTrail 47: Northumberland.

RAF Bungay (Flixton) (Station 125) – Trail 14:  Central Suffolk (Part 1).

RAF Bury St. Edmunds (Rougham) (Station 468) – Trail 16: West Suffolk (part 1).

RAF Castle CampsTrail 45: Essex (Part 2).

RAF Caxton GibbetTrail 29: Southern Cambridge (Part 1).

RAF Charterhall Trail 41: The Borders of Scotland and England.

RAF ChedburghTrail 49: Bomber Command – Bury St. Edmunds to Haverhill

RAF Collyweston Trail 37: The Northern Reaches of Cambridgeshire.

RAF Coltishall – Trail 7: Northwest Norfolk.

RAF ConingsbyTrail 1: Lower Lincolnshire.

RAF CottamTrail 40: Yorkshire (East Riding).

RAF CranwellTrail 2: Lincoln Borders and Newark.

RAF Debach (Station 152) – Trail 39: Suffolk around Ipswich (Part 1).

RAF Debden (Station 356) – Trail 46: Essex Part 3,

RAF Deenethorpe (Station 128) – Trail 6: American Ghosts.

RAF Deopham Green (Station 142) – Trail 27: Southern Norfolk (Part 3).

RAF Digby (Scopwick) – Trail 1: Lower Lincolnshire.

RAF Docking – Trail 20: North Norfolk (Part 1).

RAF Downham Market (Bexwell) – Trail 7: Northwest Norfolk.

RAF Drem – Trail 42: Edinburgh’s Neighbours.

RAF East Fortune – Trail 42: Edinburgh’s Neighbours.

RAF East Kirkby Trail 1: Lower Lincolnshire.

RAF East Wretham (Station 133) – Trail 13: Southern Norfolk around Diss (Part 2).

RAF Eye (Brome) (Station 134) – Trail 14: Central Suffolk (Part 1).

RAF Fersfield – (Station 130) – Trail 28: Southern Norfolk (Part 4).

RAF FoulshamTrail 22North Norfolk (Part 3).

RAF FowlmereTrail 32Southern Cambridgeshire (Part 3).

RAF Framlingham (Parham) (Station 153)Trail 39: Suffolk around Ipswich (Part 1).

RAF Glatton (Station 130) – Trail 6: American Ghosts.

RAF Gransden Lodge – Trail 31: Southern Cambridgeshire (Part 2).

RAF Graveley – Trail 29: Southern Cambridge (Part 1).

RAF Grafton Underwood (Station 106) – Trail 6: American Ghosts.

RAF Great Dunmow (Station 164)- Trail 33: Essex (Part 1).

RAF Great MassinghamTrail 21: North Norfolk (Part 2).

RAF Great Sampford (Station 359) – Trail 50: Haverhill’s neighbours – Wratting Common and Great Sampford.

RAF Hardwick (Station 104) – Trail 12: Southern Norfolk around Diss (Part 1).

RAF Hawkinge – Trail 18: Kent Part 2.

RAF Hethel – Trail 38: To the West of Norwich.

RFC HinghamTrail 38: To the West of Norwich.

RAF Hunsdon – Trail 25: Hertfordshire.

RAF Kimbolton (Station 117) – Trail 6: American Ghosts.

RAF King’s Cliffe (Station 367) – Trail 6: American Ghosts.

RAF LanghamTrail 23: North Norfolk (Part 4).

RAF Lashenden (Headcorn) – Trail 18: Kent Part 2.

RAF Lavenham (Station 137) – Trail coming soon.

RAF Little Snoring – – Trail 22North Norfolk (Part 3).

RAF MarhamTrail 7: Northwest Norfolk.

RAF Martlesham HeathTrail 48: Suffolk around Ipswich (Part 2).

RAF Matching (Station 166) – Trail 33: Essex Part 1.

RAF Matlask (Station 178) – Trail 34: North Norfolk (Part 5).

RAF MattishallTrail 36: North Norfolk (Part 6).

RAF Mendlesham (Station 156) – Trail 15: Central Suffolk (Part 2).

RAF MepalTrail 11: Around Ely.

RAF Methwold – Trail 8: Swaffham and Her Neighbours (Part 1).

RAF Millfield –  Trail 47: Northumberland.

RAF Narborough (Narborough Aerodrome)- Trail 7: Northwest Norfolk.

RAF North CreakeTrail 23: North Norfolk (Part 4).

RAF North Pickenham (Station 143) – Trail 9: Swaffham and Her Neighbours (Part 2).

RAF North WealdTrail 25: Hertfordshire.

RAF North Witham (Station 479) – Trail 3: Gone But Not Forgotten.

RAF Old Buckenham (Station 144) – Trail 13: Southern Norfolk around Diss (Part 2).

RAF Oulton – Trail 34: North Norfolk (Part 5).

RAF Polebrook (Station 110) – Trail 19: Northamptonshire American Ghosts II.

RAF Rattlesden (Station 126) – Trail 15: (Central Suffolk (Part 2).

RAF SawbridgeworthTrail 25: Hertfordshire.

RAF ScamptonTrail 30: Scampton and the Heritage Centre.

RAF SculthorpeTrail 21: North Norfolk Part 2.

RAF Shipdham (Station 115) – Trail 10: Swaffham and Her Neighbours (Part 3).

RAF Snetterton Heath – (Station 138) – Trail 27: Southern Norfolk (Part 3).

RAF Spanhoe Lodge (Station 493) – Trail 6: American Ghosts.

RAF Steeple Morden – Trail 32: Southern Cambridgeshire (Part 3).

RAF Stoke OrchardTrail 24: Gloucestershire.

RAF Stradishall- Trail 49: Bomber Command – Bury St. Edmunds to Haverhill

RAF Sutton BridgeTrail 3: Gone But Not Forgotten.

RAF Swannington – Trail 36: North Norfolk (Part 6) 

RAF Swanton Morley – Trail 38: To the West of Norwich.

RAF Thorpe Abbotts (Station 139) – Trail 12: Southern Norfolk around Diss (Part 1).

RAF Tibenham (Station 124) – Trail 13: Southern Norfolk around Diss (Part 2).

RAF Tuddenham – Trail 16: West Suffolk (Part 1).

RAF Tydd St. Mary – Trail 37: The Northern Reaches of Cambridgeshire.

RAF Upwood – Trail 17: The Pathfinders.

RAF Warboys – Trail 17: The Pathfinders.

RAF Watton (Station 376/Station 505) – Trail 9: Swaffham & Her Neighbours (Part 2).

RAF Wendling (Station 118) – Trail 10: Swaffham and Her Neighbours (Part 3).

RAF West Malling Trail 4: Kent Part 1.

RAF West RaynhamTrail 21: North Norfolk Part 2.

RAF WethersfieldTrail 45: Essex (Part 2).

RAF Westley – Trail 16: West Suffolk (part 1).

RAF WinfieldTrail 41: The Borders of Scotland and England.

RAF Winthorpe Trail 2: Lincoln Borders and Newark.

RAF WitchfordTrail 11: Around Ely.

RAF Wittering  – Trail 37: The Northern Reaches of Cambridgeshire.

RAF Woodall SpaTrail 1: Lower Lincolnshire.

RAF Wratting CommonTrail 50 – Haverhill’s neighbours – Wratting Common and Great Sampford.


January 1st 1945 – Loss of Mosquito PZ340

On the afternoon of January 1st 1945, Mosquito FB.VI #PZ340, ‘HB-Z’ took off from RAF West Raynham, according to the Operational Record Book it was assigned to a “high level bomber support” sortie over Heligoland, unusual as these Mosquitoes were not pressurised models. The pilot, F/O Ian George Walker (s/n: 156104) and navigator/wireless operator F/O. Joseph Ridley Watkins (s/n: 152875), had only just been brought together, F/O Watkins, from Wanstead in Essex, normally being based with 141 Squadron, but on attachment to 239 Squadron, when the flight took place.

On return, from the mission, the aircraft crashed near to Narford Hall, an Eighteenth Century stately home located a short distance to the north-east of RAF Marham in Norfolk. Whilst not confirmed, it is thought the crash was caused by an instrument failure, a crash that resulted in both airmen being killed.

Following the accident, F/O. Walker was returned to his home town and was buried in St. Michael’s Cemetery in Dumfries. F/O Watkins however, was buried locally, in nearby St. Andrew’s Church, Little Massingham not far from RAF Great Massingham. Both airmen were only 21 years of age.

The Mosquito, a Hatfield manufactured aircraft, was produced under contract 555/C.23(a), and was an aircraft designed for ‘intruder’ strike missions, it was the most commonly used variant of all Mosquitoes.  239 Squadron was in the process of replacing these examples with the MK. XXX before its disbandment on July 1st 1945.

Little Massingham St. Andrew's Church

F/O Watkins died on January 1st 1945 after the Mosquito he was in crashed near to RAF Marham, Norfolk. He rests in St. Andrew’s Church yard, Little Massingham.


4th June 1944 – Death of a Lancaster Crew

On June 3rd 1944, Lancaster ND841 ‘F2-D’ piloted by F/O. George. A. Young (s/n: 134149) RAFVR 635 Squadron, was detailed to attack Calais as part of the preparations for D-Day. There would be eight other aircraft from RAF Downham Market also detailed for the mission and take off would be late that evening.

The mission as a whole would involve 127 Lancasters and 8 Mosquitoes of No.1, 3 and 8 Groups and the targets would be the gun batteries at both Calais and Wimerereux. It was a  diversionary raid as part of Operation “Fortitude South“, to fool the Germans into believing the invasion would occur in the Pas-de-Calais region.

At 28 minutes past midnight, F/O. Young lined the Lancaster up on the runway, opened the throttles and began the long run down the runway. As the Lancaster approached take off, it began to swing striking the roof of a B1 Hangar. In an uncontrollable state the aircraft crashed just outside the airfield killing all on board.

All other eight aircraft took off and returned safely after having dropped their bombs.

On board Lancaster F2-D that night was:

Pilot: F.O. George Ambrose Young, aged 24 (s/n: 134149) RAFVR.
Flight Engineer: Sgt. Thomas Snowball, aged 32 (s/n: 1100769) RAFVR
Navigator: F.Sgt. Howard Pritchard, aged 22 (s/n: 1578502) RAFVR
Bomb Aimer: F.O. Walter Thomas Olyott, aged 21 (s/n: 151238). RAFVR
Wireless Operator / Gunner: F.Sgt. Robert Sadler, aged 23 (s/n: 1526058). RAFVR
Air Gunner: F.Sgt. Stanley Wharton, aged 30 (s/n: 1578013) RAFVR
Air Gunner: F.Sgt. Charles Patrick Nallen, aged 20 (s/n: 427537) RAAF

The Operations record book (AIR 27/2155/7) for that day simply  states:

3.6.44  ‘D’ F/O Young G.A. hit hangar after taking off and crashed on airfield when large bomb exploded and the crew all killed.  8 aircraft returned to base .

Three of the crew are buried in Kings Walk Cemetery, Downham Market, a short distance from the airfield.

Downham Market Cemetery

F.Sgt. Stanley Wharton (RAFVR)

Downham Market Cemetery

F.Sgt. Robert Sadler (RAFVR)

Downham Market Cemetery

F.O. Walter Thomas Olyott (RAFVR)