RAF Old Buckenham – the home of film stars!

In the second part of Trail 13 we leave Tibenham behind and head to another still active airfield. Like Tibenham, the heavy bombers have all gone, replaced by small single engined aircraft, and also like Tibenham, much of the site has likewise disappeared. However, the history of this airfield remains very much alive, through fly-ins, displays and events that all remind us about those difficult days of the late 1940s.

Synonymous with film starts such as James Stewart and Walter Matthau, this airfield lives on and is thriving. Showcasing a range of facilities it is a delightful little airfield and one that keeps the spirit of flying very much alive. From Tibenham we head only a few miles north-west, where we find the former US airfield Old Buckenham.

RAF Old Buckenham (Station 144)

Old Buckenham is an airfield with a rather grand name. It was a short-lived airfield, purposely built for the USAAF late on in the Second World War. It only ever housed one group, a group that was itself a late joiner. It was initially a rather unpleasant place to be, mud and rain being the airmen’s worst enemy. But as the war progressed it became more hospitable, more lively and more inspiring. Whilst the group was never considered a major player in the war, it did achieve some remarkable results, the group going on to set some extraordinary bomber records.

Opened as a bomber airfield in 1943, it was built under the class ‘A’ specification, with three intersecting concrete and woodchip runways (1 x 2,000 and 2 x 1,400 yds) each 50 yards wide. It had fifty hardstands of the spectacle style, two T2 hangars (four were allocated initially) and a standard 1941 design watch tower (12779/41).

‘Old Buck’ as it became known, was exclusively the home to the American 453rd Bomb Group, operating a range of versions of the enormous B-24 Liberator, initially under the command of Col. Joseph A Miller.

Consisting of the standard four Bomb Squadrons: 732nd (squadron code E3), 733rd (F8), 734th (E8) and 735th (H6), the group was constituted on the 14th May 1943 and activated on 1st June that same year. It then came into physical being on June 29th, taking its officers and enlisted men from the 29th BG (H), who, under Special Order No. 180, transferred fifty-five Officers and 231 enlisted men to the 453rd. Of these, twelve officers were sent to the 732nd, twelve to the 733rd, eleven to the 734th and another twelve to the 735th. Each of the squadrons also received fifty-five enlisted men, the remainder of the workforce going to the Group’s headquarters.

Even before leaving the United States, the 453rd would suffer casualties. Its first loss was B-24E #41-29032 piloted by 2nd Lt. David MacGowan (735thBS), which crashed into a hillside near to Du Bois, Wyoming whilst on a photographic and training exercise. The accident, on August 14th 1943, resulted in the loss of all eleven crewmen on board. It was perhaps, a sign of things to come.

After passing through a number of training sites in the United States: Wendover Field, Pocatello, Idaho and March Field, the ground echelons sailed across the Atlantic Ocean on the Queen Elizabeth to England. They  arrived at Old Buckenham at the end of December into what would prove to be a cold and very unpleasant winter. Considerable rain and snow had turned Old Buckenham into a mud bath. Colds and flu spread like wildfire through the ranks, and overshoes had to be issued to help against the unending sludge.

The air echelons would fly the southern route with the first leaving in early January. On the very day of departure another aircraft was lost  – two crews were now gone before the group had even reached the U.K.

The air echelons arrived throughout January and into February, organising themselves and preparing their ‘H’ model Liberators for the forthcoming battle. When possible, they undertook training flights over the English countryside, received ground instruction and took further role specific training. They began carrying out mock missions including on the 4th, a simulated mission which turned very sour for one particular crew.

Liberator #41-28641, ‘Cee Gee‘ (referred to in some references as ‘Chee Chee‘) piloted by 2nd Lt. John R. Turner, became lost and it would seem, damaged by flak. Forced down onto an enemy airfield, it was repaired by the Germans and put back into service as A3 + KB by KG 200. The aircraft was intended to be used to ferry supplies to the island of Rhodes, and was recaptured by advancing American forces in May 1945. This was the first Luftwaffe captured Liberator and only the second to be put into service with German markings.

S/Sgt J. T. Sipkovsky, inspects B-24H #41-28641 [A5+KB] of KG200  ex 453BG /732BS, left at Salsburg by retreating German forces. (WM UPL 23019)

The next day, February 5th 1944, the Union Jack was officially lowered at Old Buckenham when, with much pomp and ceremony, Sqn. Ldr. L. Archer handed over the keys of the airfield to Col. Miller. Station 144 was now officially open for business.

There would be no break nor celebratory parties for the new Group though. On that same day, the 453rd were to take part in their first mission, a bombing raid to Tours in France.

Tours had been the focus of the invading Germans in the early part of the war. Heavily bombed with incendiaries, it was quickly turned into a fortress housing military camps  with strong fortifications. The allies then made it a focus for their air bombardments, but on this occasion, the weather would be the winner with heavy cloud causing many problems over the Continent. With the 1st, 2nd and 3rd Bomb Divisions in action that day, many would drop bombs on alternative targets, reform on other divisions or return home without bombing at all.

On the 6th February, the 453rd were back in action again, and again the horrors of war would be seen at Old Buckenham, when B-24 #42-52178 ‘Little Agnes‘ crashed after take off.  After lifting off the runway, the aircraft lost power, stalled and hit the runway hard sliding along on its belly into a ditch at the end of the threshold. The aircraft then broke up, at which point one of the ten 500lb bombs exploded setting off a chain reaction that led to a fireball. Mechanical failure of the #1 and #4 engines was blamed that day when eight of the ten crew on-board were killed when the aircraft came down.

For the remainder of February, including ‘Big Week’,  the 453rd would carry out further missions to both France, Holland and also Germany. These included: Siracourt (13th & 15th); Brunswick (20th), the airfield at Achmer (21st) and the Me-110 aircraft assembly plant at Gotha (22nd & 24th). Known for its high casualties, the 453rd managed to lose only one aircraft on the two missions it carried out to Gotha, a remarkable escape considering the ferocity of the battle, and the loss of thirty-three from other groups. It was also during this mission that sixteen aircraft would come down in Switzerland, the highest number of any mission of the war.

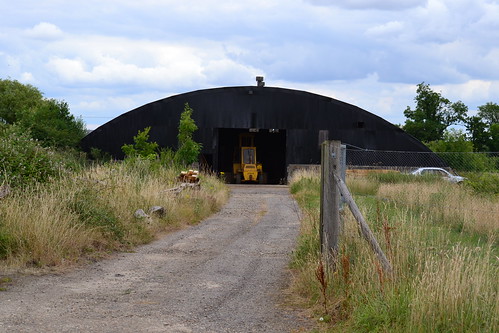
RAF Old Buckenham

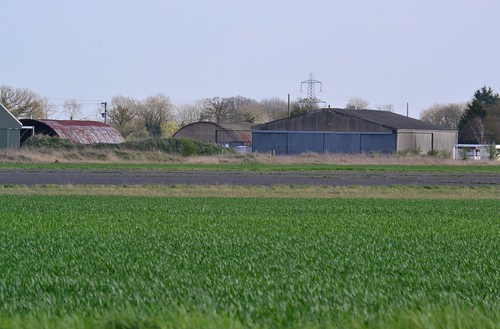
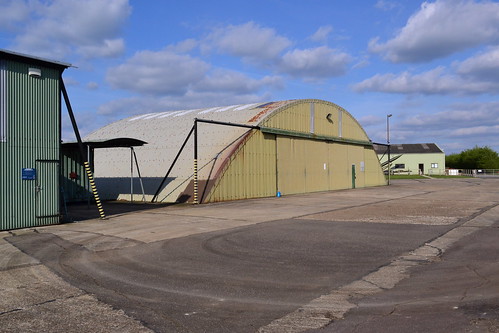
The Blister Hangar at Old Buckenham.

During March 1944, several major events would occur at Old Buckenham. Firstly, on the 6th, B-24H #42-64469 “El Flako” of the 732nd BS, whilst only on her third mission, would accidentally drop her bomb load just 3 miles from the airfield. Thankfully there were no injuries apart from a very large dent in the pride of the crew on board. Red faces aside, this mission, the USAAF’s first daylight attack on Berlin, would not be an easy ride for the 453rd.

Of the twenty-four aircraft sent out, four would fail to return, two over the target and two ditching in the channel. A fifth, piloted by Lt. Richard Holman, was badly damaged with two engines put out of action whilst over the target area. Determined to get back home, Lt. Holman dropped down to the cloud base where he was pursued by a number of FW-190s. With only two turrets operating, the crew managed to fight off the attackers, shooting down almost half of them in the process. After passing through a flak zone in Amsterdam they continued on, Lt. Holman putting the Liberator through some of the most incredible and violent turns possible, until they reached the Channel. With fuel and ammunition now critically short, the crew threw out anything and everything, in a desperate attempt to lighten the load of the failing bomber. Eventually, and only by the skill and determination of the crew, the aircraft arrived back safely at Old Buckingham. Many prayers and thanks were said on that particular day.

Then on the 18th, B-24H #41-28649, ‘Little Bryan‘, was hit by flak over Friedrichshafen, a target located close to the border with Switzerland on the banks of Lake Constance. Whilst the weather was near perfect, the target was covered with a thick smoke screen, preventing accurate visual bombing taking place. Heavy flak and fighter activity made things even worse for the bombers of the mighty Eighth.

Badly damaged, ‘Little Bryan‘ managed to continue flying but was losing fuel fast. As a result it would not make it home. On board ‘Little Bryan‘ that day was the Group’s Commanding Officer, Colonel Joseph A. Miller, along with the Group’s Navigator, Capt. Joseph O’Reilly. The aircraft crashed west of Vernon after the crew had baled out. Of the crew, ten were captured and taken prisoner, the last crewman escaping to fight another day. With the loss of a second aircraft along with three of its crew, March 18th would be a heartbreaking day for the 453rd.

The following day, Col. Ramsey Potts Jnr assumed command at Old Buckenham, a veteran of thirty-two missions he was one of the most decorated officers in the European Theatre, having been on both the Polesti and Rome bombing raids. He remained with the 453rd until mid 1944.

It was also at this time, (March 30th) that Major James “Jimmy” Stewart became the Group’s Operations Officer, Stewart who led the 733rd BS for 11 missions, went on to become a famous actor. He was promoted after the loss of Major Colfield earlier on, on February 16th.

RAF Old Buckenham

The mobile ‘control tower’ at Old Buckenham

April would see further losses for the group, but May would prove to be the worst so far. On the 8th, seven out of thirty-two aircraft would fail to return to Old Buckenham: #41-28650, #41-29571, #42-52180, #42-52185, #42-64453, #42-64464 and #42-110076, all being lost at Brunswick, a target gaining in its notoriety.

Following a move of the ground echelons on April 11th to form a new squadron at North Pickenham, the remaining staff were reshuffled to fill the gaps left behind. A small interruption to the continuing missions over Germany.

The 13th of April saw the first mission undertaken by Major Stewart, an operation that took 274 B-24s to various targets including the Dornier parts factory near Munich. The results that day were considered ‘good’.

For much of April the routine was the same, missions to France and Germany. After three months of being at Old Buckenham, the 453rd were now settling in well, improvements had been made to the living areas, more concrete had been laid to reduce the mud, and the cinema was now showing regular films. Other recreational areas were developed and morale was rising.

Throughout the conflict the 453rd would attack prestige targets: the fuel dump at Dulmen, marshalling yards, Hamm rail centres, Gelsenkirchen oil refineries, along with numerous airfields, canals and viaducts.

May would see yet another return to the dreaded Brunswick, and for the 453rd it would be another high loss mission. Using a mix of general purpose bombs and incendiaries, 307 B-24s of the 2nd Bomb Division joined aircraft from the 1st and 3rd Bomb Divisions in attacking it, and other major cities across Germany. On this day, ten aircraft would fail to return to base with eight being lost as the 453rd led the large formations into the target area. In the lead plane was Capt. Andy Low, who for his exemplary leadership, later received the Distinguished Flying Cross.

Bombing through 10/10 cloud using Pathfinder equipment, the group was attacked by around 200 enemy fighters, an attack that led to the area being known to the crews as ‘fighter-alley’.

RAF Old Buckenham

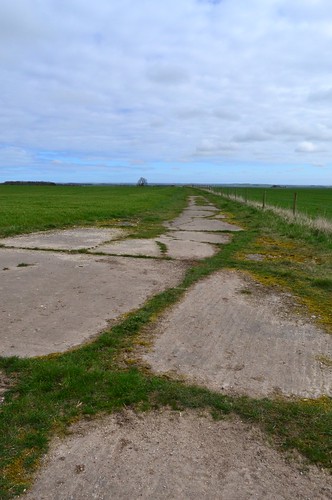
Part of the runway is now used as the taxiway.

By now, with mission counts mounting, crews were beginning to finish their tours of duty, the first full crew to do so, being the crew of Lt. Ward on May 31st, 1944.

Keeping morale up whilst the young men were away from home was always a challenge. Whilst undertaking training back in the States, a band was formed, a band that managed to reform itself finding space for rehearsals at Old Buckenham. The ‘GI’vers’ became one of the most successful forces bands in England, performing at dances both at Old Buckenham and at other US bases in the East Anglia area.

The morning of D-Day 6th June, brought early dawn action from the 453rd. Military sites between Le Harve and Cherbourg were targets for the day. The shore line batteries and any targets of opportunity, railways, troop concentrations and road junctions, were now well and truly in the sights of the bombers. So determined to play their part were the 453rd, that they flew four complete missions on that one day, unheard of in many Air Force heavy bomber Squadrons. For the next ten days Old Buckenham would be extremely busy, with missions being flown on all but one day, until the weather eventually brought an enforced break on the 16th.

As the war progressed the Old Buckenham group would go on to support many ground battles, including the Battle of the Bulge in the winter of 1944 – 45. A winter that would begin with the first crew loss through anoxia, when S/Sgt. Frank Mayar failed to respond to medical aid after his oxygen mask froze.

The 26th November 1944, would see tragedy strike home again for the 453rd. Mission 182 for the Old Buckenham Group, saw 350 B-24s of the 2nd Bomb Division and 381 B-17s of the 3rd Bomb Division attack targets in Germany. One of these targets included the railway viaduct at Bielefeld, a viaduct that became almost illusive until later destroyed by 617 (Dambusters) Sqn of the RAF.

The Bielefeld Viaduct after the dropping of the RAF’s ‘Grand Slam’. The ground bears the scars of continuous and heavy attacks (National Archives)

During take off for the mission, Capt. Ray Conard, the mission leader, failed to gain height. In a desperate attempt to avoid nearby housing, Capt. Conard jettisoned his bombs and, it is believed, deliberately crashed his aircraft away from them, thus saving the lives of those people living inside. For his actions, Capt. Conard, aged just 25, was recommended for the DSC Posthumously.

Christmas brought a much happier cheer to the Old Buckenham crews. Permission was granted to fly a plane load of toys to Paris to deliver them to French children. Locals brought as many as they could muster to the airfield and handed them over to the Americans. After slipping off the runway, ‘Liberty Run‘ eventually made it off the ground delivering the toys just in time for Christmas day.

The notorious winter weather of 1944 would claim yet another victim before the year was out. On December 27th 1944, #42-50898 failed to rise more than a few feet after taking off from a salted and slippery runway at Old Buckenham. Lt. Roscoe Brown was heard to say, “I cannot keep her up, we have had it”, just before the aircraft slammed into the ground. In the ensuing crash, the aircraft broke up and burst into flames, the fire setting off bullets and causing the bombs to explode. There was considerable ice that day, the runway and aircraft’s pitot tube later being found to have been iced up, adding to the already difficult flying conditions. As a pathfinder, it came as a terrible blow to the 453rd whose mission that day was subsequently scrubbed. Only four of Lt. Brown’s crew managed to escape the inferno that followed – it was a sad end to 1944.

The new year started as the old had finished, with more aircraft slipping on ice and crashing into parked aircraft. After further lives were lost and sliding incidents increased, the Group’s Commanding Officer Col. Thomas, called a halt to the proceedings and another mission was also scrubbed. Those that had got off the ground continued on, joining other groups in bombing their target – the Ramagen Bridge.

Crumpled tail of B-24 #42-51865 1st January 45 Old Buckenham. Eventually after numerous crashes and aircraft sliding on ice, the mission was scrubbed. (IWM FRE 1863)

With more attacks on Germany, January would become the month when the 453rd would set a record for the most missions flown (200) by any Liberator Group in a short space of time. A record they would be proud of and celebrate at reunions for years after.

As the war drew to a close, more missions would take the group into the very heart of Germany.  Even though the war was nearly over, accidents continued to occur and aircraft continued to be lost. The last mission for the 453rd took place on March 31st 1945, bombing the rail junction at Amberg. Thankfully all aircraft sent out that day came home. With the decrease in bombing sorties the Group’s focus began to change, recreational activities taking over where flying had been lost.

The final orders to stand-down finally came through on the 12th April 1945, and with it the end of 259 missions, in which 15,800 tons of bombs had been dropped. Of the original sixty-one aircraft sent over with the 453rd, only one was left, ‘Male Call‘, a B-24 veteran of ninety-five missions.

Elsewhere, the 453rd had ten aircraft that had completed 100 or more missions, the highest being that of 120  – “My Babs” of the 733rd Bomb Squadron. Even though they had lost almost all the original aircraft, they had set another record of 82 consecutive  missions without loss; a remarkable achievement considering the losses sustained by other heavy bomber groups in the European Theatre.

In mid April the group received orders to depart European shores for home. The group had been earmarked for a role in the Pacific, but ‘R & R’ was the order of the day and even though ground crews prepared the aircraft for combat, the US was firmly on the minds of all. On the 13th May the USS Hermitage set sail for the States, and Old Buckenham fell silent as the last few men departed closing the gates behind them.

Post-war, the airfield returned to RAF ownership seeing a few aircraft from other units being placed here, but no other major service or operators. Eventually in 1960, the RAF disposed of the site and it returned primarily to agriculture. Flying does continue today though, as Old Buckenham hosts fly-ins, displays and has a thriving aero club on part of the remains of the east-west runway.

As the site is an active airfield, access to any parts other than the public areas is very limited and so there is little to see from those dark days of the 1940s. The runways do remain as small roads for local tractor access, and one small part of the east-west runways is used for light flying. A further section of the north-west/south-east runway also exists as a taxiway to access the main runway. An original blister hangar is also on site along with a Nissen hut that now houses a museum.

RAF Old Buckenham

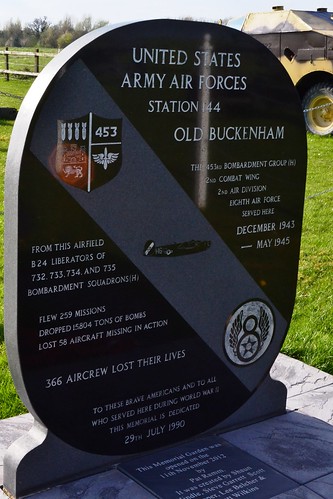
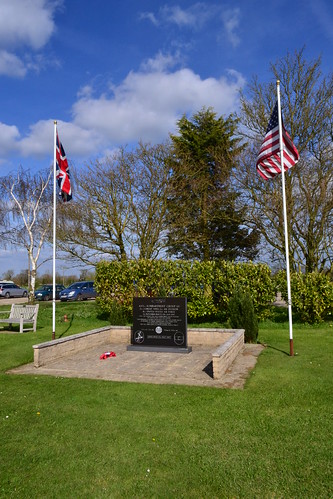
RAF Old Buckenham, memorial to those who served.

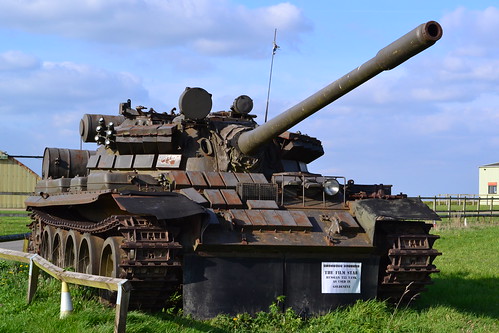
There is a varied collection of military hardware, mainly field guns, located on the site. A further ‘famous’ attraction is the T-55 Tank used in the James Bond film ‘Golden Eye’ which greets you as you arrive. A small, well cared for memorial in the shape of a Liberator tail-fin is dedicated to those 366 crew members and staff of the 453rd BG who lost their lives, and a cafe, aptly entitled “Jimmy’s“, provides refreshments for the visitor.

A delightful place to spend a warm Sunday afternoon watching light aircraft and contemplating what life was like at Old Buckenham as the roar of B-24s filled the air over 70 years ago.

RAF Old Buckenham

The T-55 tank used in the film ‘Golden Eye’

Post script

Some rare photographs taken at Old Buckenham were found following an auction in Montana, in a box of old photographic supplies. The story was reported in the ‘Eastern Daily Press‘ on December 18th 2013.

A museum to honour the men of the 453rd BG has since opened at Old Buckenham. Their website gives details of the collection and opening times.
Disaster at RAF Tibenham.

In this post, we revisit Tibenham in Norfolk, the home of the 445th Bomb Group, Eighth Air Force. Whilst here, the 445th would suffer the worst casualty rate of any Bomb Group in a single mission, a mission that virtually wiped out the entire Group. Yet they would no give up, determined they would go onto have one of the most successful bombs on target statistics of all the Eighth’s Bomb Groups, a record they can be proud of.

RAF Tibenham (Station 124)

Station 124 was one of those purpose-built airfields designed specifically for the USAAF in the mid-part of the war. Known to the locals as Tivetshall, it occupies a site previously used by the Royal Flying Corps in World War 1 (although there appears to be no record of units based here).

In preparation for the Air Force’s arrival, a Class A airfield was built, with three standard concrete and tarmac runways, the primary of 2,000 yds and two secondary each 1,400 yds long and all the standard 50 yds wide. In addition, there were thirty-five ‘frying pans’ hardstands and a further seventeen ‘spectacle’ hardstands, all dotted around the perimeter track. Aircraft maintenance was completed in two T2 hangars, one in the technical area and one other to the south side of the airfield. The bomb store was located to the north-west of the airfield, with the technical and administrative areas to the east. Beyond this, dispersed further to the north-east were the accommodation areas: two communal sites, a WAAF site, sick quarters and seven male accommodation sites. Accommodation was initially designed for 3,000 personnel, using mainly Nissen huts with some Orlit hutting on site. Most other buildings were ‘temporary’ and built of brick.

RAF Tibenham Perimeter track

Part of the perimeter track – RAF Tibenham

Built over 1941-1942 by W. and C. French Ltd, it was opened in 1942, and was the temporary residence for the ground echelons of two squadrons of the 320th BG in November that year. The plan was to send the air echelons via the northern route, but due to heavy losses of the 47th and 319th BGs, they were diverted to North Africa via the southern route. The Ground echelons would then join them departing both Tibenham and nearby Hethel on November 21st 1942.

Tibenham then remained unoccupied by operational forces until November 4th 1943, when the 700th, 701st, 702nd and 703rd Bomb Squadrons of the 445th Bomb Group, Eighth Air Force arrived.

The 445th’s journey brought them from Gowen Field in Idaho, through Wendover Air Force Base in Utah, to Sioux City where they completed their training. In October the ground echelons sailed on the Queen Mary arriving in Scotland in early November. The air echelons flew the southern route, covering Florida, Puerto Rico, Brazil and West Africa before arriving shortly afterwards.

Flying B-24 Liberators, they would perform their first mission on December 13th 1943 – a month after their arrival. Their first target was the U-boat pens at Kiel. Along with other units of the 2nd Bomb Division fifteen aircraft would take off and undertake what was to be a relatively uneventful sortie, all the 445th aircraft returning with only two aircraft damaged and no casualties.

Their third mission, also in December, was less successful. A massive force of 546 bombers left England to attack Breman, arriving over the target between 11:42 and 12:14, the force was badly hit by ME-410s of the Luftwaffe. The 445th had fifteen of their aircraft damaged, with two crewmen wounded and eleven classed as ‘missing’. The realities of war were beginning to bite home.

1944 would be a more decisive year for Tibenham and the 445th. During the February ‘Big Week’ campaign against the German aircraft industry, Tibenham would suffer from accidental bombing by a returning Liberator. After being recalled, a  B-24 accidentally released a bomb whilst flying over Tibenham airfield, the resultant explosion killing two servicemen and a civilian in a nearby house.

The 445th would also suffer this year, but for their determination and action over Gotha they would be awarded a Distinguished Unit Citation (DUC), an award that reflected their bravery.

RAF Tibenham

Today’s huts and hangars

The eight groups of the 2nd Bomb Division (BD) were targeting the Me-110 factories on February 24th 1944, dropping 372 tons of high explosive bombs. During the  mission 239 aircraft would leave England in three large wing formations, the 445th in the 2nd Combat Wing (CW) were to fly in the lead, along with the 389th BG and the 453rd BG. Behind them were the 14th Combat Wing with the 20th Combat Wing bringing up the rear.

The lead group were hit hard as much as 80 minutes before the target. Flying ahead of schedule, they had failed to rendezvous with their escort and so were at a huge disadvantage. Flying at altitude, the lead aircraft of the 389th suffered oxygen problems, which caused the bomb aimer to suffer from anoxia, the condition led to him release the bombs early, over Eisenach and not the primary target. As the bombs fell toward the ground, others in the wing began to follow suit, all releasing their bombs far too early, and well away from the target area. The 445th realising there was a problem, ignored the false signal and continued on to the target alone. Being out of formation and without escort, the B-24s were ‘sitting ducks’, and unsurprisingly were given special attention by the Luftwaffe.

From then on, and for an hour after the bomb run, Luftwaffe fighters attacked the B-24s, and one by one, the heavy bombers fell from the sky as fighters picked them off. After two and a half hours of relentless attacks, thirteen of the original twenty-five aircraft had been lost and nine others were badly damaged. The mission had cost 50% of the groups aircraft, but it was a tragedy that was not to be their last, nor their worst.

The main formation who had released early, had also suffered badly, being subjected to aerial bombing, cable bombing and rockets, an attack which led to a mission tally of thirty-three aircraft being lost and 314 airmen being classed as ‘missing in action’.

March 1944 would also be a noteworthy month. It was the end of a career as Commanding Officer for Capt. James Stewart, Commander of the 703rd BS. Posted here before he was declared unfit for flying duty, he arrived as ‘Operations Officer’, before being given the Command of the 703rd. He would go onto fly ten missions with the 703rd before departing Tibenham for Old Buckenham and the 453rd BG as Group Operations Manager.

Because the 445th had flown many missions over the winter months, March would become noteworthy for another reason. Four months after their first operation, Lt. Sam Miller and the crew of B-24 #42-110037 of the 700th BS had completed twenty-five missions whilst here at Tibenham, they were the first crew of the group to do so. At last some good news had brought relief to the horrors of the previous months and in particular the disaster of ‘Big Week’.

Ground personnel of the 445th Bomb Group gather around a B-24 Liberator (I5-B+, serial number 42-110037) after its return to base on D-Day. Printed caption on reverse: '51451- Ground crew swarming around a bomber returning from a D-Day mission for information on the invasion.' Handwritten caption on reverse: 'Lt Sam Miller's B-24 returning to Tibenham, Norfolk after he and crew completed a 25 mission tour of operations. First crew in the 445th bomb Group to do so.'

The return of B-24 #42-110037 after its crew had completed 25 Missions (USAF).

In the lead up to the Normandy invasion in June, the 445th attacked airfields in the Paris area along with V-weapons sites in Northern France, and on D-Day itself, they returned and attacked the shore installations, pounding them before the land forces arrived. The 445th then went on to help with the breakout at St. Lo striking enemy defensive positions. The Tibenham group were now so successful that they led the ratings for the most accurate bombing of all the Liberator groups in Europe, these successes though, were to be short-lived, for on September 27th 1944, the 445th would suffer its own ‘day of infamy’.

On that day the group was allocated the Henschel facility in Kassel, and they were to lead 315 B-24s to the target. Navigating by GEE the 445th took a wrong turn and left the protection of the formation. The turn went unnoticed by the remainder of the group and so, all of a sudden, the 445th were now out on a limb and lacking the protection of the formation once again.

The group then all dropped their bombs, but unbeknown to them they were not over Kassel but were in fact over Gottingen some 20 miles away. After implementing the withdrawal plan, the 445th put themselves even further away from the main force, they were now alone. All of a sudden the 445th met II/JG.4, and what followed would all but wipe out the group.

Fw-190s approached the group from behind, three abreast diving down as they fired. Then followed two Me-109 Gruppen of JG.4 who picked off the damaged aircraft. With individuals falling away, the formation was spread and broken up, some 150 enemy aircraft had attacked and devastated the group.

In around five minutes, the Luftwaffe fighters had picked off and dispatched twenty-five B-24s and damaged most of those that remained flying. Only the intervention of US fighters stopped the total and complete annihilation of the group. The scene was devastating, the sky was full of smoke and debris, parachutes from both sides floated through the carnage. Three more B-24s crashed on the way, luckily in allied territory, two others managed to reach Manston’s emergency runway and one more crashed at Old Buckenham. The four remaining aircraft managed to limp back to Tibenham, but only one was able to fly again the next day.

In a written account*1, Pilot Capt. William R Dewey Jr describes the scene in his B-24 (one of those that made Manston)

“The tail turret had caught fire, from direct hits by 20 mm cannon in the first wave of FW-190s, both waist gunners were wounded and bloody along with the tail gunner. There was a huge hole in the right waist ahead of the window, the left waist window was shattered. Control cables to the tail were partially damaged, and the twin vertical rudders appeared frayed and disintegrating. Looking out the copilot’s window we could see a 3′ diameter hole in the upper surface of the wing behind the #3 engine, where 100 octane gasoline was splashing out.”

Dewey goes on to explain how the co-pilot William L. Boykin Jr, carried oxygen bottles back to the wounded crew, gave them first aid and comforted them. Dewey then decided to drop below oxygen requirement level and risk ditching. Switching channels to the emergency channel, he manged to contact air-sea rescue using the code word “Colgate“. After obtaining a radar fix, they gave him a heading for Manston.

After an hour Dewey spotted Manston and began the task of landing not knowing what condition the flaps, undercarriage or tyres were in. Thankfully all were in good order and he described it as:

“the best I ever made in a B-24 – like we were on feathers. A day we will never forget!”*1

Statistics for the day were horrendous, the efficiency of the German controllers had been spectacular, no previous efforts had yielded such incredible results; 236 men were missing, 1 was dead and 13 were injured in the resultant crashes. This loss, left only ten aircraft in the entire group, and would go down as the worst operational day of the war for any single group of ‘The Mighty Eighth’.

The 445th would regroup and return though. In December and January they supported the troops in the Battle of the Bulge by bombing German communication lines, helping the Paratroops holding up in the forests of the Ardennes.

On February 24th 1945, Ford built Liberator B-24H-1-FO #42-7619 “Bunnie” a veteran of 103 missions, took off from Tibenham’s main east-west runway. Within seconds something went wrong and the bomber crashed a few hundred yards west of the airfield. In the crash four of the crew were killed, the remaining five managed to survive.

Photo of

“Chuck” Walker & his crew being congratulated by Lt. Col. Fleming, (deputy commander) on completion of their 35th mission and “Bunnie’s” 100th.(IWM)

and then on 24th March 1945, they dropped food, ammunition and medical supplies to the troops who had made the Rhine crossing at Wesel. They returned later that day to bomb the landing grounds at Stormede.

The 445th went on to carry out a total of 282 operations building a reputation for high accuracy bombing in the face of danger. Further awards were received from the French for their support of the Resistance, in dropping food supplies, gaining them the Croix de Guerre, a highly regarded award.

The 445th flew their last mission on 25th April 1945, the last mission by the Eighth Air Force in Europe, attacking airfields and rail targets in south-east Germany and Czechoslovakia without loss. The 445th finally returned to the US at the end of hostilities leaving behind huge numbers of crews for whom home would never be back on their own soil.

After their departure in May / June, Tibenham remained ‘operational’ although no operational flying took place. The RAF then began to sell off parts of the airfield to the local farmers. A short-lived expansion of the airfield’s runway in 1955 led nowhere, as no aircraft were assigned to the airbase, and in 1959, Tibenham was finally closed as a military base. During this time, the Norfolk Gliding Club took over part of the site, paying a rent to the Ministry of Defence, remaining here even after 1964/65 when the airfield site was finally sold.

Since then the Club has fought long and hard to keep flying at Tibenham. Battles over land and attempts to curb flying have so far failed. Gradually bit-by-bit the infrastructure has been removed, sold off for hardcore and agriculture use.

Flying at Tibenham

Small piston engined aircraft keep the spirit alive

A small collection of memorabilia and photographs of the four squadrons based at Tibenham are maintained by the club, and a memorial stands as a lasting legacy to those who never returned.

Currently, large parts of two of the runways remain; the perimeter track can also be seen, being split by the main road round the airfield. Also a small number of huts are still being used and the site is in remarkable condition as a result.

Other evidence is hard to find, the majority of the accommodation, stores and works all being located to the east amongst the trees and on private land. I am reliably informed that primitive airfield defences can be found amongst the trees at the end of the runway. These amount to a ladder that would enable any defence troops to climb up and remain hidden should any German paratroopers fall.

The heavily laden bombers have long since been replaced by the grace and beauty of gliders, the control tower and other major buildings are now history, but as the summer sun and cool breeze wafts across the open skies above Norfolk, it is easy to picture these lumbering bombers, fuelled and crewed waiting for their turn to depart. With the roar of labouring engines now long gone, peace has returned once more to this quiet corner of Norfolk.

RAF Tibenham memorial

Memorial dedicated to the 445th BG.

Tibenham was initially visited in April 2014 when these photos were taken. It appears as part of Trail 13 along with Old Buckenham and East Wretham. This page is an update with additional information on the 445th’s history.

Sources and further reading.

The Norfolk Gliding Club website gives details of their activities, opening times and flying operations.

*1 A typescript memoir written by Capt. William R. Dewey ‘Disaster at Kassel’: 27th Sep 1944. Second Air Division Digital Archive . Ref: MC 371/250, USF 5/1 accessed 25/3/18.

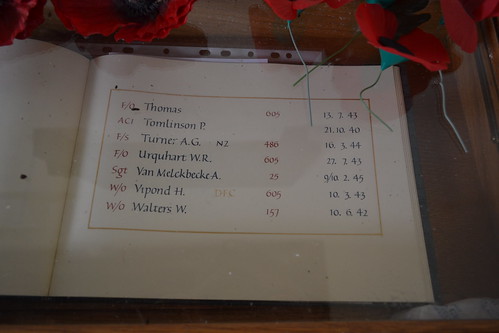
All Saints Church in Tibenham also has a small memorial and kneelers dedicated to those who flew from Tibenham.

Great Sampford – A disaster for the U.S. “Eagles”.

After leaving RAF Wratting Common, we turn south and head back past Haverhill towards Finchingfield. Reputedly one of the most photographed villages in England, it has a ‘chocolate box’ appeal, its quaint houses, old tea shops and village pond, reminiscent of Britain’s long and distant past. Finchingfield and this trail, are also close to the airfield at Wethersfield, and a short detour to the east, is an added bonus and a worthy addition to the trail.

This next airfield, a small satellite airfield, lies one and a half miles to the west of Great Sampford village, and five miles south-east of Saffron Walden. It is actually quite remote, with no public roads close to the site. Footpaths do cross parts of the former airfield, which is all now  completely agricultural.

As we head south we stop  off at the former airfield RAF Great Sampford.

RAF Great Sampford (Station 359)

RAF Great Sampford was a short-lived airfield, built initially as a satellite for RAF Debden, it would be used primarily by RAF Fighter Command, and later by the US Eighth Air Force. It was also used by 38 Group for paratroop training, and by the Balloon Command.

Being a satellite it was a rudimentary airfield, and accommodation was basic; utilising wooden huts as opposed to the more pleasant brick dwellings found at its parent station RAF Debden. It was very much the poorer of the airfields in the area, although by the war’s end a wooden hut would no doubt have been preferential to a cold, metal Nissen hut!

As a satellite it would be used by a small number of squadrons, No. 65 RAF, No. 133 (Eagle Squadron) RAF and No. 616 Squadron RAF. The famous Eagle Squadrons being manned by American volunteers, 133 Sqn was later renamed 336th Fighter Squadron (FS), 4th Fighter Group (FG), after their absorption into the US Army Air Force.

There were two runways at Great Sampford, one of grass and one of steel matting (Sommerfeld track), a steel mat designed by Austrian Expatriate, Kurt Sommerfeld. The tracking was adapted from a First World War idea, and was a steel mat that when arrived, was rolled up in rolls 3.25 m (10 ft 8 in) wide by 23 m (75 ft 6 in) long. It was so well designed that a full track could be laid, by an unskilled force, in a matter of hours. Each section could be replaced easily if damaged, and the entire track could be lifted and transported by lorry, aeroplane or boat to another location and then reused.

Sommerfeld track (along with a handful of other track types) were common on fighter, training and satellite airfields, especially in the early part of the war. It was also used extensively on forward landing grounds in Kent and later France after the Allied invasion of Normandy.

Tracking had to be robust, it had to be able to withstand heavy landings and be non-conspicuous from the air. Sommerfeld track met both of these, and other stringent criteria very well, although it wasn’t without its problems. Crews often complained of a build up of mud after heavy rain, and concerns over both tyre and undercarriage damage were also extensively voiced. Some records report tail wheels being ripped off after catching in the track lattice.

At Great Sampford the steel matting was 1600 yards long, extended later to 2,000 yards, the grass strip being much shorter at just over 1,000 yards. A concrete perimeter track circumnavigated the airfield, and due to the nature of the area the airfield took on a very odd shape indeed. With many corners and little in the way of straight sections, it may have suited the longer noses of the RAF’s Spitfires well, avoiding the need to weave continuously to see passed the long engine. However, because it was small and uneven, it caused numerous problems for pilots taking off, the hedges and trees proving difficult obstacles to clear without stalling the aircraft in an attempt to get above them.

Hangars and maintenance huts were also sparse, but four blister hangars were provided as the main structures for aircraft repair and maintenance.

Opened on 14th April 1942, the first unit to use the site was No. 65 (East India) Squadron RAF who arrived the same day that it was opened. No. 65 Sqn, being veterans of both Dunkirk and the Battle of Britain, had been moved about to regroup and refit, upgrading its aircraft numerous times before settling with the Spitfire.

The Spitfire VB of 65 Sqn (who were previously based at Debden) was a modified MK.V,  the first production version of the Spitfire to have clipped wingtips, a modification that reduced the wingspan down to 32 ft but increased the roll rate and airspeed at much lower altitudes. No. 65 Squadron, would use their Spitfire VBs for low-level fighter sweeps and bomber escort duties, something that suited the clipped wing version well.

Between April and July 1942, 65 Squadron would move between Debden, Martlesham Heath and Hawkinge with short spells in between at Great Sampford. They would then have a longer spell in Kent before leaving for RAF Drem in Southern Scotland. These repeated moves were largely in response to the threat of renewed Luftwaffe attacks on the airfields of southern England, and were part of a much larger plan put into place to protect the front line squadrons.

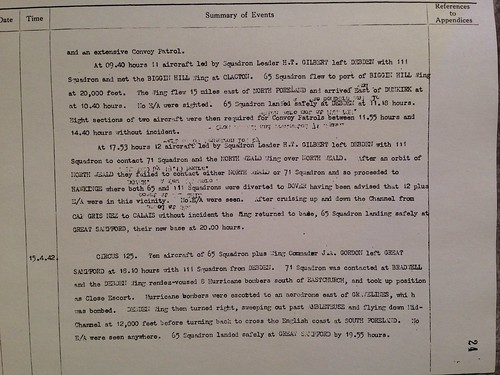
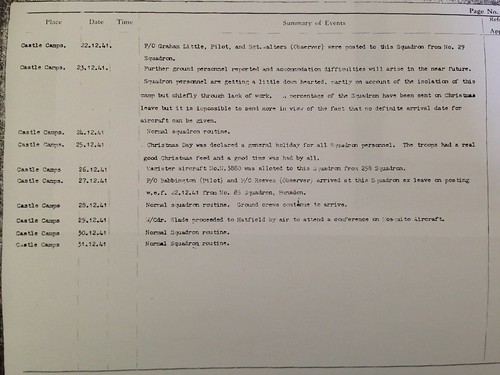
65 Squadron ORB Great Sampford

The entry in the Operational Record Book for April 14th shows the first landing of Spitfires at Great Sampford. (AIR 27/594/4)

On April 14th, the move took place, a move that was achieved under some difficulty as the squadron was called upon to participate in two Rodeo (fighter sweeps) operations. After extensive searching between Cap Gris Nez and Calais, no enemy aircraft were sighted, and so the wing returned to their various bases. At 20:00 hrs, the first 65 Sqn aircraft touched down at Great Sampford – the base was now open and operational.

The next mission would be the very next day – there was no let up for the busy flyers! “Circus 125” led by Wing Commander J. Gordon, consisted of ten aircraft from Great Sampford, who after taking off at 18:10, met with the bomber formation and escorted them to an airfield target near Gravelines. The entire mission was uneventful and the aircraft arrived safely back at Great Sampford at 19:55 hrs.

This mission pretty much set the standard for the remainder of the month. Numerous Rodeo and Circus operations saw 65 Sqn repeatedly penetrate French airspace with various sighting of, but little contact with, enemy aircraft. The first real skirmish took place on the 25th, when the Boston formation they were escorting was attacked by fourteen FW-190s. One of the Bostons was hit and subsequently crashed into the sea. Flt. Sgt. Stillwell (Red 3) of 65 Sqn threw his own dingy out to the downed crewman who seemed to make no effort to reach it – he was then assumed to be already dead.

On the April 27th, “Circus 142” took place, the escort of eight Hurricane bombers who were attacking St. Omer aerodrome. Three sections ‘Red’, ‘White’ and ‘Blue’ made up 65 Squadron’s section of the Wing, and consisted of both Rhodesian, Czech and British airmen. The Wing flew across the Channel at 15,000 ft, and when on approach to the target, they were attacked by 50-60 FW-190s. In the ensuing dogfight F/O. D. Davies, in Spitfire #W3461; P/O. Tom Grantham (s/n: 80281) flying Spitfire #BL442, and P/O. Frederick Haslett (s/n: 80143) in Spitfire #AB401, were all reported missing presumed dead. It was thought that both F/O. Davies and P/O. Grantham may have collided as they were together when they went down, P/O. Grantham was just 19 years of age.

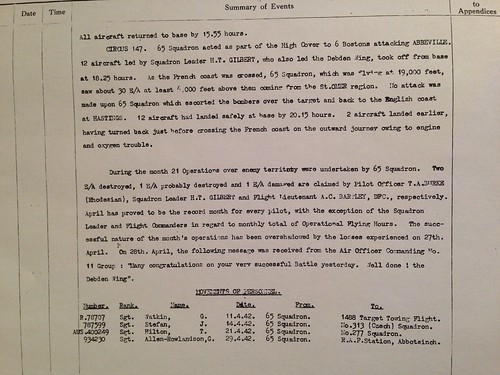
There were no further losses that month although operations continued up until the last day. In all, 21 operations had been flown in which 2 enemy aircraft were destroyed, 1 was a probable and 1 was damaged. April proved to be a record month in terms of operational flying hours for every pilot below the rank of Squadron Leader, the successes of which though, were marred by the sad events of the 27th and the loss of three colleagues.

On the 28th, their last day of this, the first of several stays at Great Sampford, a congratulatory message came though from the Air Officer Commanding No. 11 Group, “Well done the Debden Wing”, which went some way to lighten the atmosphere before the new month set in.*1

65 Squadron ORB Great Sampford

The Operational Record Book for 65 Squadron. A message of congratulations from the Air Officer Commanding No. 11 Group. (AIR 27/594/4)

It was three months later on July 29th 1942, that 65 Squadron would depart Great Sampford for the last time, and the next squadron would arrive, the Spitfire VIs of No. 616 Squadron RAF.

No. 616 Sqn were formed prior to the declaration of war in November 1938. An Auxiliary Air Force Unit, it too took part in supporting both the Dunkirk evacuation and the early days of the Battle of Britain. Now, at Great Sampford, it had been given the high altitude Spitfire, the MK. Vl, an attempt by Supermarine to tackle the Luftwaffe’s high altitude bombers, and quite the opposite to the VBs of 65 Sqn – these Spitfires had extended wingtips!

616 Squadron would, like 65 Sqn before them, spend July to September yo-yoing between Great Sampford and the airfields further south, Ipswich and Hawkinge, before departing Great Sampford for the final time on September 23rd 1942 for RAF Tangmere. Whilst here at Great Sampford, they would perform fighter sweeps, bomber escort and air patrols over northern France, engaging with the enemy on numerous occasions.

On the same day as 616 Sqn departed, the last operational unit would arrive at Great Sampford, the U.S. volunteer squadron, 133 Squadron known as one of the ‘Eagle Squadrons’. Being one of three squadrons manned totally by American crews, it had been on the front line serving at RAF Biggin Hill and RAF Martlesham Heath before arriving here at Great Sampford. Whilst some British RAF ground crews helped servicing and maintenance, the aircrew were entirely US, and crews were regularly changed as losses were incurred or crews were transferred out.

Many of these new recruits came in from other units. Ground crews coming into Great Sampford would have to get the train to Saffron Walden where they were met by a small truck who would take them to RAF Debden for a meal and freshen up. Afterwards they were transferred, again by truck, the few miles here to Great Sampford, the transformation was astonishing! In the words of many of those who were stationed here, “there was nothing ‘great’ about Great Sampford!”*2 Also flying Spitfire VBs, they were to quickly replace them with the MK.IX, a Spitfire that was essentially a MK.V with an updated engine. Having a higher ceiling than the FW-190 and being marginally faster, its improved performance took the Luftwaffe by complete surprise.

It would be a short-lived stay at Great Sampford though, as 133 Sqn RAF were disbanded on the 29th September, being renumbered as 336th FS, 4th FG, USAAF, and officially becoming US Air Force personnel. They were no longer volunteers of the Royal Air Force.

Just three days before this final transfer, on September 26th 1942, 133 Sqn would suffer a major disaster, and one that almost wiped out the entire squadron.

A small force of seventy-five B-17s from the 92nd BG, 97th BG and the 301st BG, were to mount raids on Cherbourg and the airfields at Maupertus and Morlaix, when the weather closed in. The 301st BG were recalled as their fighter escort failed to materialise, and the 97th BG were ineffective as cloud had prevented bombing to take place. The RAF’s 133 (Eagle) Sqn were to provide twelve aircraft (plus two spares) to escort the bombers on these raids. After refuelling and a rather vague briefing at RAF Bolt Head in Devon, they set off. Unbeknown to them at the time, the two pilots instructed to stay behind, P/O. Don Gentile and P/O. Erwin Miller, had a guardian angel watching over them that day.

During talks with P/O. Beaty, it was ascertained that the Spitfires had flown out above 10/10th cloud cover and so were unable to see any ground features, thus not being able to gain a true understanding of where they were. Added to that, a 100 mph north-easterly wind blew the aircraft far off course into the bay of Biscay. Finding the bombers after 45 minutes of searching, the flight set for home and reduced their altitude to below the cloud for bearings. Being over land they searched for the airfield, all the time getting low on fuel. Instead of being over Cornwall however, where they thought they were, they were in fact over Brest, a heavily defended port, and in the words of 2nd Lt. Erwin Miller – “all Hell broke loose.” *3

In the subsequent battle, all but one of 133 Sqn aircraft were lost, with four pilots being killed.  P/O. William H. Baker Jr (O-885113) in Spitfire #BS446; P/O. Gene Neville (O-885129) in Spitfire #BS140 – Millers replacement; P/O. Leonard Ryerson (O-885137) in Spitfire #BS275 and P/O. Dennis Smith (O-885128) in Spitfire #BS294.

Only one pilot managed to return, P/O. Robert ‘Bob’ Beatty,  who crash landing his Spitfire at Kingsbridge in Devon after he too ran out of fuel. During the crash he sustained severe injuries but luckily survived his ordeal. From his debriefing it was thought that several others managed to land either on the island of Ouissant or on the French mainland. Of these, six were known to have been captured and taken prisoners of war, one of whom, F/Lt. Edward Brettell  DFC was executed for his part in the Great Escape from Stalag Luft III. A full report of the events of that day are available in an additional page.

There would be no further operational flying take place for the rest of the month for 133 Sqn – all in all it was a disastrous end for them, and to their spell as RAF aircrew.*4

Pilot Officer Gene P. Neville 133 (Eagle) Sqn RAF, stands before his MK. IX Spitfire at Great Sampford. He was Killed during the Morlaix disaster. (@IWM UPL 18912)

Because these marks of Spitfire were in short supply, the remainder of the Squadron were re-equipped with the former MK.VBs, a model they retained into 1943 before replacing them with the bigger and heavier Republic P-47 ‘Thunderbolts’.

As a result of the losses, the dynamics of the group would change. The cohesive nature of the men who had been together for so long, was now broken and the base took on a very different atmosphere.

The effect on those left behind was devastating, morale slumped, and in an attempt to raise it, Donald ‘Don’ Blakeslee ordered the remaining pilots to line up along the eastern perimeter track and take off in formation; something that had been considered virtually impossible due to its short length, uneven surface and rather awkwardly placed trees along its boundary. Blakeslee, who became a legendary fighter pilot with both 133 Sqn and later the 4th Fighter Group (FG), led the group in true American Style, getting all the aircraft off the ground without any mishaps. Heading for Debden, they formed up, and flew directly over the station at below 500 feet, shaking windows and impressing those on the ground with precision flying that took as much out of the pilots as did air to air combat.

That night, the mess hall at Debden, was awash with celebrations as 133 Squadron pilots enjoyed the limelight they had for so long deserved.

On the next day, September 29th, the crews packed their personal belongings and departed Great Sampford for the comforts of Debden, where an official handover took place. General Carl Spaatz and Air Chief Marshal Sir Sholto Douglas, witnessing the official transfer of the three Eagle Squadrons to the United States Air Eighth Air Force, a move that on the whole, pleased the American airmen.

From then on, Great Sampford would remain under control of the USAAF, being used as a satellite for the 4th FG at Debden, but without any permanent residents. The occasional flight of Spitfires or P-47s would land here whilst on detachment or away pending a Luftwaffe attack. In the early stages of 1943, the Americans decided that Great Sampford (renamed Station 359 as per US designations) was no longer suitable for their needs as it wouldn’t accommodate either the  P-38s or the P-47s due to its awkward size and shape. By February 1943 they had pulled out, and Great Sampford was returned to RAF ownership. By March 1943 the airfield now surplus to flying requirements, was closed, used only by a large selection of RAF Regiments training in airfield defence, Guard of Honour duties and VIP Security. The station eventually closed in August 1944.

Airmen of the 336th Fighter Squadron, 4th Fighter Group with a clipped wing Spitfire Mk. Vb (MD-A), 1943. Handwritten caption on reverse: '19A. KP. Fall, 1942. Great Sampford Satellite Field. 336th crew by 336th Spit Mk. Vb. Wings clipped by sawing off wing & pounding in board then carving and painting it. MD-A, red/blue wheel. Source -Bill Chick, Megura.'

Airmen of the 336th Fighter Squadron, 4th Fighter Group with a clipped wing Spitfire Mk. Vb (MD-A), 1943. at Great Sampford. (@IWM – FRE3230)

However, this closure was not the end for Great Sampford. With paratroop operations progressing in Europe, the airfield was put back into use on 6th December 1944 by 620 Sqn in Operation ‘Vigour‘.

No. 38 Group, in need of practice areas, had acquired the airfield, and were dropping SAS paratroops into the site. This flight preceded another similar activity the following day where Horsa gliders pulled by 620 Sqn Stirlings, took part in Operation ‘Recurrent‘; a cross-country flight from RAF Dunmow in Essex. This flight culminated with the Horsas being released and landing here at Great Sampford. These activities continued throughout the appalling winter of 1944 / 45, and into the following months. In March, in the lead up to Operation ‘Varsity‘ the allied crossing of the Rhine, there was further activity in the skies of this small grass strip. Operation ‘Riff Raff‘  saw yet more paratroops and gliders at Great Sampford, whilst in November 1945, after the war’s end, Operation ‘Share-Out‘ saw the final use of Great Sampford by the paratroops. No. 620 Squadron, who had been based at RAF Dunmow, were now winding down themselves and their use of Great Sampford ceased virtually overnight.

Since then, Great Sampford has become completely agricultural, the perimeter track virtually all that remains of this small but rather interesting site. It lies in a remote area, fed only by farm tracks and small footpaths. The tracks, now a fraction of their original size, still weave their way around the airfield as they did for that short, but busy time, in the mid 1940s.

Regretfully the airfield and its unique history has all but passed into the history books, and rather sadly, no memorial marks the airfield, even though many airmen were lost during  the many sorties in those dark days of the war-torn years of the 1940s.

We depart Great Sampford heading off once more, the airfields of Essex and East Anglia beckoning. As we move off, we spare a thought for those for whom this was the last view they had of ‘home’, and of those who never came back to this quiet and remote part of the world.

Sources and further reading

*1 National Archives: AIR 27/594/4 .

*2 Goodson. J,. “Tumult in the clouds” Penguin UK, (2009) 

*3 Price. A., “Spitfire – A Complete Fighting History“, Promotional Reprint Company,  (1974).

*4 National Archives: AIR 27/945/26

National Archives: AIR 27/945/25

The “Slightly-out-of-Focuswebsite has details of a photo essay documenting the planning and execution of an airborne exercise prior to Operation Varsity. It’s a detailed document which includes gliders of 38 Group RAF landing at Great Sampford.

Operation ‘Fuller’ – “The Channel Dash”.

On 12th February 1942, 18 young men took off on a daring mission from RAF Manston, in outdated and out gunned biplanes, to attack the German fleet sailing through the English Channel.

Leaving Brest harbour, a force of mighty ships including the Scharnhorst, Gneisenau and Prinz Eugen, attempted a break out, supported by sixty-six surface vessels and 250 aircraft, they were to head north through the Channel out into the North Sea and homeward to Germany where they could receive valuable repairs.

For many weeks the British had been monitoring the vessels awaiting some movement out to sea. Then,  German transmitting stations based at both Calais and Cherbourg, began a cat and mouse game transmitting false readings to interfere with British radar sets on the south coast. In mid February, the Luftwaffe organised themselves over northern France and the radars went wild with false readings and interference. Temporarily blinded by these measures, the British were unable to ‘see’ the mighty armada slip out into the Channel waters. Their escape had been a success.

The British, fearing such an attempt, had prepared six Fairy Swordfish of 825 Naval Air Squadron at nearby RAF Manston in readiness for the breakout. Ageing biplanes, they were no match for the Luftwaffe’s fast and more dominant fighters, nor the defensive guns of the mighty German fleet they were hoping to attack.

In front of their Swordfish, Lieut Cdr E Esmonde, RN, (2nd Left) on board HMS Ark Royal, October 1941. This photo was taken after the attack on the Bismark, and includes the various aircrew who received decorations as a result of that daring attack. (Left to right: Lieut P D Gick, RN, awarded DSC; Lieut Cdr E Esmonde, RN, awarded DSO; Sub Lieut V K Norfolk, RN, awarded DSC; A/PO Air L D Sayer. awarded DSM; A/ Ldg Air A L Johnson, awarded DSM). (© IWM A 5828)

In the cold winter of 1942, the Swordfish were kept ready, engines warmed and torpedoes armed, when suddenly and unexpectedly, at 12:25 on the 12th February, the fleet was sighted. They could no longer wait, and instead of attacking as planned at night, they would have to attack during the day, and so the order was given. The crews started their engines and set off on their daring and suicidal mission.

Shortly after take off, the escort arrived, merely ten Spitfires from No. 72 Squadron RAF, led by Squadron Leader Brian Kingcombe, and not the five Spitfire squadrons promised. The six Swordfish, led by  Lt. Cdr. Eugene Esmonde, dived to 50 feet and began their attack. Hoping to fly below the level of the anti-aircraft guns each of the six Swordfish flew gallantly toward their targets. Eventually hit and badly damaged, they pressed home their attacks, but they were out-gunned, and out performed, and just twenty minutes after the attack began, all six had fallen victim to the German guns. No torpedoes had struck home.

Of the eighteen men who took off that day, only five were to survive.

Leading the attack, Lt. Cdr. Esmonde was warded the V.C. Posthumously, he had previously been awarded the Distinguished Service Order for his part in the attack on the Battleship Bismark; an award that also went to: S/Lt. B Rose, S/Lt. E Lee, S/Lt. C Kingsmill, and S/Lt. R Samples. Flying with them, L/A. D. Bunce was awarded the Conspicuous Gallantry Medal and twelve of the airmen were mentioned in dispatches.

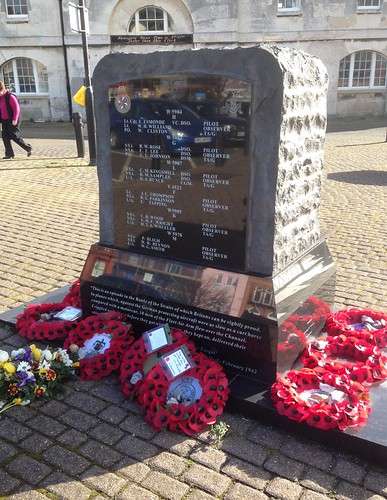
In their honour and to commemorate the brave attempt to hit the German fleet that day, a memorial was erected in Ramsgate Harbour, the names of the eighteen men are listed where their story is inscribed for eternity.

Operation 'Fuller'

The memorial stands in Ramsgate Harbour.

Operation 'Fuller'

The names of the 18 airmen and the Swordfish they flew.

RAF Milfield – Arguably One of Britain’s Most Significant Airfields.

High up in the northern most reaches of England is an airfield that has repeatedly appeared in the memoirs of many RAF and USAAF pilots. Not because it was a busy front-line station dealing with the constant battle against marauding enemy bombers, but more simply because it was a training station. However, this airfield was no ordinary training facility. It operated a large number of aircraft whose pilots played a major part in both the Normandy landings and the drive on through France and the low countries. In this, the next trail, we visit Northumberland, and a place where ground attack pilots honed their skills, perfecting the use of rockets, canon and bombs, in the destruction of enemy troop convoys, trains and tanks. The first stop on this trail is an airfield that is arguably one of Britain’s most significant airfields – RAF Milfield.

RAF Milfield.

RAF Milfield lies a short distance from the village it takes its name from, at the foot of the Cheviot hills on an area known as the Millfield Plain. It is an area steeped in history. On this site, evidence has been found of Neolithic hearths, storage pits and post holes.  There is also evidence of two Bronze Age circular houses and a further three rectangular houses dating back to the ‘Dark Age’; an age that probably pre-dates the Anglo-Saxon conquest of the area from around AD 547.

This area was also the scene of many fierce and brutal battles between the English and the Scots, The Battle of Homildon Hill and the Battle of Flodden were both fought within a few miles of this very site. In both these conflicts, heavy casualties were suffered by both sides, and it is therefore, an area that is both used to war, and one that is rich in historical interest.

RAF Milfield

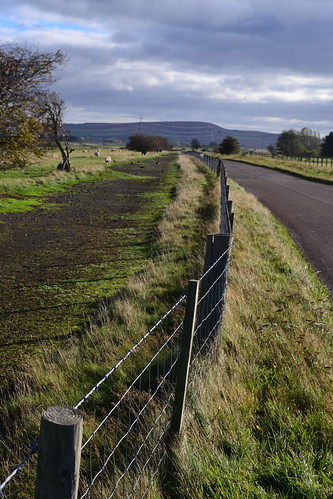
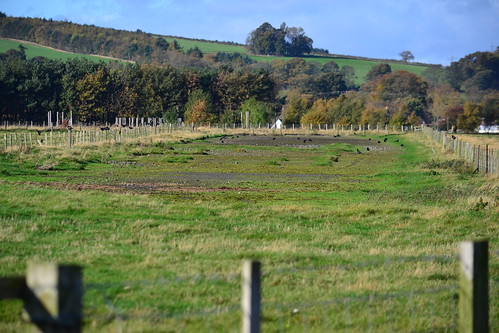
The Perimeter track is now the public road, parts lay visible alongside with associated dispersal pans.

As a military aviation site, Milfield came into being during the First World War. One of several such sites in the region that was used as little more than an emergency landing ground by 77 Squadron who were based further north at Edinburgh. Known at the time as Woodbridge, it would be a quiet little site that would soon disappear, quickly returning to its agricultural roots once war was over.

As a second war with Germany seemed inevitable, the need for new airfields became evermore apparent, and so the Air Ministry implemented the airfield expansion scheme. This programme developed so quickly that by 1942 there was a front line airfield opening at the rate of one every three days! As the German forces moved ever more quickly, and the Fall of France led to the Battle of Britain, the need for fresh, well-trained pilots became paramount. With home reserves drying up, the Commonwealth became an untapped source that would fill the ever-increasing void that was becoming a thorn in the side of the RAF.

Trained only in basic flying techniques, these crews had to be battle hardened and fit for action in a matter of weeks or even less. Initial training operations were mere ‘lip-service’ and recruits often had as much chance of killing themselves as they did the enemy they were intended to down. To meet this demand, numerous training stations were created, manned mainly by Operational Training Units (OTU), they were governed by the various arms of the Air Command: Fighter, Bomber, Naval, Transport etc.

At these training sites, crews would in essence, perform a ‘post-graduate’ training exercise, where they would be assembled for the first time and trained in their respective roles on the aircraft they would be expected to fly operationally. Milfield would be designated as one such station, and was initially identified as a suitable location for a bomber command site. Following requisition of the land in early 1941, the green-light for development was given, the process was put into place, and RAF Milfield was born.

Before any bomber crew would use Milfield though, it would pass from Bomber Command control over to Fighter Command whose focus would now be fighter pilots, and in particular, those specialising in both ground attack and dive bombing techniques.

As pilots came from all across the world, their training standards were some what disjointed, and so a refresher course bringing all crews up to the same standard would be required. This was a role that Milfield would fulfil. Working in conjunction with its satellite station a  few miles to the east, RAF Brunton, Milfield crews would spend some 9 to 10 weeks in total on flying techniques, both solo and formation flying, with the more advanced training taking place at RAF Brunton.

Nestled between the main road and the River Till, Milfield would be built to bomber station specifications, the three runways being wood chip and concrete one of 1,400 yards and two of 1,100 Yards. During development and subsequent handover to Fighter Command though, the new Class ‘A’ airfield standard would come in to being, requiring all airfields to be built with a longer runway specification. However, being a fighter training site, these were not imposed and whilst two of the runways were extended (1,800 and 1,300 yards) they were not to the full Class A specification.

RAF Milfield

The runway threshold is still surviving, note the close proximity of the hills in the background.

As a training airfield it would be exceptionally busy. An expected turnover would be a new course starting around every 3 weeks, which would mean a considerable number of aircrew and aircraft; in excess of 100 air frames would be located here at Milfield at any one time. The primary fighter aircraft at this point would be the Hurricane with other examples including the Miles Master and Magister. To repair and maintain the aircraft, two T2 hangars were constructed with a further eight blister hangars located around the dispersal areas. Squadron dispersal huts were spread around the perimeter, with the technical area and main hangars being located to the south-eastern side. Accommodation, designed to be temporary, was dispersed over 13 sites, and would be designed to accommodate in the region of 1,650 staff, both male and female. Like many airfields though, this figure was surpassed with the actual ‘on roll’ totals varying considerably reflecting the constant movement of staff. Including the numerous support staff, it is believed that some 3,300 people were employed at Milfield at its height.

Adjacent to the airfield was the former Galewood Farm House, an old farm building used as an Officer’s mess during the airfield’s operational life. Destroyed in the 1960s, it was once part of an estate that adjoined the airfield, and was previously home to Josephine Butler. Josephine was the leader of a national women’s political campaign in Victorian England, who campaigned on behalf of prostitutes, abused and trafficked women until her death in 1906*1. Now commandeered by the military, a snooker table with lights powered by a generator was placed inside, and nearby stood the NAAFI theatre, the recreational building showing the usual films to keep the personnel entertained.

It was during this construction period that the first enemy action would occur over Milfield. On September 1st 1941, at 23:00 hrs, six bombs were dropped in the vicinity of Milfield. A crater 72 feet wide and 10 feet deep was recorded, the road was blocked and telephone lines were brought down. Also during this time, and whilst not officially open, aircraft would land at Millfield, presumably as test landings or after getting into difficulty. One of the first casualties here was that of Sgt. James B Spangler (R71573) RCAF flying Hurricane V7044 on 25th June 1941, who was “killed in the course of a training flight” whilst flying with 59 OTU. This tragic accident would be a sign of things to come.

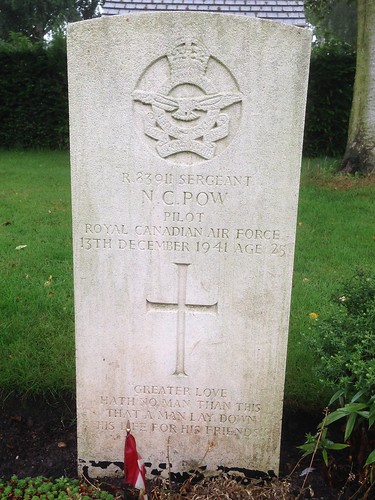
Because of the nature of training flights, accidental deaths on or around Milfield would become fairly common. These included on October 6th, 1941, Hurricane MK. I W9177 which was forced to Bellyland in a field near to Stocksfield just west of Newcastle-upon-Tyne. On 13th December 1941, Sgt. Norman Clunie Pow, (R83911) RCAF, again of 59 OTU, crashed in Hurricane P3809. Sgt. Pow was just 25 years of age and was buried some several hundred miles away next to RAF Sutton Bridge in Lincolnshire, another training station.

Sutton Bridge Churchyard

Sgt. Pow’s grave at Sutton Bridge.

As a training airfield, no operational front line squadrons would use Milfield, other than a detachment of 184 Sqn Hurricane IIDs between 1st December, 1942 and 1st March, 1943. The only other use of Milfield by ‘front line’ units would be as a transit base in the early post-war months.

The first full unit to arrive was that of 59 Operational Training Unit (OTU), arriving in the August of 1942.

59 OTU were originally formed at Turnhouse in December 1940, and operated amongst other things, the Hurricane, the Magister, the Fairy Battle and finally Hawker’s Tempest, all in a training capacity. After spending some five months at Crosby-on-Eden, the unit transferred to Milfield where they trained pilots in the ground attack role. As with many training stations, casualties were high, with many accidents happening through either pilot error or mechanical defects. Many of the Hurricanes used here were veterans themselves, beaten and patched up following intensive fighting in the Battle of Britain, many were long past their sell by date.

One of the first accidents to occur was that of Sgt. K. Dole, RCAF, who stalled whilst performing aerobatics – either authorised or not. His aircraft, a Hurricane MK.I ‘V7316’, MF 89 of ‘Z’ flight 59 OTU, crashed on farmland near Cornhill in August 1942. Luckily Sgt. Dole was unhurt, and the aircraft was salvaged; being repaired and sent to operations in the Middle East. The same fate however, did not fall to P/O J. Methum, who was killed in early September 1942, when his Hurricane MK.I ‘V6840’ crashed in a forced landing a few miles away to the east. The aircraft was written off in this most tragic of accidents.

The dangers of training became evermore apparent over the next few months, Saturday 27th March 1943 being particularly poor for 59 OTU with two crashes on the same day.  Hurricanes Mk.I ‘W9184’ and ‘W9121’ crashing in forced landings and night landings respectively. Both pilots were killed that day; Sgt. Robert MacFadzean (s/n: 1349862) born of US resident parents, and Welshman, Sgt. Gordon Cullener (s/n: 1383311).

Four months after 59 OTU’s arrival, No 1 Specialised Low Attack Instructors School  (SLAIS) would also be formed here (7th December, 1942) another unit that used the Hurricane and the Magister. One of the Chief Instructors of the School would be Squadron Leader J.H. “Ginger” Lacey DFM and Bar, a Battle of Britain Veteran who ended his career with 28 confirmed kills.

Hurricane MK.IID of No. 1 Specialised Low Attack Instructors School being refuelled and rearmed by Ground crew, including a WAAF, on a wet dispersal at Milfield. The fairings covering the two Vickers 40mm anti-tank guns beneath the wings have been removed and a warning notice hung from the barrel. (IWM CH 18134)

Low flying, in even in the relative safety of Northern England, was not immune from accidents, mishaps or misjudgements by the pilots. On 21st February 1943, Hurricane MK.II ‘HW731’ of the SLAIS hit an obstacle one mile north of Beal, the pilot escaped unharmed and after nursing the aircraft back to Milfield, it was repaired and converted for ground training purposes as ‘4616M’.

As flying training continued, so too did the number of accidents, burst tyres, engine malfunctions and fires, pilot error and collisions accounting for a wide range of them. On April 27th 1943, two Hurricanes collided in mid-air whilst performing formation flying. Both airmen, F/Sgt Davies and F/O Thompson were killed; an event that was mirrored in the following July when Hurricanes ‘P3475’ and ‘V7173’ also collided again with fatal results. New Zealander Charles Humphrey (s/n: 421056) is buried locally.

On May 1st 1943, 59 OTU transferred from 81 Group to No. 9 Group, at which point 81 Group was disbanded. No 9. took over 81’s responsibility, and it remained primarily a training arm of the Royal Air Force. For 59 OTU though, little would change.

On September 16th 1943, a B-17F-BO  (42-30030) named ‘Old Ironsides‘ ran out of fuel whilst returning from La Rochelle. The pilot Lieutenant Henry J Nagorka, decided to ditch in the sea near Farne Islands, off the Northumbrian coast. The aircraft quickly filled with water and in under four minutes she had disappeared beneath the waves.

During the ditching two crewmen were lost, waist gunners: S/Sgt. Ed Christensen and S/Sgt. Claude Whitehead, whilst the tail gunner S/Sgt. Harris lost a leg. Those that survived managed to climb into a dingy and sailed to St Cuthbert’s Island where they awaited rescue. Upon being saved, they were transferred to Milfield, where they were collected by another B-17 from the USAAF. However, as Milfield was a fighter airfield and its runways hadn’t been extended to Class A specifications, there were doubts about the aircraft’s ability to get off the ground on the short space available. To overcome the problem, the hedges at the end of the runway were removed and steal planking temporarily laid, the problem never arose though as the B-17 along with its additional human cargo left Milfield safely.

B-17F ‘Old Ironsides’ 42-30030, was loss at sea on the 16th September 1943 with the loss of two men. (IWM UPL 28296)

On January 26th 1944, both 59 OTU and the SLAIS were disbanded and a new unit formed, the Fighter Leaders School (FLS). The School had its origins in 52 OTU formed at Chedworth, and was in January, created as a unit in its own right. Formed through the need for more ground attack pilots in preparation for the forthcoming invasion, it was a unit that would take on the responsibility for the majority of the RAF’s ground attack crews. One notable figure of the FLS at Milfield was Bob Doe DSO, DFC & Bar, another veteran of the Battle of Britain. He would later return to operational duties after his short stay here in Northumberland.

Using the codes HK, OQ and MF, the FLS operated a number of aircraft predominately Spitfire VBs, and Spitfire MK IXs along with a handful of other marks. It later went on to adopt the Sabre engined Typhoon IB. In total over 130 aircraft would be used by the  Milfield unit, an incredible amount of aircraft on one site at any one time. Milfield continued to be in the spotlight.

It was also during this time, early 1944, that the USAAF would begin to send their pilots to Milfield to train on their ranges. With them, came a variety of US built aircraft, P-38 ‘Lightnings’, P-47 ‘Thunderbolts’ and the P-51 ‘Mustangs’. The brainchild of General Quesada, the plan was to train Ninth Air Force pilots in the art of dive bombing, skip bombing and low-level attacks, techniques that would become paramount if the push through France and on into Germany was to succeed. The arrival and increased use of Milfield by the US crews gave an indication that the impending invasion was drawing ever closer.

One of the earliest accidents for the FLS was in March of 1944, when Mohawk MK.III AR633 of 510 Squadron was hit by a Typhoon (JR509) of the Fighter Leader School on take off. Also on this day, a Spitfire MK.IIa (P8549) of the FLS tragically blew up in mid-air during a dive bombing attack on the Goswick ranges. The pilot of the Spitfire, F/Lt. Bouquen, a Belgian, was killed in the incident.

About a month later, a flight of four P47D Thunderbolts from the 366th FS (358th FG) from RAF Raydon attached to Milfield, were carrying out practice strafing attacks on a military convoy. During the climb out of the attack, one of the Thunderbolts (#42-25530), piloted by 1st Lt A. Serapiglia collided head on with Spitfire Mk 1 ‘R6762’ which was preparing to land at nearby RAF Eshott. In the collision, both pilots Sgt. Kai Knajenhjelm a 19-year-old Norwegian and Lt. Serapiglia were killed. After the investigation it was deemed that all future exercises should be performed “outside of local flying areas” of nearby airfields, something that perhaps seems obvious today, but reflects the hectic and often frantic skies over northern England in the 1940s.

A further accident to befall the Americans occurred on May 27th 1944, when a P-38 ‘Lightning’ #42-67425, of the 392nd FS, 367th FG piloted by Dueron H. Robertson, of the Ninth Air force, suffered a landing accident. The aircraft suffered major damage in the crash.

One of the benefits of attending the FLS was the diverse range not only of nationalities: Dutch, Czech, Canadian, Australian, New Zealand and South Africans to name but a few, but also the range of aircraft used. At the end of courses, trainees – now fully fledged fight pilots – were sometimes given the opportunity to try out other types of aircraft. An action that no doubt put the fear of God into the Station Commander who was heard to have shut his door and say “to hell with it”*2 . A number of other incidents occurred during this hectic time, which saw, by the end of December 1944, the FLS being absorbed into the Central Fighter Establishment based at RAF Wittering. Following this, the staff at Milfield all moved out, and momentarily peace prevailed once more.

Between mid December 1944 and into early January 1945, 56 OTU was reformed. Previously at RAF Sutton Bridge in Lincolnshire, it brought new aircraft, to the area, and Northumbria now reverberated to the radial engines of the Typhoon IB and the Tempest V; as four squadrons operated the aircraft using the codes FE, GF, HQ and OD. A collection of other aircraft types also graced the skies of this now highly significant airfield, Spitfires, Tiger Moths, Leopard Moths and Magisters to name but a few.

Even though the war in Europe was winding its way toward its conclusive ending, priority for aircraft was given to this purposefully created unit, and practice flights continued in earnest. The skies remained busy and accident numbers remained high.  In the space of one month between mid January and mid February 1945, there were no less than 8 incidents involving aircraft from Milfield and 56 OTU. As with many incidents here, poor weather, engine failures and pilot error were the causes of many  aircraft abandonment, pilot injuries and tragically deaths. In these eight incidents six involved Typhoons and two involved Tempests.

RAF Milfield

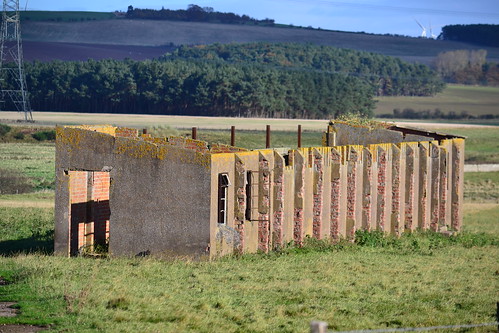
MG & Cannon Range building, one of the few remaining structures at Milfield.

March and April were similar stories, accidents, mishaps and deaths continued to plague Milfield, with pilot error accounting for a larger number of the accidents. Perhaps one of the most bizarre incidents took place on March 8th 1945 when the leader of a Spitfire squadron ‘deliberately’ attacked a Typhoon Mk.Ib ‘MP187’ of 56 OTU, killing the pilot F/O. R Smith of the Royal Canadian Air Force. The Typhoon was commonly mistaken for the Luftwaffe’s Focke Wolf 190, a formidable beast that became the scourge of the USAAF bomber formations.

The closing stages of the war didn’t bring a respite either. Saturday 12th May saw a collision between Tempests ‘EJ685’ and ‘NV759’ an event that killed an instructor pilot. Even after the war’s end, accidents continued to occur, with June, July, August and September all witnessing  further deaths and incidents. August 23rd saw Typhoon ‘SW638’ collide on the ground with two other aircraft, both those struck were written off whilst the ‘offending’ aircraft was badly damaged.

At the end of the war, and over just a two-day period, the only two operational units to use Milfield would arrive, using it as a transit stop. Both 164 Squadron and 183 Squadron would arrive and depart on the same day 16 – 17th June 1945 bringing with them yet more Typhoons.

Eventually, nearly nine months after the war’s end, on February 14th 1946, 56 OTU were disbanded, but not before one final roll of the dice when the life of an RAF pilot was taken. On January 29th 1946, whilst on a “Camera Exercise” and after performing a slow roll ten miles west of Holy Island, Tempest Mk. V EJ859 piloted by F/Lt. Vincent Parker (s/n 42356) RAFVR, an Australian aged 27, dived into the ground killing him. In a cruel twist of irony, F/Lt Parker was killed after having survived as a prisoner of war since 16th August 1940. He had remained in a German POW camp until its liberation at the end of hostilities, returning to England in June 1945, his post-war, peacetime life had been shorter than his life in captivity.

The departure of 56 OTU signified the end of the RAF’s interests in Milfield, and although not a front line operational airfield, it had become a very active and played a highly significant role in fighter training and development. Used to train both new and experienced pilots, it had become one of the RAF’s top fighter pilot training stations, developing pilot’s proficiency in low-level weapons delivery techniques. No matter how dangerous the training got, crews had continued to pass through, morale had  remained high and the standards were never dropped. Of the 1,200 pilots who had passed through here, many went on to make their names as the top ground attack pilots of the Second World War.

Immediately after the war, many of the accommodation huts were used to house Latvian soldiers, many staying here up until 1950. Local people were then housed in refurbished WAAF blocks before moving on to more permanent housing in the local village.

Soon after, Milfield began its decline with many of the buildings being demolished over the coming years. During the cold war era, the two T2 hangars were designated storage units for dried foods and emergency rations, thankfully a role that never had to be called into operation.  Eventually the runways were dug up and removed for hardcore, quarrying took over the southern end of the airfield and much of the surface layers were removed in the process.

During the 1970s investigations were carried by Air Anglia into the possibility of commencing commuter flights to European cities, but the project failed to ‘get off the ground’ and the service was scrapped before it ever developed into anything more than investigative flights.

Now partly returning to agriculture, a small section of the airfield has been retained by the Borders Glider Club*3 . The battle to keep gliders and flying here alive, being a long and difficult one. Through this small organisation, that operates only at the weekends, the spirit of flying lives on, and Milfield continues to fight for survival, a fight that has been both emotive and historically significant in the battle for the skies over Britain. The T2s have now gone as has virtually all the remaining buildings. A stone statue built by an Italian POW who was employed on the local farm, stands on private land, marking what was the official entrance to the airfield during the war years, it is clearly visible from the road side.

RAF Milfield

One of two sculptures, one made by an Italian POW, the second copied by an RAF serviceman.

Located four miles north-west of Wooler and Visiting today, there is some evidence of the former airfield left. Small sections of the perimeter track are now the public road, but alongside the road,  the remainder of the track can just still be seen. The north-western end of the runway is also visible as are a small collection of dispersal pans.  The MG & Cannon Range building still stands, minus its roof it is rapidly decaying, it has a very short life left.

Interestingly, as a training airfield, Milfield used both a Fisher Front Turret Trainer and Hawarden Trainer, a simulation trainer that used the fuselage of a Spitfire to train pilots in interception techniques. A model suspended from the ceiling up to 60 feet away from the pilot could be moved forwards or backwards by operating the opposite movement of the Spitfire’s throttle. As the Spitfire ‘accelerated’ the model moved backwards along a rail, rather similar in design to a 1970’s child’s toy. During these sessions a range of flying skills could be tested, interception and aircraft recognition, throttle control and cockpit procedures included. A primitive method that was state of the art in 1941. Sadly neither of these exist today.

Two memorials are located at this site, the first in a public car park to the western end of the airfield, next to the Maelmin heritage trail. The second is located outside the club house of the Borders Gliding Club, approximately on the site of the former watch office, itself no longer there. This memorial was commissioned by the club entirely through donations and is their way of acknowledging the sacrifice of those who flew from Milfield.

Interestingly a comment made by visitor Reginald Hall states that his wife’s uncle, David Harrison, (born in Gateshead in 1911) was stationed here to “strip out as much non-essential equipment as possible from the planes (he said principally Spitfires) to lighten their weight and so permit a greater quantity of fuel to be carried, sufficient to enable the return flights from Milfield to Scandinavia that were required for photographic reconnaissance“. Unfortunately the exact date of this Reg is unsure of, but I thank him for his comment which can be read in full in the comments below.

Milfield is arguably one of the most significant airfields of the Second World War, many Spitfire, Hurricane and Typhoon pilots quote it in their memoirs, their time here short but memorable. Here ground attack pilots cut their teeth, low-level strafing and dive bombing techniques being honed to absolute perfection. The battle for Europe would certainly have been more difficult were it not for those daring young men who passed through this remote but historically important airfield.

After we leave Milfield, we head east, toward the coast and the satellite of Milfield. A small airfield, it too played a major part in the development of ground attack crews and it too saw many accidents and losses through its training programme. From here we go to RAF Brunton.

Sources and Further Reading.

*1 A website tells the story of Josephine Butler’s life, and another has photos of Galewood farm-house.

*2 Dunn, W.R., “Fighter Pilot: The First American Ace of World War II“,  1996, The University Press of Kentucky, Page 118.

*3 Border flying club website

The Friends of Berwick and District Museum and Archives website provide information about the archaeological history of Milfield.

A book has been published about RAF Milfield, a complementary website gives fabulous personal detail of life at the airfield and is well worth a visit.

Photos of those stationed at Milfield can be seen through the BGC Flckr account.

RAF Debden (Part 1) – The Build up to the Battle of Britain.

Not far from Wethersfield, lies the parent airfield of Castle Camps. Now closed to aviation, it currently resides in the hands of the Army as the Carver Barracks. On this next part of this Trail we wind our way through the Essex countryside to the former fighter station that gained notoriety during the early 1940s, and in particular the Battle of Britain. In this, the first part of the visit, we look into the development of the airfield, and the build up that took it into the heart of the Battle. We visit the former RAF Debden.

RAF Debden (Station 356) – Essex

The internet and history books are awash with pictures and information about RAF Debden, and rightly so. It is an airfield with an incredible history, famous for its part in the Battle of Britain and the defence of London, it was home to no less than thirty RAF squadrons at some point; it was used by the U.S. volunteer squadrons the ‘Eagle Squadrons’, and then taken over by USAAF as a fighter airfield following their official entry into the war. It was then used again by the RAF post war up until 1975 when the British Army took over,  those whose hands it remains in today as the Carver Barracks.  Not only is it history long but the site is historically highly significant. According to Historic England, Debden airfield represents “one of the most complete fighter landscapes of the Battle of Britain period“, considered historically important due to its “largely intact defensive perimeter and flying-field with associated blast pens“.*1

Debden is therefore a remarkable site, but as an active military base, access and views are understandably very restricted. However, some buildings can still be seen from public areas, particularly the front as you pass by the main entrance.

RAF Debden

One of 11 Blister Hangars built at Debden.

Debden’s life began in the mid 1930s, it eventually opened in 1937, as part of the expansion programme of the pre-war era, and was classified as a fighter airfield under Scheme ‘C’ of the airfield construction programme. During this period, great consideration was given to the architectural features of airfield buildings, standard designs being finished and positioned aesthetically in line with both the local landscape, stone and environment. Design and construction of these airfields, in this the second part of the expansion phase, was carried out in conjunction with the Royal Fine Arts Commission, whose influence led to an overall improvement in airfield design. During this phase of expansion, over 100 permanent sites were built using these new designs, in fact, according to Historic England, it is these sites that have tended to survive in the best condition to date largely thanks due to their post war and Cold War usage. Even in this pre-war period, aesthetics were as important as operability!

Built by W. L. Fench Limited, Debden wasn’t completed until after it had been opened, thus the first units there were using the site in its unfinished state. The two initial landing surfaces were grass, but as a fighter airfield little more was needed. Even so, and not long after it opened, these were replaced by concrete and tarmac surfaces, giving the airfield much stronger and more adaptable landing surfaces. Being the standard 50 yards wide, these runways were also extended from the initial 1,600 and 1,300 yards to 2,600 and 2,100 yards respectively, allowing for larger and more powerful aircraft to utilise the site.

Debden had a large number of hangars built: three ‘C’ type, one Bellman and eleven blister hangars which were all spread around the perimeter and technical areas of the airfield. Some 80 hardstands were also provided, thus large quantities of aircraft were expected to use the site at one point or another.

Of these thirty operational flying squadrons to pass through Debden, the primary aircraft to see service would be the Spitfires and Hurricanes of Fighter Command. Biplanes such as the Demon and the Gloster Gladiator were also to feature here, as were the twin-engined aircraft the Beaufighter, Havoc/Bostons and the jet engined Meteor in the latter stages of the war. The period 1939 – 1942 though, was by far the busiest period for Debden, the majority of squadrons operating from here during this time.

Upon opening in 1937, Debden would operate the outdated and obsolete biplanes of the Royal Air Force, Hawker’s Fury II of 87 squadron being the first to arrive on 7th June 1937, being replaced shortly after by Gloster’s Gladiator, that famous Biplane that protected Malta as ‘Faith’, ‘Hope’ and ‘Charity’. In the summer of 1938, prior to the outbreak of war, Hurricanes were brought in and the entire squadron moved to airfields in France where they would stay until May 1940, when France was invaded by the German forces. Brought back to England, a short two-day stop over at Debden, would lead to a move north and Yorkshire before returning to the battle, and a night fighter role over Southern England.

Joining 87 Sqn in June 1937 were further Gladiators, those of 80  Squadron who, themselves formed a month earlier, would stay at Debden until departing for the Middle East and Ismailia a year later. A third squadron would arrive during this time, 73 Squadron, who shortly after reforming at nearby Mildenhall, would also replace their Hawker Furys with Gladiators coinciding with their move to Debden. Also moving to France, 73 Sqn would eventually move to the Middle East, where they would remain for the duration of the war, flying from numerous airfields including that of Habbaniyah, one of several places where my father was stationed post-war.

One other squadron would grace the skies over Debden that year, that of 29 Squadron, whose Hawker Demons were adapted to accept a Frazer-Nash turret for defence. A small aircraft, they would be no match for enemy fighters and so were replaced in December 1938 by the far superior aircraft the Blenheim IIF. Coinciding with this, was the movement of a detachment of 29 sqn aircraft to Martlesham Heath, which was followed by a months stay at RAF Drem in the border region before returning to Debden once more. By the end of June though, the entire squadron have been pulled out of Debden and moved to Digby in Lincolnshire and a new role as night fighters.

1938 also saw the reforming of 85 Squadron on the 1st June. 85 sqn, as a unit, had their roots in the First World War, being stationed in France before disbandment in the summer of 1919. But on this occasion, they were reformed out of ‘A’ Flight of 87 squadron prior to them taking on their Hurricanes and imminent move abroad. During the period 1939 – 1940, 85 Sqn would move around almost weekly, with one of their longest permanent stays being between November 1938 and September 1939 whilst here at Debden. Being the parent airfield of Castle Camps, Debden units would often be dispersed there, or in some cases stationed there, whilst also operating out of Debden – 85 Sqn being no exception.

Two other squadrons would fly from Debden during the winter/spring of 1939 – 40, both 17 and 504 operating the Hurricane MK. I. On an almost weekly basis, both units would yo-yo between Debden and Martlesham Heath, an almost continuous spiral of postings saw them using the ‘Heath’ as a forward operating airfield until around May 1940, when both units were moved to France in support of the B.E.F.

Hawker Hurricane Mark Is of No 17 Squadron taxiing at Debden, July 1940. In the foreground is YB-C, that of the CO, Squadron Leader Harold ‘Birdy’ Bird-Wilson, who was shot down on 24th September flying YB-W (P3878) (IWM – HU 54517)

As the fall of France turned into the Battle of Britain, fighter units to defend Britain became top priority. The dawn of 1940 would see the beginning of six more squadrons operate out of Debden, the majority of which would arrive during the height of the Battle. Debden, as the Sector Station responsible for the Thames Estuary and eastern approaches to London, would become a prestige Luftwaffe target during those early days of the Battle. As a result, it along with other Sector stations at Northolt, North Weald, Biggin Hill, Tangmere and Hornchurch, would endure some of the most sustained and prolonged attacks by German bomber formations.

To meet the demand for fighter units, 257 Squadron were reformed and posted to Debden initially flying the Spitfire MK. I. They quickly replaced these with the Hurricane I prior to them becoming operational on July 1st. Four days later they were joined at Debden by both 601 (the ‘Millionaires Squadron’ named so after the men who initially joined it) and 111 Squadron making this one of the largest collections of Hurricanes at that time.

85 Squadron were soon in the thick of the battle. As July 1940 turned to August, patrols would be sent up as regularly as the sun would rise, many of these patrols would result in enemy engagement; the Operational Record Books being testament to the continuing battle for the skies over Britain at that time. At the beginning of August on the 7th, Air Vice-Marshal K.R. Park M.C., D.F.C. visited  Debden, a visit that preceded the transfer of Debden from 12 Group into 11 Group. It was also at this time that the funeral of P/O. Britton of 17 Sqn took place, a young man who lost his life in a flying accident on the 6th whilst carrying out an air test in Hurricane N2456. In poor weather, visibility of only four miles, P/O Britton crashed into Debden Park destroying the aircraft in which he lost his life.

In mid August 1940, both ‘A’ and ‘B’ flights of 85 Sqn were brought back from Martlesham Heath and Castle Camps to Debden, a move that preceded the not only the first but one of the largest attacks by a Debden squadron on enemy aircraft.

In part 2, we see how Debden was affected by the German campaign, the relentless attacks that drew Debden crews into battle. We look at the changes at Debden and how the American made a name for themselves as determined and fearless fighter pilots.

*1 Historic England, Historic Military Aviation Sites – Conservation Guidance, 2016.

RAF Castle Camps – A return to Essex.

Bordered by Cambridge and Suffolk to the North, Hertfordshire to the west, London to the south and the North Sea to the east, Essex is a coastal county that boasts a diverse range of landscapes. Primarily commuter belt for London, it has a range of its own industrial giants, electronics and pharmaceuticals being prime employers of the area. It also has a long and diverse aviation history, hosting a number of wartime airfields some of which are still in use today – albeit under a different guise.

Following on from Trail 33 (Essex Pt. 1), we return once more to Essex to its northern borders to visit some of the airfields that can be found among its green fields and idyllic villages. We start off at the former airfield, RAF Castle Camps.

RAF Castle Camps.

Castle Camps lies straddling the borders of Cambridge and Essex, a small unassuming airfield, it was none the less home to thirteen operational units at some point in their wartime career. It was constructed early on in the war, in sight of an ancient Motte and bailey built by Aubrey de Vere, soon after the Norman Conquest. Itself quite a historic monument, there is evidence that dates the site back further to both the Saxons and Romans. This castle itself is known to be the largest Medieval fortress in the county, and dates back to the latter parts of the thirteen century*1. Originally known as Great Camps, and Camps Green, it is after this Castle that both the village and airfield gained their names.

Castle Camps housed a small number of aircraft types: Hurricanes, Beaufighters, Spitfires and Mosquitos all resided here, with some as detachments, but many as full squadrons. Even with increases in Squadron  numbers, only one unit was ever formed here, that of 527 Squadron in 1943. However, that did not mean a posting here was by any means ‘quiet’.

Opening in the summer of 1940, it was designed as a satellite for nearby R.A.F. Debden and as such, both its accommodation and facilities were rudimentary to say the least. A grass airfield, with initially little more than tents for sleeping, it possessed a more ‘informal’ atmosphere than many of the R.A.F.’s other airfields.

No. 85 Squadron – a First World War unit that had only been reformed two years before war broke out – had been stationed in France to face the advancing might of the German army. Badly beaten and continuously moved around the many airfields of France: Merville, Lille, Mons-en-Chaussee and Boulogne, the squadron was completely decimated with only four aircraft from those originally sent out returning. In May 1940, these aircraft were pulled back to Debden to reform and re-equip. With detachments at both Martlesham Heath (A Flight) and Castle Camps (B Flight) they would be led by the soon-to-be-famous, Squadron Leader Peter Townsend, D.F.C.

85 Sqn would  initially take on a regime of coastal patrols many starting in the early dawn sunlight and continuing on through until dusk. These repeated flights were undertaken using many new ‘green’ crews who were eager to get back at the enemy for defeats in France. Whilst those at Martlesham would be thrown into the deep end, the Debden and Castle Camps’ crews would find their time slightly less ‘strenuous’.

The CO of No. 85 Squadron, Sqn Ldr Peter Townsend, jumps down from Hurricane Mk I P3166 ‘VY-Q’ while being refueled at Castle Camps, July 1940. © IWM (HU 104489)

With many airmen arriving with less than 10 hours flying experience, it was vital they learn discipline and extreme vigilance whilst flying, and Townsend saw these flights as a way of achieving that. By the end of June 1940, the flights at Debden and Castle Camps had undertaken 505 hours of flying, of which only 25 had been recorded as ‘operational’.*2

The importance of this training was soon realised when on July 22nd 1940, Hurricane P3895 piloted by Pilot Officer John Laurence Bickerdike (s/n 36266), undershot the runway at Castle Camps. In the resultant crash,  Bickerdike at just 21 years of age, was killed.

On August 13th, ‘B’ Flight departed Castle Camps and returned to Debden joining with ‘A’ Flight from Martlesham Heath. At last the squadron was together again and it wouldn’t be long before they would be moving on to pastures new, this time to Croydon, on the southern outskirts of London.

Other than an almost passing overnight stay in September, 85 Squadron wouldn’t return to Castle Camps until the war’s end in 1945.

Hawker Hurricane P2923 ‘VY-R’ of No. 85 Squadron. The Operational Record Books show this aircraft being flown by F/O R.H.A. Lee, D.S.O., D.F.C., at Castle Camps, August 1940. He was lost on the evening of August 18th 1940. Note the ‘temporary’ wooden airmen huts see note below. © IWM (HU 104510)

Whilst Debden remained busy – 85 Sqn making a straight swap with 111 Sqn – Castle Camps was quiet. The next users would be 73 Squadron in early October 1940.

Moving from the night training duties of Church Fenton, 73 Squadron had themselves been more successful in France than 85 Sqn. Using Hurricanes in this night fighter role though proved to be a costly mistake, as they were wholly unsuited and casualties were high in these early flights. By the end of October into early November, operational sorties has ceased as preparations were made to transfer the entire unit, via HMS Furious, to Heliopolis.

With this departure, Castle Camps fell operationally quiet again, and it was decided to upgrade both the airfield’s accommodation and flying facilities.

Three runways were built all covered with tarmac: the main running south-west to north-east of 1,900 yards, with a secondary and third runway of 1,600 yards and 1,070 yards respectively. Both the main and third runways were later extended, the main to 2,600 yards and the third to a more standard 1,100 yards. Sixteen hardstands were provided for aircraft dispersal as hangars were not yet added, but a Bellman and eight blisters were later erected.

Accommodation would be provided for 1,178 male and 184 female staff, 1,179 of which were ordinary ranks. The original temporary wooden huts (possibly Laing huts) were supplemented with ‘improved’ Ministry of Supply (MoS) huts. These differed in that they had canted sides as opposed to vertical sides normally found in these types of accommodation huts. Three of these huts are believed to survive today in a very much modified condition and used for agricultural purposes, a big change from the time they were used by the W.A.A.F.s of Castle Camps.

Once construction was near complete, operational units would again return. On the 17th December 1941, 157 Squadron (formed at Debden three days earlier) were informed of their immediate  departure to Castle Camps, which would now become a self-serving airfield. The move, which would involve 3 Officers, 34 N.C.O.s and a few airmen, began that day, with ground crews from 3081 Servicing Echelon accompanying them on the next day. A range of other staff began arriving during the course of the closing days of 1941.

However,  the running of the airfield and squadron was badly hampered by the lack of an N.C.O Disciplinarian and Clerk, and by the fact that officers were having to travel back to Debden for accommodation, as it was not available yet here at Castle Camps – the situation was far from ideal.

As Christmas approached, morale began to decline. Influenced by a number of factors it was primarily due to both the lack of work and the isolation of the Castle Camps airfield; the continuing influx of ground personnel also hindered the camp, as by now, it was beginning to put a strain on the lack of completed accommodation. On the 21st, Wing Commander Gordon Slade and Pilot Officer Truscott, his observer, both arrived on posting from 604 Squadron at Middle Wallop. Joining Slade at Castle Camps a month to the day, would be Sqn. Ldr. Rupert Clerke, formerly of No.1 Photographic Reconnaissance Unit (P.R.U.), who flew the first operational Mosquito sortie the previous year on 17th September to Brest. It would be almost a year later on September 30th 1943, that Clerke would fly the first Mosquito day sortie, a flight that resulted in the loss of a Junkers Ju 88 off the Dutch coast.

With little work to do, ‘Normal Squadron Routine‘ was repeatedly entered into the operations records, and so to help boost this flagging morale, the 25th December, was declared a general holiday for all staff who had were said to have a “real good Christmas feed and a good time was had by all“, no doubt a welcome break to the monotony that had preceded the season’s festivities.*3

Operations Record Book 157 Sqn

The entries for December reflect the poor morale and the regular Normal Squadron Routine that was becoming ‘routine’. Note the arrival of Sgt. Walters, His name appears in the Roll of Honour – see below. (AIR 27/1045)

Boxing day would see the first aircraft to arrive, bringing new hope to the squadron. A  Magister (N3880) was not what had been hoped for, but at least it was taking the squadron in the right direction.  More ground crews arrived and more “normal squadron routines” occurred. On the 29th, W/Cdr. Slade travelled to Hatfield to attend a conference on the new Mosquito and in the new year, Air Marshal Sir Sholto Douglas (A.O.C. in C. Fighter Command) arrived with the Debden Sector Commander Group Captain Peel. A full inspection of the airfield took place, which coincided with twelve airmen transferring on attachment to 32 Maintenance Unit (M.U.) at St. Athan, where the new Mosquitos were being “fitted and tested”.

A flurry of activity over the next few days saw W/Cdr. Slade travel to both Boscombe Down, and St. Athan – at last things seemed to be happening.

Finally, on the 26th January, 1942 the first Mosquito would land, flown in by W/Cdr. Slade. Slade, who had flown the prototype Mosquito previously at Boscombe Down, brought in a dual control aircraft (W4073) but hopes of more aircraft were soon dashed as this was sadly the only model to arrive for some time.

For the remaining weeks bad weather hampered work on the airfield, and with workshops, decent accommodation and tools still lacking, Castle Camps was rapidly becoming a thorn in the Squadron’s side.

Further ground staff came and went, Mosquitos were ferried between Hatfield and St. Athan by pilots of 157 sqn, for fitting of electronic equipment, W/Cdr. Slade and five officers moved in to dispersed accommodation at a large mansion known as “Walton House” near Ashdon, 3 miles from the airfield.

RAF Castle Camps

The village sign at Castle Camps reflects the ever-present Black Mosquitos of 157 Sqn at the airfield.

On February 22nd, a Beaufighter II arrived, flown by W/Cdr. Ashfield, and by the end of the month more than a dozen Mosquitos had been transferred for modification to St. Athan. There was now a light at the end of the cold, dark tunnel. Staffing was now up to 16 Officers, 12 N.C.Os and 160 other ranks; some of the accommodation site drainage had been sorted, officers showers and baths were now working, and the N.A.A.F.I was at last open and providing entertainment for the staff. The first football match was played between the squadron and the works flight, a resounding thrashing saw the squadron winning 6 – 0.

Over the next few weeks facilities would gradually improve, the weather began to get warmer, and the signs were that more aircraft would soon arrive. On March 9th 1942, the first two operational Mosquitos arrived at Castle Camps, and what a welcome sight it must have been.

The first to arrive were W4087 and W4098, neither were yet fully fitted, but that wouldn’t dishearten the staff at Castle Camps, at least things were now moving. Over the next few days a large number of Mosquitoes would arrive, these NF.IIs were Airborne Interception (AI) equipped night fighters, armed with four .303in Brownings and four 20mm cannon – all very potent weapons of the night war.

By March 29th 1942, 157 squadron had to its name: 14 Mosquitos, 1 Beaufighter (fully equipped), 1 dual Mosquito, 3 not fully equipped Mosquitos, and 2 Magisters. Night flying would now start, but a lack of workshops, sleeping accommodation and fitters meant that not all aircraft could be kept serviceable at this time. By the end of April, training flights had reached their peak, and 157 was now ready for war.

On April 27th 1942, operations would begin. Three patrols would take off followed by four the next day and then three on the 29th. No visuals were recorded from the first two nights but a Do. 217 was identified but subsequently lost in cloud.

At the end of the month F/Lt. Stoneman (Engineer Officer) invented a modification that improved the effectiveness of the Browning’s flash eliminator, an improvement that was so successful, it was quickly adopted by the Air Ministry for other models.

Successes were slow coming to 157 Sqn, problems with the A.I. sets led to frustrations and missed opportunities, but eventually they did come, and the Mosquito proved itself to be a truly outstanding night fighter.

RAF Castle Camps

The Roll of Honour in All Saints Church lists W/O. W. A. C. Walters death as 10th June 1942. Walters (s/n 755538) arrived at Castle Camps on 22nd December 1941 (see above entry in O.R.B), he is currently buried in Nottingham Southern Cemetery, Sec. F.24. Grave 55. He was Son of Arthur and Annie Walters, of West Bridgford, Nottingham, and died at the age of 21.

By  March 1943 a change in command, Wing Commander V. J. Wheeler, M.C., D.F.C. replacing W/Cdr Slade, and then as night defenders turned to intruders, the role of 157 Sqn changed, and they prepared to move to pastures new and R.A.F. Bradwell Bay.

Around this time a small detachment of Mosquitos would share the facilities at Castle Camps, 456 sqn, who were primarily based at Middle Wallop, would have aircraft use the site between March and August 1943 – a month that would take Castle Camps into a new period, and new leadership.

The 15th would be a very busy day for staff at Castle Camps, with the departure of 157 Sqn came the simultaneous arrival of 605 Squadron.

RAF Castle Camps

Part of the Perimeter Track that leads away to the airfield.

Led by the then Wing Commander George Lovell “Uncle” Denholm D.F.C., he was himself a Battle of Britain veteran, a Turbinlite advocate and was also famed for his part in the shooting down of the first German bomber on British soil. The famous ‘Humbie Heinkle’ was generally credited to Flight Lieutenant Archie McKellar of 602 Squadron from R.A.F. Drem, but Denholm and his 603 Sqn, played their part in damaging the aircraft before its eventual crash in East Lothian.

With the arrival of 605 Sqn and their Mosquitos, Castle Camps, like the stations at Bradwell Bay and Hunsdon, were quickly becoming synonymous with squadrons of the new type. Also Flying Mosquito IIs, (replaced four months later by the FB.VI) they would eventually depart here also for Bradwell Bay, but not before the ruggedness and reliability of the Mosquito would be put to the test.

On August 17th 1943, Sqn. Ldr. Mack and Flt. Sgt. Harrison, flew Mosquito FB.VI (HJ781) on a night intruder mission to Jagel in the northern most tip of Germany. Whilst on this mission, the aircraft was hit by a cable rocket projectile (Parachute and Cable or P.A.C.) fried from the ground. With a thin cable attached to a parachute they were designed to bring down allied aircraft and could be fired from either multiple or single launchers. HJ781, flew into one such cable which severed around 3 feet off the end of the starboard wing. The Mosquito, suffering considerable damage, managed to return to Castle Camps and was later repaired and returned to flight – such was the strength of the design of the Mosquito.

For the duration of their stay, 605 Sqn would perform almost nightly patrols over the airfields of the low countries and northern Germany, a tit-for-tat game played between the R.A.F. and the Luftwaffe, each aiming to catch returning aircraft as they approached their home airfield. A game that resulted in minor and relatively insignificant attacks on Castle Camps itself.

For eight months from June 1943, Castle Camps would be shared with a new squadron, the only squadron to be formed here, 527 Squadron, who were formed through the combining of both 74 and 75 Wing Calibration Flights from Duxford and Biggin Hill respectively.  Flying a collection of Hurricanes (I & IIB), Blenheim IV and Hornet Moths, they would test the accuracy of Britain’s defence radar systems across southern England and East Anglia.

The October departure of 605 sqn left 527 the only unit operating from Castle Camps, and operationally all was quiet once more. In the December 1943, 410 Sqn, another Hunsdon Mosquito unit arrived, stayed for a short while and then returned to Hunsdon in the April of 1944. A short but active spell saw them victors over a number of German types.

1944  would see another flurry of activity, with units arriving and departing in quick succession, and it would be a few months before another Mosquito would grace the skies over Castle Camps once more. 486 Sqn (RNZAF) , yo-yoed between Castle Camps and Ayr during the month of March, bringing with them yet another potent and deadly weapons platform, the Tempest V; followed by 91 Sqn while they were upgrading their Spitfire XII to XIVs.

Giving a useful indicator of scale, F/O. J. R. Cullen of No. 486 Squadron (RNZAF), poses with his Tempest Mk V at Castle Camps. Cullen became a successful Operation DIVER pilot, shooting down around 16 flying bombs. © IWM (CH 13967)

Between March and June little happened at Castle Camps, 68 Sqn*4 breaking the quiet with their Beaufighter VIFs at the end of June, which were quickly replaced with Mosquito XVIIs and Mosquito XIXs.  68 (Night Fighter) Squadron was primarily an R.A.F. Squadron, but Czechoslovak pilots formed one of its flights. The determination of the Flight’s crews resulted in some high ‘kill’ rates, with twenty-one verified kills, three probable, seven enemy planes damaged  and three V-1 flying bombs to their credit. The flight saw Twenty-three Czechoslovak pilots (twenty-one Czechs and two Slovaks) pass through their doors, culminating in an incredible 1,905 combat sorties covering 4,095 operational hours during the war.*5 By the October 68 Sqn too had departed, replaced by 151 Sqn and 25 Sqn for a short period both with yet another Mosquito model, the MK XXX.

1945 and the close of war saw units slowly begin to disband and wind down, 307 were followed by 85 Sqn who returned in the June and September also with the MK. XXX. A  huge improvement and development from their early Hurricanes of 1939 / 40 and a fitting end to a station that had seen many a brave young man come and go. 25 Sqn also returned, in both the August and October with the Mosquito VI, staying until June 1946, whereupon the airfield closed and returned to agriculture, a state it remains in today.

Castle Camps has little – aviation wise – to offer the visitor these days.  A recently erected memorial stands at the northern end of the airfield, the only visible marker of this once busy site that grew from a cold and windy field with little more than tents for accommodation, to a bustling site with possibly the most advanced and formidable fighters of the Second World War.

It may not appear to be much more than green fields and cattle farming, but sitting in the summer sun, as I did, you can still hear the rumblings of that magnificent engine the Merlin, as the Hurricanes and Mosquitos of the R.A.F. fly over your head transporting you back to those days of 1940s England.

Sources and further reading.

*1 The Castle Camps Village webiste details the history of the Castle.

*2 AIR/27/703/14 National Archives

*3 AIR/27/1045 National Archives

*4 An interesting blog highlighting some of the Czech pilots who flew with 68 Sqn.

*5 Pilot Josef Capka, D.F.M. (a member of the Guinea Pig Club) joined 68 Sqn after they left Castle Camps. His incredible story is told in the Free Czechoslovak Air Force blog and through his book ‘Red Sky at Night‘.

Scotland’s National Museum of Flight – East Fortune (Part 3).

The final public hangar at East Fortune holds what is perhaps its pièce de résistance, an aircraft so ahead of its time that it has never been successfully matched. An aircraft that became simply too expensive to operate but was withdrawn under a cloak of darkness and sadness. In the third public hangar is the story of the Jet Age, a story that tells of the development of the modern jet air liner, from the post war development through to the classics of today. A story that is set around the beautiful aircraft that is of course the B.A.C. Concorde.

The Jet Age Hangar.

The Concorde at the National Museum of Flight (G-BOAA) was the first model Concorde to go into active service in 1976. After flying for a total of 22,768 hours and 56 minutes, in almost 25 years of service, she finally came to rest after what was possibly the most ambitious transportation project ever undertaken. In all her flying time she has visited cities right across the world including: New York, Paris, Bahrain, Miami, Calcutta, Auckland and Barbados. In her life time, G-BOAA has landed over 8,000 times and has flown through almost 7,000 supersonic cycles. She has become an icon, a reflection of what is achievable in civil aviation development.

Concorde was designed and built in agreement between the French Sud Aviation (later Aérospatiale) and Britain’s British Aircraft Corporation (later B.A.E.). Each would make their own prototype, the French (001) flying first on 2nd March 1969, with the British model (002) flying from Fliton a month later on April 9th 1969. At the Paris airshow prospects looked good and over the next few years 65 initial orders were placed by 17 countries with options for many more. However, growing concerns over manufacturing costs, noise, environmental pollution and running costs eventually reduced the orders to just a handful from both British Airways and Air France.

With the price of a return ticket London to New York in excess of £6,500 in 2003, it certainly wasn’t cheap, nor affordable for the average man in the street (but where else can you watch the Mach Meter climb through Mach 2). It was however, a head turner. Wherever Concorde flew crowds gathered to watch in awe of her grace and technological advancement.

Concorde

Concorde G-BOAA stands proudly as the centre piece of the Concorde Experience.

Sadly, on July 25th 2000, it all went terribly wrong when taking off from Charles de Gaulle airport, Concorde  F-BTSC ran over a small piece of debris causing the tyre to burst sending shards of rubber at high-speed into the wing of the aircraft. An internal fuel tank ruptured and high-octane fuel poured from the wing igniting as it left. With too little runway to land and insufficient power to fly, it couldn’t fail to miss the Hôtelissimo Les Relais Bleus Hotel and crashed. A terrible tragedy that began the rapid rundown and retirement of the entire Concorde fleet.

Following a slump in air travel due to terrorist activities, rising costs of Concorde and the urgent need for upgrades, by 2003 all Concordes had ceased flying, and the disposal of the air-frames began.

G-BOAA was delivered to East Fortune following a major operation that involved taking it by road to the River Thames, along the Thames by specialist barge and out to sea, around the coast of England and Scotland, and then by road to East Fortune. Roads had to be purposely made cutting through a number of fields in order to get the aircraft to its new home. An operation that took over a week was supported by members of 39 Engineer Regiment’s 53 Field Squadron (Air Support) with a helicopter assistance.

Today Concorde G-BOAA stands as the centre piece of the Jet Age and Concorde Experience Hangar, a proud and open monument to the collaboration and development of the Supersonic passenger age.

But this hangar is not just about Concorde. A cockpit and front cabin portion from a Boeing 707-436 (G-APFJ), and Hawker Siddeley Trident 1C (G-ARPH) cockpit, gives the visitor another insight into life inside another 1960s long haul passenger jet. Outside another two classic passenger aircraft, de Havilland’s Comet 4C (G-BDIX) and the BAC 111-510ED (G-AVMO) further give the visitor an insight into these classic times. A range of jet engines allow you to compare sizes and features, and stories from those who were involved in flying these masters of the sky bring the ‘Golden age of air travel’ to life once more.
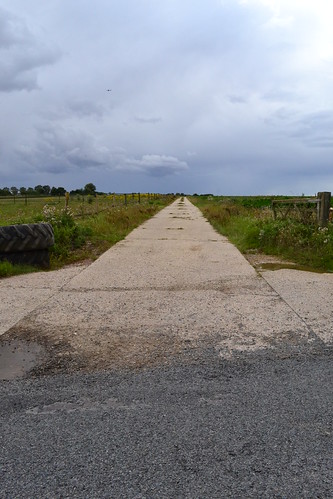
East Fortune

Some of the engines on view at East Fortune.

The remainder of the museum is displays and hands on activities. The history of East Fortune, is well portrayed as are the medals of Captain Eric Melrose “Winkle” Brown, CBE, DSC, AFC, Hon FRAeS, RN., and the flying jacket and personal artefacts of Rolf Niehoff, the navigator of the Humbie Heinkel.
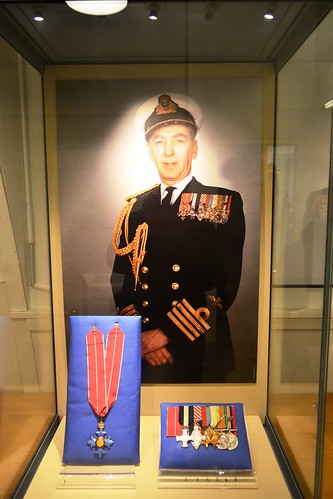
East Fortune

Portrait and medals of Captain Eric Melrose “Winkle” Brown, CBE, DSC, AFC, Hon FRAeS, RN

As mentioned earlier, in Post 1 the parachute store has been fully refurbished and is displayed in the way it would have been used during the war years. A unique building, they are easily recognisable by their higher central roof section, or as in some models, offset sloping roofs. Designed to hang and dry parachutes, they are kept at a constant temperature, ideally between 550F and 650F. Wartime parachute stores were built with 4.5 inch thick walls, early designs having a symmetrical two-stage pitched roof as is here at East Fortune. The parachutes were hung from the highest point on a pulley system, so that the silk was kept away from the floor and allowed to dry evenly and cleanly. Once dry, they were lowered to a packing table, inspected, packed away and stored in the store on racks. Each pack was labelled with an inspection date and the person to whom it belonged – each crewman having earlier being measured for his own parachute.
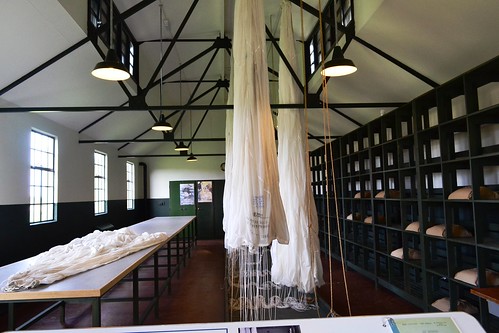
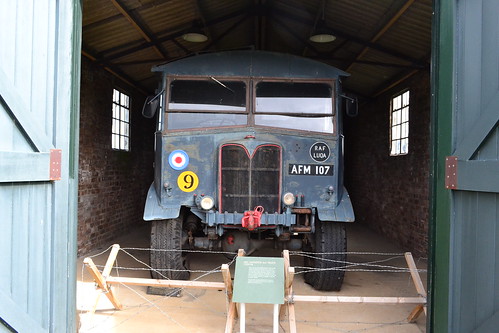
This is possibly the only original parachute store remaining in this condition in the UK and shows the method of drying, packing and storing these vital pieces of equipment extremely well.

East Fortune

The inside of the parachute store clearly shows how they parachutes were dried, packed and stored.

Other exhibits include the RAF’s Matador lorry and a ‘Green Goddess’ fire engine. Made more famous perhaps by the firemen’s strikes of 2002, they were built in the 1950s, and were designed to be used in the event of a nuclear attack. Operated by civilian personnel of the Auxiliary Fire Service (AFS) they would be rushed into cities to extinguish fires and repair water systems. Thankfully, they were never used in this particular role.

East Fortune National Museum of Flight

The RAF’s Matador truck.

The range of exhibits at East Fortune is fabulous. The history of aviation, both civil and military is shown through a range of rare examples, that are restored and maintained in original buildings, purposely restored in line with their original designs and construction. For anyone wanting to see original airfield buildings and beautifully restored aircraft, it is certainly worthy of a trip and is time very well spent.

Sources and Further Reading.

The National Museum of Flight Website has details of tickets, events and features on the various exhibits there.

A list of the aircraft locations at East Fortune.

Scotland’s National Museum of Flight – East Fortune (Part 2).

In the second part of this visit we look into the current display of military aircraft at East Fortune. A collection that ranges from the Second World War through to the end of the Cold War, it is a glimpse into the history and development of fighter aircraft over the last half of the 1900s.

The Military Hangar.

Early examples include the Bristol Bolingbroke IV-T, the Canadian built Blenheim that was used to train air gunners, navigators and bomb aimers.

Bristol Bolingbroke

The Bristol Bolingbroke, an ex Strathallan collection model that served with the R.C.A.F.

The Bolingbroke had a crew of three, with a top speed of 266 mph. It was initially a Blenheim MKI (designated Bristol Type 142M) and was first flown at Filton on 24th September 1937.

Morphing into the Blenheim, the Bolingbroke soon passed into obscurity, however, it did catch the eye of the Canadian Government, who applied to build it under licence at the Fairchild Aircraft Company in Quebec.

The original prototype model was sent to Canada and used as a pattern for subsequent designs, the first model entering Royal Canadian Air Force (R.C.A.F.) service in November 1939. For the first few years, Bolingbrokes were used in the anti-submarine role, initially along the eastern coast of Canada and then later on, after the Japanese attack on Pearl Harbour, along the western coast .

The Canadians made a number of changes to the original design, installing U.S. dials and instruments in a modified cockpit for one, and also making room to store a dingy should the aircraft come down in the icy waters around Canada.

Then as part of the agreement made between the Canadians and British for Canada to supply trained crews as part of their support for the war effort, Bolingbrokes were used as training aircraft, and so were supplied to various Gunnery and Flying Training Schools across Canada.

This particular example ‘9940’, is painted in a yellow colour scheme, it flew as part of this British Commonwealth Air Training Plan. It is an ex Strathallan collection aircraft previously used by the R.C.A.F. No. 5 Bomber and Gunnery School, Dafoe, Saskatchewan in Canada.

Another wartime example in the military hangar is the Supermarine Spitfire  LF.XVIe. Built in July 1945, TE462 never saw active war service, instead flew with one of the five Flying Refresher Schools to retrain pilots after the Second World War. Post service, it was used as a gate guard at RAF Ouston, Northumberland, in a time when the R.A.F. flew D.H. Vampires from the airfield. In 1968 TE462 was removed from Oulton to be used in the highly acclaimed film the ‘Battle of Britain’. Being  a much later model to those classic 1940 examples, extensive modifications would have been needed if it were to appear in any flying roles on camera.

In 1971, TE462 was donated by the Ministry of Defence to the now National Museum of Scotland, who were then, due to lack of space in Edinburgh, allowed to use one of the hangars at East Fortune for her storage.  It was this move that helped generate the ideas and movements that created the museum as it is today. Spitfire ‘TE462’ stands proudly as the centre piece of the military exhibition.

Supermarine Spitfire LF.XVIe

Spitfire LF.XVIe ‘TE462’ now stands on a plinth as the centre piece of the East Fortune Military Hangar.

Another Second World War Example is the German Messerschmitt Komet Me 163B-1a. Another 1945 example, this model (s/n 191659) is unique in that it was flown by R.A.F. pilot Captain Eric ‘Winkle’ Brown. The Komet, built by various manufactures using slave labour, was the only rocket-powered aircraft ever to enter combat. A very dangerous aircraft to fly because of its mixture of explosive fuels, Brown described its handling to 32,000 ft as “Fantastic!”.

Messerschmitt Komet 163

The Messerschmitt Komet 163 flown by Captain Eric ‘Winkle’ Brown

Post war and Cold War examples make up for most of the exhibits in this hangar at East Fortune. The nose section of Canberra B.8 reported to be VX185, is an ex Wroughton exhibit, the original of which flew a return flight to Canada in 10 hours 3 minutes and 29.28 seconds, setting a new transatlantic record at that time. The Canberra being a revolution in aircraft design in the early post war era, was used to fly long-range reconnaissance missions and proved its worth for many years to come.

Hawker Sea Hawk

WF259 Hawker Sea Hawk of the Royal Navy.

Two Royal Navy aircraft examples are found in this hangar, the Hawker Sea Hawk and the D.H. Sea Venom.

The Sea Hawk ‘WF259’ (171) is an F.2 model and a Lossiemouth veteran. Designed around a Rolls-Royce Nene 101 and latterly 103 engine, they were single seat fighters that first flew as a prototype on 2nd September 1947. Whilst not seen as a major step forward from the RAF’s Vampires and Meteors, it was successful with the Navy, proving its worth in the ground attack role. The Sea Hawk, a thoroughbred from the Sir Sydney Camm stables, formed the backbone of the Fleet Air Arm during the 1950s and was exported to various European countries and India, where many still survive as museum pieces today.

The D.H. Sea Venom, an FAW.22, WW145 ‘680’, is also an ex Lossiemouth veteran. Serving with both 891 and 750 Naval Air Squadrons of the Fleet Air Arm. It was a naval development of the RAF’s 2-seater Venom NF3 Night Fighter, with numerous modifications to enable it to operate from carrier decks.

de Havilland Sea Venom

The D.H. Sea Venom operated with both 891 and 750 Naval Air Squadrons of the Fleet Air Arm.

A Meteor NF.14 of The Ferranti Flying Unit based at Edinburgh’s Turnhouse Airport, is painted in white and red giving it a distinctive paint scheme. The unit was set up in 1949 to test distance measuring equipment for the Ferranti group whilst based at the airport. Between its inception and disbandment in 1973, it flew twenty-five different models of aircraft, the long-nosed NF.14 being just one of them.

Aero S-103

Czechoslovakian marked Aero S-103. A Mig 15 built under licence.

International Cold War aircraft are represented with the Czechoslovakian marked Aero S-103. A Soviet MiG-15bis, it was built under licence by the Aero Vodochody aircraft company in 1956. The Mig proved itself as a very potent fighter during the Korean War, attacking U.S. bombers from beyond their defensive gun range. Whilst it did have its flying limitations, it was quickly realised as a close match for the American F-86 Sabres.

This particular model, ‘3677’ is an ex Caslav, Ostravian Air Regt. c/n 613677 of the Czechoslovakian Air Force, the badge just visible on the nose is that of the City of Ostrava.

Moving toward more modern eras, we see the E.E. Lightning, SEPECAT Jaguar, Hawker Siddeley Harrier, and the Panavia Tornado.

English Electric Lightning

XN776 served with 92 Squadron.

The Lightning, F.2A ‘XN776’, built by English Electric (B.A.C./B.A.) served with 92 Squadron, and was the only Mach 2 all British aircraft to serve with the R.A.F. Lightning XN776 first flew (as an F.2) on 18th October 1962 subsequently being delivered to 19 Squadron. After seven years, she was returned to Warton for conversion work to upgrade her to an F.2A model, and then delivered to 19 squadron at Gutersloh a few months later. Her last operational flight was on 3rd March 1977, being flown to Leuchars on April 5th that year. She displays on her tail, the blue diamonds that represent the Blue Diamond Aerobatic team that previously used Hunters with 92 Squadron. With a maximum speed of 1,500 mph (Mach 2.3) and a service ceiling in excess of 60,000 ft, she was a potent and deadly weapon restricted only by her high usage of fuel.

The Harrier, a GR.1, is the reputed to be the oldest surviving Harrier example, a unique design it is famous for its Vertical or Short Take-Off and Landing (V/STOL) capabilities, now taken on by the F.35 Lightning. This particular model (XV277) was only used for test purposes and never saw operational service. During its life it has taken on many changes and modifications, but it still remains the much-loved Harrier.

Hawker Siddeley Harrier GR.1

The oldest surviving Harrier GR.1

The remaining aircraft here, the Jaguar and Tornado, did however see operational service. The Jaguar ‘XZ119’ (with nose art Katrina Jane), flew 40 operational sorties during the first Gulf War in 1990 / 1991, her nose-art bomb-tally testament to her successes; whilst the Tornado ‘ZE934’ also flew during the first Gulf War, performing air defence patrols from Saudi Arabia. Other than this it operated primarily at RAF Leuchars in Fife with 111 squadron.

SEPECAT Jaguar GR.1A

Jaguar GR.1A ‘XZ119’ carried out 40 successful bombing missions during the first Gulf War.

Outside the military hangar is Vulcan B.2 XM597, the mighty ‘V’ bomber designed as Britain’s nuclear deterrent until the role was taken on by the Royal Navy in 1969.  XM597, an ex Waddington aircraft, entered service with 12 squadron on the 27th of August 1963, going on to serve with 35, 50, 9, and 101 squadrons. She also saw service in the Falklands in three of the Black Buck missions.

XM597 was different to other Vulcans in that she had wing pylons fitted. These carried up to four Shrike anti-radar missiles (previously for Skybolt) and were used during these missions.

Avro Vulcan XM597

XM597 next to a Blue Steel Stand off missile

Her first mission, Black Buck 4, was cancelled due to a faulty refuelling drogue on a Victor tanker. On the Black Buck 5 mission, on 31st May 1982, the Vulcan took off once again, over the target she fired two missiles causing some minor damage to an Argentinian Radar installation.

On mission six, XM597 returned to the Falklands again armed with more Shrike anti-radar missiles. Two missiles were launched and the enemy ground-based radar was destroyed. On the return leg of the mission though, a planned rendezvous with a Victor tanker went wrong when the refuelling probe on the Vulcan became damaged. With too little fuel to get home to Ascension Island, the Pilot, Squadron Leader Neil McDougall, diverted  to the only airfield he could possibly reach before running out of fuel. Climbing high and jettisoning the remaining two weapons (one failed to release and remained on the pylon), he carefully nursed the Vulcan to Rio de Janeiro where he landed safely and where the aircraft, her crew, and the remaining missile were impounded for nine days before being released.

One of the conditions of the release however, was that XM597 took no further part in the conflict with Argentina and that the rogue missile stayed in Brazil. XM597 later retired to the East Fortune collection in 1984, with her two missile strikes painted on her nose*3.

Avro Vulcan XM597

The under wing pylons that carried the Shrike Anti Radar missiles.

The military collection at East Fortune is, like the civil collection, filled with unique and historically important aircraft. A range that stems from the Second World War through the Cold War and on to modern conflicts and models, it is a dynamic collection of aircraft that just cannot fail to impress.

Sources and Further Reading.

*3 Royal Air Force Website – Operation ‘Black Buck’.

RAF Cottam – Built and Abandoned.

Up in the Yorkshire Wolds stands an airfield that could have been considered as one the Air Ministry’s ‘less sensible’ decisions. Open to the elements, this site was built but never fully used by an operational flying unit, in fact, Cottam could be considered one of the RAF’s more expensive bomb dumps, used primarily for munitions storage toward the war’s end. In its construction it would have accommodation, a hangar, and a watch office, along with three concrete runways – all the makings of an RAF bomber base, yet it was often desolate and empty. Even though it wasn’t used operationally, it did have its own problems however, and its own casualties . As we head across the River Humber into the East Riding of Yorkshire, we visit the former RAF airfield, RAF Cottam.

RAF Cottam.

Designed originally as a satellite for RAF Driffield, Cottam airfield lies high up in the hills on Cottam Well Dale, about 5 miles north of Driffield, just a stones throw from the village of Langtoft, and the tiny parish of Cottam. At 475 ft. above sea level, it is one of the higher peaks in the area which makes it popular with dog walkers and ramblers alike.

The airfield site encompasses the site of the ancient village of Cottam, (on maps of the late 1600s it appears as Cotham) of which only the church remains.  A lone building, it stands neglected and derelict, a reminder of a small community that has long since gone.

RAF Cottam (Yorkshire)

The abandoned medieval church marks the boundary of Cottam airfield and a community long gone.

The Air Ministry decided to build an airfield here to be used as a satellite and possible bomber base. The airfield would have a watch office with detached operations block (the separate block designed to drawing 13023/41). As construction was completed before June 1941, it would be classed as a Type ‘A’ building, and would need to be modified to bring it up to the newer Type ‘B’ standard as were being built on later airfield sites. Under the Type ‘B’ scheme, Cottam would have a Watch Office built to design 13726/41, then adapted by the fitting of smaller ‘slit’ windows more in line with bomber and O.T.U. satellite airfields of that time (15683/41). Sadly, the entire building was demolished in 1980, and no there are no signs of its existence left on site today.

A single T1 hangar provided space for aircraft repairs and maintenance, and accommodation, although sparse, would accommodate around 1000 men and 120 women of the Maintenance Command by December 1944.

RAF Cottam (Yorkshire)

The remains of the secondary runway looking west.

Cottam officially opened in September 1939, and as a grassed airfield, would only be used for dispersed aircraft from Driffield’s 4 Group Bomber Command, flying Whitleys of 77 and 102 Sqn. Cottam was also used later on for the Fairy Battles of 4 Group Target Towing Flight (4G T.T.F.) also based at Driffield at that time.

It wouldn’t be long though before Cottam would have its first accident. On July 1st 1940, a dispersed aircraft, Whitley V, (N1391) ‘DY-H’ of 102 Sqn, swung on take off causing minor damage to the aircraft. Luckily there weren’t thought to be any casualties in the incident, but the aircraft was rendered unable to fly, and the damage was sufficiently serious to need it to be taken away for repairs.

A month later, the 15th August 1940, signified a major point in the Battle of Britain, one which saw all of the Luftwaffe’s air fleets deployed for the first time, in a full and coordinated attack on the British mainland. This day saw the heaviest fighting of the Battle with attacks ranging from the south coast to east Yorkshire, and up to Edinburgh. This also meant the start of a number of attacks on British airfields and Driffield would not be left out. In this first attack, a Luftwaffe force of some 50 Junkers Ju 88s attacked the airfield damaging or destroying 12 aircraft on the ground – many of these were Whitleys. This attack was particularly devastating for a number of reasons, one of which was that it caused the first death on active service of a Bomber Command W.A.A.F., (A.C.W.2) Marguerite Hudson, who was killed after delivering stores to the site. This attack caused extensive damage to both the airfield site, infrastructure, and aircraft, and for a short period whilst repairs were undertaken, some aircraft were moved and dispersed here at Cottam. Indeed, on 27th September 1940, 4 Group T.T.F moved over to Cottam where they stayed for a month, not returning until the 24th October, once repairs had been completed and air attacks had all but ceased.

RAF Cottam (Yorkshire)

The secondary runway looking east, this part is full width but built upon.

It is possible that these attacks may have led to the demise of one 77 Sqn Whitley V (N1355) ‘KN-X’ flown by Sgt. James Walter Ward RAFVR (741435), who undershot on landing at Cottam, hitting a fence, causing the undercarriage to later collapse. The five occupants of the aircraft were unhurt, but the aircraft itself was later struck off charge on 22nd September 1940, after assessment at Armstrong Whitworth in Baginton*1. Ward himself was killed with his crew only five days later, when his aircraft, Whitley V, (N1473) was shot down by flak over Noord Brabant, 2km from Vijfhuizen, on September 25th 1940. He died along with P/O C. Montague, himself a veteran of three previous serious crashes.

By the end of August 1940, both 77 and 102 Sqns had departed Driffield and so Cottam, which left it only being used by the Fairy Battles of 4 G T.T.F. During the winter months Cottam was abandoned by these aircraft, presumably due to its inclement weather conditions, but dispersed aircraft did return again in the spring and summer months. In October 1941, 4G T.T.F. reformed at Driffield as 1484 T.T.F., and it is at this point that it is thought their use of Cottam ceased.

RAF Cottam (Yorkshire)

The perimeter track looking east. The main airfield is to your left.

Under the Ministry’s airfield expansion plan, new airfields of the early 40s were built with concrete surfaces. ‘Older’ grass sites, like Cottam, were upgraded having new runways laid down in an effort to reduce water logging and provide a more stable surface for the heavier bomber aircraft coming in. To meet these upgrades Cottam’s three runways – all consisting of concrete and wood chip – were built; the main being just short of 5,300 ft., with the two further runways around 4,000 ft. in length. Pan style aircraft dispersals were also added which gave Cottam a new look and hope for the future. However, and even though huge amounts of money had been spent on the airfield, it was decided it was not to be used further, as either a satellite or a bomber station. Cottam was offered to various other military groups who all turned down the location for various reasons. The army did take up residency for a short while until March 1944, whereupon it was then used to store vehicles for the impending invasion of Normandy.

RAF Cottam (Yorkshire)

Blocks from the former site, and the beautiful views across the Wolds from one of the highest peaks in the area.

It is believed that further forced landings took place at Cottam during this time. Firstly, a damaged B-24 ‘Liberator’ came down after sustaining damage on a raid; and secondly, it is also thought that a Halifax landed here after an S.O.E. mission. Sadly at present, I can find no further official details of these events, and cannot therefore expand on them further.

Toward the end of the year 91 Maintenance Unit (M.U.) were based here*2 using the runways and hardstandings to store ammunition and other stores that were delivered by road from the rail yard at Driffield. A spell of residency for 244 Maintenance Unit carried on the storage work before the airfield was finally abandoned and closed in June 1954.

Returned to agriculture, the airfield is mostly gone, a section of the easy-west runway does still exist, and in part, at full width. Footpaths allow for walks across the site allowing views along the runway in both directions, they also allow walkers to use the remains of the perimeter track and secondary runway – albeit as a track. The frame of an air-raid shelter and the standby set house (designed to drawing 13244/41) are in situ, although by far the runways are the most prominent feature surviving today.

Access is best made from the Cottam Lane junction. The path leads up through the site of the medieval village of Cottam where the church still stands. This takes you south onto the airfield site itself and along the two runways. The walk extends along the perimeter track to the south, where debris from the perimeter track can also be seen.

Built high on the Wolds of Yorkshire, it is hard to understand why such a site was chosen. In winter, it could be bleak, windy and very cold. Landing conditions must have been difficult at best, and treacherous at worst. Its history of accidents tell their own tale.

In 2016, Cottam Airfield was the subject of a wind farm review, and a battle between the locals and the energy firm R.W.E, began. As yet though the site remains free of turbines, a gem for walkers and those wishing to experience the natural beauty of the Yorkshire Wolds. The open air and fabulous views hide a strange history, one that goes back long before the Second World War, but one that has only scars to tell the tale in this oddly historical, but beautiful part of Yorkshire. *3

Source and further reading:

*1 This was reported on a number of sites (Air Safety Network) but no records could be found referring to the accident in the Operational Records Book recorded by 77 Squadron at that time.

*2 See the National Archives website for details.

*3 News report on the proposal.

The Hull and East Riding at War Website has a range of information on the area during the Second World War.

My thanks go to Ronnie and Jo for the great walk, and for being such fabulous hosts.